Set up CCM for GCP
Harness Cloud Cost Management (CCM) monitors the cloud costs of your GCP products, projects, SKUs, and location. As a first step, you need to connect Harness to your GCP account to get insights into your cloud infrastructure, and GCP services, Compute Engine, Cloud Storage, BigQuery, etc. CCM offers a wide range of features to track and control costs associated with your cloud resources.
☆ NOTE — After enabling CCM, it takes about 24 hours for the data to be available for viewing and analysis.
Before you begin
- The same connector cannot be used in NextGen and FirstGen. For information on creating a GCP connector in the FirstGen see Set Up Cost Visibility for GCP.
- Review Required permissions and roles to create an IAM role at the organization level
- Ensure that you have the following permissions to enable and configure the export of Google Cloud billing data to a BigQuery dataset:
- Billing Account Administrator role for the target Cloud Billing account
- BigQuery User role for the Cloud project that contains the BigQuery dataset that will be used to store the Cloud Billing data
Connect Harness to Google Cloud Platform (GCP) Account
Connect Harness to your GCP account to gain access your GCP services, Compute Engine, Cloud Storage, BigQuery, etc. Harness CCM gives you cost insights that are derived from the billing export. For deep Kubernetes visibility and rightsizing recommendations based on the historical utilization and usage metrics, set up Kubernetes connectors. See Set Up Cloud Cost Management for Kubernetes.
☆ NOTE — Time periods in the GCP Cloud Billing report use the Pacific Time Zone (PST) and observe daylight saving time shifts. However, Harness CCM explorer uses the UTC time zone. You may notice some cloud cost differences between Harness CCM explorer and the GCP Cloud Billing report due to the time zone difference.
- Create a new Kubernetes connector using one of the two options below:
- From Account Settings
- From Cloud Costs
- Go to Account Resources > Connectors.
- Select + New Connector.
- Under Cloud Costs, select GCP.
- Go to Setup > Cloud Integration.
- Select New Cluster/Cloud account.
- Select GCP.
- Perform the following tasks in the GCP Connector wizard.
Overview
- In Overview, in Connector Name, enter a name that describes this account.
- In Specify Project ID, enter the project ID and select Continue. For more information on how to get a project ID, go to Create a BigQuery dataset.
GCP Billing Export
Cloud Billing export to BigQuery enables you to export detailed Google Cloud billing data (such as usage and cost estimate data) automatically throughout the day to a BigQuery dataset that you specify.
Make sure that you have enabled Detailed Usage Cost on the Billing Export page on your GCP console. For more information, see Enable Cloud Billing export to the BigQuery dataset.
In GCP Billing Export, select Launch GCP console.
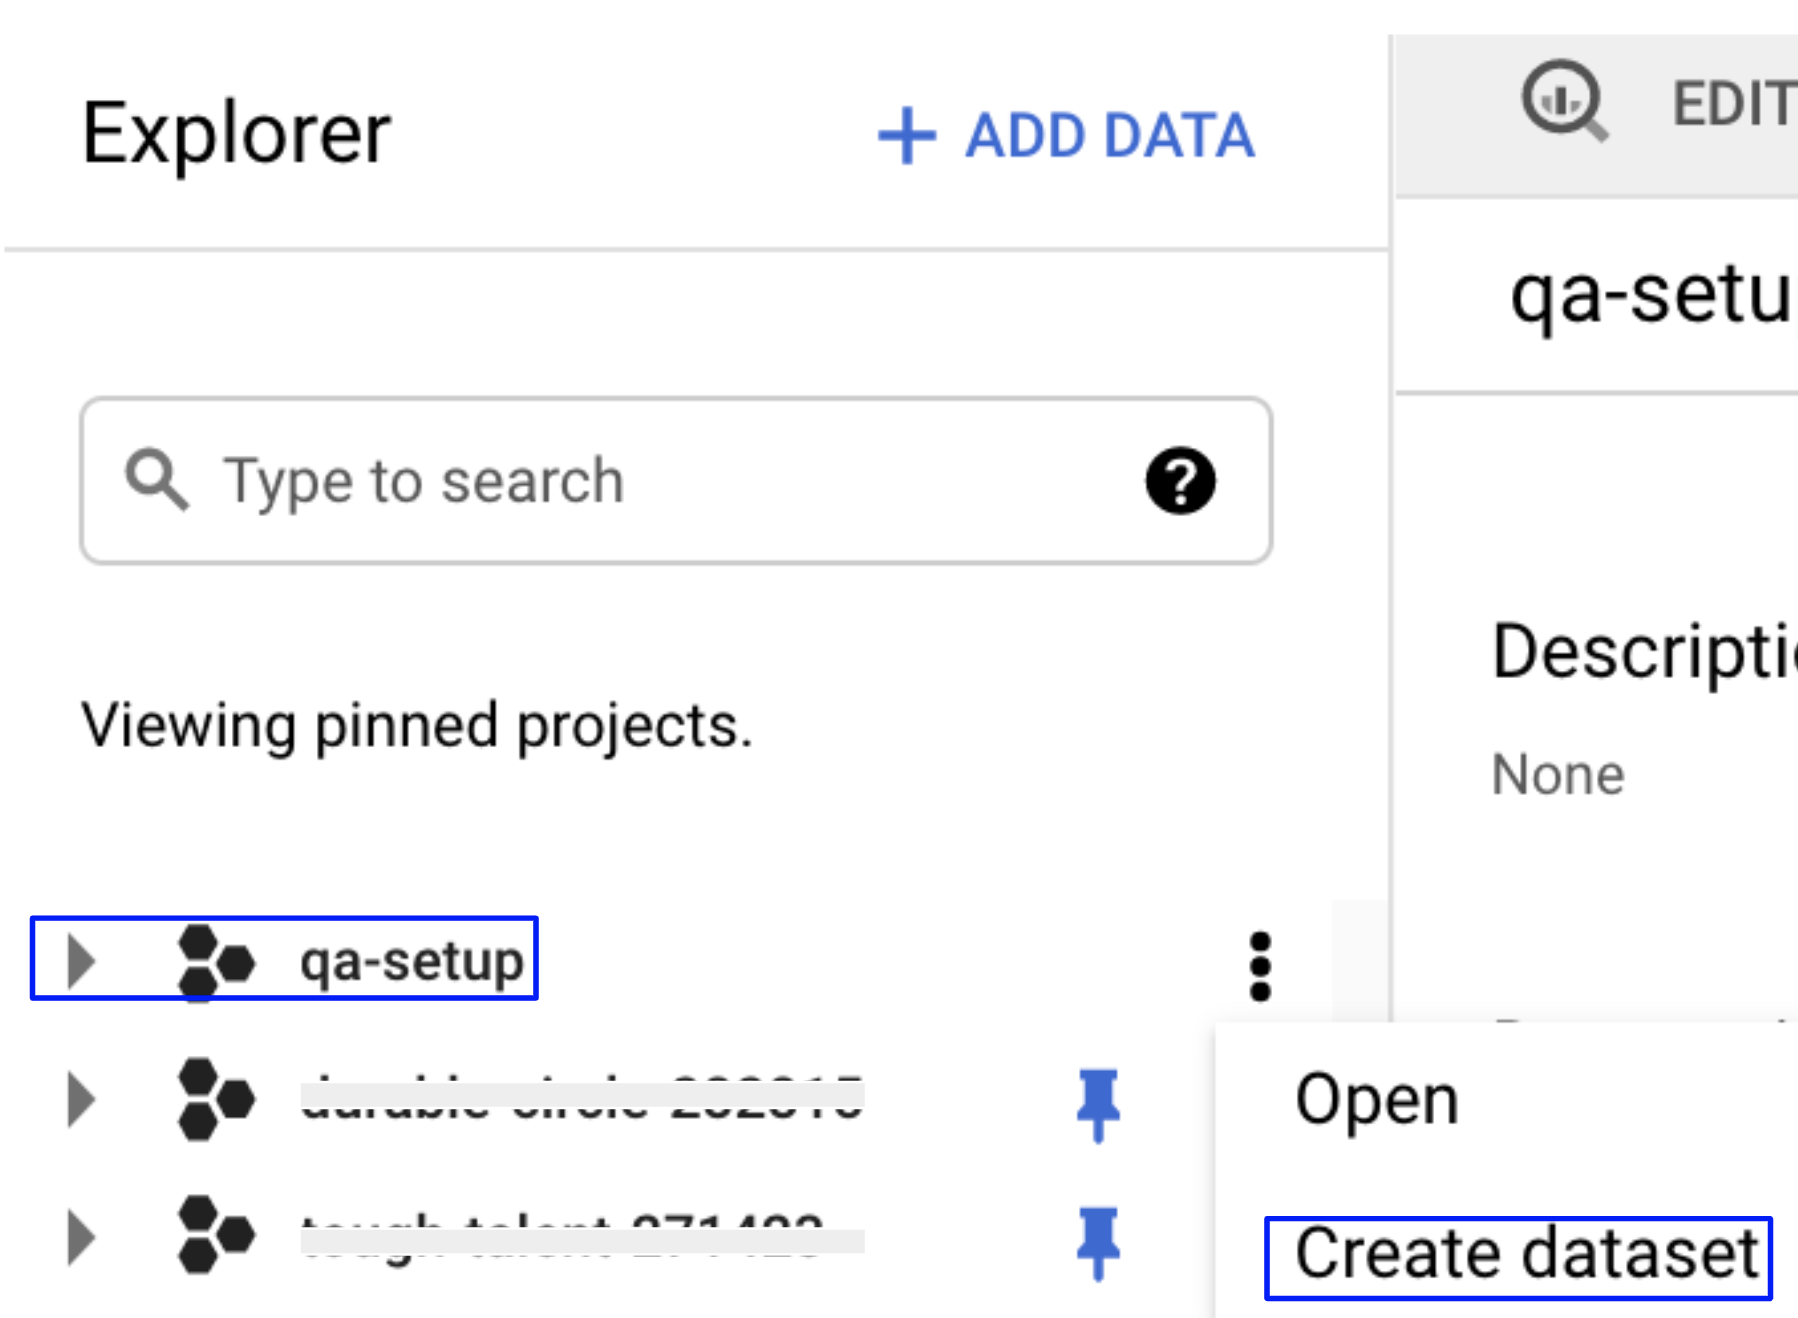
In the GCP Explorer window, in the pinned projects section, select your project ID to open the project. If you see an overflow menu (:) next to your project ID, select the menu and select Open.
Select Create dataset. For more information, go to Create a BigQuery dataset.
Enter a Dataset Name.
You need to enter Dataset Name in Harness.Select a Data location.
Set the Default table expiration to Never.
Set the Encryption option to Google-managed key.
To save, select CREATE DATASET.
Enter the Dataset Name in Harness.
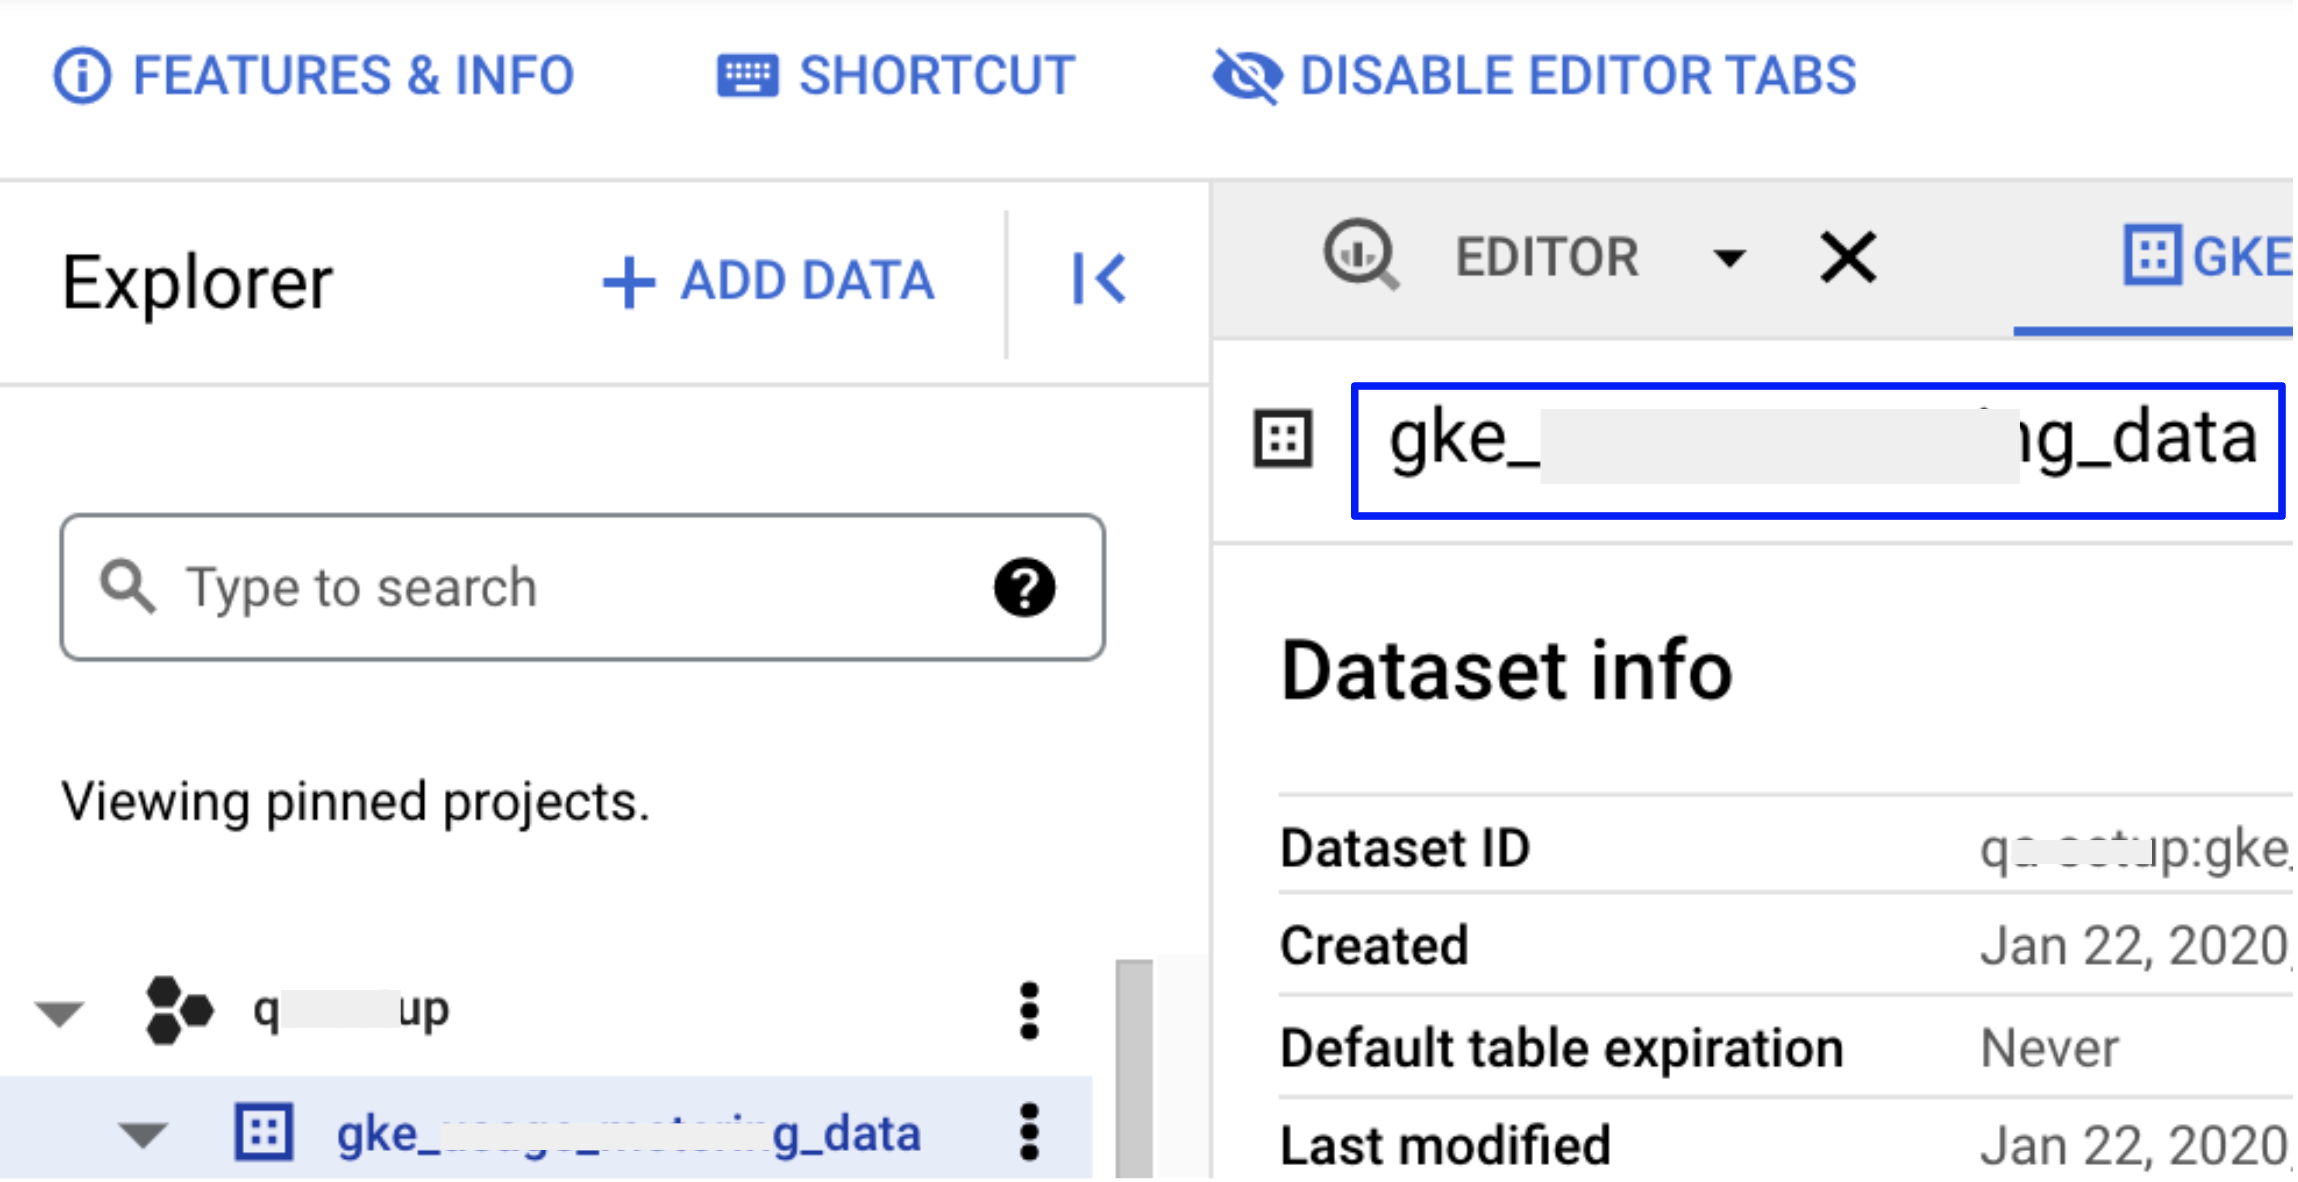
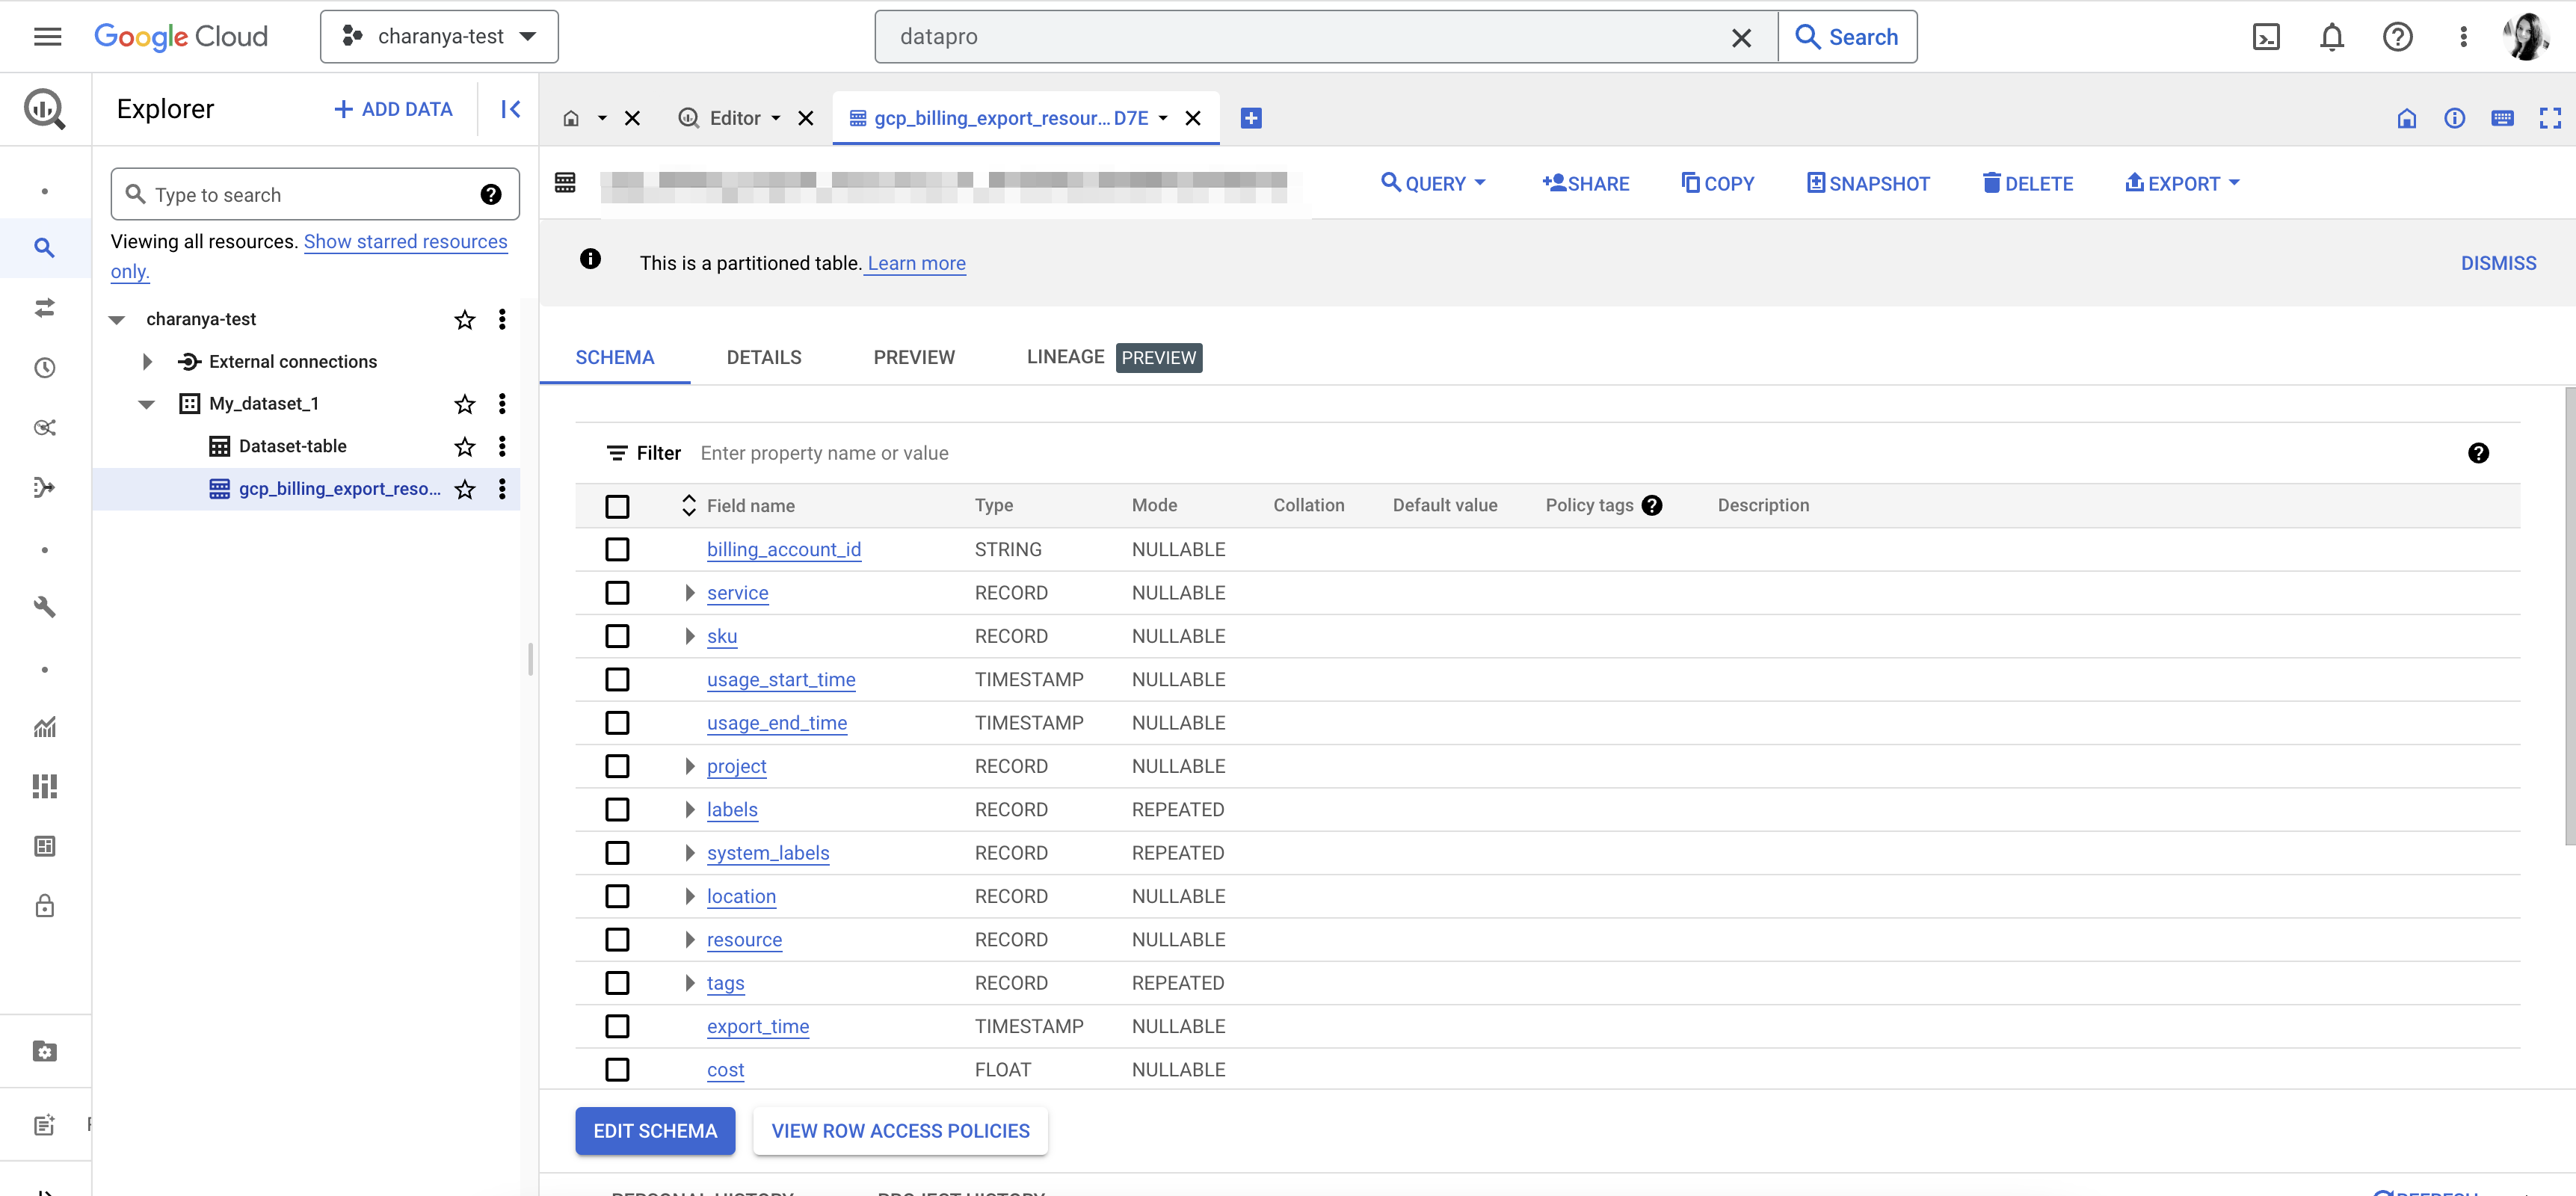
Next, you need to enter the table name in Harness. From the GCP console, copy the table name where the billing export is available. In your BigQuery dataset, the table is named
gcp_billing_export_v1_<BILLING_ACCOUNT_ID>.
Enter the Table Name in Harness.
Select Continue.
Choose Requirements
Select the Cloud Cost Management features that you would like to use on your GCP account.
CCM offers the following features:
| Features | Capabilities |
|---|---|
| Cost Visibility (Required) | This feature is available by default. Make sure you have set up the GCP Billing Export. Provides the following capabilities:
|
| GCP Inventory Management (Optional) | This feature provides visibility into your GCE VMs and unused disks and snapshots. The insights provided by inventory management can be used by Finance teams to understand resource utilization across the board. |
| GCP optimization using AutoStopping rules (Required for AutoStopping Rules) | This feature allows you to enable Intelligent Cloud AutoStopping for your GCP cloud resources. For more information, see Create AutoStopping Rules for GCP.
|
Make your selection and select Continue.
Grant Permissions
Cloud Billing Export to BigQuery helps you export detailed Google Cloud billing data (such as usage and cost estimate data) to a BigQuery dataset that you specify. The export happens throughout the day automatically.
In Grant permissions, select Open BigQuery Page.
Log into the GCP console and go to the BigQuery page.
Select your project in the left panel.
Select your dataset. For more information on creating a dataset, see Creating datasets.
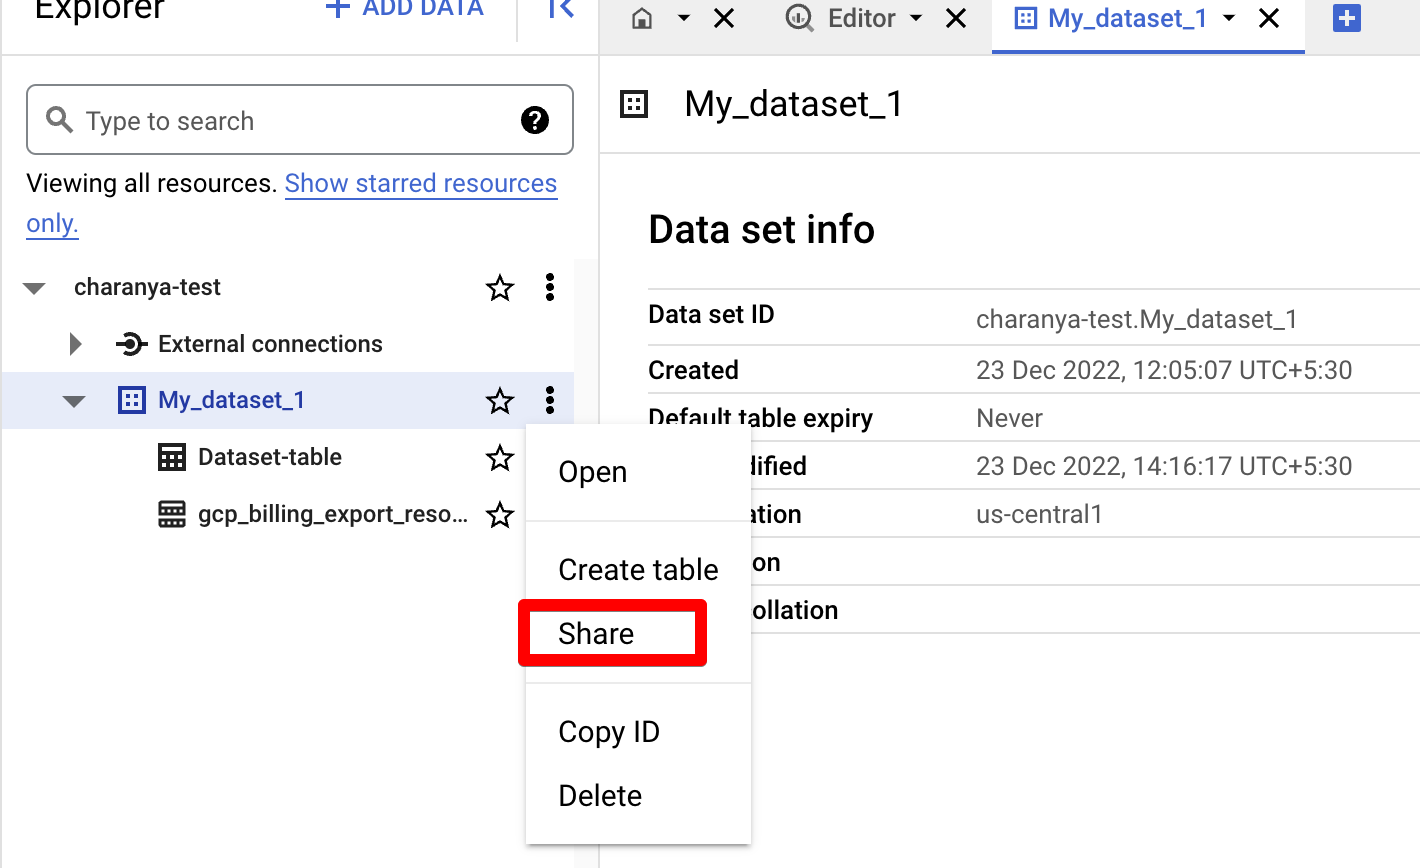
Select the more actions icon (three vertical dots) against the dataset, and then select Share.
In Dataset permissions, in Add Principals, enter the Harness service account as a member.
Copy the service account detail from Harness. The service account is generated dynamically for your account.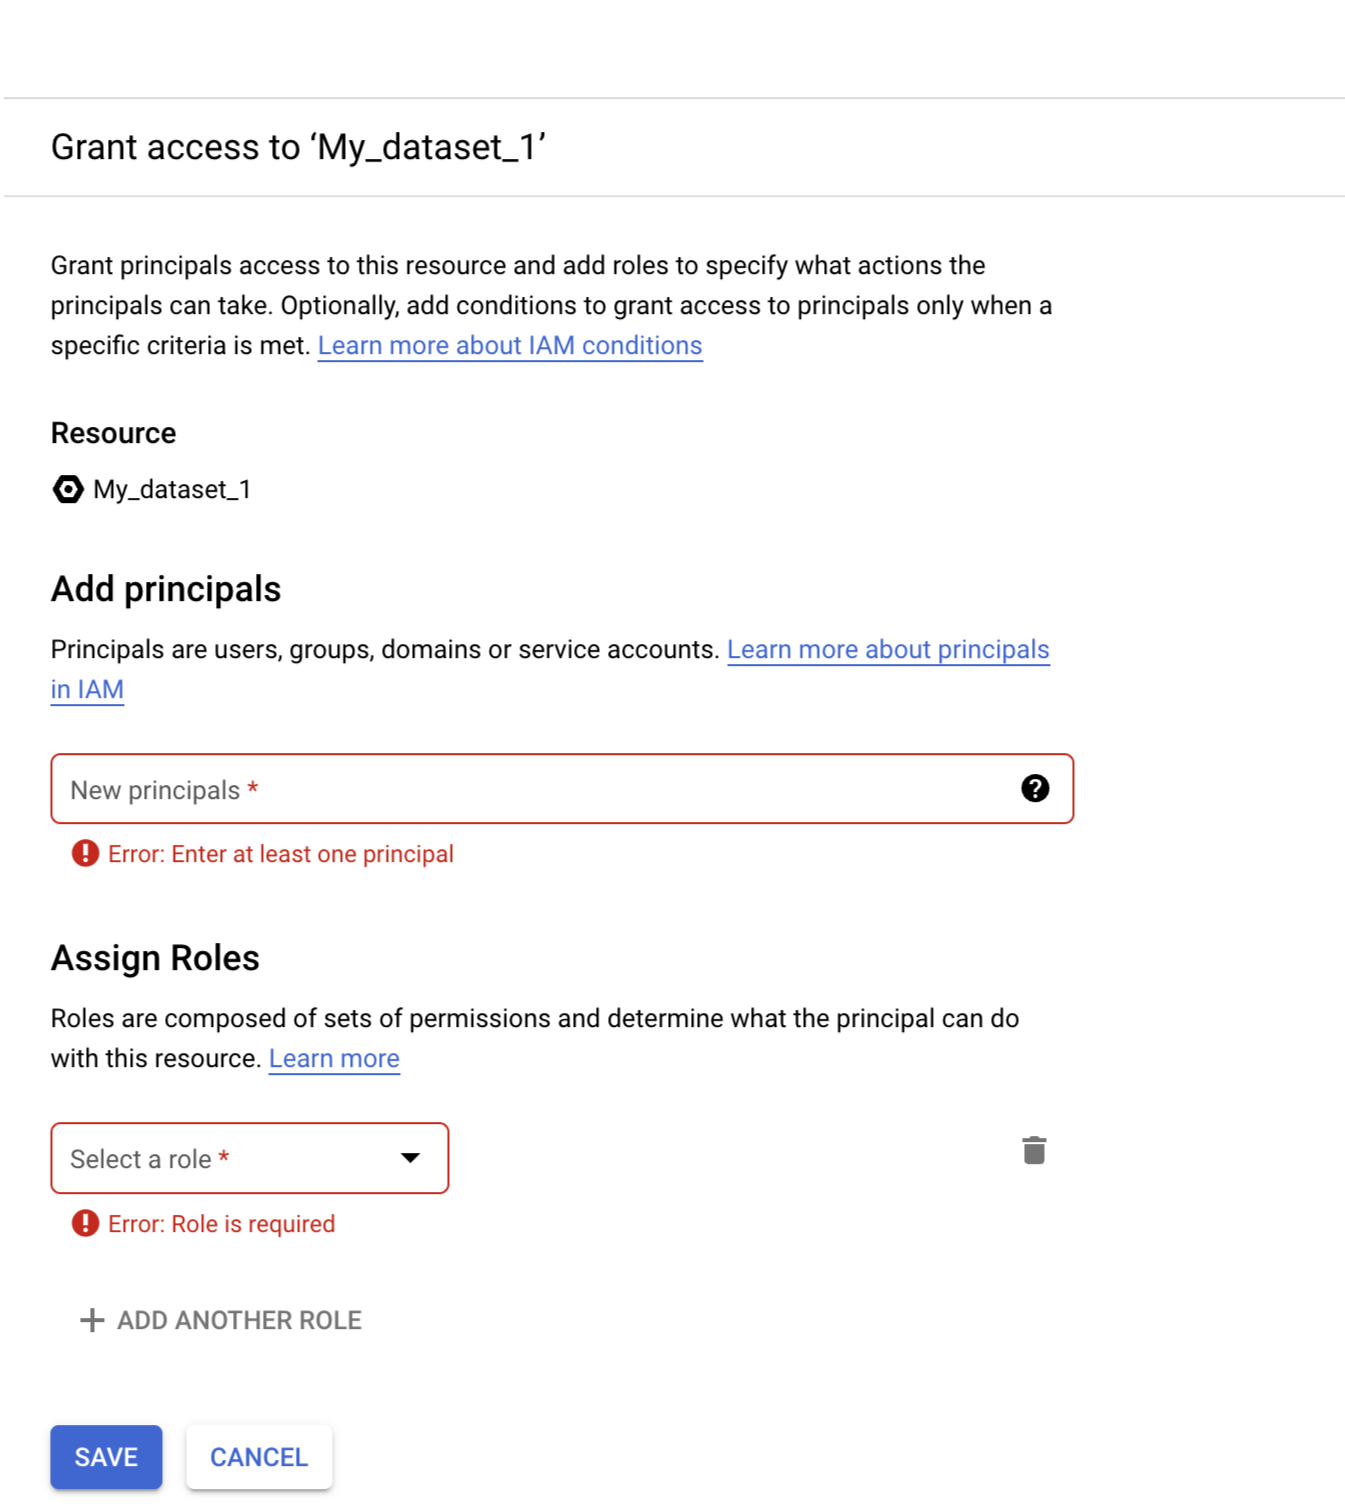
In Select a role, select BigQuery Data Viewer, and then select Add.
Select Done.
When you are done, the following screen is displayed: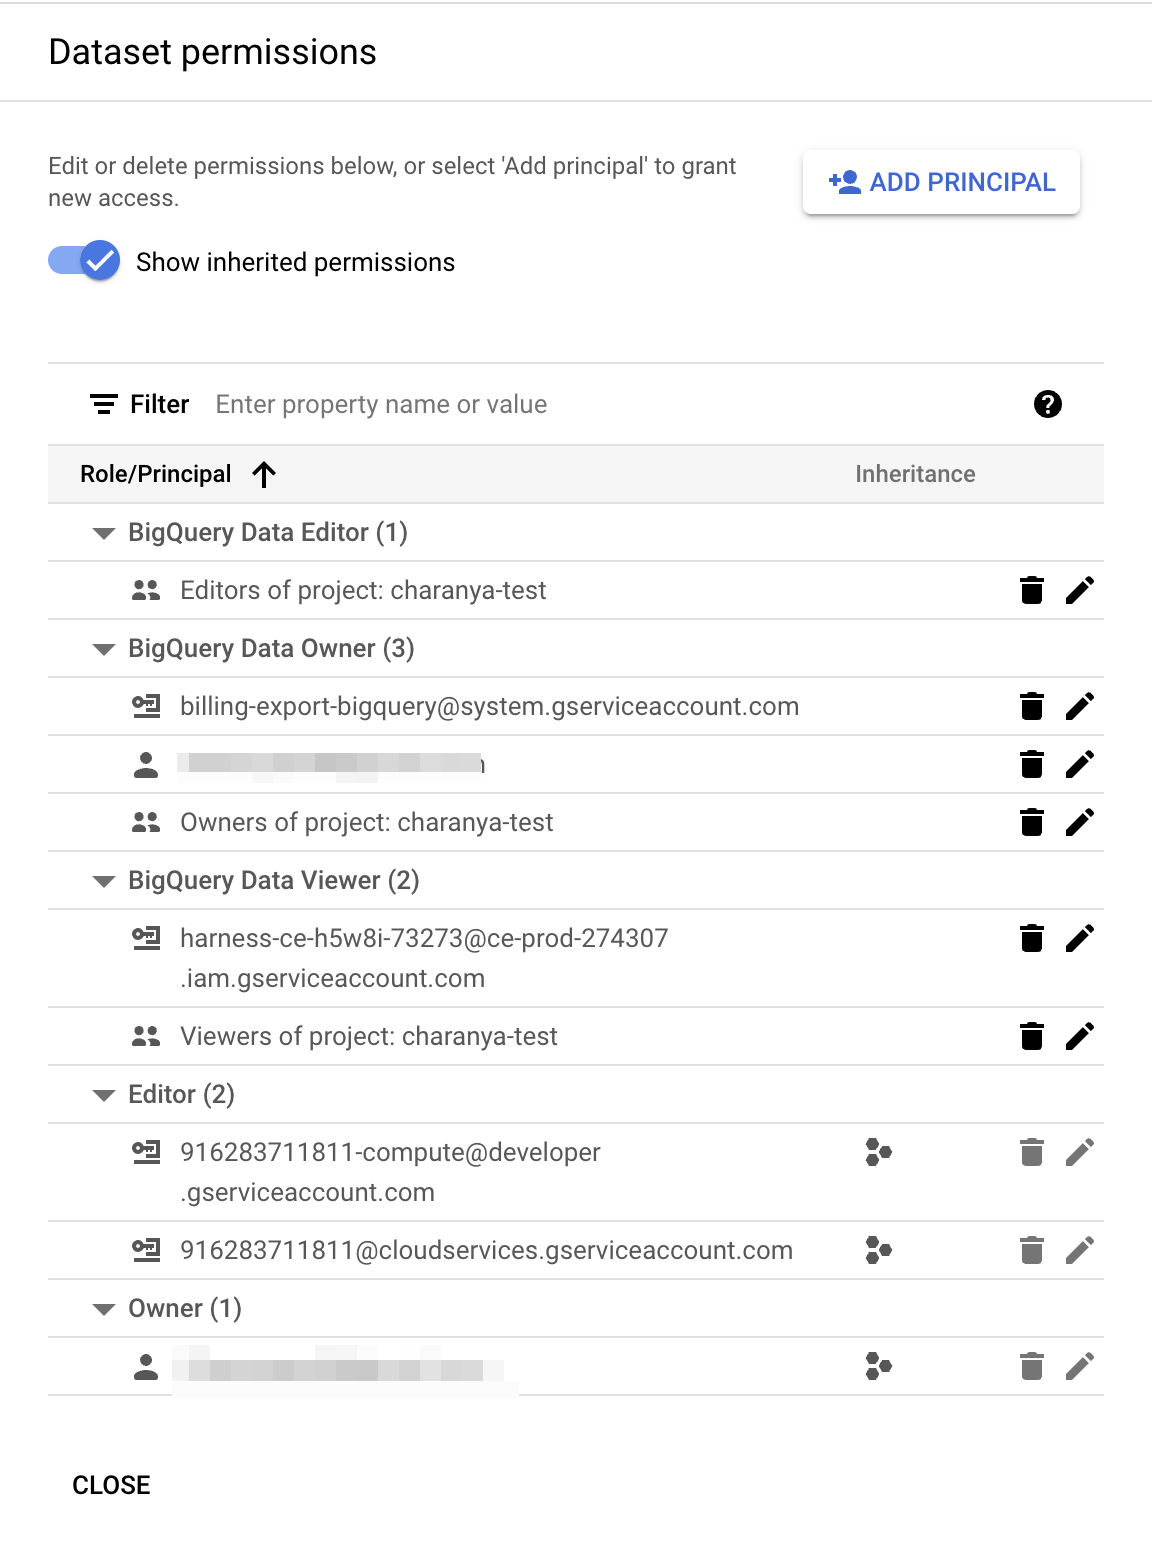
To enable AutoStopping rules, you need to add more permissions. For more information, see Create a GCP Connector for AutoStopping Rules.
- Select Continue in Harness.
Connection Test
The connection is validated and verified in this step. After successfully testing the connection, select Finish.
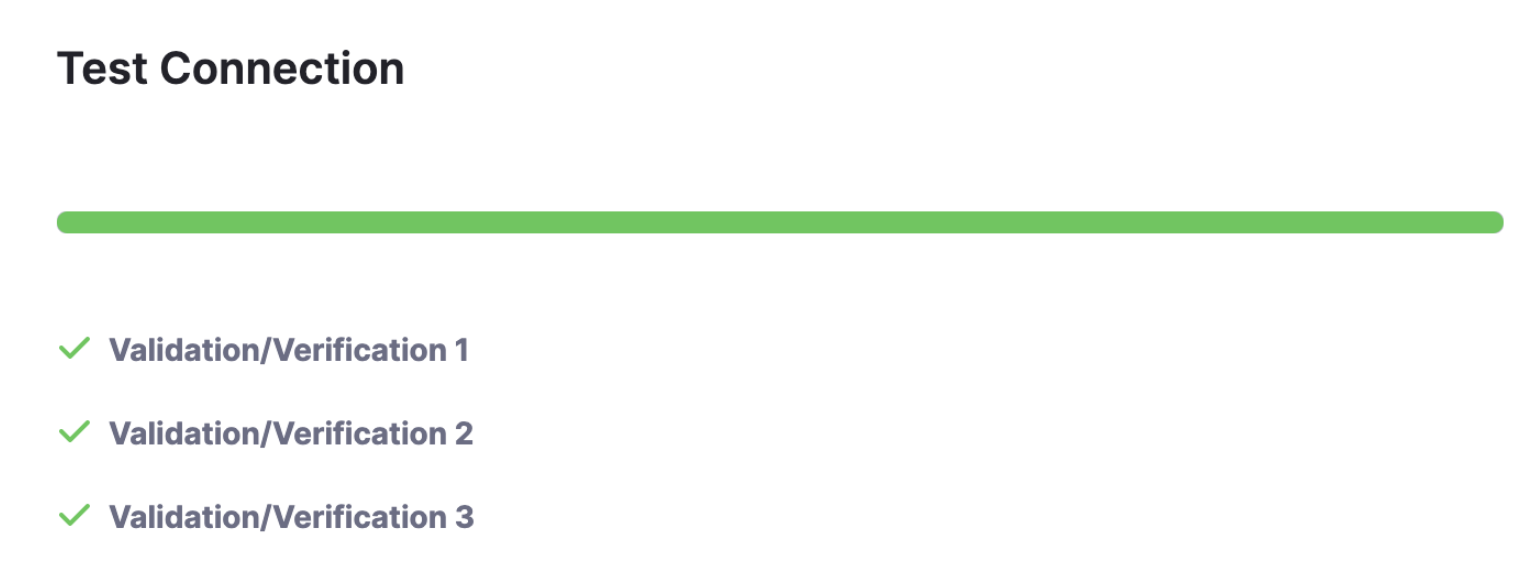
Your connector is now listed in the Connectors.
