Event preference or log feedback
Event preference or log feedback
Event preference or log feedback allows you to customize the event type, enhancing the accuracy of the verification process for a specific service.
After running log verification as part of the verify step, you can review the detected logs and provide feedback. This feedback is taken into account during subsequent verifications. The feedback is provided in the form of a risk value assigned to each log. By providing log feedback and assigning appropriate risk values, you can fine-tune the verification outcome to better suit your specific requirements and context.
Set event preference
To the event preference or log feedback:
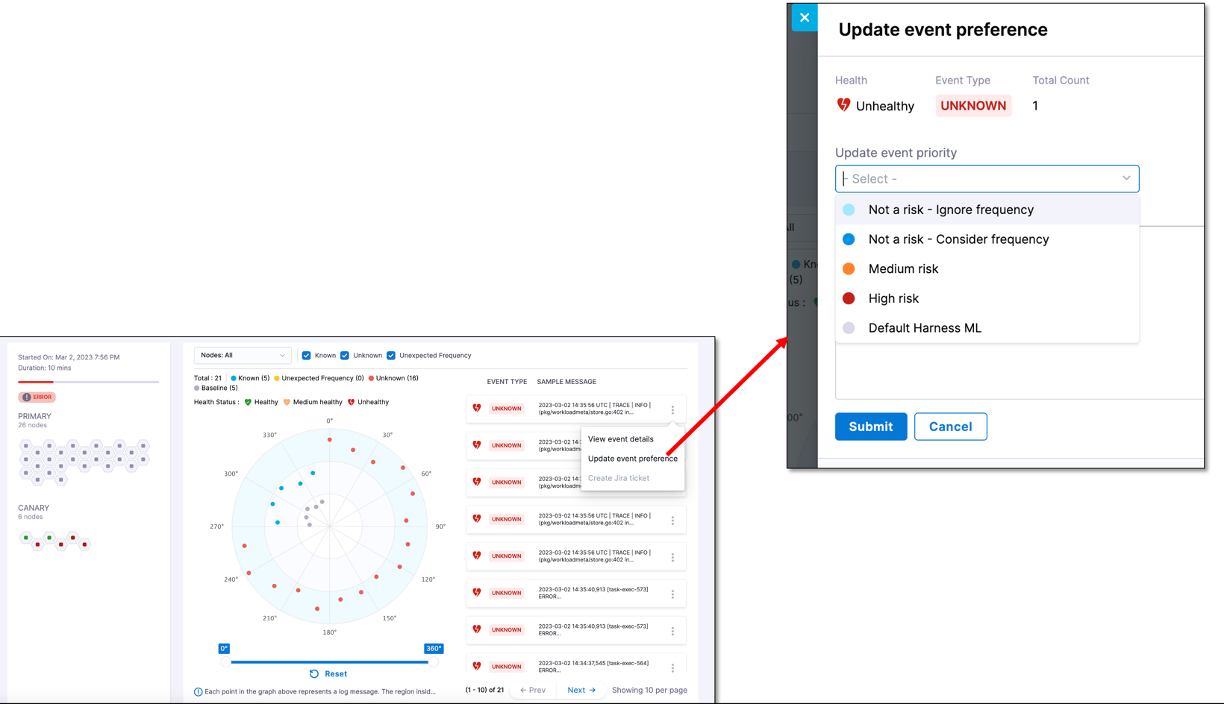
On the Event list, select the three vertical dots next to the event for which you want to set the preference, and then select Update event preference.
Alternatively, you can go to the Event Details page by clicking the event and then selecting Update event preference from the top.On the Update event preference page, from the Update event priority dropdown, you select one of the following preferences:
- Not a risk - Ignore frequency: These logs do not impact the verification result and will be ignored during the verification process. Also, they are ignored by the Harness during future verifications.
- Not a risk - Consider frequency: These logs do not impact the verification result, but the frequency will be monitored by Harness during future verifications.
- Medium risk: A log marked as medium risk will only cause verification to fail when the verification is set to high sensitivity. Otherwise, it will not affect the verification outcome.
- High risk: If a log is marked as high risk, any occurrence of that log will cause the verification to fail, regardless of whether it appeared in the previous version or the current version.
- Default Harness ML: Harness ML marks the log based on the analysis of previous verification runs.

Enter a reason for updating the event preference and then select Submit.
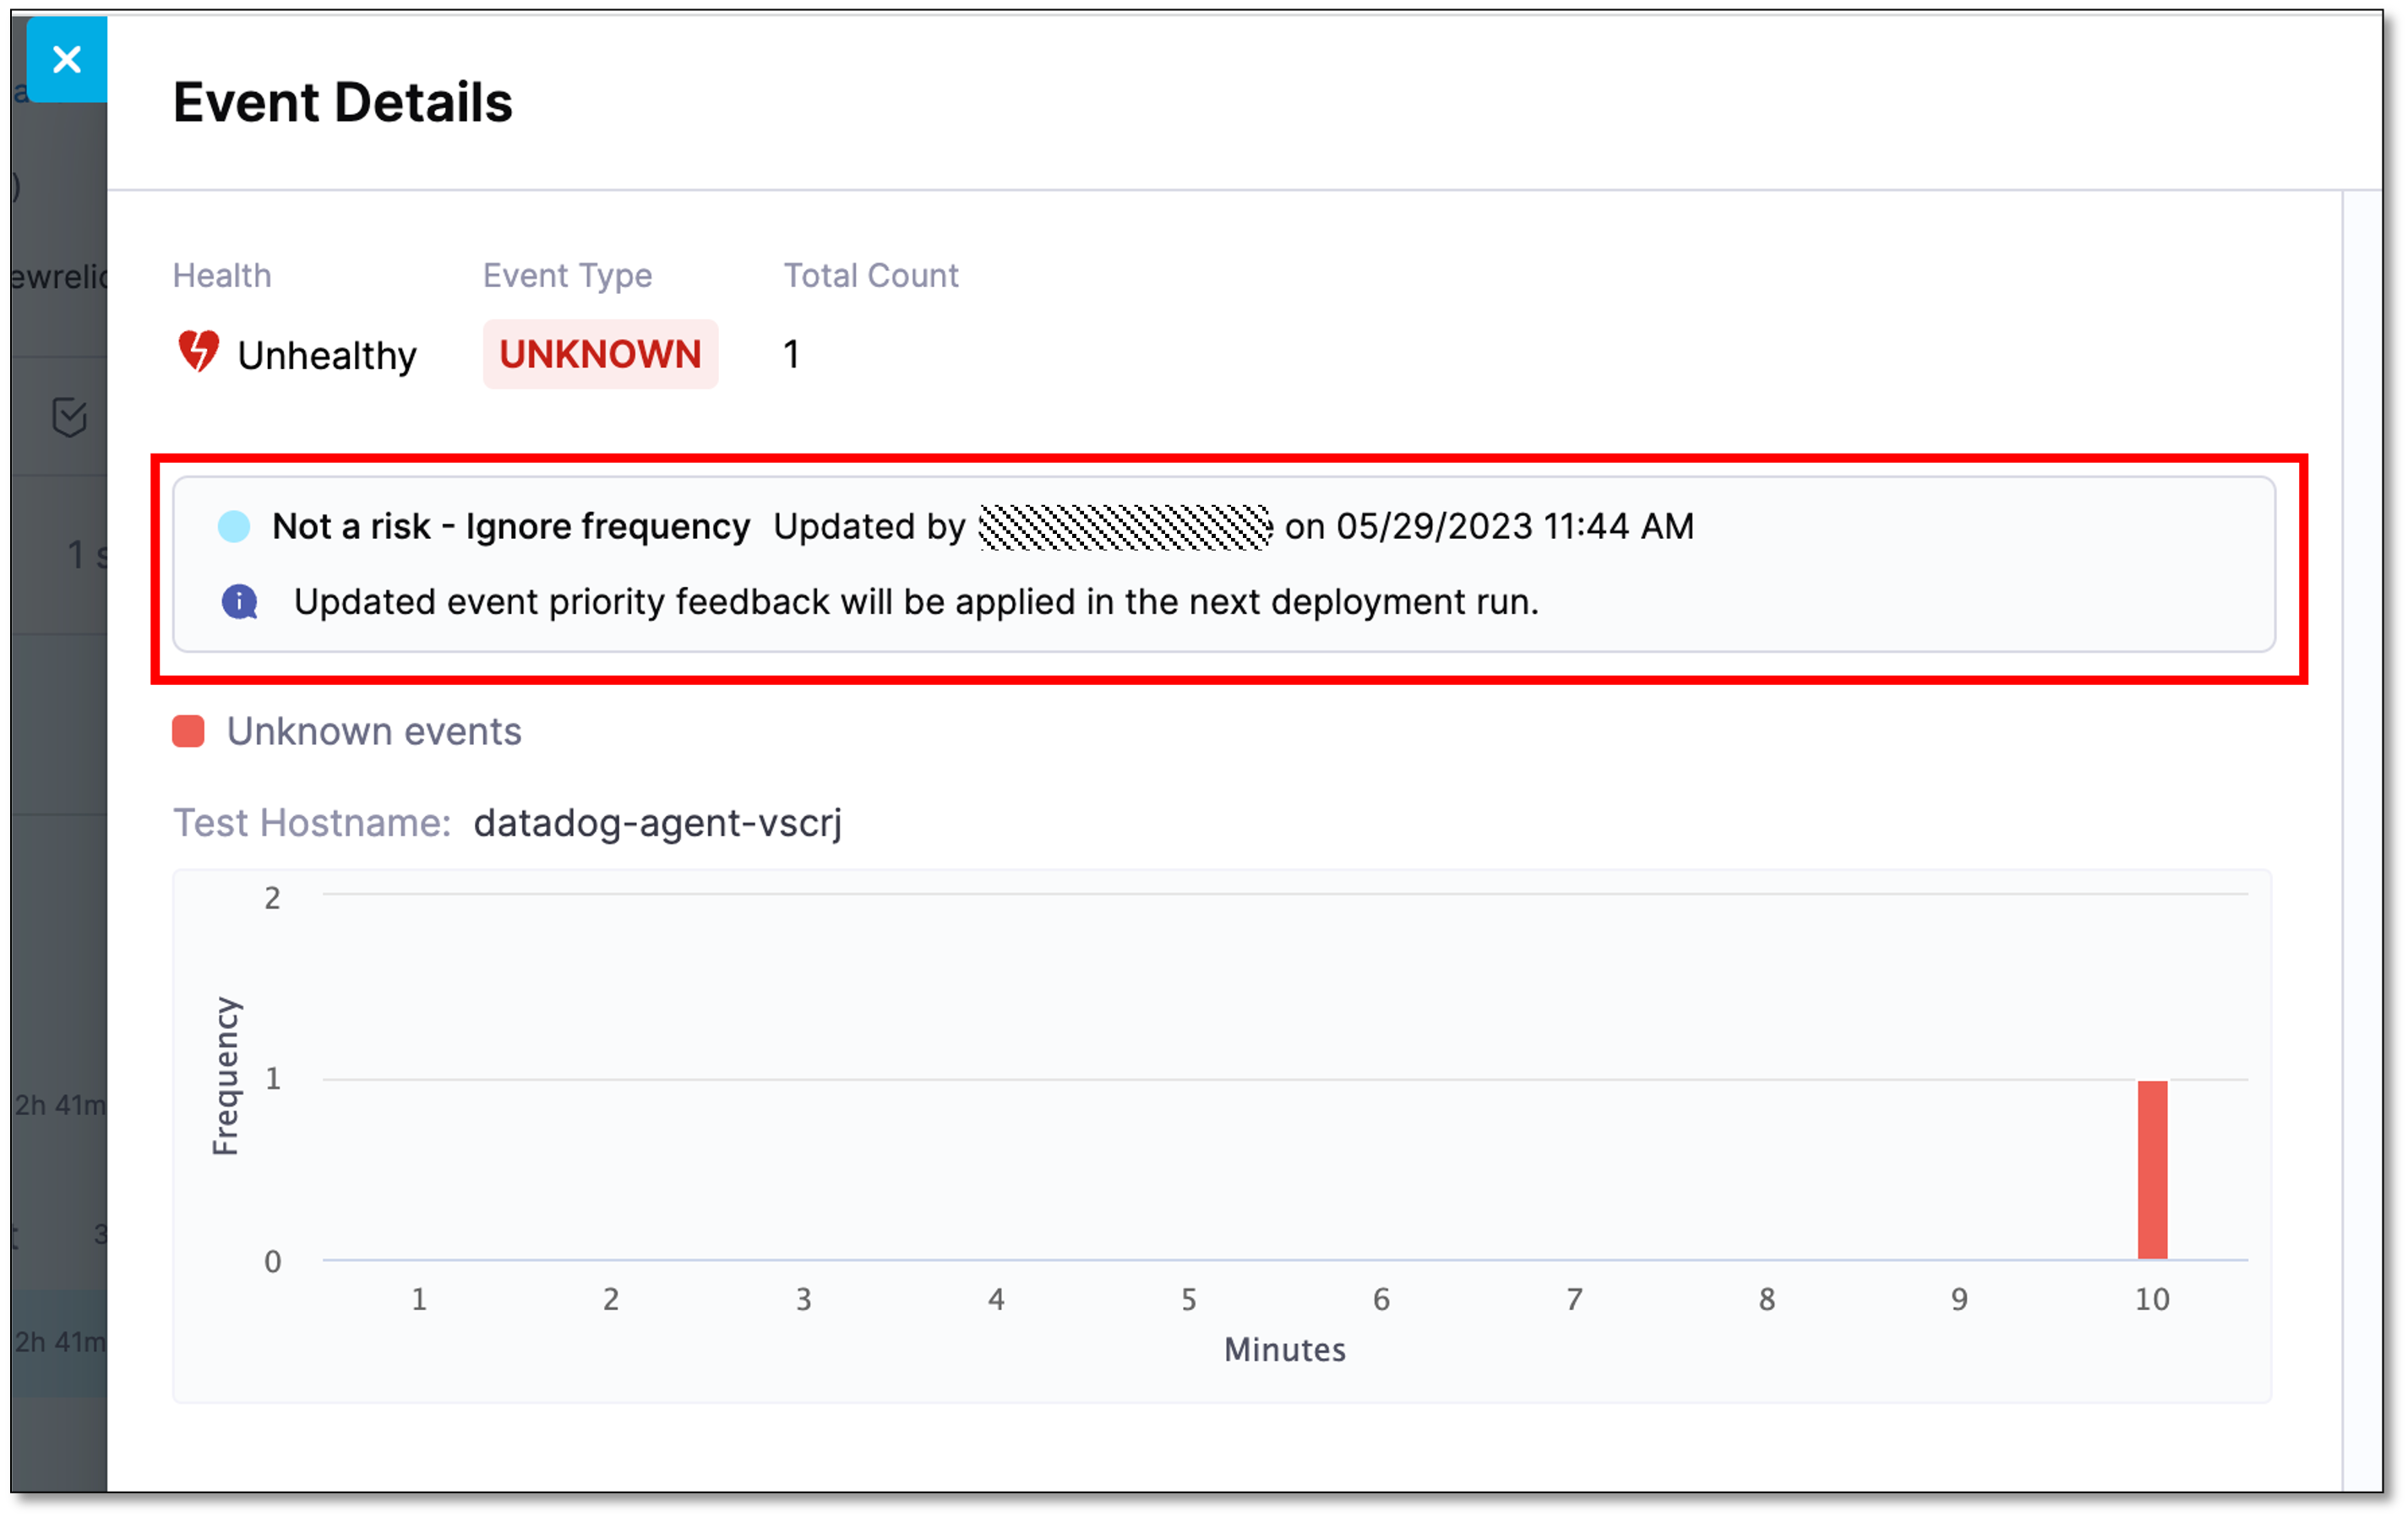
The updated event preference appears on the Event Details page.
View event preference history
To view the event feedback history:
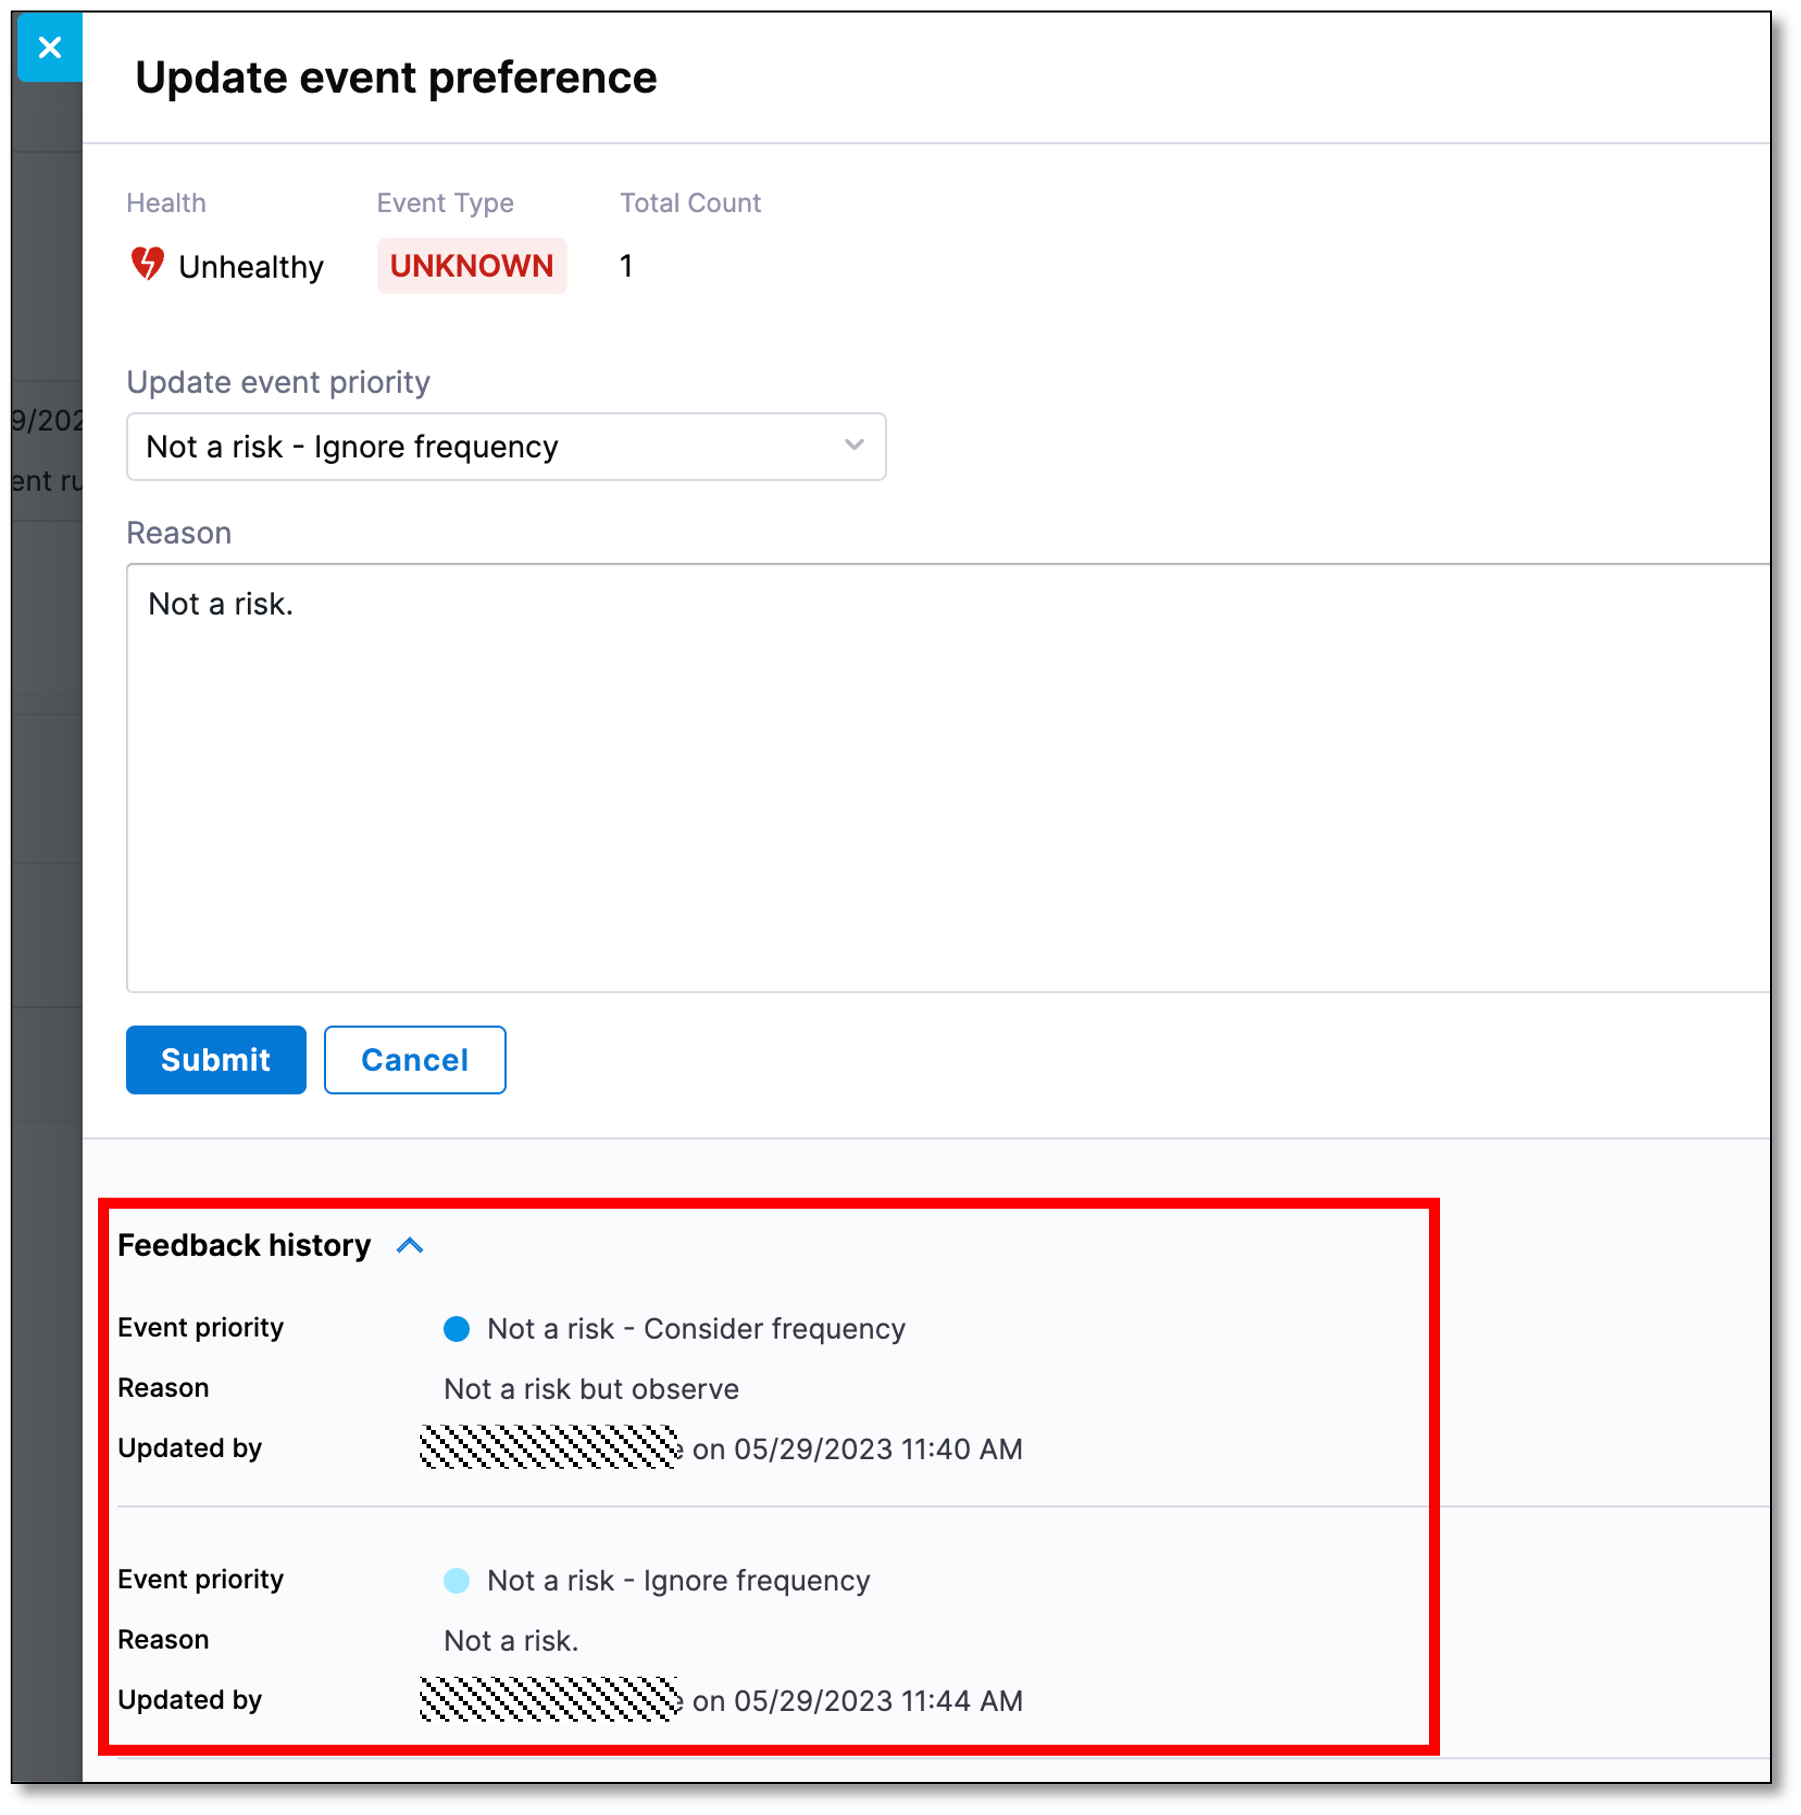
On the Update event preference page, select Update event preference, and expand Feedback history. Event feedback details such as event priority, reason, who updated the event priority and the date and timestamp are displayed.

The last applied event preference is displayed on the Update event preference page.

Create a Jira ticket
You can create a Jira ticket only for the events for which you have already set the event preference.
Prerequisite: You should have added a Jira connector at the Project, Org, or Account level. To learn how to add a Jira connector, go to Add a Jira Connector.
To create a Jira ticket:
On the Event list, select the three vertical dots next to the event for which you want to create a Jira ticket, and then select Create Jira ticket.
Alternatively, you can go to the Event Details page by clicking the event and then select Create Jira ticket from the top.On the Create Jira Ticket page, select the Jira Project, Issue Type, and Priority, and enter Ticket Summary and optional Description.
Optionally, you can enter the Jira fields by expanding the Optional Configuration. These are additional fields that are mandatory for your Jira project. For example, labels.
Select Create Jira Ticket.
The Jira ticket is created, and the ticket number is displayed below the event on the Events list.
View Jira ticket details
To view a Jira ticket:
- On the Event list, select the three vertical dots next to the event for which you want to view the Jira ticket details, and then select View Jira ticket.
Alternatively, you can go to the Event Details page by clicking the event and then selecting View Jira ticket from the top.
To go to the Jira ticket page in the Jira website, select View in Jira. You can also go to the Jira ticket page on the Jira website by selecting the Jira ticket number displayed below the event on the Events list.