2 - Services for IIS
The procedures in this guide pull IIS website, application, and virtual directory metadata from AWS S3 and deploy them to a Windows instance in AWS EC2 or a Microsoft Azure VM. The first step is creating Harness Services for the IIS website, application, and virtual directory.
This topic describes how to create the IIS website, application, and virtual directory Harness Services.
Add Harness Application
A Harness Application is a logical grouping of the Services, Environments, and Workflows for your IIS website deployment. First, we will create the Harness Application, and then each of the IIS Services.
To add the Harness Application, do the following:
- Click Setup, and then click Add Application. The Application dialog appears.
- Enter the name for your Application, such as IIS-Example, and click SUBMIT. Your new Application appears.
- Click your Application’s name. The application entities appear. These are the tools you will use to define and execute your deployment.
Add IIS Website Service
Services include artifact sources, deployment specifications, and configuration variables. For more information, see Add a Service.
In this procedure you will define which artifact(s) to use for your IIS Website. Harness will then create a Deployment Specification using PowerShell.
We are using IIS artifact types in this topic, but Harness WinRM Services support IIS and Docker artifact types:To add a service for your IIS Website, do the following:
- In your Application, click Services, and then click Add Service. The Service dialog appears.
- Give the service a name, such as IIS-website.
- In Deployment Type, select Windows Remote Management (WinRM).
- In Artifact Type, select IIS Website.
There are several types supported, including Other, which you can use for a Windows-native application: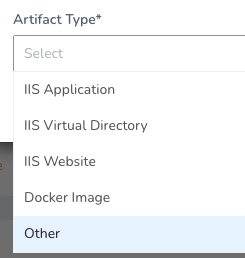
- Click SUBMIT. The service is displayed. In Service Overview you can see the name and type of your service.
- To add the artifact source for your IIS website, click Add Artifact Source. A list of artifact source types appears.
- Click the artifact source type. The artifact sources consist of the cloud providers and build servers you added earlier. For this guide, we will use Amazon S3. Harness also supports other popular Windows protocols such as SMB and SFTP.
- For the Amazon S3 example, in Cloud Provider, select the S3 provider you added earlier. Harness connects to the provider automatically
- In Bucket, select one of the buckets in the S3. The list is automatically populated by Harness.
- In Artifact Path, select the file(s) for your IIS website. The list is automatically populated by Harness. For this guide, we will use a zip file.
Harness uses Metadata-only: For WinRM connections, Harness does not use direct artifact copy when you deploy. Harness executes Powershell scripts on the target host(s) to download the artifact.
Metadata is used to download the artifact directly onto the Windows Host during deployment runtime. For this reason, ensure that the target host has connectivity to the Artifact Server before deploying.When you are finished, the Artifact Source will look something like this: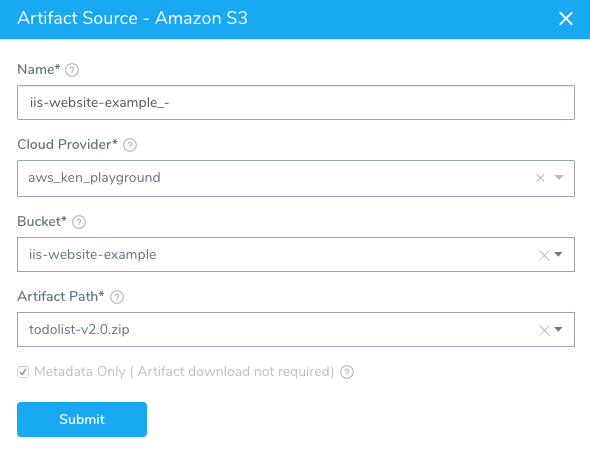
- Click SUBMIT. Harness builds the service, including the Deployment Specification.
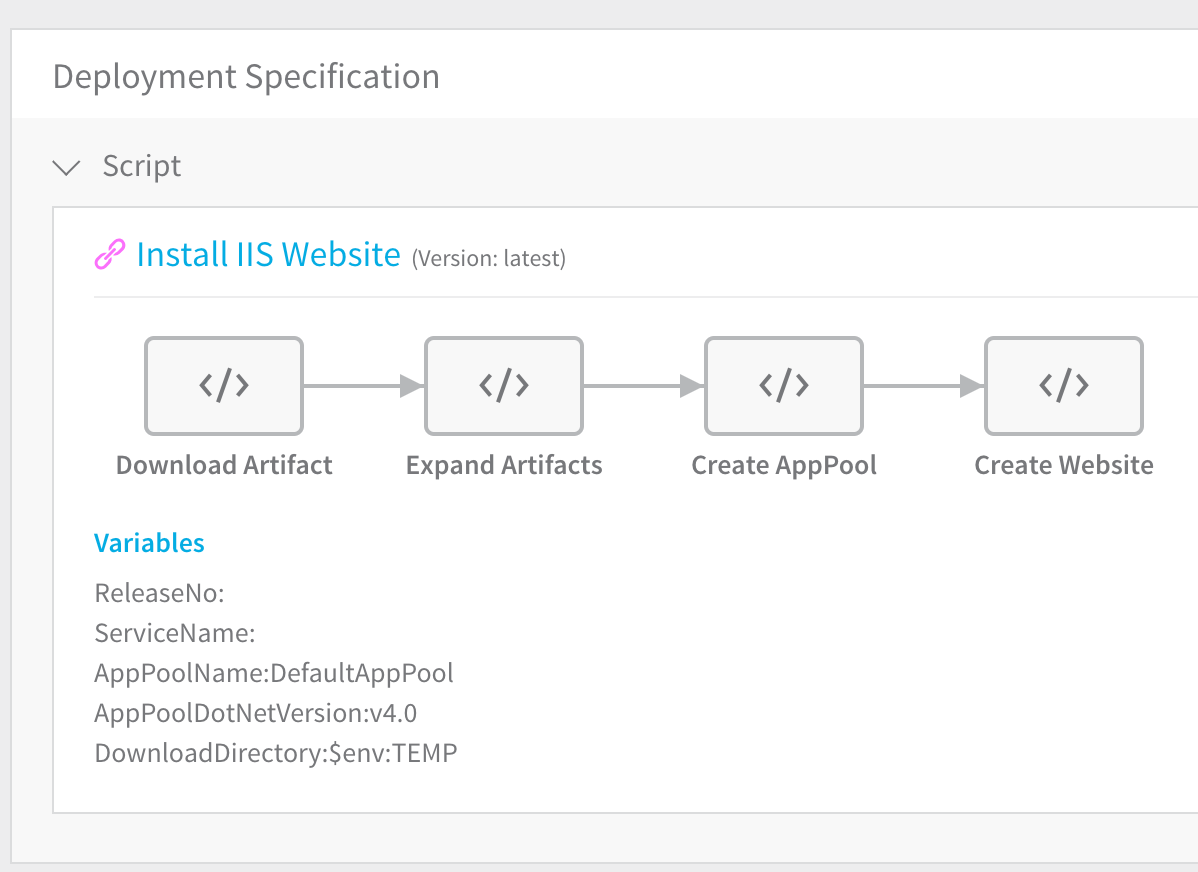 The Deployment Specification section is automatically filled with the Install IIS Website template, which pulls the artifact, expands it, creates the Application Pool (AppPool) and creates the website. Later you will create the environment where the scripts will be executed.
To add more scripts, mouseover anywhere in the script and click the plus icon: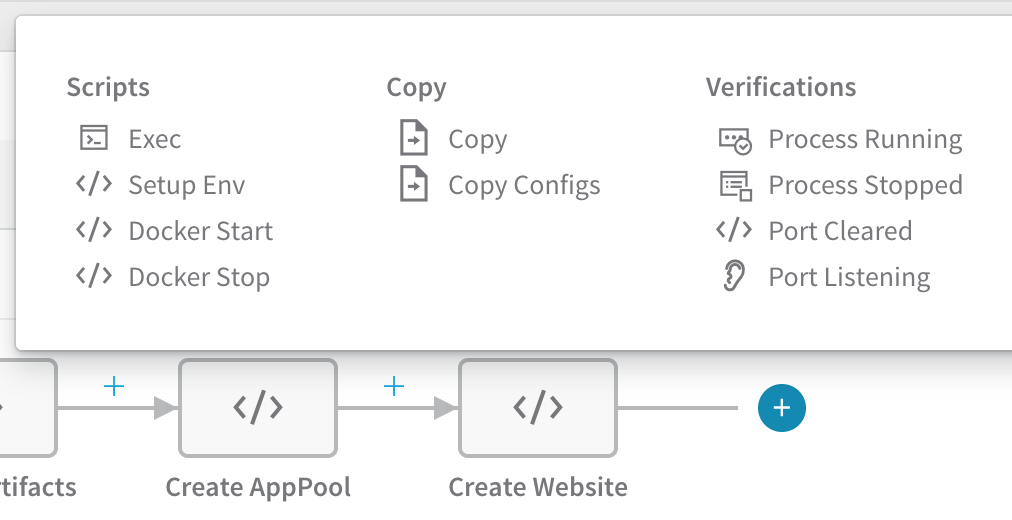
By default the Install IIS Website Template is linked to the template in the Template Library and its scripts cannot be edited in the Service (although its variables may be edited).
Install IIS Website Template
When you create a Service of type IIS Website, a link to the Install IIS Website template is added to the Service. The template contains the following script steps:
- Download Artifacts - As noted earlier, for WinRM connections, Harness does not use direct artifact copy when you set up the Service. Only metadata is supported and is used to download the artifact directly onto the target Windows host during deployment runtime. Ensure the target host has connectivity to your Artifact Server.
- Expand Artifacts - PowerShell script runs to expand the artifact.
- Create App Pool - See Application Pools below.
- Create Website - PowerShell script to create the IIS Website.
For more information on templates, see Use Templates.
Template Variables
To edit the variables used in the Install IIS Website Template in the Service, click Variables. The Edit Command dialog appears.
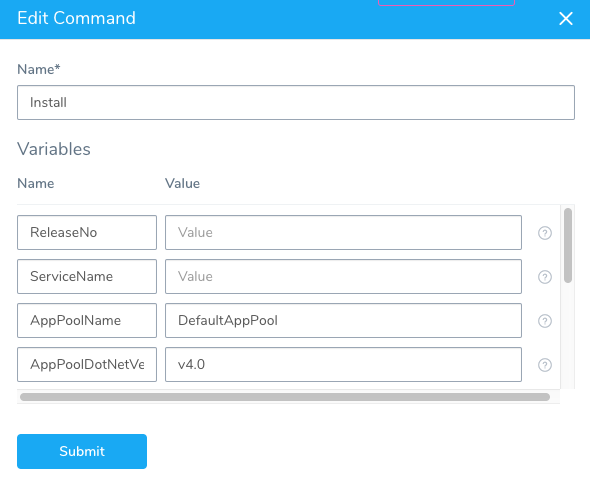
Add values for the variables as needed. The variables used in the Install IIS Website Template in the Service can be modified without influencing the Install IIS Website Template in the Template Library.
Application Pools
Harness manages the deployment of the new IIS website, application, or virtual directory artifacts to your Windows instances using the default Application pool. If you want to specify the Application pool, use the applicationPool element, adding it to the New-Item script during application creation.
For more information, see:
When you create the IIS services in Harness, you can modify the AppPool name used in the Create AppPool settings of the Deployment Specification.
Add IIS Application Service
In this procedure you will define which artifact(s) to use for your IIS Application. Harness will then create a Deployment Specification using PowerShell.
To add a service for your IIS Application, do the following:
- In your application, Click Services, and then click Add Service. The Service dialog appears.
- Give the service a name, such as IIS-application.
- In Deployment Type, select Windows Remote Management (WinRM).
- In Artifact Type, select IIS Application.
- Click SUBMIT. The service is displayed.
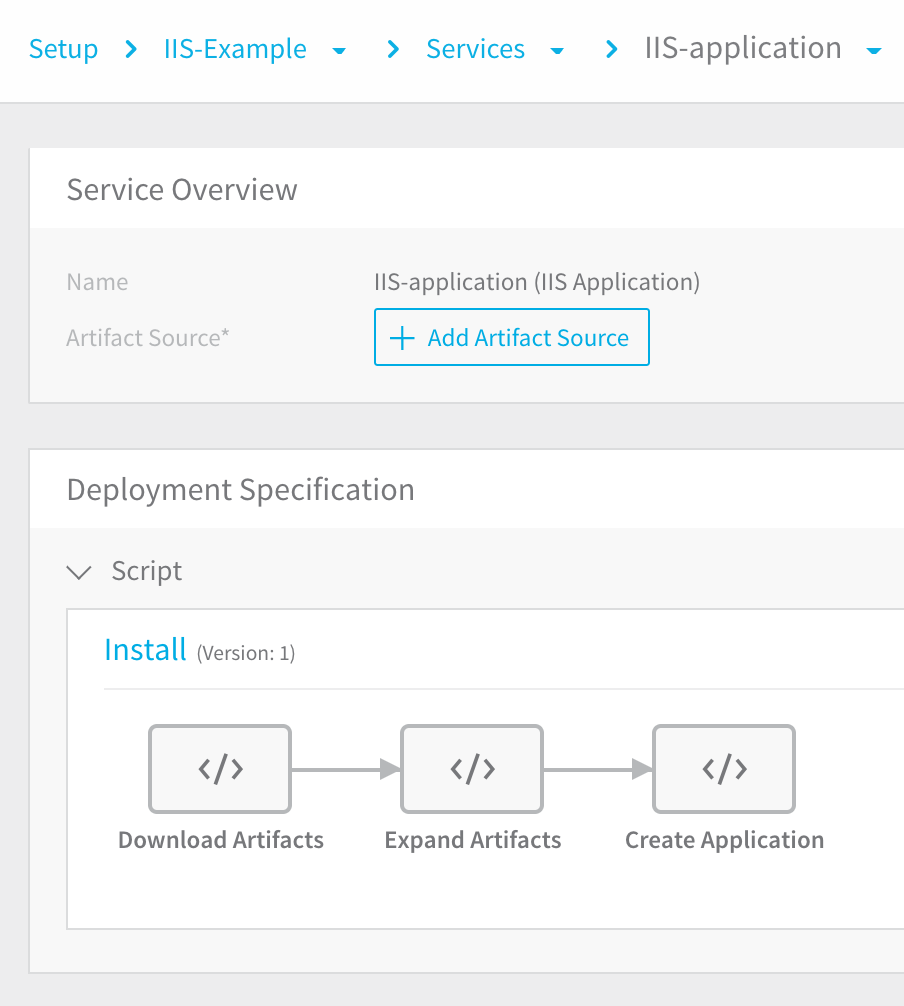 In Service Overview you can see the name and type of your service.
 - To add the artifact source for your IIS application, click Add Artifact Source. A list of artifact source types appears.
- Click the artifact source type. The artifact sources consist of the cloud providers and build servers you added earlier. For this guide, we will use Amazon S3.
- For the Amazon S3 example, in Cloud Provider, select the S3 provider you added earlier. Harness connects to the provider automatically
- In Bucket, select one of the buckets in the S3. The list is automatically populated by Harness.
- In Artifact Path, select the file(s) for your IIS application. The list is automatically populated by Harness. For this guide, we will use a zip file.
For WinRM connections, Harness does not use direct artifact copy when you set up the Service. Metadata is supported and is used to download the artifact directly onto the Windows Host during deployment runtime. For this reason, ensure that the target host has connectivity to the Artifact Server before deploying.When you are finished, the Artifact Source will look something like this: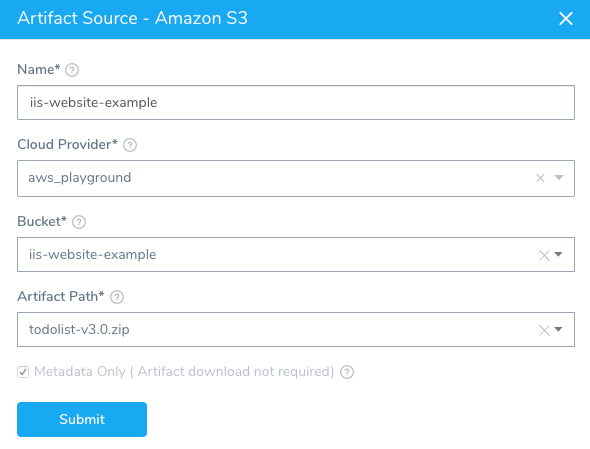
Click SUBMIT to add the artifact source. Harness builds the service, including the Deployment Specification.
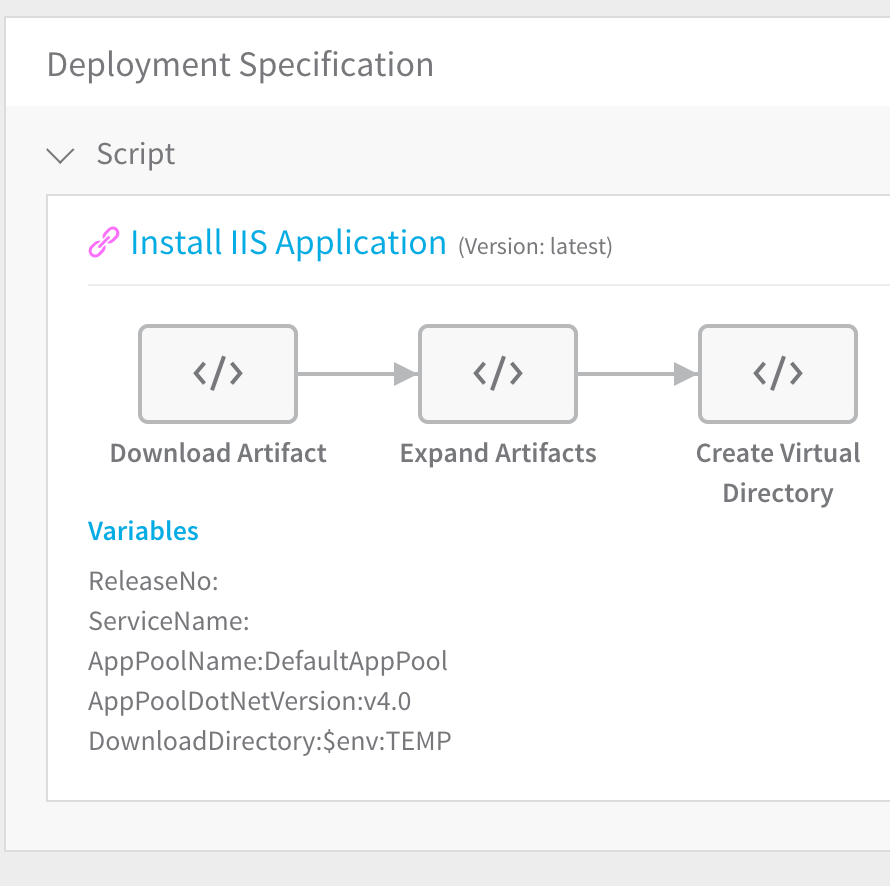
The Deployment Specification section is automatically filled with, and linked to, the Install IIS Application template.
By default, the Install IIS Application template is linked to the template in the Template Library and its scripts cannot be edited in the Service (although its variables may be edited). To modify its scripts, you must copy the template instead of linking to it. To do this, in the Deployment Specification, click Add Command, select From Template Library, select the Install IIS Application Template, and choose Copy instead of Link.
Install IIS Application Template
When you create a Service of type IIS Application, a link to the Install IIS Application template is added to the Service. The template contains the following script steps:
- Download Artifact - As noted earlier, for WinRM connections, Harness does not use direct artifact copy when you set up the Service. Meta-data is supported and is used to download the artifact directly onto the Windows Host during deployment runtime. Ensure the target host has connectivity to your Artifact Server.
- Expand Artifacts - PowerShell script runs to expand the artifact.
- Create Virtual Directory - PowerShell script runs to create the Virtual Directory.
For more information on templates, see Use Templates.
To edit the values for variables used in the template, click Variables. The variables used in the Install IIS Application template in the Service can be modified without influencing the Install IIS Application Template in the Template Library.
Add IIS Virtual Directory Service
In this procedure you will define which artifact(s) to use for your IIS virtual directory. Harness will then create a Deployment Specification using PowerShell.
To add a service for your IIS virtual directory, do the following:
- In your application, Click Services, and then click Add Service. The Service dialog appears.
- Give the service a name, such as IIS-virtual-directory.
- In Deployment Type, select Windows Remote Management (WinRM).
- In Artifact Type, select IIS Virtual Directory.
- Click SUBMIT. The service is displayed. In Service Overview you can see the name and type of your service.
- To add the artifact source for your IIS virtual directory, click Add Artifact Source. A list of artifact source types appears.
- Click the artifact source type. The artifact sources consist of the cloud providers and build servers you added earlier. For this guide, we will use Amazon S3.
- For the Amazon S3 example, in Cloud Provider, select the S3 provider you added earlier. Harness connects to the provider automatically
- In Bucket, select one of the buckets in the S3. The list is automatically populated by Harness.
- In Artifact Path, select the file(s) for your IIS virtual directory. The list is automatically populated by Harness. For this guide, we will use a zip file.
For WinRM connections, Harness does not use direct artifact copy when you set up the Service. Meta-data is supported and is used to download the artifact directly onto the Windows Host during deployment runtime. For this reason, ensure that the target host has connectivity to the Artifact Server before deploying.When you are finished, the Artifact Source will look something like this: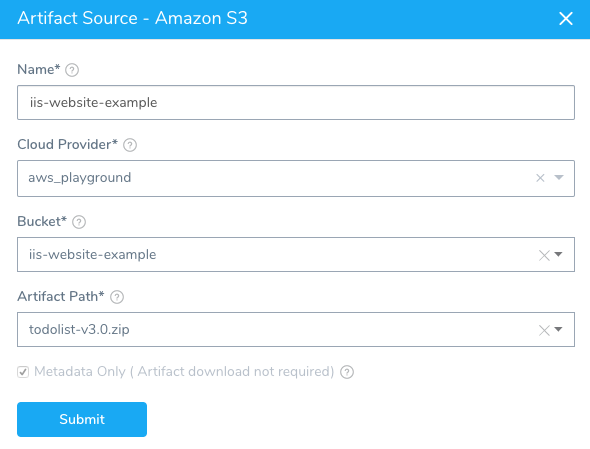
Click SUBMIT to add the artifact source. Harness builds the service, including the Deployment Specification.
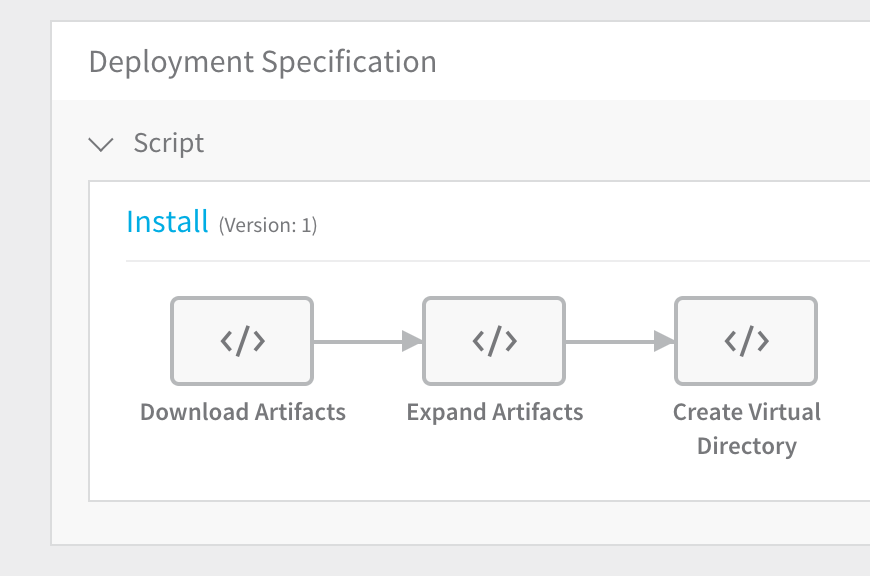
The Install IIS Application template is also used for the IIS Virtual Directory service type. By default, as with the IIS Application Service, the Install IIS Application template is linked to the template in the Template Library and its scripts cannot be edited in the Service (although its variables may be edited). To modify its scripts, you must copy the template instead of linking to it. To do this, in the Deployment Specification, click Add Command, select From Template Library, select the Install IIS Application Template, and choose Copy instead of Link.
You can modify the variables of the Install IIS Application template scripts by click Variables. The variables used in the Install IIS Application template in the Service can be modified without influencing the Install IIS Application Template in the Template Library.
Click Create Virtual Directory, and the Create Virtual Directory dialog appears. The dialog contains the following default PowerShell script that will be run during shell session of your Harness workflow:
Import-Module WebAdministration

$siteName="Default Web Site"
$releaseId="${workflow.ReleaseNo}"
$virtualDirectoryName="${service.Name}"
$appPhysicalDirectory=$env:SYSTEMDRIVE + "\Artifacts\" + $virtualDirectoryName + "\release-" + $releaseId

Write-Host "Creating Virtual Directory" $virtualDirectoryName ".."
$VirtualDirPath = 'IIS:\Sites\' + $siteName + '\' + $virtualDirectoryName
New-Item -Path $VirtualDirPath -Type VirtualDirectory -PhysicalPath $appPhysicalDirectory -Force

Write-Host "Done."
Note the following:
- The
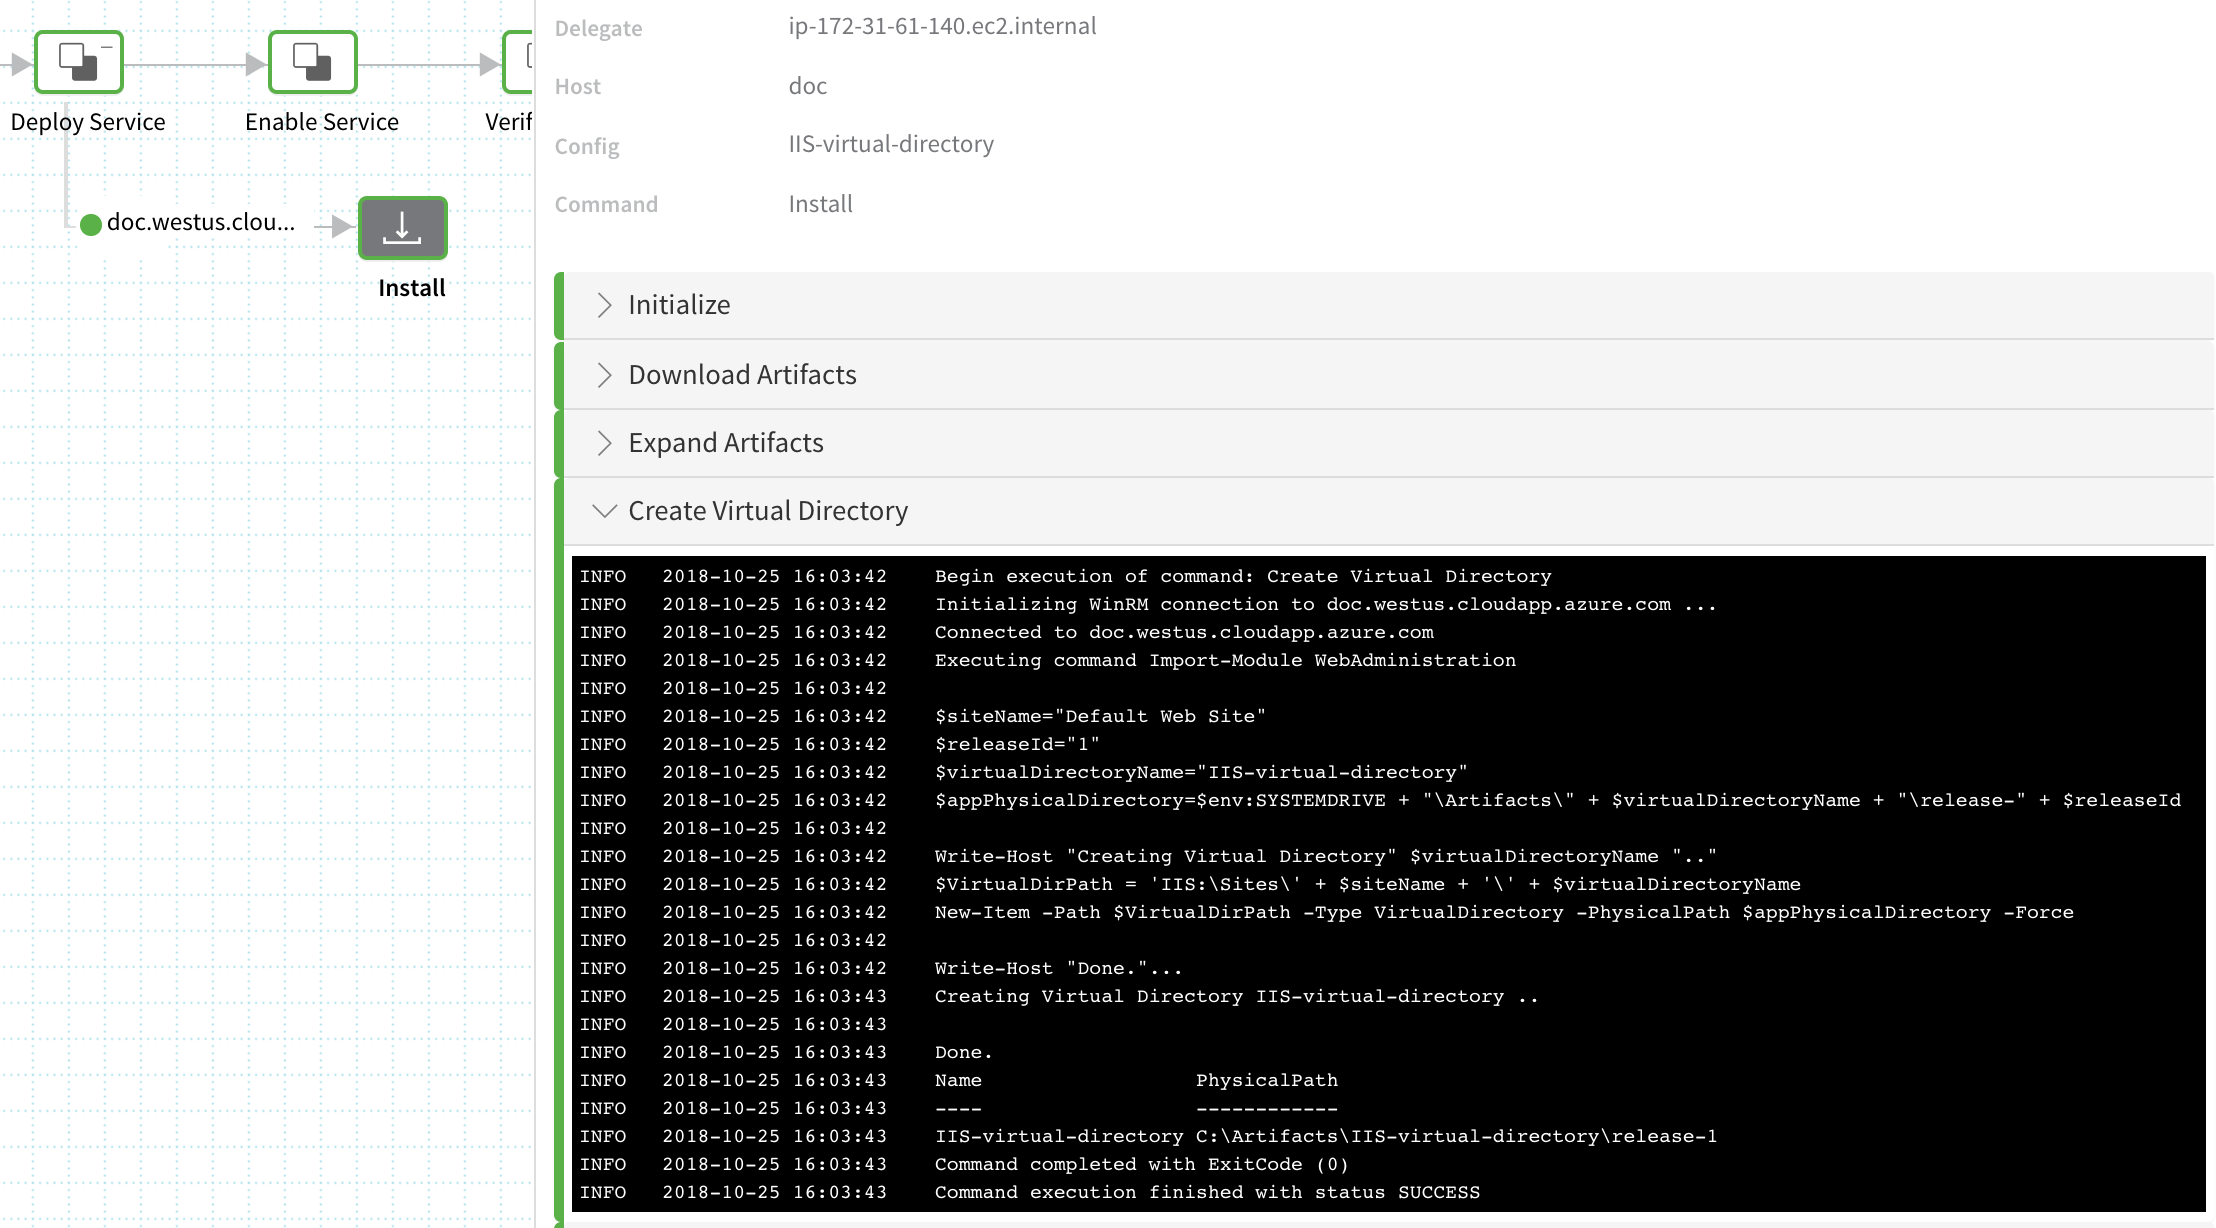
$releaseIdvariable has the value${workflow.ReleaseNo}. This is one of the builtin Harness variables. For more information, see Variables and Expressions in Harness. - The
$VirtualDirPathvariable shows you where your IIS directory will be deployed.
When you deploy this service as part of your workflow, you will see these variables used in the Harness deployment dashboard:
WinRM and Copy Configs Command
The Copy Configs command copies configuration files defined in the Configuration section of the Service.
There is no file size limit on the config files that can be copied using the Copy Configs command.
