Create your first CD pipeline
This is a step-by-step tour of using Harness CD pipelines to deploy an application. We show you how to use our YAML, API, Terraform Provider, and console (Pipeline Studio) methods for building pipelines.
Want to try out Harness CD locally?
You can also run all of Harness CD locally using the Harness CD Community Edition.
Harness CD Community Edition is a lightweight version of Harness that you can download and run on your laptop or any VM with 3GB RAM and 2 CPUs. Harness CD Community Edition is intended to get devs started with Harness quickly without having to sign up for a Harness SaaS account.
For more information, go to:
Prerequisites
All you need is a deployment environment and a Harness delegate installed where it can reach the environment and Harness.
Deployment environment
If you already have access to a cluster, you can skip this section. Simply install a Harness delegate in the cluster as described in the next section.
Here are several options for creating a cluster, including popular cloud platforms and local options.
- Minikube (local)
- Docker Desktop (local)
- Google GKE
- Azure AKS
- AWS EKS
If you want to use Minikube, use Minikube minimum version v1.22.0 or later installed locally.
minikube start --memory=4g --cpus=1 --nodes=2
After running this command, you can verify that the cluster is running by running the following command:
kubectl get nodes
To set up a Kubernetes cluster with 2 replicas, 4GB of memory, and 1 CPU in Docker Desktop, you can follow these steps:
- Open Docker Desktop and go to the Settings menu.
- Select the Kubernetes tab.
- Enable Kubernetes by checking the Enable Kubernetes checkbox.
- Set the number of replicas to 2 by adjusting the Replicas slider.
- Set the amount of memory to 4GB and the number of CPUs to 1 by adjusting the Memory and CPU sliders.
- Select the Apply & Restart button to apply the changes and restart Docker Desktop.
After Docker Desktop restarts, you can verify that the cluster is running by running the following command:
kubectl get nodes
Replace ZONE with your GCP region, for example us-central1-c:
gcloud container clusters create [CLUSTER-NAME] --num-nodes=2 --machine-type=[MACHINE-TYPE] --disk-size=10GB --zone=[ZONE]
For example:
gcloud container clusters create my-cluster --num-nodes=2 --machine-type=n1-standard-1 --disk-size=10GB --zone=us-central1-a
After running this command, you can verify that the cluster is running by running the following command:
kubectl get nodes
Replace myResourceGroup with your AKS resource group:
az aks create -g myResourceGroup -n myAKSCluster --enable-managed-identity --node-count 2 --enable-addons monitoring --enable-msi-auth-for-monitoring --generate-ssh-keys
After running this command, you can verify that the cluster is running by running the following command:
kubectl get nodes
You can replace my-cluster and my-nodegroup with whatever names you want and us-west-2 with the region you want to use:
eksctl create cluster --name=my-cluster --version=1.21 --nodegroup-name=my-nodegroup --node-type=t3.small --nodes-min=2 --nodes-max=2 --node-volume-size=20 --region=us-west-2
After running this command, you can verify that the cluster is running by running the following command:
kubectl get nodes
Harness delegate
We now need to install a Harness delegate in the target Kubernetes cluster.
Delegates are worker processes that run on your infrastructure to execute tasks on behalf of the Harness platform. Delegates make outbound, secure connections to Harness and your other providers only.
Use the delegate installation wizard
- In your Harness project, select Project Setup.
- Select Delegates.
- Select Install a Delegate.
- Follow the delegate installation wizard.
Use this delegate installation wizard video to guide you through the process.
Install a delegate using the terminal
Install Harness Delegate on Kubernetes or Docker
What is Harness Delegate?
Harness Delegate is a lightweight worker process that is installed on your infrastructure and communicates only via outbound HTTP/HTTPS to the Harness Platform. This enables the Harness Platform to leverage the delegate to execute the CI/CD and other tasks on your behalf, without any of your secrets leaving your network.
You can install the Harness Delegate on either Docker or Kubernetes.
Install Harness Delegate
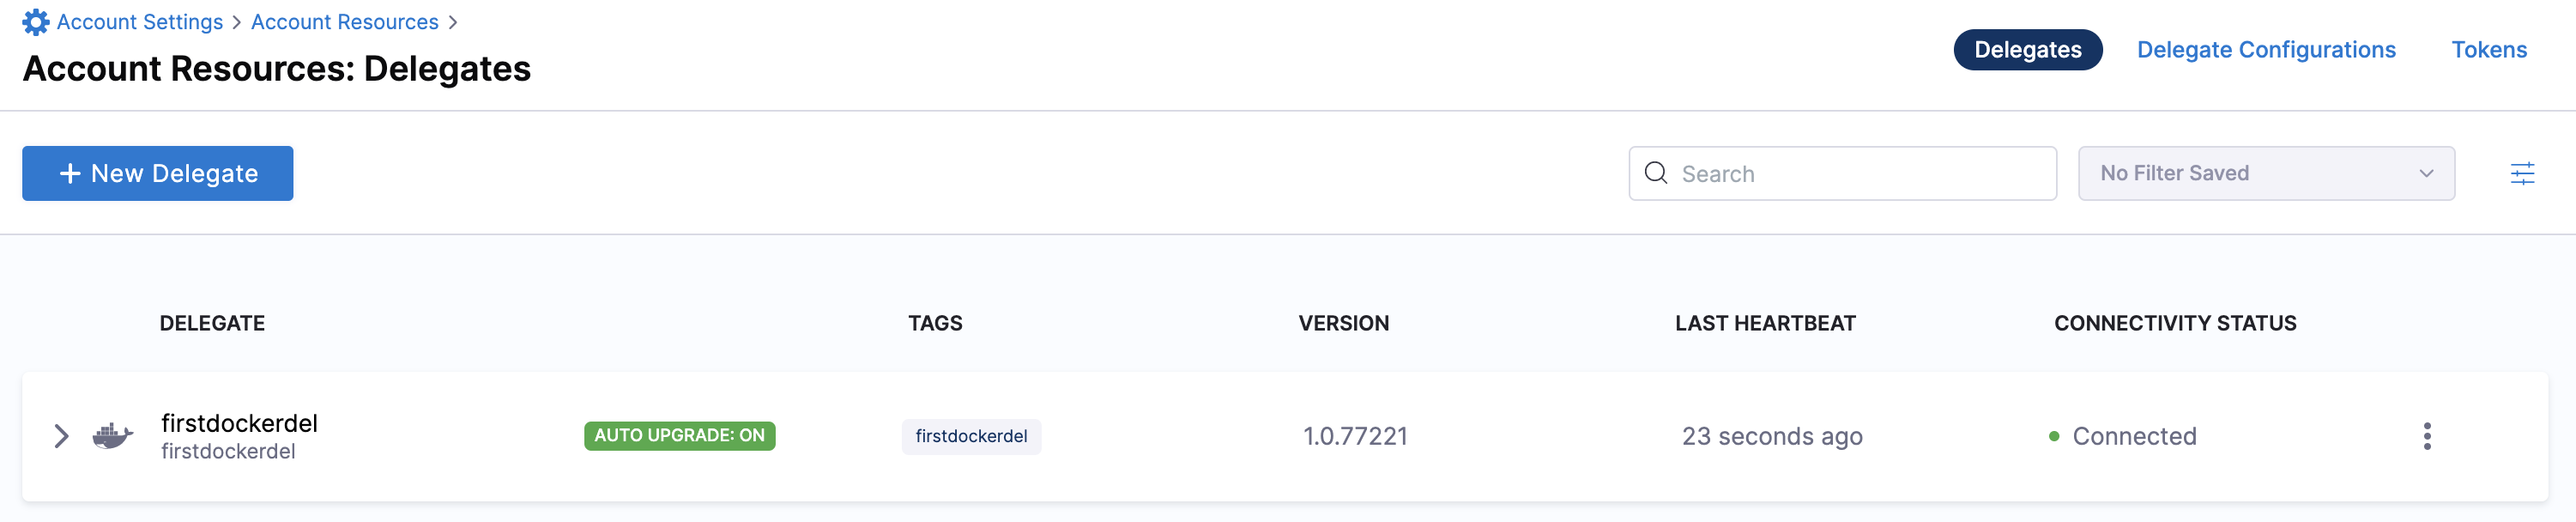
Create a new delegate token
Log in to the Harness Platform and go to Account Settings -> Account Resources -> Delegates. Select the Tokens tab. Select +New Token, and enter a token name, for example firstdeltoken. Select Apply. Harness Platform generates a new token for you. Select Copy to copy and store the token in a temporary file. You will provide this token as an input parameter in the next installation step. The delegate will use this token to authenticate with the Harness Platform.
Get your Harness account ID
Along with the delegate token, you will also need to provide your Harness accountId as an input parameter during delegate installation. This accountId is present in every Harness URL. For example, in the following URL:
https://app.harness.io/ng/#/account/6_vVHzo9Qeu9fXvj-AcQCb/settings/overview
6_vVHzo9Qeu9fXvj-AcQCb is the accountId.
Now you are ready to install the delegate on either Docker or Kubernetes.
- Kubernetes
- Docker
Prerequisite
Ensure that you have access to a Kubernetes cluster. For the purposes of this tutorial, we will use minikube.
Install minikube
- On Windows:
choco install minikube
- On macOS:
brew install minikube
Now start minikube with the following config.
minikube start --memory 4g --cpus 4
Validate that you have kubectl access to your cluster.
kubectl get pods -A
Now that you have access to a Kubernetes cluster, you can install the delegate using any of the options below.
- Helm Chart
- Terraform Helm Provider
- Kubernetes Manifest
Install the Helm chart
As a prerequisite, you must have Helm v3 installed on the machine from which you connect to your Kubernetes cluster.
You can now install the delegate using the delegate Helm chart. First, add the harness-delegate Helm chart repo to your local Helm registry.
helm repo add harness-delegate https://app.harness.io/storage/harness-download/delegate-helm-chart/
helm repo update
helm search repo harness-delegate
We will use the harness-delegate/harness-delegate-ng chart in this tutorial.
NAME                                    CHART VERSION   APP VERSION DESCRIPTION
harness-delegate/harness-delegate-ng    1.0.8           1.16.0      A Helm chart for deploying harness-delegate
Now we are ready to install the delegate. The following example installs/upgrades firstk8sdel delegate (which is a Kubernetes workload) in the harness-delegate-ng namespace using the harness-delegate/harness-delegate-ng Helm chart.
To install the delegate, do the following:
In Harness, select Deployments, then select your project.
Select Delegates under Project Setup.
Select Install a Delegate to open the New Delegate dialog.
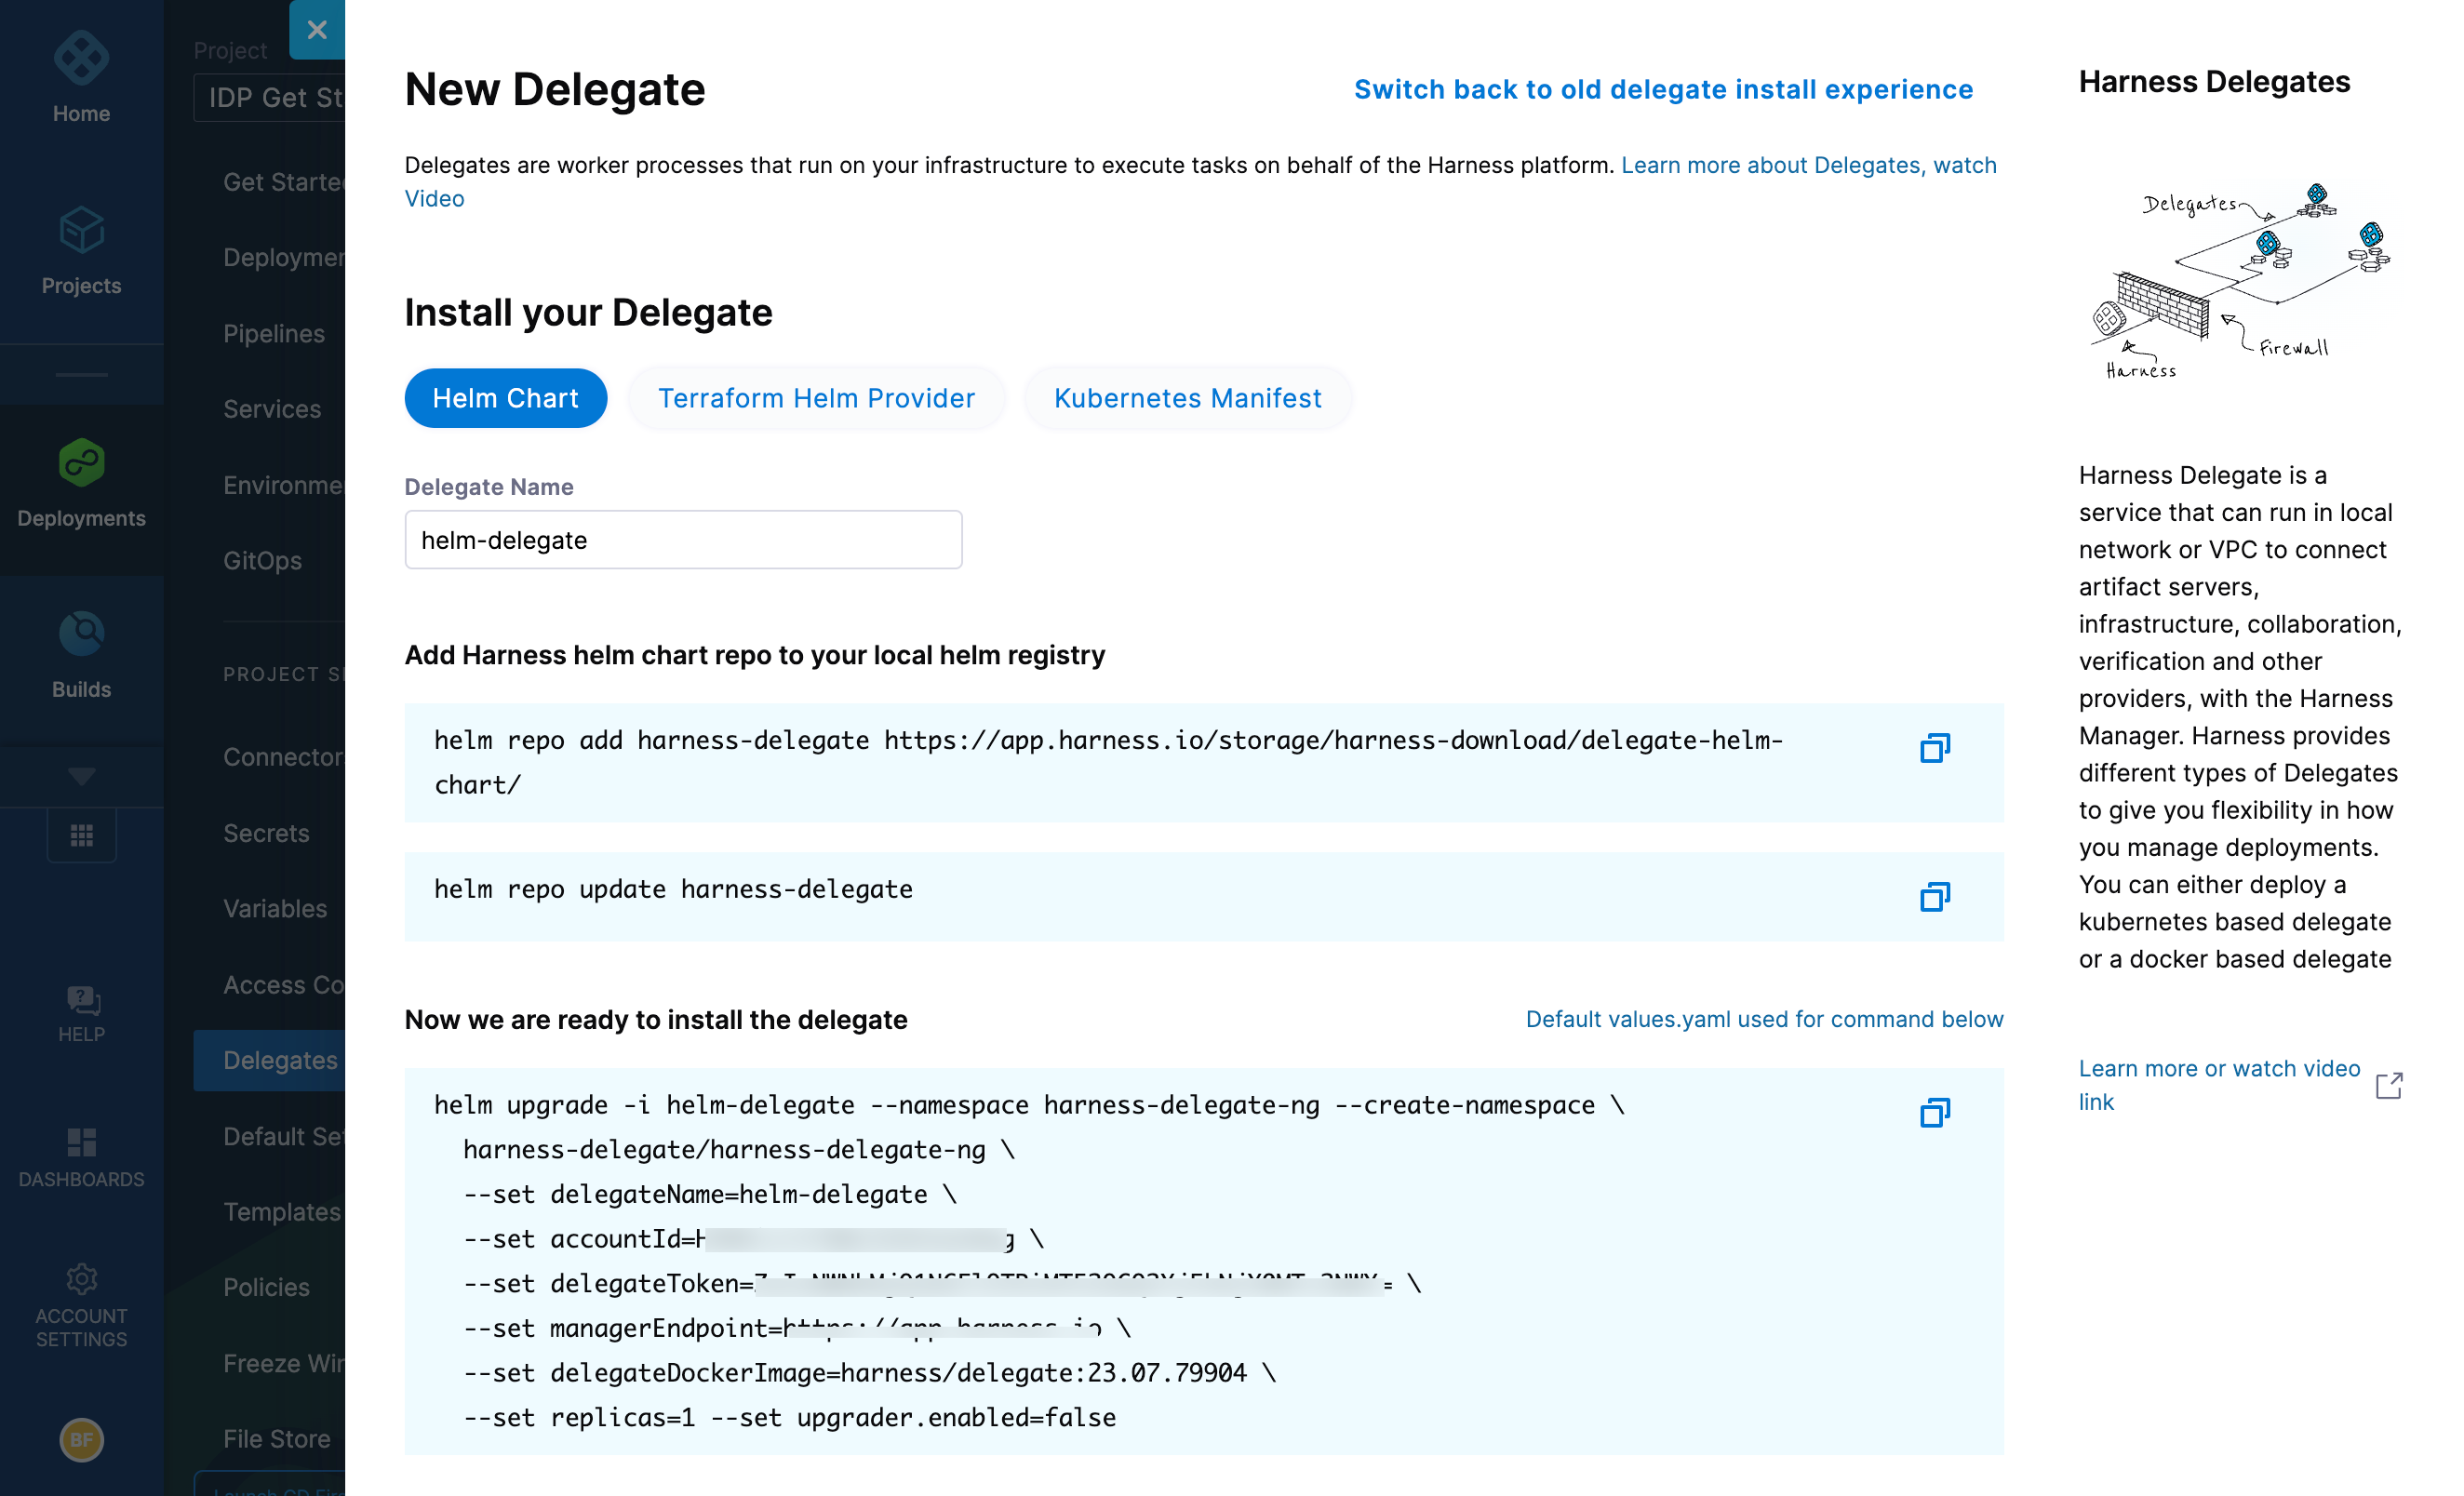
Select Helm Chart under Install your Delegate.
Copy the
helm upgradecommand.Run the command.
The command uses the default values.yaml located in the delegate-helm-chart GitHub repo. If you want change one or more values in a persistent manner instead of the command line, you can download and update the values.yaml file as per your need. You can use the updated values.yaml file as shown below.
helm upgrade -i firstk8sdel --namespace harness-delegate-ng --create-namespace \
  harness-delegate/harness-delegate-ng \
  -f values.yaml \
  --set delegateName=firstk8sdel \
  --set accountId=PUT_YOUR_HARNESS_ACCOUNTID_HERE \
  --set delegateToken=PUT_YOUR_DELEGATE_TOKEN_HERE \
  --set managerEndpoint=PUT_YOUR_MANAGER_HOST_AND_PORT_HERE \
  --set delegateDockerImage=harness/delegate:23.02.78306 \
  --set replicas=1 --set upgrader.enabled=false
Create main.tf file
Harness uses a Terraform module for the Kubernetes delegate. This module uses the standard Terraform Helm provider to install the Helm chart onto a Kubernetes cluster whose config by default is stored in the same machine at the ~/.kube/config path. Copy the following into a main.tf file stored on a machine from which you want to install your delegate.
module "delegate" {
  source = "harness/harness-delegate/kubernetes"
  version = "0.1.5"

  account_id = "PUT_YOUR_HARNESS_ACCOUNTID_HERE"
  delegate_token = "PUT_YOUR_DELEGATE_TOKEN_HERE"
  delegate_name = "firstk8sdel"
  namespace = "harness-delegate-ng"
  manager_endpoint = "PUT_YOUR_MANAGER_HOST_AND_PORT_HERE"
  delegate_image = "harness/delegate:23.02.78306"
  replicas = 1
  upgrader_enabled = false

  # Additional optional values to pass to the helm chart
  values = yamlencode({
    javaOpts: "-Xms64M"
  })
}

provider "helm" {
  kubernetes {
    config_path = "~/.kube/config"
  }
}
Now replace the variables in the file with your Harness accound ID and delegate token values. Replace PUT_YOUR_MANAGER_HOST_AND_PORT_HERE with the Harness Manager Endpoint noted below. For Harness SaaS accounts, you can find your Harness Cluster Location on the Account Overview page under the Account Settings section of the left navigation. For Harness CDCE, the endpoint varies based on the Docker vs. Helm installation options.
| Harness Cluster Location | Harness Manager Endpoint on Harness Cluster |
|---|---|
| SaaS prod-1 | https://app.harness.io |
| SaaS prod-2 | https://app.harness.io/gratis |
| SaaS prod-3 | https://app3.harness.io |
| CDCE Docker | http://<HARNESS_HOST> if Docker Delegate is remote to CDCE or http://host.docker.internal if Docker Delegate is on same host as CDCE |
| CDCE Helm | http://<HARNESS_HOST>:7143 where HARNESS_HOST is the public IP of the Kubernetes node where CDCE Helm is running |
Run Terraform init, plan, and apply
Initialize Terraform. This downloads the Terraform Helm provider to your machine.
terraform init
Run the following step to view the changes Terraform is going to make on your behalf.
terraform plan
Finally, run this step to make Terraform install the Kubernetes delegate using the Helm provider.
terraform apply
When prompted by Terraform if you want to continue with the apply step, type yes, and then you will see output similar to the following.
helm_release.delegate: Creating...
helm_release.delegate: Still creating... [10s elapsed]
helm_release.delegate: Still creating... [20s elapsed]
helm_release.delegate: Still creating... [30s elapsed]
helm_release.delegate: Still creating... [40s elapsed]
helm_release.delegate: Still creating... [50s elapsed]
helm_release.delegate: Still creating... [1m0s elapsed]
helm_release.delegate: Creation complete after 1m0s [id=firstk8sdel]

Apply complete! Resources: 1 added, 0 changed, 0 destroyed.
Download a Kubernetes manifest template
curl -LO https://raw.githubusercontent.com/harness/delegate-kubernetes-manifest/main/harness-delegate.yaml
Replace variables in the template
Open the harness-delegate.yaml file in a text editor and replace PUT_YOUR_DELEGATE_NAME_HERE, PUT_YOUR_HARNESS_ACCOUNTID_HERE, and PUT_YOUR_DELEGATE_TOKEN_HERE with your delegate name (for example, firstk8sdel), Harness accountId, and delegate token values, respectively.
Replace the PUT_YOUR_MANAGER_HOST_AND_PORT_HERE variable with the Harness Manager Endpoint noted below. For Harness SaaS accounts, you can find your Harness Cluster Location on the Account Overview page under the Account Settings section of the left navigation. For Harness CDCE, the endpoint varies based on the Docker vs. Helm installation options.
| Harness Cluster Location | Harness Manager Endpoint on Harness Cluster |
|---|---|
| SaaS prod-1 | https://app.harness.io |
| SaaS prod-2 | https://app.harness.io/gratis |
| SaaS prod-3 | https://app3.harness.io |
| CDCE Docker | http://<HARNESS_HOST> if Docker Delegate is remote to CDCE or http://host.docker.internal if Docker Delegate is on same host as CDCE |
| CDCE Helm | http://<HARNESS_HOST>:7143 where HARNESS_HOST is the public IP of the Kubernetes node where CDCE Helm is running |
Apply the Kubernetes manifest
kubectl apply -f harness-delegate.yaml
Prerequisite
Ensure that you have the Docker runtime installed on your host. If not, use one of the following options to install Docker:
Install on Docker
Now you can install the delegate using the following command.
docker run --cpus=1 --memory=2g \
  -e DELEGATE_NAME=docker-delegate \
  -e NEXT_GEN="true" \
  -e DELEGATE_TYPE="DOCKER" \
  -e ACCOUNT_ID=PUT_YOUR_HARNESS_ACCOUNTID_HERE \
  -e DELEGATE_TOKEN=PUT_YOUR_DELEGATE_TOKEN_HERE \
  -e LOG_STREAMING_SERVICE_URL=PUT_YOUR_MANAGER_HOST_AND_PORT_HERE/log-service/ \
  -e MANAGER_HOST_AND_PORT=PUT_YOUR_MANAGER_HOST_AND_PORT_HERE \
  harness/delegate:23.03.78904
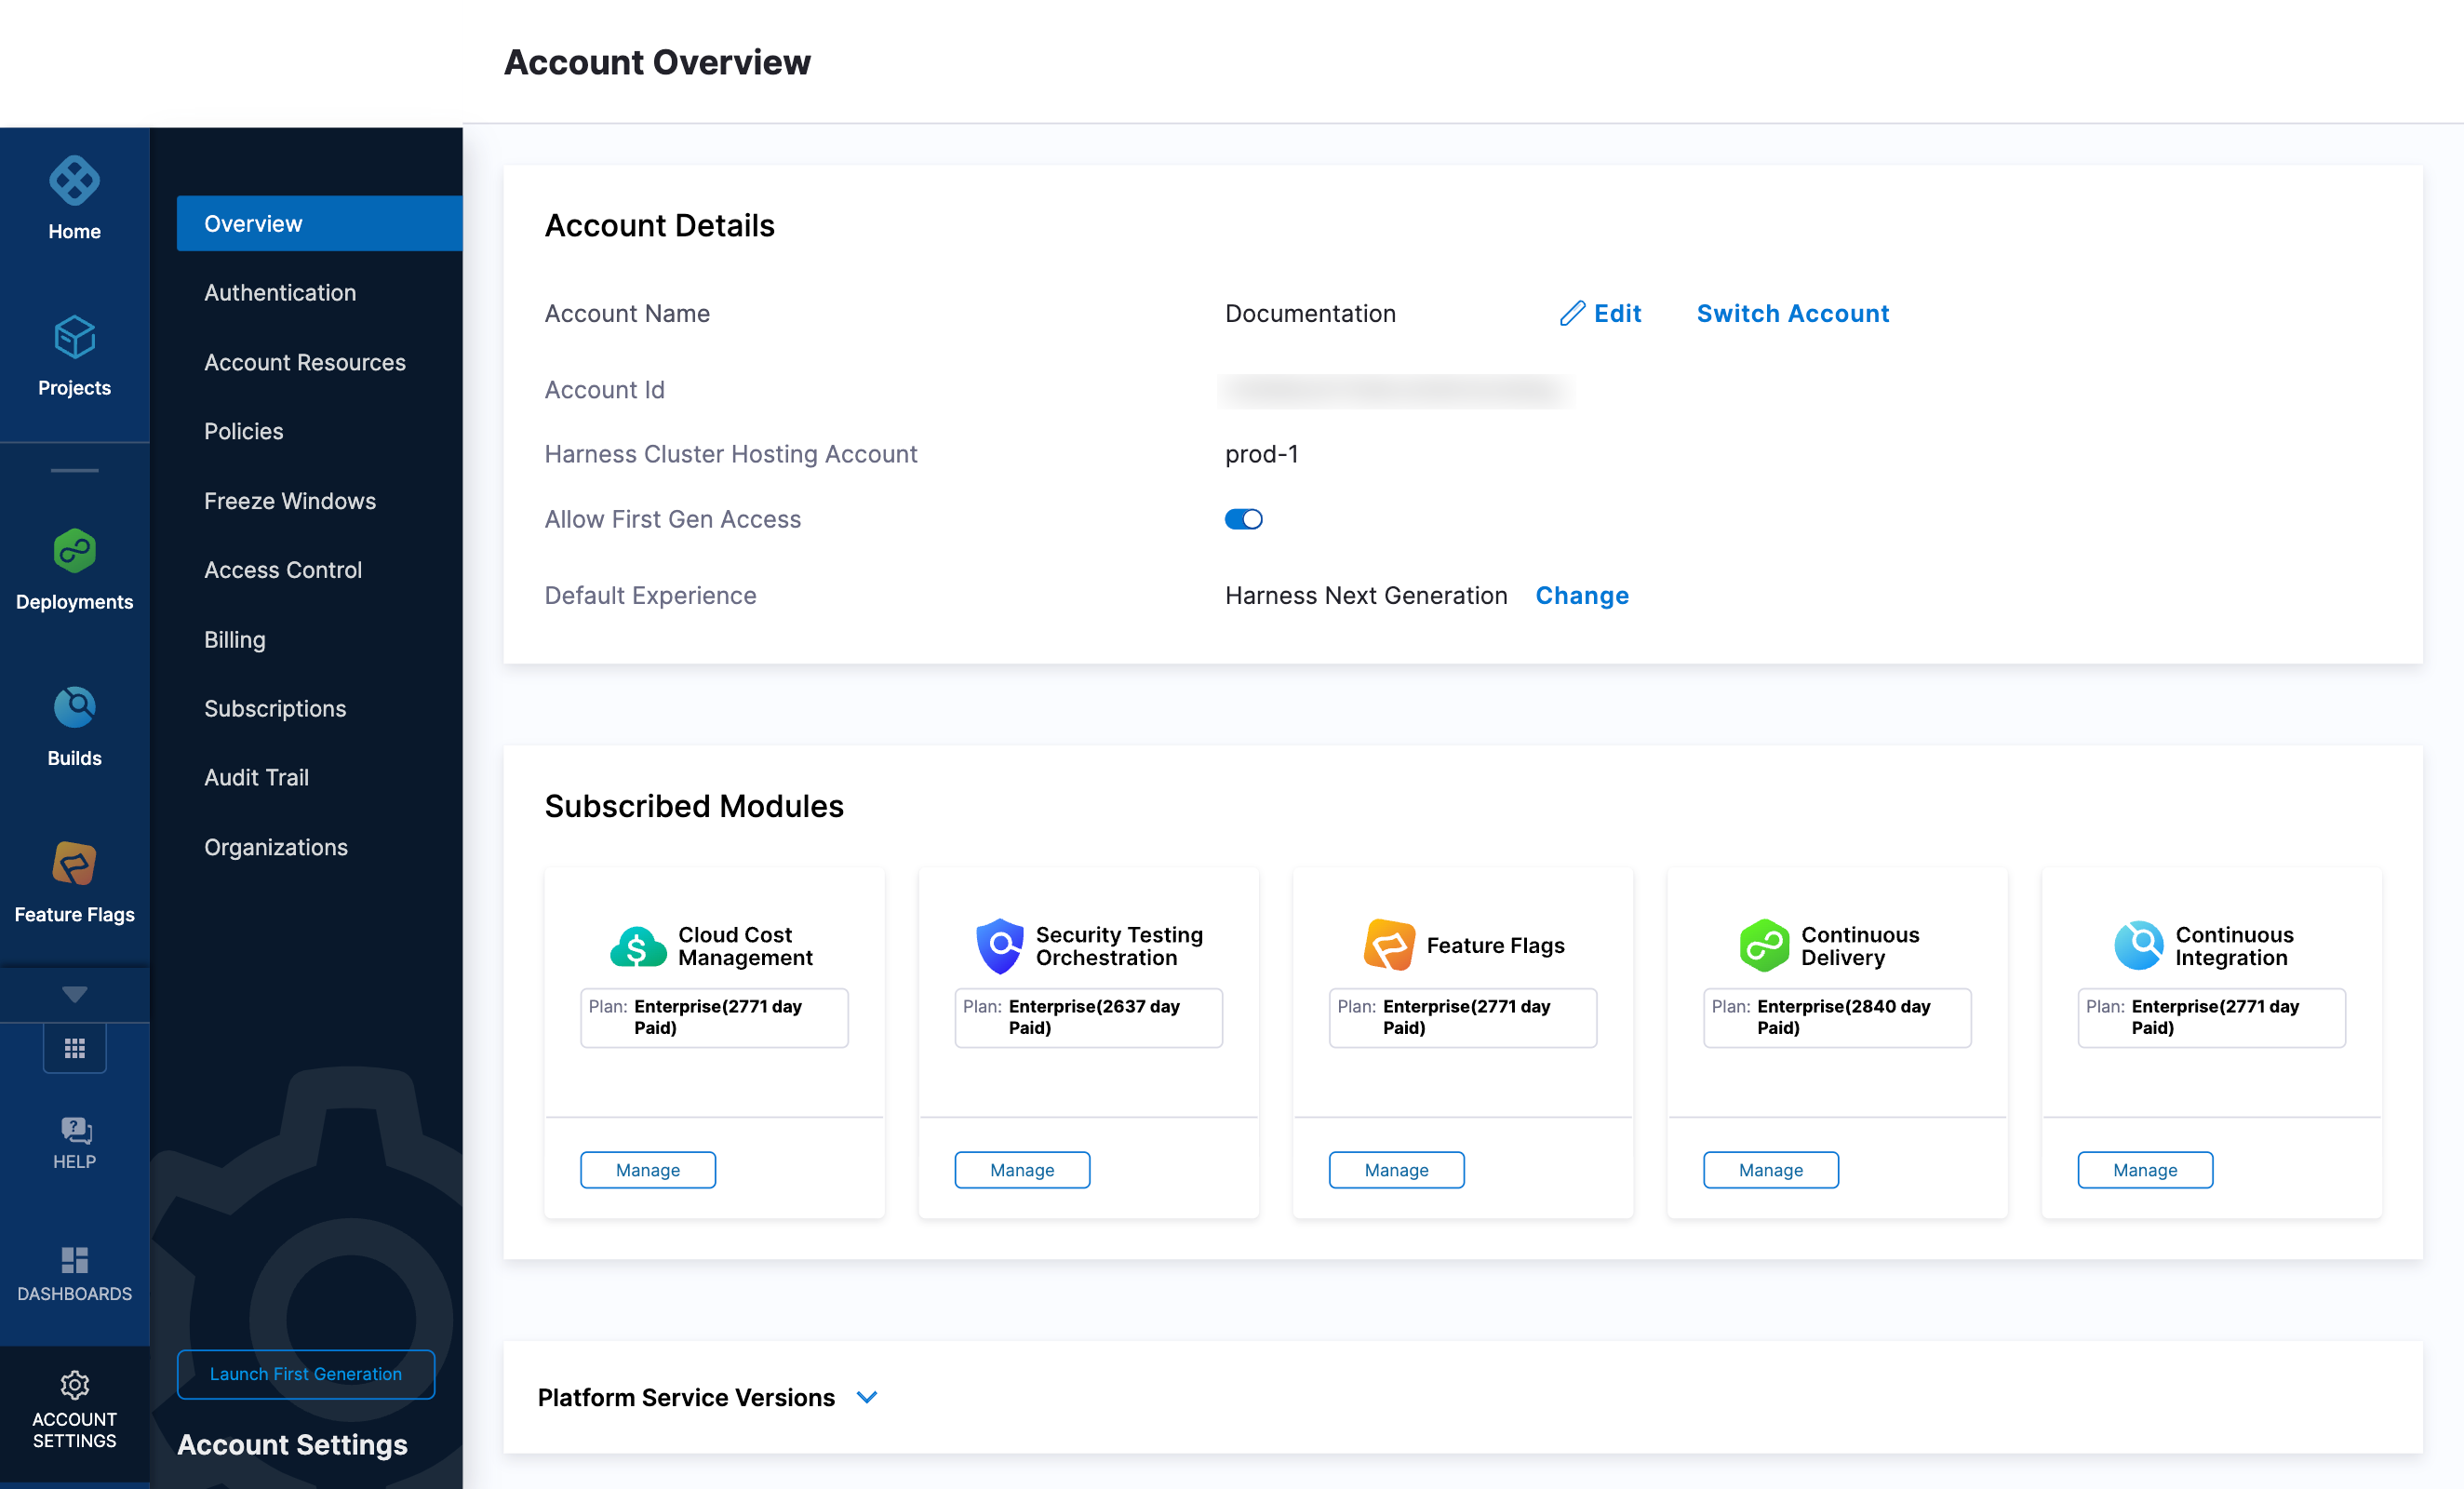
Replace the PUT_YOUR_MANAGER_HOST_AND_PORT_HERE variable with the Harness Manager Endpoint noted below. For Harness SaaS accounts, to find your Harness cluster location, select Account Settings, and then select Overview. In Account Overview, look in Account Settings. It is listed next to Harness Cluster Hosting Account.
For more information, go to View account info and subscribe to downtime alerts.
For Harness CDCE, the endpoint varies based on the Docker vs. Helm installation options.
| Harness Cluster Location | Harness Manager Endpoint on Harness Cluster |
|---|---|
| SaaS prod-1 | https://app.harness.io |
| SaaS prod-2 | https://app.harness.io/gratis |
| SaaS prod-3 | https://app3.harness.io |
| CDCE Docker | http://<HARNESS_HOST> if Docker Delegate is remote to CDCE or http://host.docker.internal if Docker Delegate is on same host as CDCE |
| CDCE Helm | http://<HARNESS_HOST>:7143 where HARNESS_HOST is the public IP of the Kubernetes node where CDCE Helm is running |
If you are using a local runner CI build infrastructure, modify the delegate install command as explained in Use local runner build infrastructure
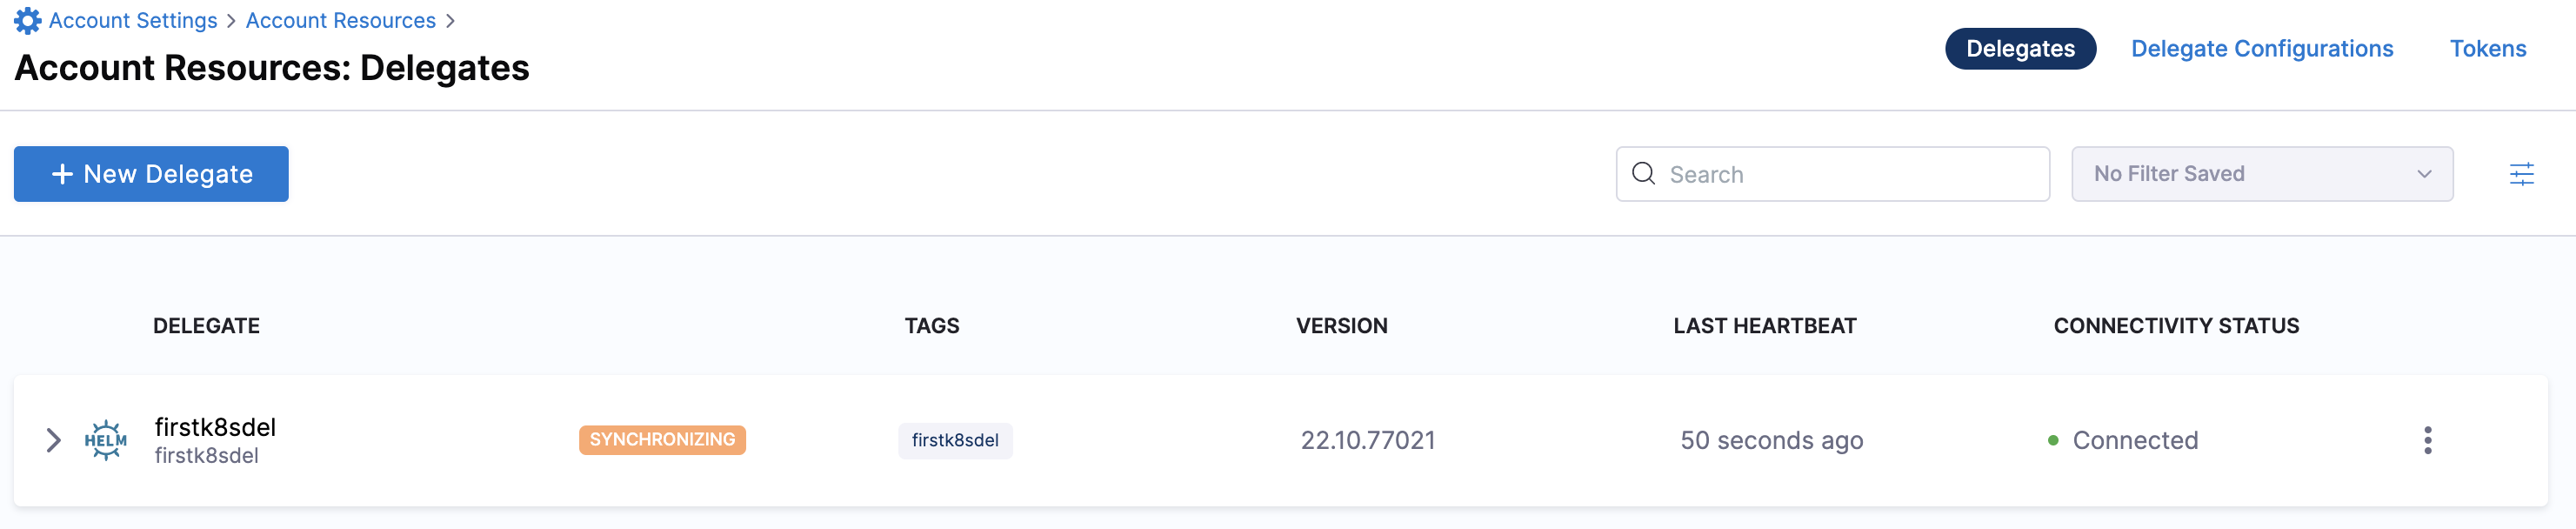
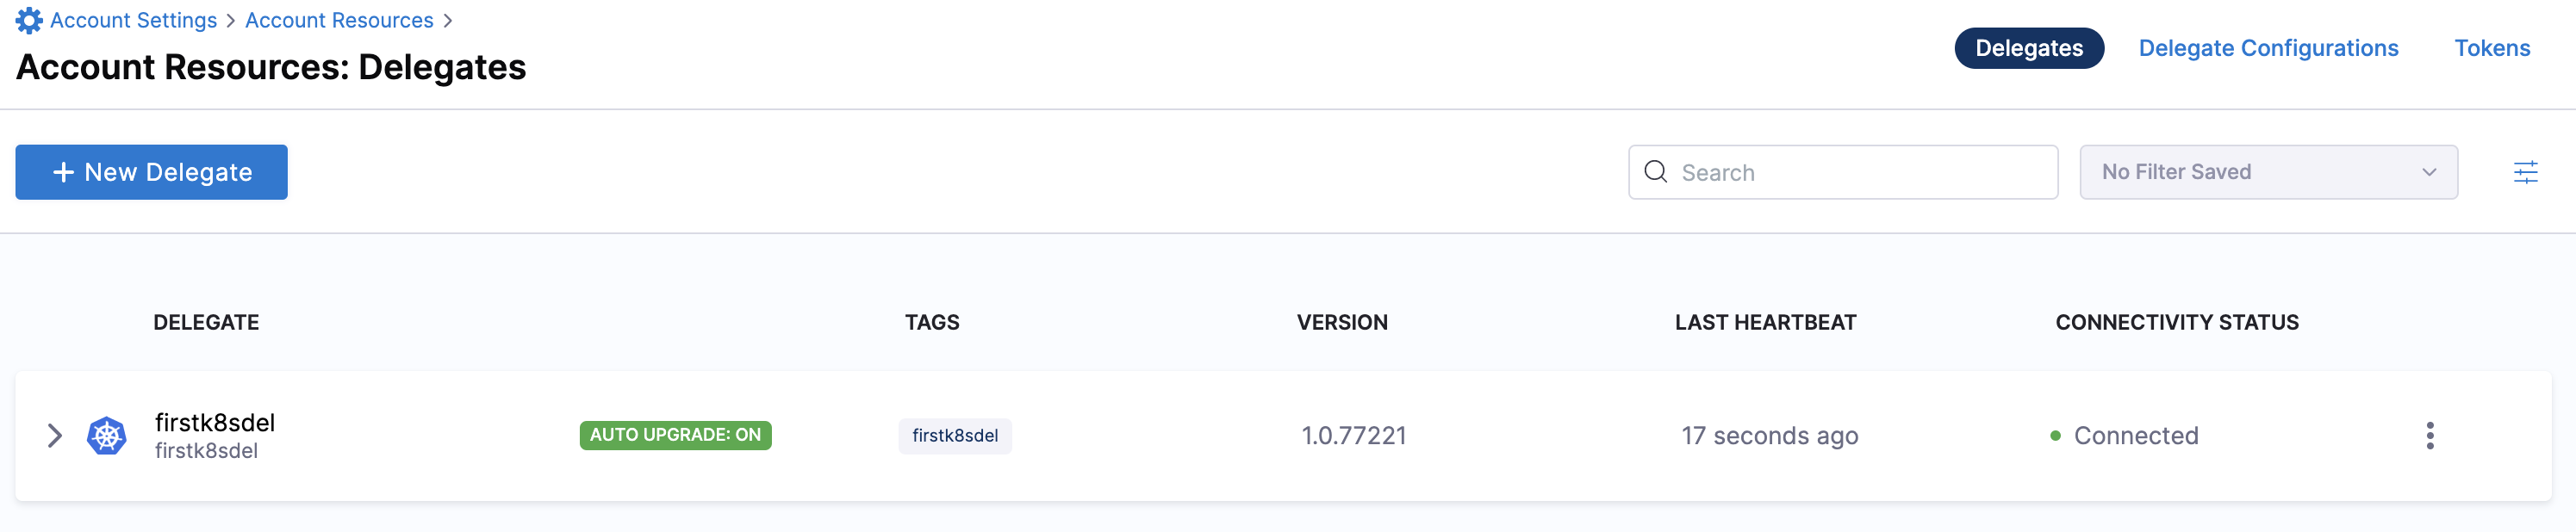
Verify delegate connectivity
Select Continue. After the health checks pass, your delegate is available for you to use. Select Done and verify your new delegate is listed.
Helm chart & Terraform Helm provider
Kubernetes manifest
Docker
You can now route communication to external systems in Harness connectors and pipelines by selecting this delegate via a delegate selector.
Delegate selectors do not override service infrastructure connectors. Delegate selectors only determine the delegate that executes the operations of your pipeline.
Troubleshooting
The delegate installer provides troubleshooting information for each installation process. If the delegate cannot be verified, select Troubleshoot for steps you can use to resolve the problem. This section includes the same information.
Harness asks for feedback after the troubleshooting steps. You are asked, Did the delegate come up?
If the steps did not resolve the problem, select No, and use the form to describe the issue. You'll also find links to Harness Support and to Delegate docs.
- Helm Chart
- Terraform Helm Provider
- Kubernetes Manifest
- Docker
Use the following steps to troubleshoot your installation of the delegate using Helm.
Verify that Helm is correctly installed:
Check for Helm:
helmAnd then check for the installed version of Helm:
helm versionIf you receive the message
Error: rendered manifests contain a resource that already exists..., delete the existing namespace, and retry the Helm upgrade command to deploy the delegate.For further instructions on troubleshooting your Helm installation, go to Helm troubleshooting guide.
Check the status of the delegate on your cluster:
kubectl describe pods -n <namespace>If the pod did not start, check the delegate logs:
kubectl logs -f <harnessDelegateName> -n <namespace>If the state of the delegate pod is
CrashLoopBackOff, check your allocation of compute resources (CPU and memory) to the cluster. A state ofCrashLoopBackOffindicates insufficent Kubernetes cluster resources.If the delegate pod is not healthy, use the
kubectl describecommand to get more information:kubectl describe <pod_name> -n <namespace>
Use the following steps to troubleshoot your installation of the delegate using Terraform.
Verify that Terraform is correctly installed:
terraform -versionFor further instructions on troubleshooting your installation of Terraform, go to the Terraform troubleshooting guide.
Check the status of the delegate on your cluster:
kubectl describe pods -n <namespace>If the pod did not start, check the delegate logs:
kubectl logs -f <harnessDelegateName> -n <namespace>If the state of the delegate pod is
CrashLoopBackOff, check your allocation of compute resources (CPU and memory) to the cluster. A state ofCrashLoopBackOffindicates insufficent Kubernetes cluster resources.If the delegate pod is not healthy, use the
kubectl describecommand to get more information:kubectl describe <pod_name> -n <namespace>
Use the following steps to troubleshoot your installation of the delegate using Kubernetes.
Check the status of the delegate on your cluster:
kubectl describe pods -n <namespace>If the pod did not start, check the delegate logs:
kubectl logs -f <harnessDelegateName> -n <namespace>If the state of the delegate pod is
CrashLoopBackOff, check your allocation of compute resources (CPU and memory) to the cluster. A state ofCrashLoopBackOffindicates insufficent Kubernetes cluster resources.If the delegate pod is not healthy, use the
kubectl describecommand to get more information:kubectl describe <pod_name> -n <namespace>
Use the following steps to troubleshoot your installation of the delegate using Docker:
Check the status of the delegate on your cluster:
docker container ls -aIf the pod is not running, check the delegate logs:
docker container logs <delegatename> -fRestart the delegate container. To stop the container:
docker container stop <delegatename>To start the container:
docker container start <delegatename>Make sure the container has sufficient CPU and memory resources. If not, remove the older containers:
docker container rm [container id]
For details and a video, go to Delegate overview.
Create your first pipeline
Harness provides multiple methods for creating your pipelines.
The process is the same for all methods:
- Add a Kubernetes Cluster connector to connect Harness with your cluster.
- Define a Harness service that represents your app or microservice. This includes your manifest and artifact but we'll only using a manifest with a hardcoded artifact in this topic.
- Define a target environment.
- Define the pipeline execution steps. If you use the Harness Manager, Harness automatically adds the steps you need for different deployment strategies.
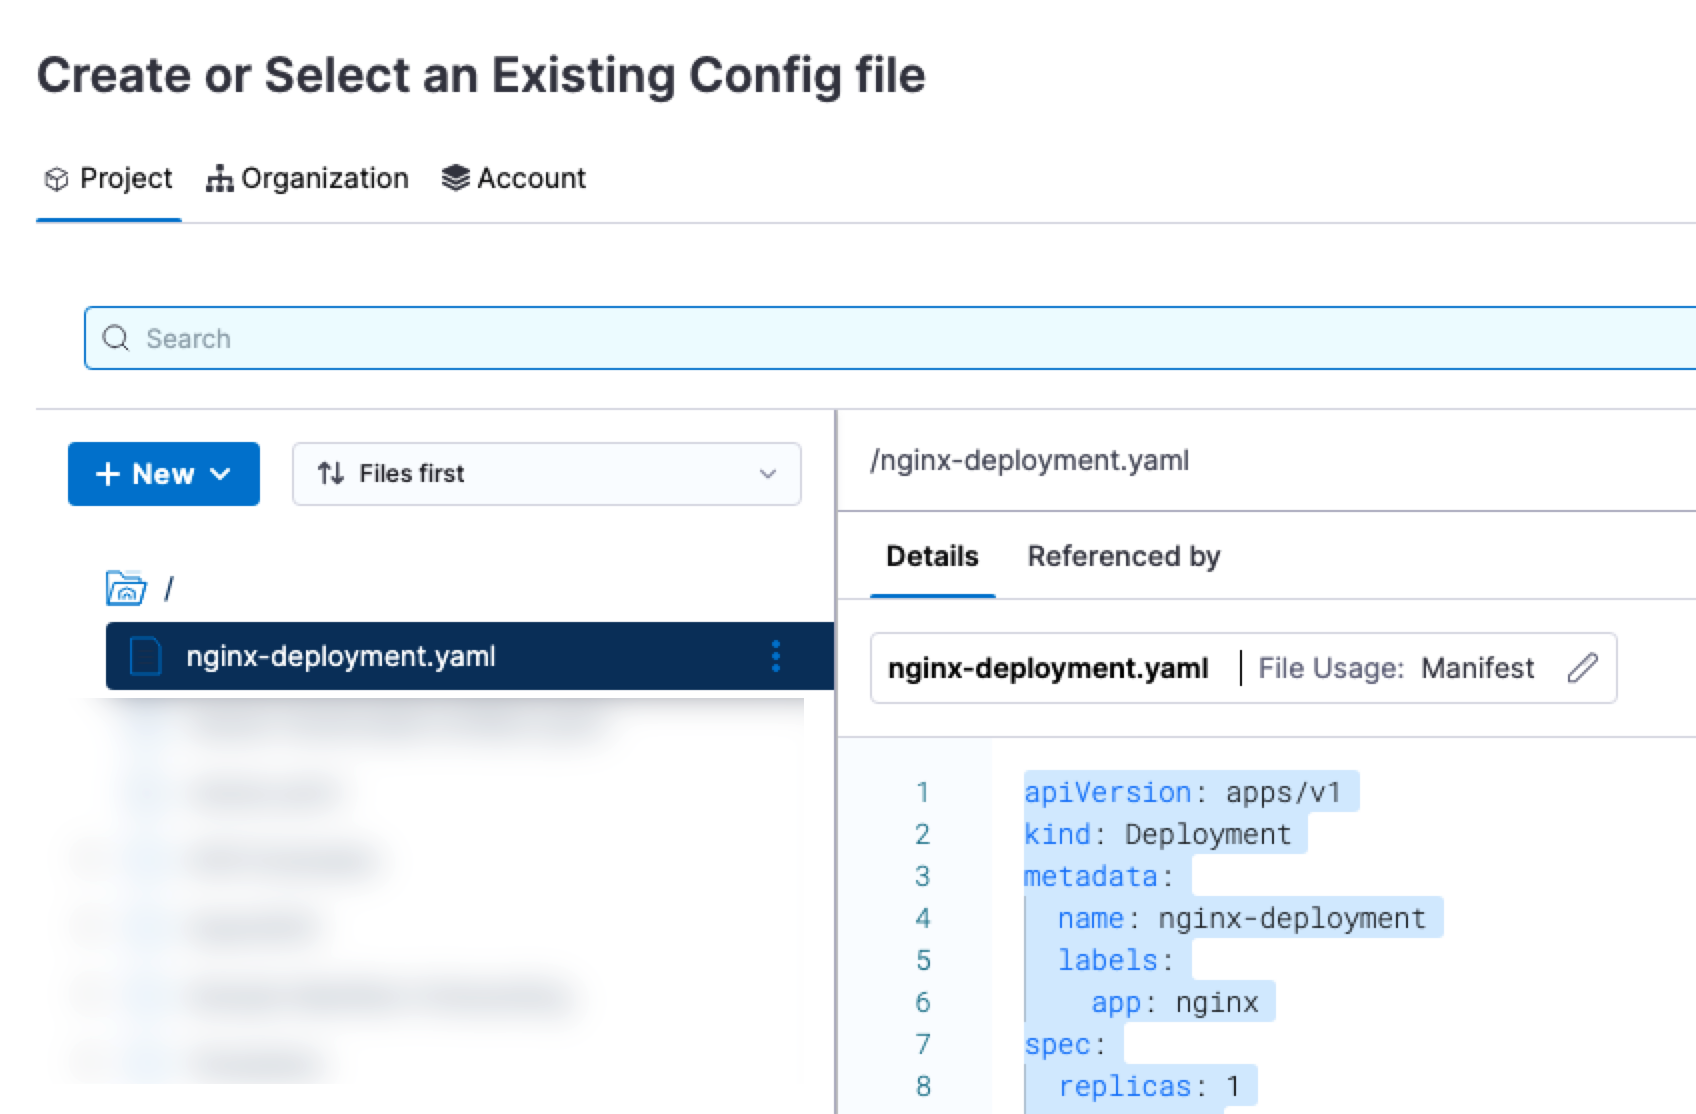
First, let's add the manifest we'll be using to the Harness File Store in your project. You can add a manifest from any remote repo, but we'll use the File Store in this topic.
- In your Harness project, select Project Setup, and then select File Store.
- Select New, and then select New File.
- Name the file nginx-deployment.yaml, in File Usage select Manifest, and the select Create.
- Paste the following manifest into the new file and select Save.
nginx-deployment.yaml
apiVersion: apps/v1
kind: Deployment
metadata:
  name: nginx-deployment
  labels:
    app: nginx
spec:
  replicas: 1
  selector:
    matchLabels:
      app: nginx
  template:
    metadata:
      labels:
        app: nginx
    spec:
      containers:
      - name: nginx
        image: nginx:1.14.2
        ports:
        - containerPort: 80
Next, choose one of the following methods for building your pipeline.
- YAML
- API
- Terraform Provider
- Pipeline Studio
The following example creates the Harness entities needed for a simple pipeline that deploys a publicly available Docker Nginx image to your target cluster using the manifest we just added.
For information on using YAML in Harness, go to Harness YAML Quickstart.
Create the Harness connector
We'll create a Harness Kubernetes Cluster connector to connect to your target cluster.
Kubernetes Cluster connector:
connector:
  name: K8sCluster
  identifier: K8sCluster
  description: ""
  orgIdentifier: default
  projectIdentifier: CD_Docs
  type: K8sCluster
  spec:
    credential:
      type: InheritFromDelegate
    delegateSelectors:
      - [delegate tag]
Replace [delegate tag] with tag of the delegate you installed in your cluster. For example:
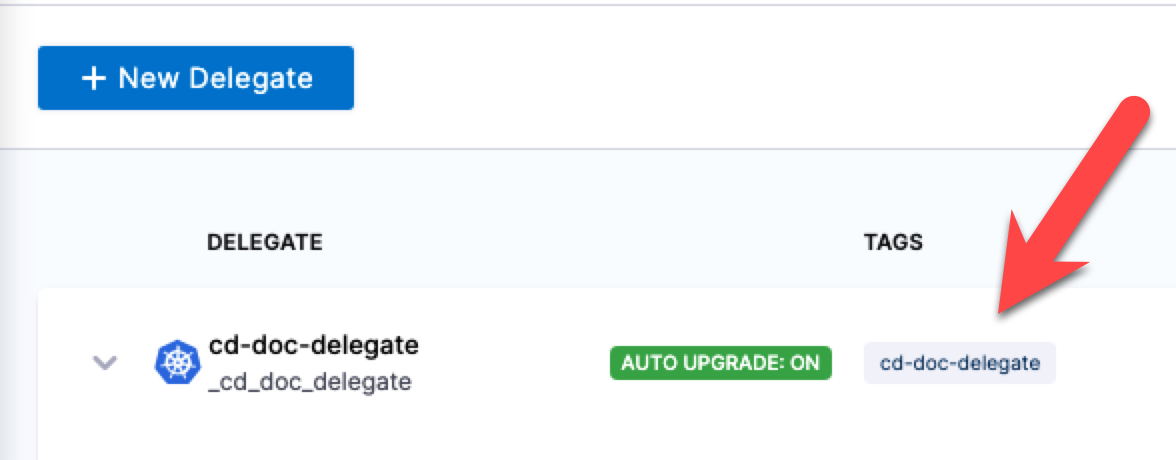
Create the Harness service
The following service uses the manifest you added to the Harness File Store earlier.
service:
  name: Nginx
  identifier: Nginx
  tags: {}
  serviceDefinition:
    spec:
      manifests:
        - manifest:
            identifier: nginx
            type: K8sManifest
            spec:
              store:
                type: Harness
                spec:
                  files:
                    - /nginx-deployment.yaml
              skipResourceVersioning: false
              enableDeclarativeRollback: false
      artifacts:
        primary: {}
    type: Kubernetes
Create the Harness environment and infrastructure definition
First, create the Harness environment.
environment:
  name: myenv
  identifier: myenv
  tags: {}
  type: PreProduction
  orgIdentifier: default
  projectIdentifier: CD_Docs
  variables: []
Next, create the infrastructure definition for that environment. This infrastructure definition uses the Kubernetes Cluster connector you created earlier and targets the default namespace. You can enter a different namespace.
infrastructureDefinition:
  name: myinfra
  identifier: myinfra
  description: ""
  tags: {}
  orgIdentifier: default
  projectIdentifier: CD_Docs
  environmentRef: myenv
  deploymentType: Kubernetes
  type: KubernetesDirect
  spec:
    connectorRef: K8sCluster
    namespace: default
    releaseName: release-<+INFRA_KEY>
  allowSimultaneousDeployments: false
Create the pipeline
Now we can put everything together in a pipeline with a CD stage that deploys the Harness service to the infrastructure definition we added.
The pipeline uses a Kubernetes rolling deployment.
pipeline:
  name: cd
  identifier: cd
  projectIdentifier: CD_Docs
  orgIdentifier: default
  tags: {}
  stages:
    - stage:
        name: nginx
        identifier: nginx
        description: ""
        type: Deployment
        spec:
          deploymentType: Kubernetes
          service:
            serviceRef: Nginx
          environment:
            environmentRef: myenv
            deployToAll: false
            infrastructureDefinitions:
              - identifier: myinfra
          execution:
            steps:
              - step:
                  name: Rollout Deployment
                  identifier: rolloutDeployment
                  type: K8sRollingDeploy
                  timeout: 10m
                  spec:
                    skipDryRun: false
                    pruningEnabled: false
            rollbackSteps:
              - step:
                  name: Rollback Rollout Deployment
                  identifier: rollbackRolloutDeployment
                  type: K8sRollingRollback
                  timeout: 10m
                  spec:
                    pruningEnabled: false
        tags: {}
        failureStrategies:
          - onFailure:
              errors:
                - AllErrors
              action:
                type: StageRollback
You can now run your pipeline.
The following example creates the Harness entities needed for a simple pipeline that deploys a publicly available Docker Nginx image to your target cluster using the manifest we just added.
For information on using the Harness API, go to Harness API Quickstart. For information on the security token, go to Add and Manage API Keys.
Create the Harness connector
Create the Kubernetes Cluster connector using the Create a Connector API.
The Harness API uses API keys to authenticate requests. You create the API key in your Harness Manager User Profile, add a Personal Access Token (PAT) to the key, and then use the PAT in your API requests. For steps, go to Add and Manage API Keys.
Replace the following request settings in [] with your account information.
curl --location --request POST 'https://app.harness.io/gateway/ng/api/connectors?accountIdentifier=[account Id]' \
--header 'Content-Type: text/yaml' \
--header 'x-api-key: [security token]' \
--data-raw 'connector:
  name: K8s Cluster
  identifier: K8sCluster
  description: ""
  orgIdentifier: default
  projectIdentifier: [project Id]
  type: K8sCluster
  spec:
    credential:
      type: InheritFromDelegate
    delegateSelectors:
      - [delegate tag]'
Replace [delegate tag] with tag of the delegate you installed in your cluster. For example:
Create the Harness service
Create a service using the Create Services API.
curl -i -X POST \
  'https://app.harness.io/gateway/ng/api/servicesV2/batch?accountIdentifier=[account Id]' \
  -H 'Content-Type: application/json' \
  -H 'x-api-key: [security token]' \
  -d '[{
    "identifier": "KubernetesTest",
    "orgIdentifier": "default",
    "projectIdentifier": "[project Id]",
    "name": "KubernetesTest",
    "description": "string",
    "tags": {
      "property1": "string",
      "property2": "string"
    },
    "yaml": ""service:\n  name: Nginx\n  identifier: Nginx\n  tags: {}\n  serviceDefinition:\n    spec:\n      manifests:\n        - manifest:\n            identifier: nginx\n            type: K8sManifest\n            spec:\n              store:\n                type: Harness\n                spec:\n                  files:\n                    - /nginx-deployment.yaml\n              skipResourceVersioning: false\n              enableDeclarativeRollback: false\n      artifacts:\n        primary: {}\n    type: Kubernetes""
  }]'
Create the Harness environment and infrastructure definition
Create the environment using the Create an Environment API.
curl -i -X POST \
  'https://app.harness.io/gateway/ng/api/environmentsV2?accountIdentifier=[account Id]' \
  -H 'Content-Type: application/json' \
  -H 'x-api-key: [security token]' \
  -d '{
    "orgIdentifier": "default",
    "projectIdentifier": "[project Id]",
    "identifier": "string",
    "tags": {
      "property1": "string",
      "property2": "string"
    },
    "name": "myenv",
    "description": "string",
    "color": "string",
    "type": "PreProduction",
    "yaml": "environment:\n  name: myenv\n  identifier: myenv\n  tags: {}\n  type: PreProduction\n  orgIdentifier: default\n  projectIdentifier: [project Id]\n  variables: []"
  }'
Create the infrastructure definition in that environment using the Create an Infrastructure in an Environment API.
curl -i -X POST \
  'https://app.harness.io/gateway/ng/api/infrastructures?accountIdentifier=[account Id]' \
  -H 'Content-Type: application/json' \
  -H 'x-api-key: [security token]' \
  -d '{
    "name": "myinfra",
    "identifier": "myinfra",
    "description": "infrastructure description",
    "tags": {},
    "orgIdentifier": "default",
    "projectIdentifier": "[project Id]",
    "environmentRef": "myenv",
    "deploymentType": "Kubernetes",
    "type": "KubernetesDirect",
    "yaml": "infrastructureDefinition:\n  name: myinfra1\n  identifier: myinfra1\n  description: \"\"\n  tags: {}\n  orgIdentifier: default\n  projectIdentifier: [project Id]\n  environmentRef: myenv\n  deploymentType: Kubernetes\n  type: KubernetesDirect\n  spec:\n    connectorRef: K8sCluster_1679347042448\n    namespace: default\n    releaseName: release-<+INFRA_KEY>\n  allowSimultaneousDeployments: false"
  }'
Create the pipeline
Create the pipeline using the Create a Pipeline API.
curl -i -X POST \
  'https://app.harness.io/gateway/pipeline/api/pipelines/v2?accountIdentifier=[account Id]&orgIdentifier=default&projectIdentifier=[project Id]' \
  -H 'Content-Type: application/yaml' \
  -H 'x-api-key: [security token]' \
  -d '"pipeline:\n  name: cd\n  identifier: cd\n  projectIdentifier: [project Id]\n  orgIdentifier: default\n  tags: {}\n  stages:\n    - stage:\n        name: nginx\n        identifier: nginx\n        description: \"\"\n        type: Deployment\n        spec:\n          deploymentType: Kubernetes\n          service:\n            serviceRef: Nginx\n          environment:\n            environmentRef: myenv\n            deployToAll: false\n            infrastructureDefinitions:\n              - identifier: myinfra\n          execution:\n            steps:\n              - step:\n                  name: Rollout Deployment\n                  identifier: rolloutDeployment\n                  type: K8sRollingDeploy\n                  timeout: 10m\n                  spec:\n                    skipDryRun: false\n                    pruningEnabled: false\n            rollbackSteps:\n              - step:\n                  name: Rollback Rollout Deployment\n                  identifier: rollbackRolloutDeployment\n                  type: K8sRollingRollback\n                  timeout: 10m\n                  spec:\n                    pruningEnabled: false\n        tags: {}\n        failureStrategies:\n          - onFailure:\n              errors:\n                - AllErrors\n              action:\n                type: StageRollback"'
You can now run your pipeline.
The following example creates the Harness entities needed for a simple pipeline that deploys a publicly available Docker Nginx image to your target cluster using the manifest we just added.
For information on using the Harness Terraform Provider, go to Onboard with Terraform Provider.
Create the Harness connector
For the Terraform Provider resource, go to harness_platform_connector_kubernetes.
## Create the Kubernetes cluster connector

resource "harness_platform_connector_kubernetes" "inheritFromDelegate" {
  identifier  = "K8sCluster"
  name        = "K8s Cluster"
  description = "description"
  tags        = ["foo:bar"]

  inherit_from_delegate {
    delegate_selectors = ["[delegate tag]"]
  }
}
Replace [delegate tag] with tag of the delegate you installed in your cluster. For example:
Create the Harness service
For the Terraform Provider resource, go to harness_platform_service.
## Configure the service

resource "harness_platform_service" "example" {
  identifier  = "Nginx"
  name        = "Nginx"
  description = ""
  org_id      = "default"
  project_id  = "[project_id]"
  yaml = <<-EOT
                service:
                  name: Nginx
                  identifier: Nginx
                  tags: {}
                  serviceDefinition:
                    spec:
                      manifests:
                        - manifest:
                            identifier: nginx
                            type: K8sManifest
                            spec:
                              store:
                                type: Harness
                                spec:
                                  files:
                                    - /nginx-deployment.yaml
                              skipResourceVersioning: false
                              enableDeclarativeRollback: false
                      artifacts:
                        primary: {}
                    type: Kubernetes
              EOT
}
Create the Harness environment and infrastructure definition
For the Terraform Provider resources, go to harness_platform_environment and harness_platform_infrastructure.
## Configure the environment

resource "harness_platform_environment" "example" {
  identifier = "myenv"
  name       = "myenv"
  org_id     = "default"
  project_id = "[product Id]"
  tags       = ["foo:bar", "baz"]
  type       = "PreProduction"

  yaml = <<-EOT
                environment:
                  name: myenv
                  identifier: myenv
                  tags: {}
                  type: PreProduction
                  orgIdentifier: default
                  projectIdentifier: [product Id]
                  variables: []
      EOT
}

## Configure the infrastructure definition

resource "harness_platform_infrastructure" "example" {
  identifier      = "myinfra"
  name            = "myinfra"
  org_id          = "default"
  project_id      = "[project Id]"
  env_id          = "myenv"
  type            = "KubernetesDirect"
  deployment_type = "Kubernetes"
  yaml            = <<-EOT
                infrastructureDefinition:
                  name: myinfra
                  identifier: myinfra
                  description: ""
                  tags: {}
                  orgIdentifier: default
                  projectIdentifier: [project Id]
                  environmentRef: myenv
                  deploymentType: Kubernetes
                  type: KubernetesDirect
                  spec:
                    connectorRef: K8sCluster
                    namespace: default
                    releaseName: release-<+INFRA_KEY>
                  allowSimultaneousDeployments: false
      EOT
}
Create the pipeline
For the Terraform Provider resource, go to harness_platform_pipeline.
## Configure the pipeline

resource "harness_platform_pipeline" "example" {
  identifier = "cd"
  org_id     = "default"
  project_id = "[project Id]"
  name       = "cd"
  yaml = <<-EOT
      pipeline:
        name: cd
        identifier: cd
        projectIdentifier: [project Id]
        orgIdentifier: default
        tags: {}
        stages:
          - stage:
              name: nginx
              identifier: nginx
              description: ""
              type: Deployment
              spec:
                deploymentType: Kubernetes
                service:
                  serviceRef: Nginx
                environment:
                  environmentRef: myenv
                  deployToAll: false
                  infrastructureDefinitions:
                    - identifier: myinfra
                execution:
                  steps:
                    - step:
                        name: Rollout Deployment
                        identifier: rolloutDeployment
                        type: K8sRollingDeploy
                        timeout: 10m
                        spec:
                          skipDryRun: false
                          pruningEnabled: false
                  rollbackSteps:
                    - step:
                        name: Rollback Rollout Deployment
                        identifier: rollbackRolloutDeployment
                        type: K8sRollingRollback
                        timeout: 10m
                        spec:
                          pruningEnabled: false
              tags: {}
              failureStrategies:
                - onFailure:
                    errors:
                      - AllErrors
                    action:
                      type: StageRollback
  EOT
}
You can now run your pipeline.
The following example creates the Harness entities needed for a simple pipeline that deploys a publicly available Docker Nginx image to your target cluster using the manifest we just added.
Create the Harness connector
For steps on adding the Kubernetes Cluster connector, go to Add a Kubernetes Cluster Connector.
In Delegates Setup, ensure that you select the delegate you installed. For example:

Create the Harness service
To add Kubernetes manifests to your service, do the following:
- In your project, in CD (Deployments), select Services.
- Select Manage Services, and then select New Service.
- Enter a name for the service and select Save.
- Select Configuration.
- In Service Definition, select Kubernetes.
- In Manifests, click Add Manifest.
- In Specify Manifest Type, select K8s Manifest, and then click Continue.
- In Specify K8s Manifest Store, select Harness.
- In Manifest Details, in Name, enter a name for the manifest.
- Select File/Folder Path, and then, in Create or Select an Existing Config file, select the manifest we added earlier, and select Apply Selected.
- Select Submit.
- Save the service.
Create the Harness environment and infrastructure definition
To add the environment and infrastructure definition, do the following:
- In your project, in CD (Deployments), select Environments.
- Select New Environment.
- Enter a name for the environment, select the Pre-Production environment type, and select Save.
- In the new environment, select Infrastructure Definitions.
- Select Infrastructure Definition to create a new infrastructure definition.
- Enter a name and select the Kubernetes deployment type.
- In Select Infrastructure Type, select Kubernetes.
- In Cluster Details, select the Kubernetes Cluster connector you added earlier.
- In Namespace, enter the namespace where you want to deploy, such as
default. - Select Save.
Create the pipeline
To add the pipeline, do the following:
- In your project, in CD (Deployments), select Pipelines.
- Select Create a Pipeline.
- Enter a name for the pipeline, and select Start.
- Select Add Stage, select Deploy, select the Kubernetes deployment type, and select Set Up Stage.
- In Service, select the service you added earlier.
- In Environment, select the environment and infrastructure definition you added earlier.
- In Execution, select the rolling or canary strategy. Harness will automatically populate the steps you need for each strategy.
You can now run your pipeline.
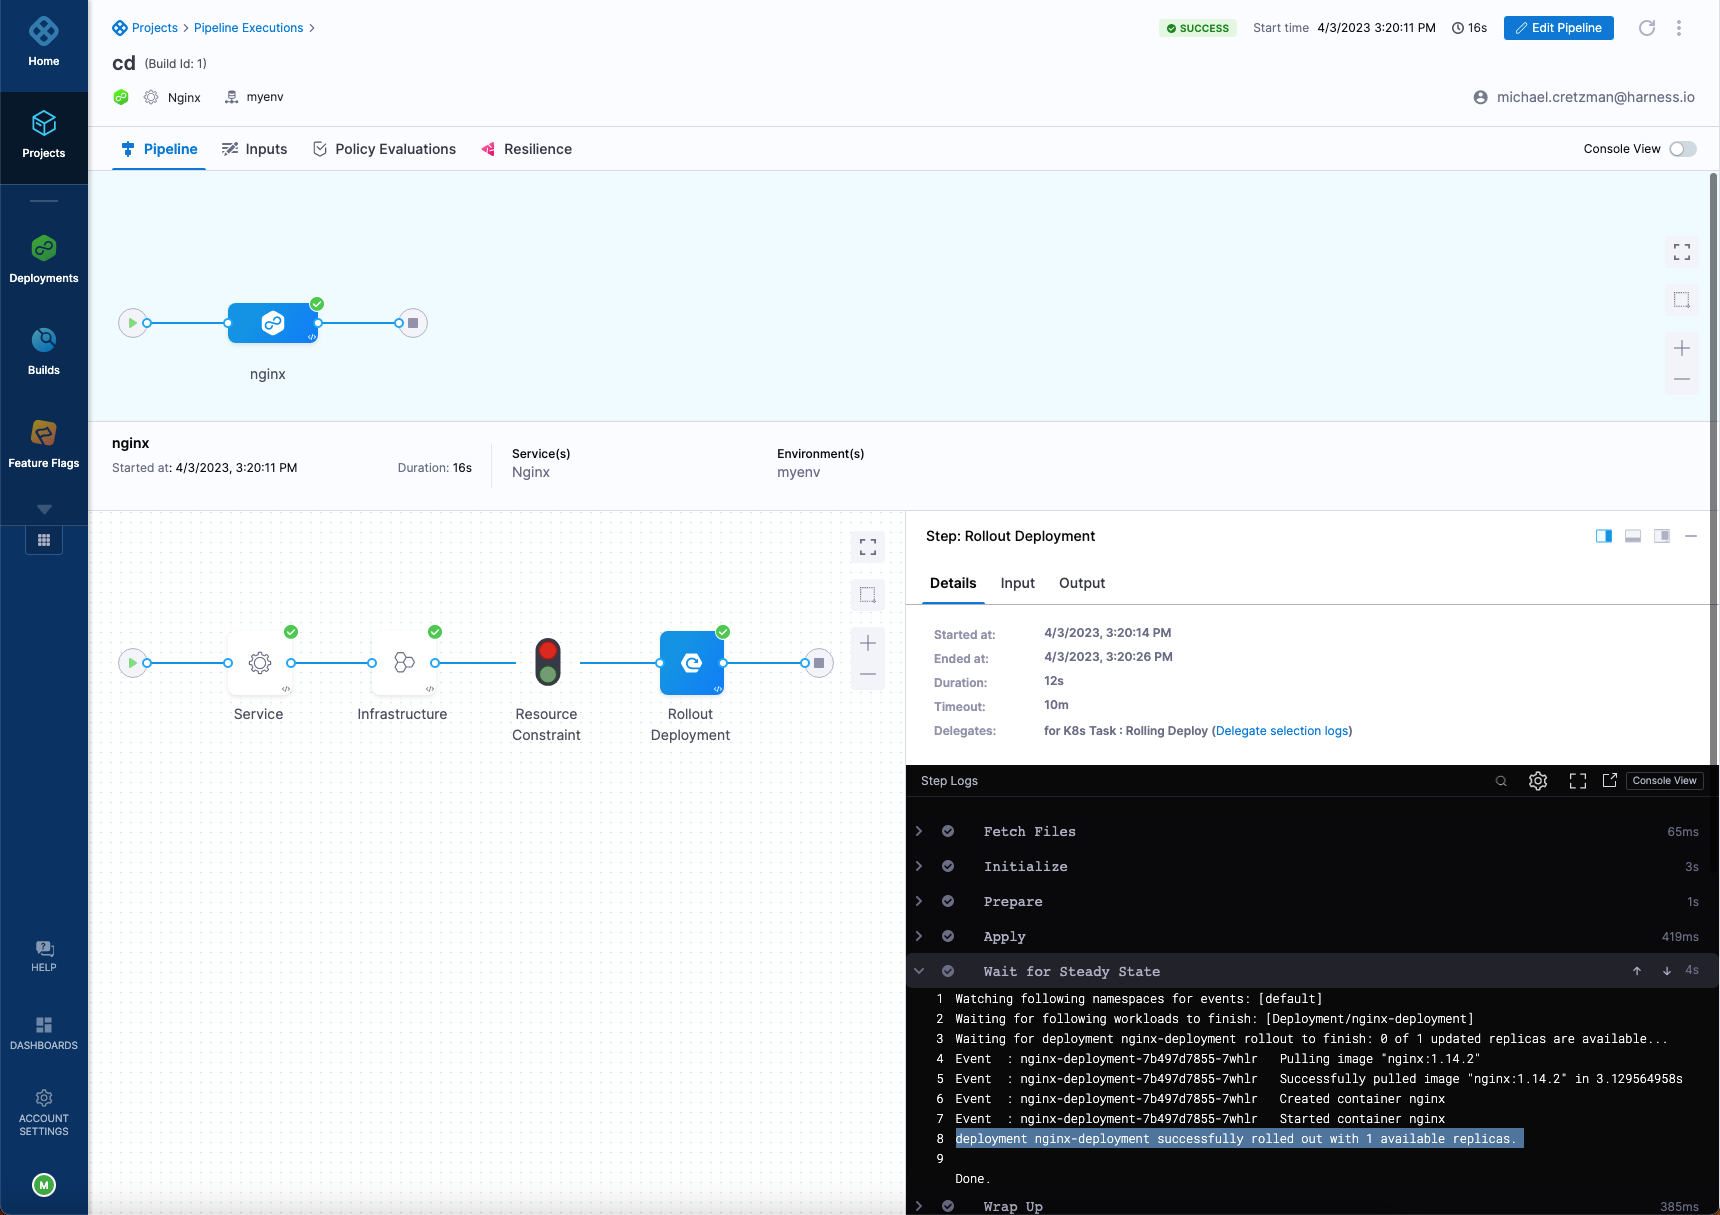
View and manage your pipelines
You can view your pipeline executions in Pipeline Executions.
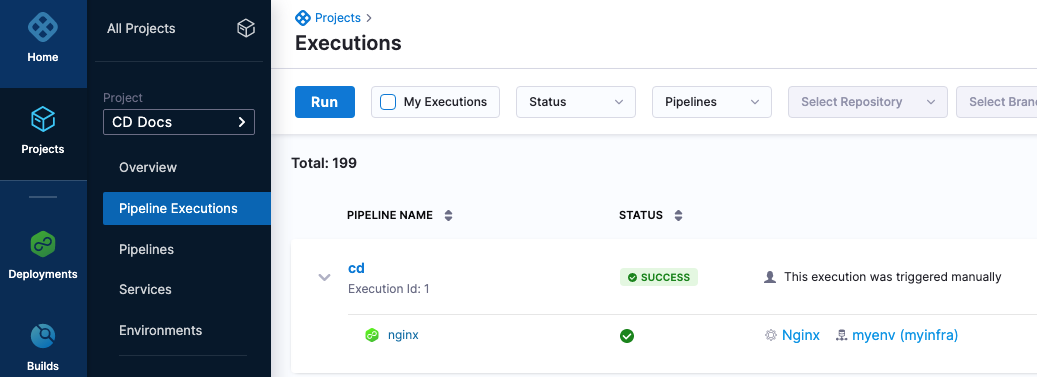
Select any execution to view its steps and logs.
Next steps
Now that you know the basics of CD pipeline modeling in Harness, go to CD third-party integrations to see how Harness supports your manifest and artifact repos and deployment environments.