Run Docker-in-Docker in a Build stage
Docker-in-Docker (DinD) with privileged mode is necessary only when using a Kubernetes build infrastructure. For other infrastructure types, you can run Docker commands directly on the host.
CI pipelines that use a Kubernetes build infrastructure need Docker-in-Docker (DinD) if you need to run Docker commands as part of the build process. For example, you can build images from two separate codebases in the same pipeline: One with a Build and Push an Image to Docker Registry step and another with Docker commands in a Run step.
This topic illustrates a simple build-and-push workflow using Docker-in-Docker for a pipeline that uses a Kubernetes build infrastructure.
Before You Begin
Docker-in-Docker must run in privileged mode to work properly. Use caution because this provides full access to the host environment. For more information, go to the Docker documentation for Runtime Privilege and Linux Capabilities. You can't use Docker-in-Docker on platforms that don't support privileged mode, such as those that run containers on Windows.
These steps assume you are familiar with the following concepts:
- Pipeline configuration, such as in the build and test on a Kubernetes cluster build infrastructure tutorial
- Harness key concepts
- CI Build stage settings
Step 1: Set Up the CI Stage
In your Harness Pipeline, click Add Stage. Then click Build.
In the Overview tab for the new Build Stage, configure the Stage as follows:
- For this example, disable Clone Codebase. You will be cloning a different codebase from the one referenced in the Codebase Object.
- Under Shared Paths, add the following:
/var/run/var/lib/docker
- Under Advanced, add stage variables for your Docker Hub Personal Access Token and any other fields you want to parameterize. For passwords and Personal Access Tokens, select Secret as the variable type.
Step 2: Define the Build Farm Infrastructure
In the CI Build stage > Infrastructure tab, define the build infrastructure for the codebase. See Set Up Build Infrastructure.
Step 3: Add a DinD Background step
In the Execution tab, add a Background step and configure it as follows:
- Name:
dind_Service - Container Registry: A Docker Hub container registry connector.
- Image: The image you want to use, such as docker:dind.
- Optional Configuration: Select Privileged. This is required for Docker-in-Docker.
Providing arguments
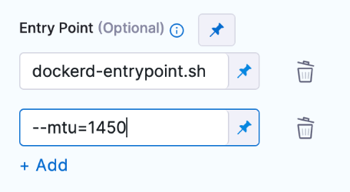
Provide arguments as a list in Entry Point.
For example, the entry point for the docker:dind image is dockerd-entrypoint.sh. If you want to add an --mtu argument, you would include both the image entry point and the argument in your step's Entry Point specification.
- Visual
- YAML

entrypoint:
  - dockerd-entrypoint.sh
  - "--mtu=1450"
Step 4: Configure the Run Step
In the Execution tab, add a Run Step and configure it as follows:
- Container Registry: A Connector to your Docker registry.
- Image: The Docker image, with the Docker binary, that you want to run the Run step in.
- Command: Enter the shell commands you want to run in the dind container.
Once the container is started, the software inside the container takes time to initialize and start accepting connections. Give the service adequate time to initialize before trying to connect. You can use a while loop, as shown here:
while ! docker ps ;do
      echo "Docker not available yet"
done
echo "Docker Service Ready"
docker ps
The following example code clones a Git repo, builds an image, and pushes the image to a Docker registry:
apk add git
git --version
git clone https://github.com/$GITHUB_USERNAME/$GITHUB_REPO
cd $GITHUB_REPO

echo $DOCKERHUB_PAT > my_password.txt
cat my_password.txt | docker login --username $DOCKERHUB_USERNAME --password-stdin

docker build -t $DOCKER_IMAGE_LABEL .
docker tag $DOCKER_IMAGE_LABEL $DOCKERHUB_USERNAME/$DOCKER_IMAGE_LABEL:<+pipeline.sequenceId>
docker push $DOCKERHUB_USERNAME/$DOCKER_IMAGE_LABEL:<+pipeline.sequenceId>
Step 5: Run the Pipeline
Now you can run your Pipeline. You simply need to select the codebase.
- Click Save.
- Click Run.
- If prompted, specify a Git branch, tag, or PR number.
- Click Run Pipeline and check the console output to verify that the Pipeline runs as intended.
Configure As Code: YAML
To configure your pipeline as YAML in CI, go to Harness Pipeline Studio and select YAML. Here is an example of a pipeline that uses the workflow described in this topic. Modify the YAML attributes, such as name, identifiers, codebase, connector refs, and variables, as needed.
pipeline:
  name: dind-w-background-step
  identifier: dindwbackgroundstep
  projectIdentifier: myproject
  orgIdentifier: myorg
  tags: {}
  stages:
    - stage:
        name: build-bg
        identifier: buildbg
        type: CI
        spec:
          cloneCodebase: false
          execution:
            steps:
              - step:
                  type: Background
                  name: Background
                  identifier: Background
                  spec:
                    connectorRef: mydockerhubconnector
                    image: docker:dind
                    shell: Sh
                    privileged: true
              - step:
                  type: Run
                  name: Run
                  identifier: Run
                  spec:
                    connectorRef: mydockerhubconnector
                    image: docker:run_step_image
                    shell: Sh
                    command: |-
                      while ! docker ps ;do
                            echo "Docker not available yet"
                      done
                      echo "Docker Service Ready"
                      docker ps

                      apk add git
                      git --version
                      git clone https://github.com/john-doe/$GITHUB_REPO
                      cd $GITHUB_REPO

                      echo $DOCKERHUB_PAT > my_password.txt
                      cat my_password.txt | docker login --username $DOCKERHUB_USERNAME --password-stdin

                      docker build -t $DOCKER_IMAGE_LABEL .
                      docker tag $DOCKER_IMAGE_LABEL $DOCKERHUB_USERNAME/$DOCKER_IMAGE_LABEL:<+pipeline.sequenceId>
                      docker push $DOCKERHUB_USERNAME/$DOCKER_IMAGE_LABEL:<+pipeline.sequenceId>
                    privileged: false
          infrastructure:
            type: KubernetesDirect
            spec:
              connectorRef: docsexampledelegate
              namespace: harness-delegate-ng
              nodeSelector: {}
              os: Linux
          sharedPaths:
            - /var/run
            - /var/lib/docker
        variables:
          - name: DOCKERHUB_USERNAME
            type: String
            description: ""
            value: jdoe
          - name: DOCKERHUB_PAT
            type: Secret
            description: ""
            value: jdoedockerhubpat
          - name: GITHUB_USERNAME
            type: String
            description: ""
            value: john-doe
          - name: GITHUB_REPO
            type: String
            description: ""
            value: codebaseAlpha
          - name: GITHUB_PAT
            type: Secret
            description: ""
            value: johndoegithubpat
          - name: DOCKER_IMAGE_LABEL
            type: String
            description: ""
            value: dind-w-bg-step