Add an Azure Key Vault secret manager
To store and use encrypted secrets (such as access keys) and files, you can add an Azure Key Vault Secret Manager.
Before you begin
- See Harness Secret Manager Overview.
- See About Azure Key Vault by Microsoft.
- See Azure Key Vault Basic Concepts.
- Make sure you have set up an Azure account.
- Make sure you have View and Create/Edit permissions for secrets.
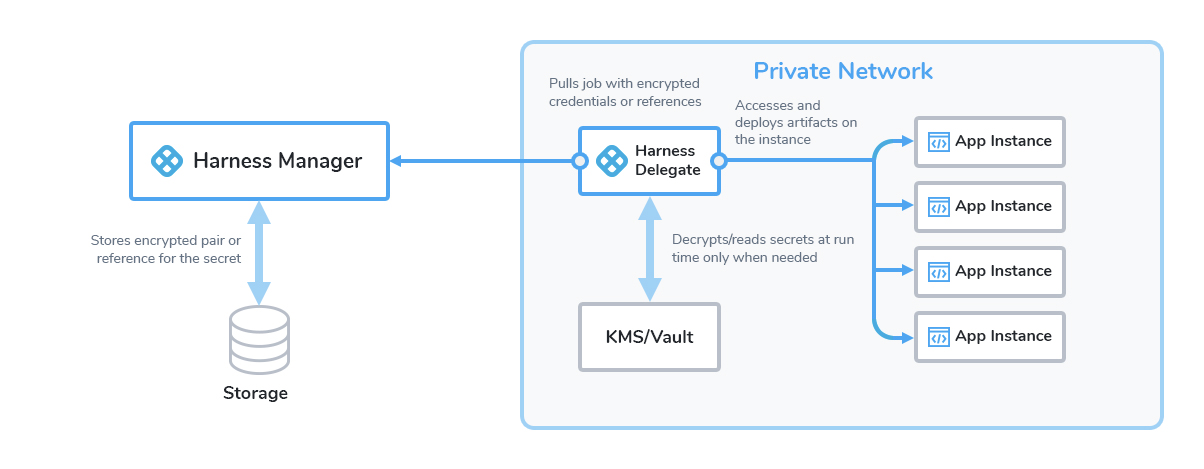
Secret manager overview
For a full overview of how your secrets are used with the Secrets Managers you configure in Harness, go to Harness Secrets Management Overview and Harness Security FAQs.
Here's a visual summary:
Limitations
- Key Vault stores and manages secrets as sequences of octets (8-bit bytes), with a maximum size of 25k bytes each. For more information, go to Azure Key Vault secrets.
Create an Azure Reader role
To enable Harness to later fetch your Azure vaults (in Step 7 below), you must first set up a Reader role in Azure. You can do this two ways:
- Azure portal
- PowerShell command
Create a Reader role in Azure
To create a Reader role in the Azure portal UI:
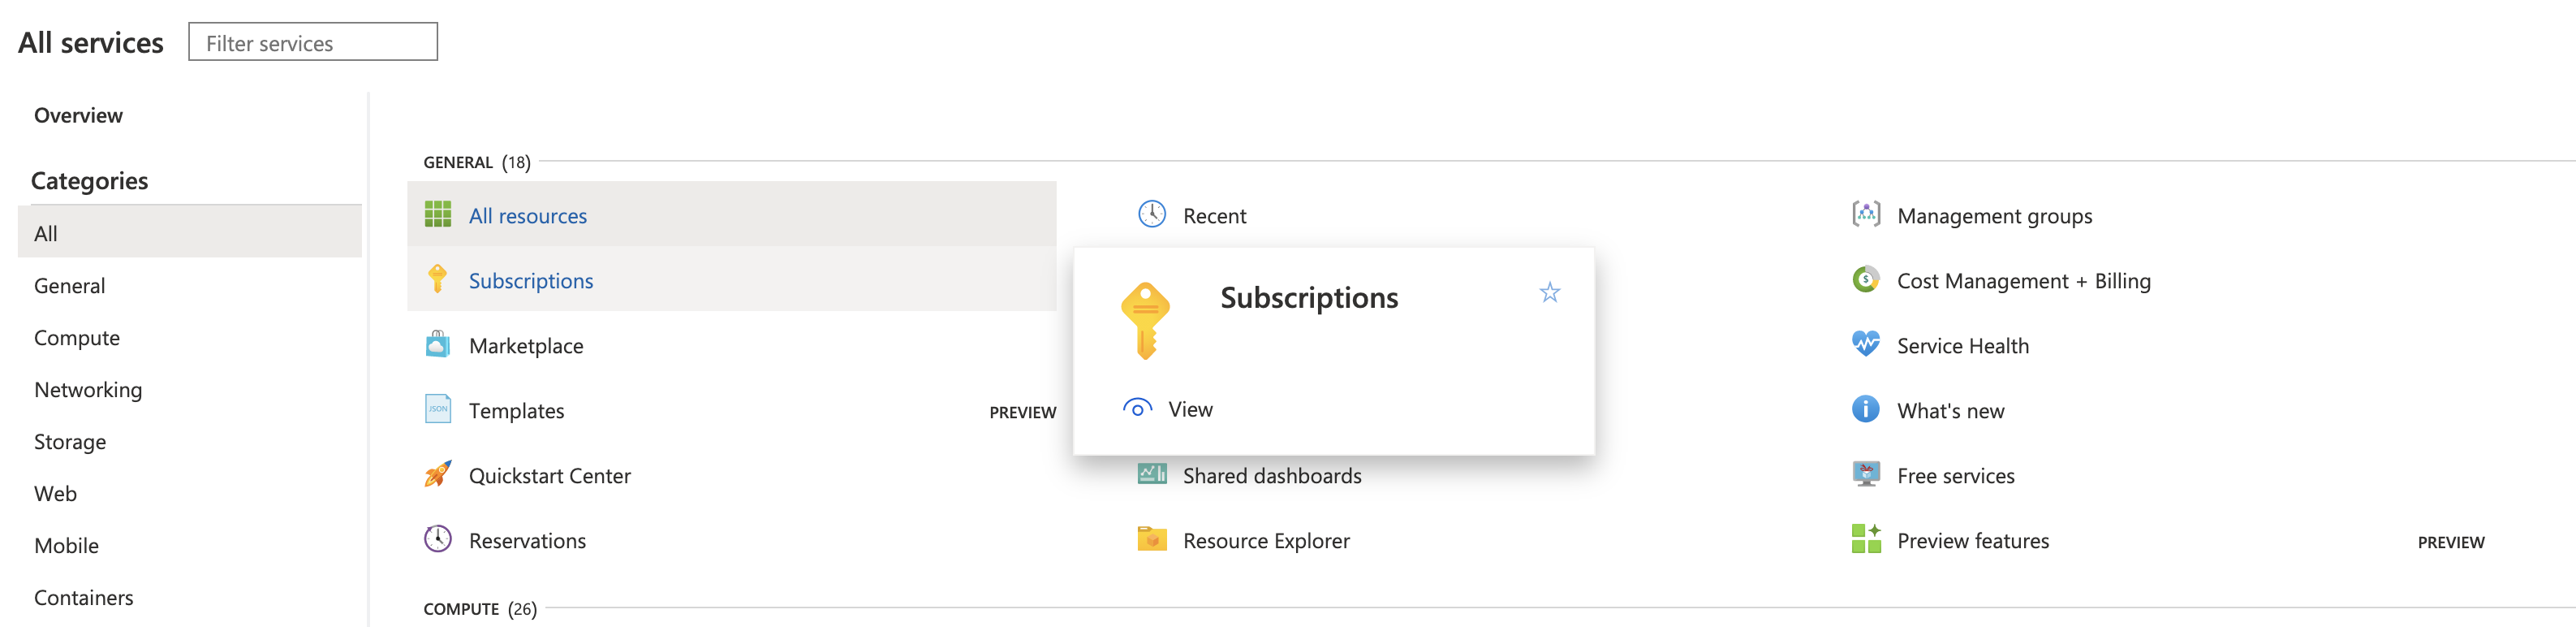
Navigate to Azure's Subscriptions page.
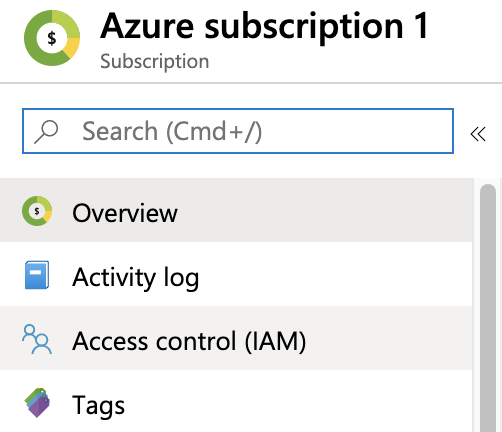
Under Subscription name, select the subscription where your vaults reside.

Copy and save the Subscription ID. You can paste this value into Harness Manager below at Option: Enter Subscription.Select your Subscription’s Access control (IAM) property.
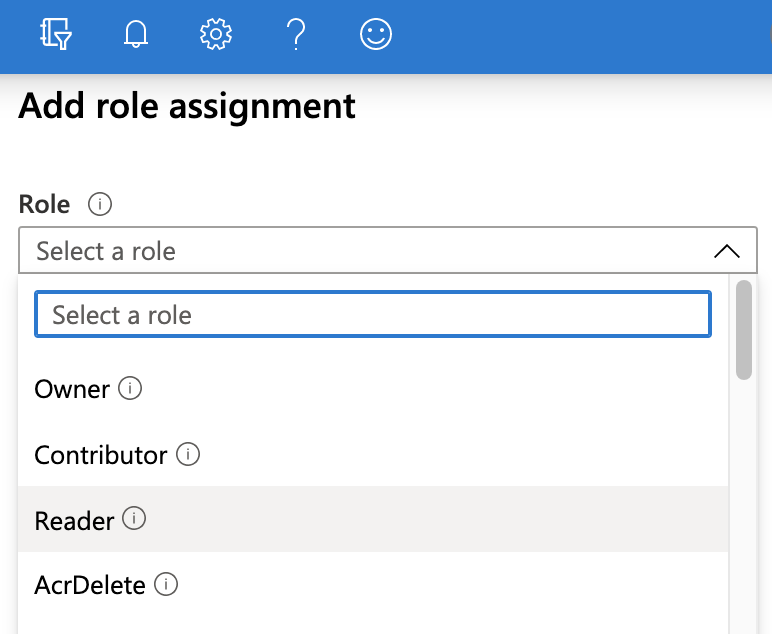
On the resulting Access control (IAM) page, select Add a role assignment.
In the resulting right pane, set the Role to Reader.
Accept the default value: Assign access to: Azure AD user, group, or service principal.
In the Select drop-down, select the name of your Azure App registration.
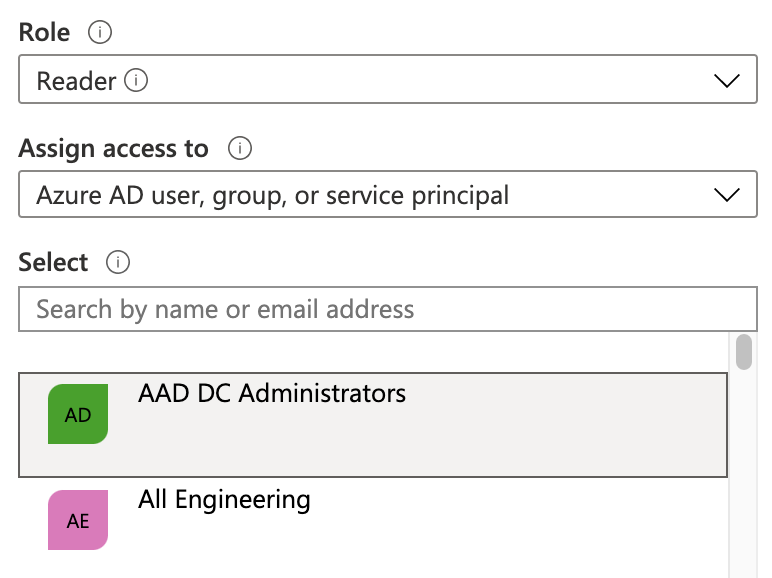
Click Save.
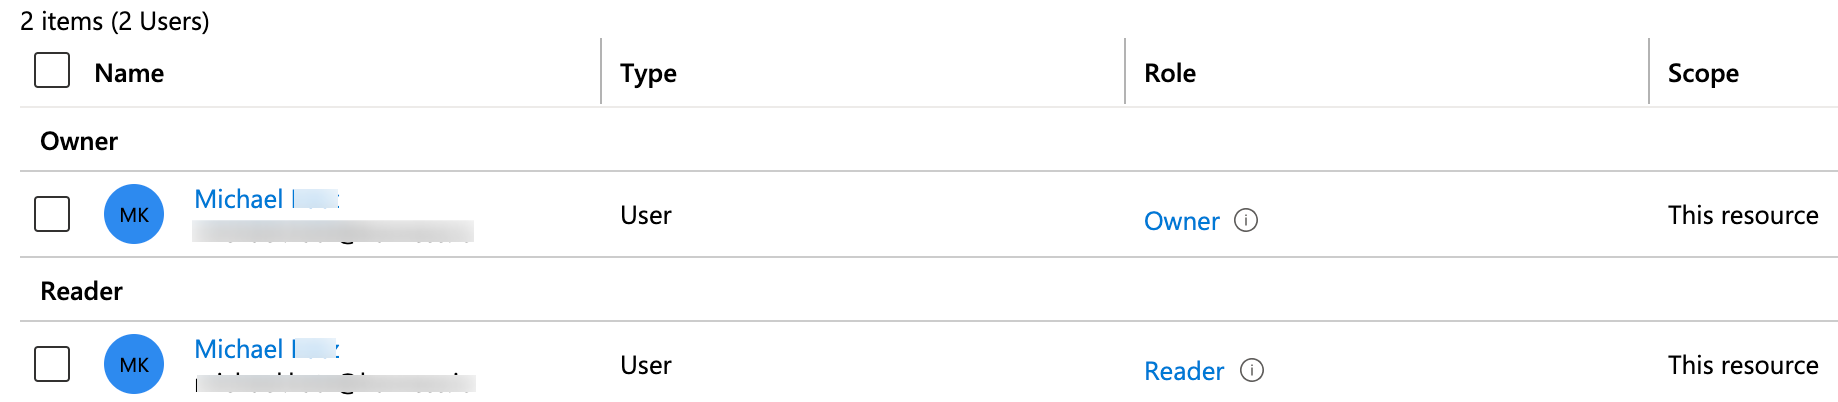
On the Access control (IAM) page, select the Role assignments tab. Make sure your new role now appears under the Reader group.
Microsoft Azure's Manage subscriptions documentation adds details about the above procedure but focuses on the Administrator rather than the Reader role.
Create a Reader role using a PowerShell command
You can also create a Reader role programmatically via this PowerShell command, after gathering the required parameters:
New-AzRoleAssignment -ObjectId <object_id> -RoleDefinitionName "Reader" -Scope /subscriptions/<subscription_id>
For details and examples, see Microsoft Azure's Add or remove role assignments documentation.
Add an Azure Key Vault secret manager in Harness
You can add an Azure Key Vault connector in account or org or project scope.
This topic explains steps to add an Azure Key Vault connector in the project scope.
To add an Azure Key Vault secret manager:
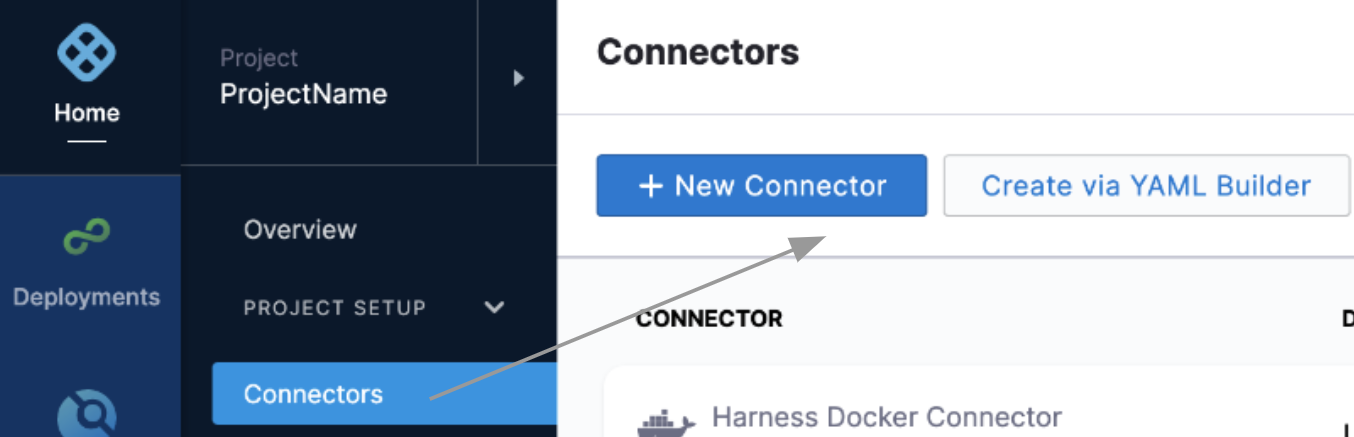
In Harness, select your project.
Select Connectors and then select New Connector.
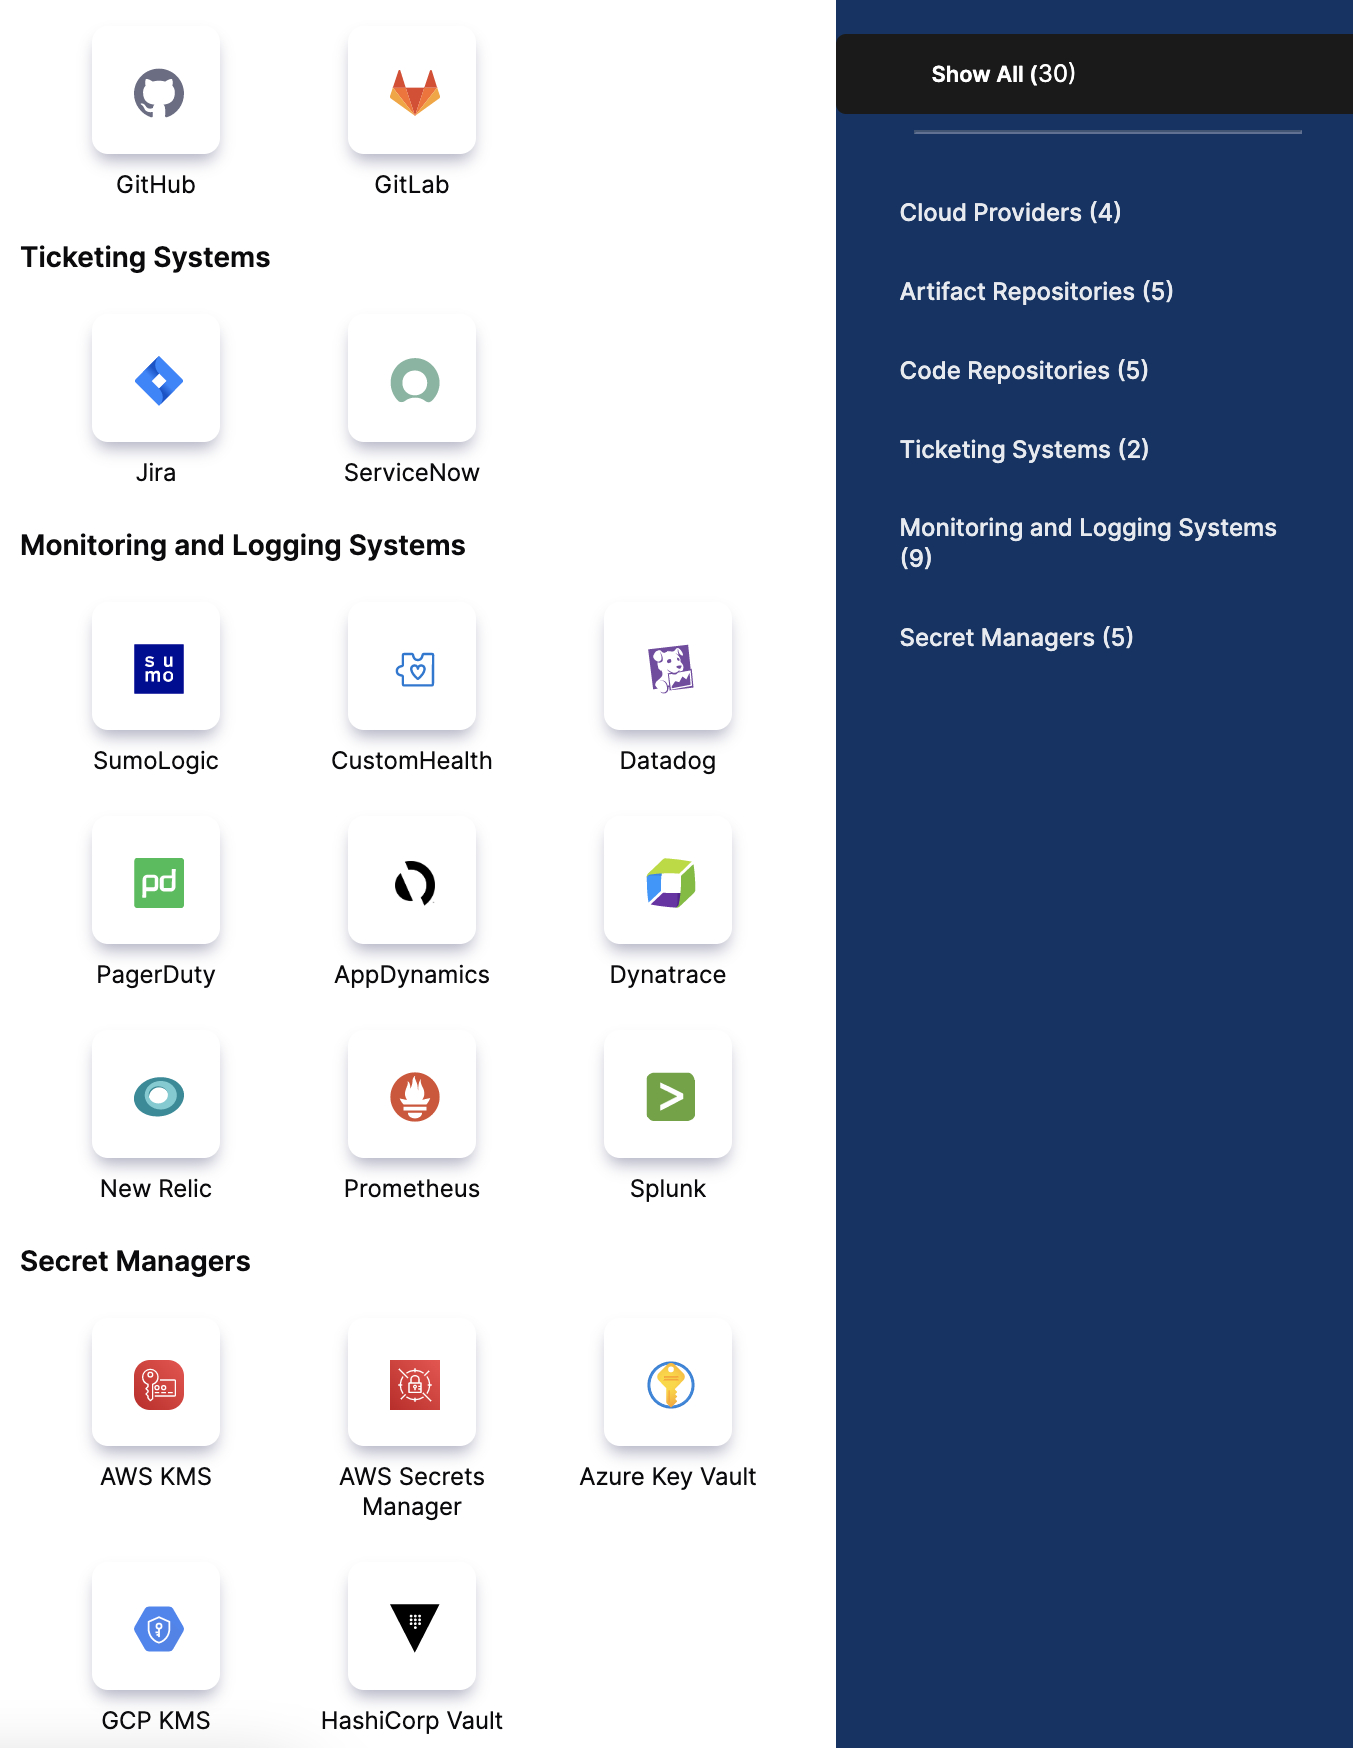
In Secret Managers, select Azure Key Vault.
Enter a Name for the secret manager.
You can choose to update the ID or let it be the same as your secret manager's name. For more information, see Entity Identifier Reference.
Enter Description and Tags for your secret manager.
Select Continue.
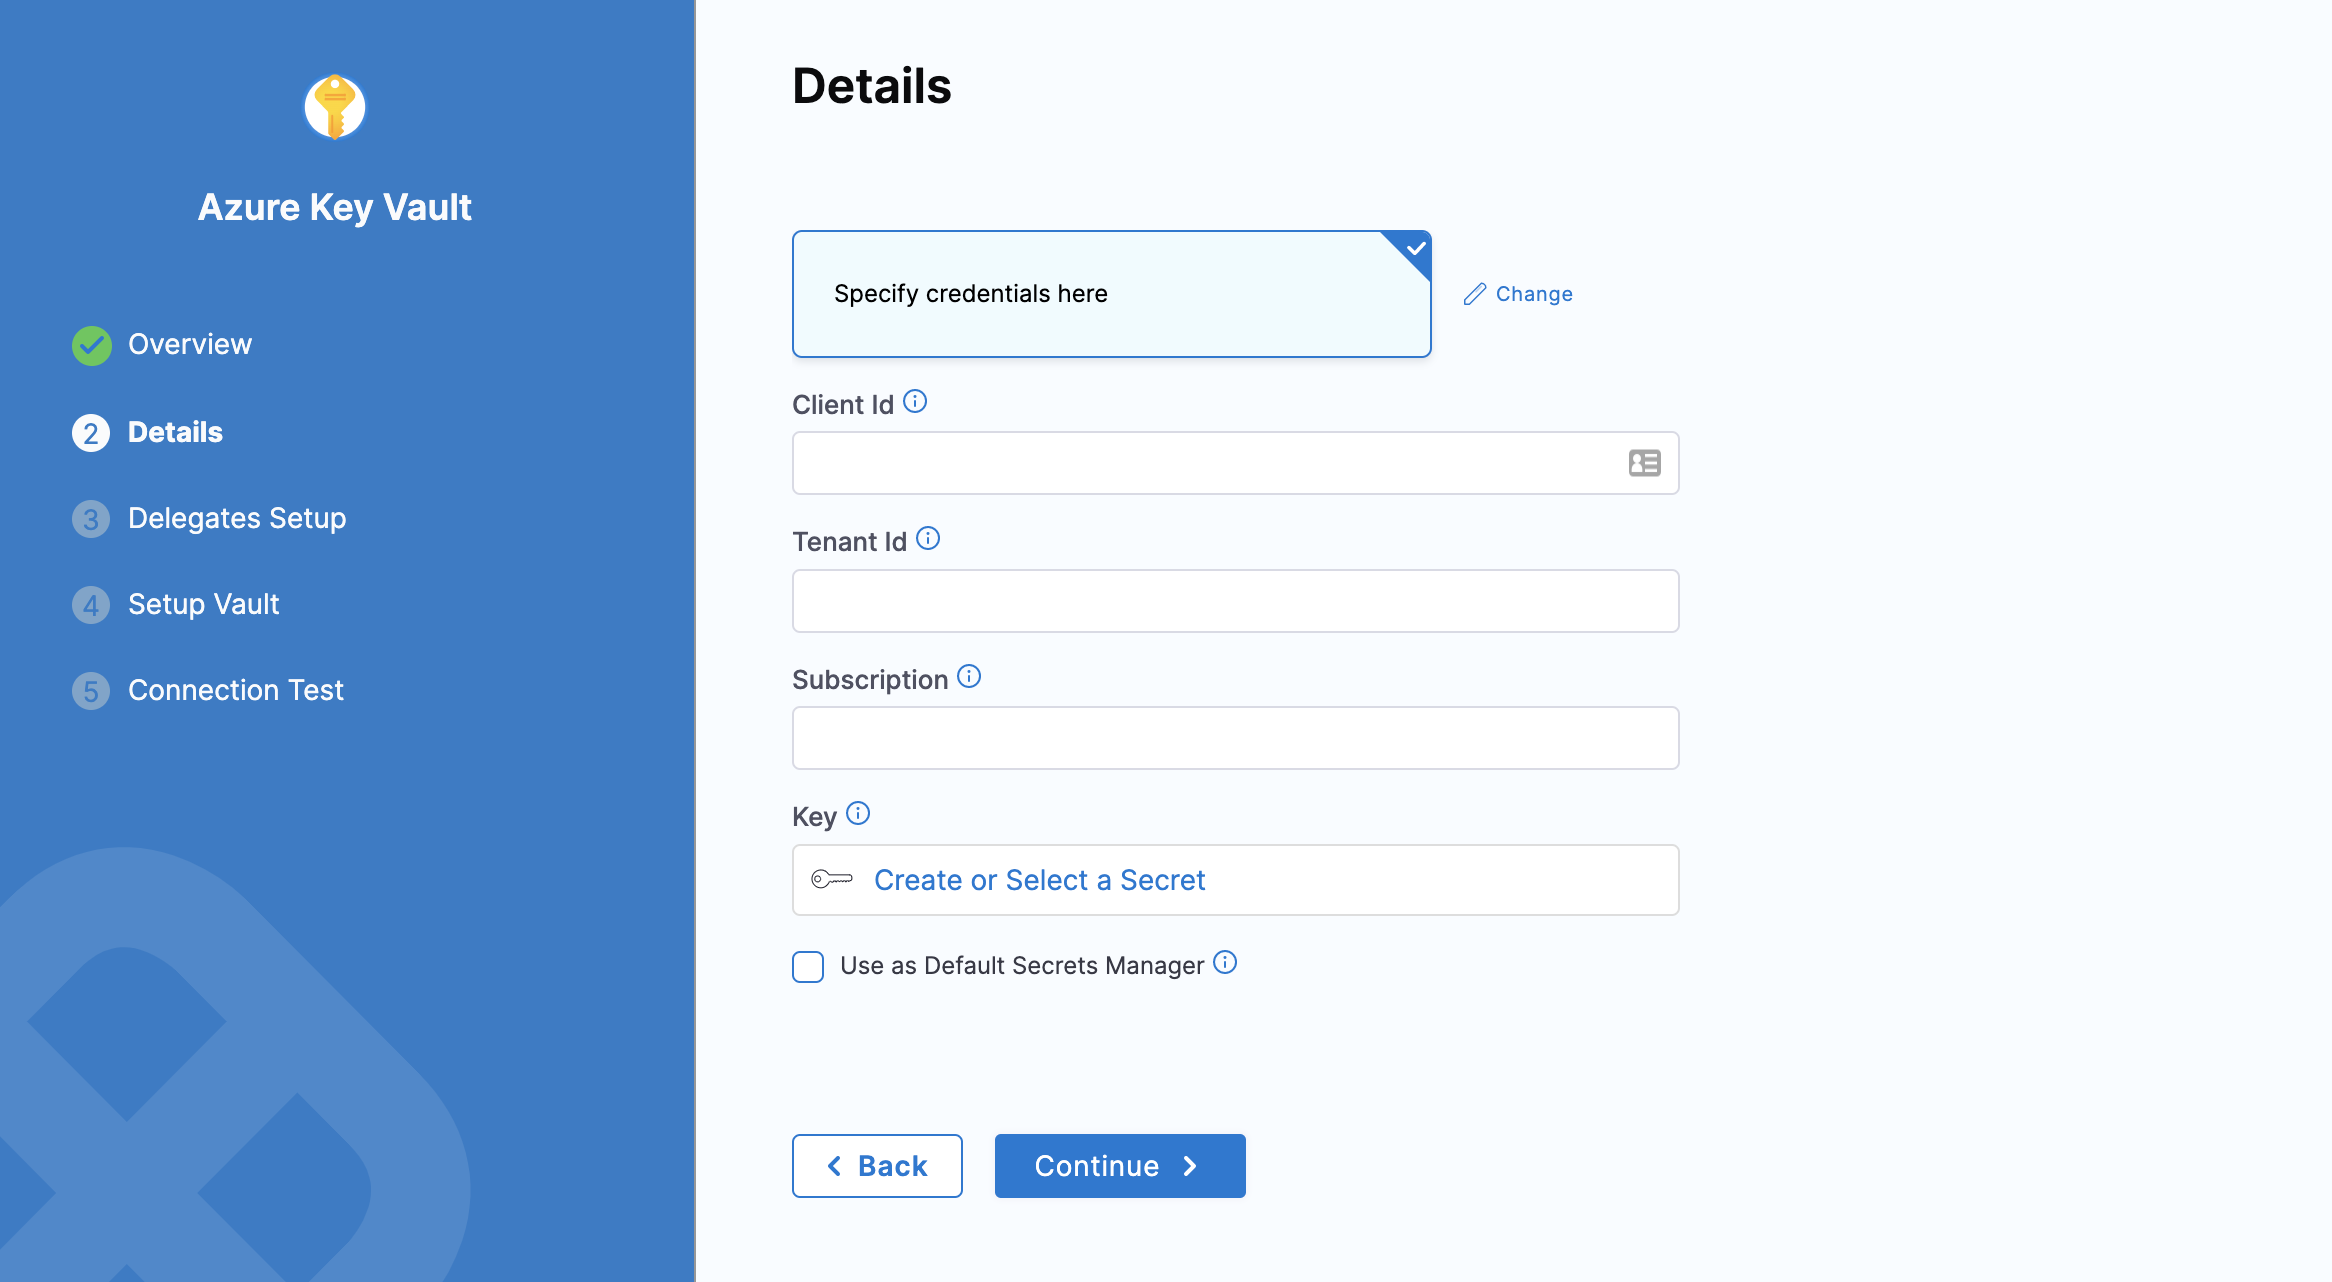
Configure details of the Azure Key Vault connector
To configure the details for your Azure Key Vault connector, you can do one of the following:
- Specify credentials
- Use the credentials of a specific delegate
Specify credentials
Select Specify credentials here.
Enter Client ID, Tenant ID corresponding to the fields highlighted below in the Azure UI:

To provide these values:
- In Azure, navigate to the Azure Active Directory > App registrations page, then select your App registration. (For details, see Azure's Quickstart: Register an application with the Microsoft identity platform.)
- Copy the Application (client) ID for the Azure App registration you are using, and paste it into the Harness dialog's Client ID field.
- Copy the Directory (tenant) ID of the Azure Active Directory (AAD) where you created your application, and paste it into the Harness dialog's Tenant ID field. (For details, see Microsoft Azure's Get values for signing in topic.)
In Subscription, you can optionally enter your Azure Subscription ID (GUID).
To find this ID, navigate to Azure's Subscriptions page, as outlined above in Step 1: Create Azure Reader Role. From the resulting list of subscriptions, copy the Subscription ID beside the subscription that contains your vaults.
 note
noteIf you do not enter a GUID, Harness uses the default subscription for the Client ID you've provided above.
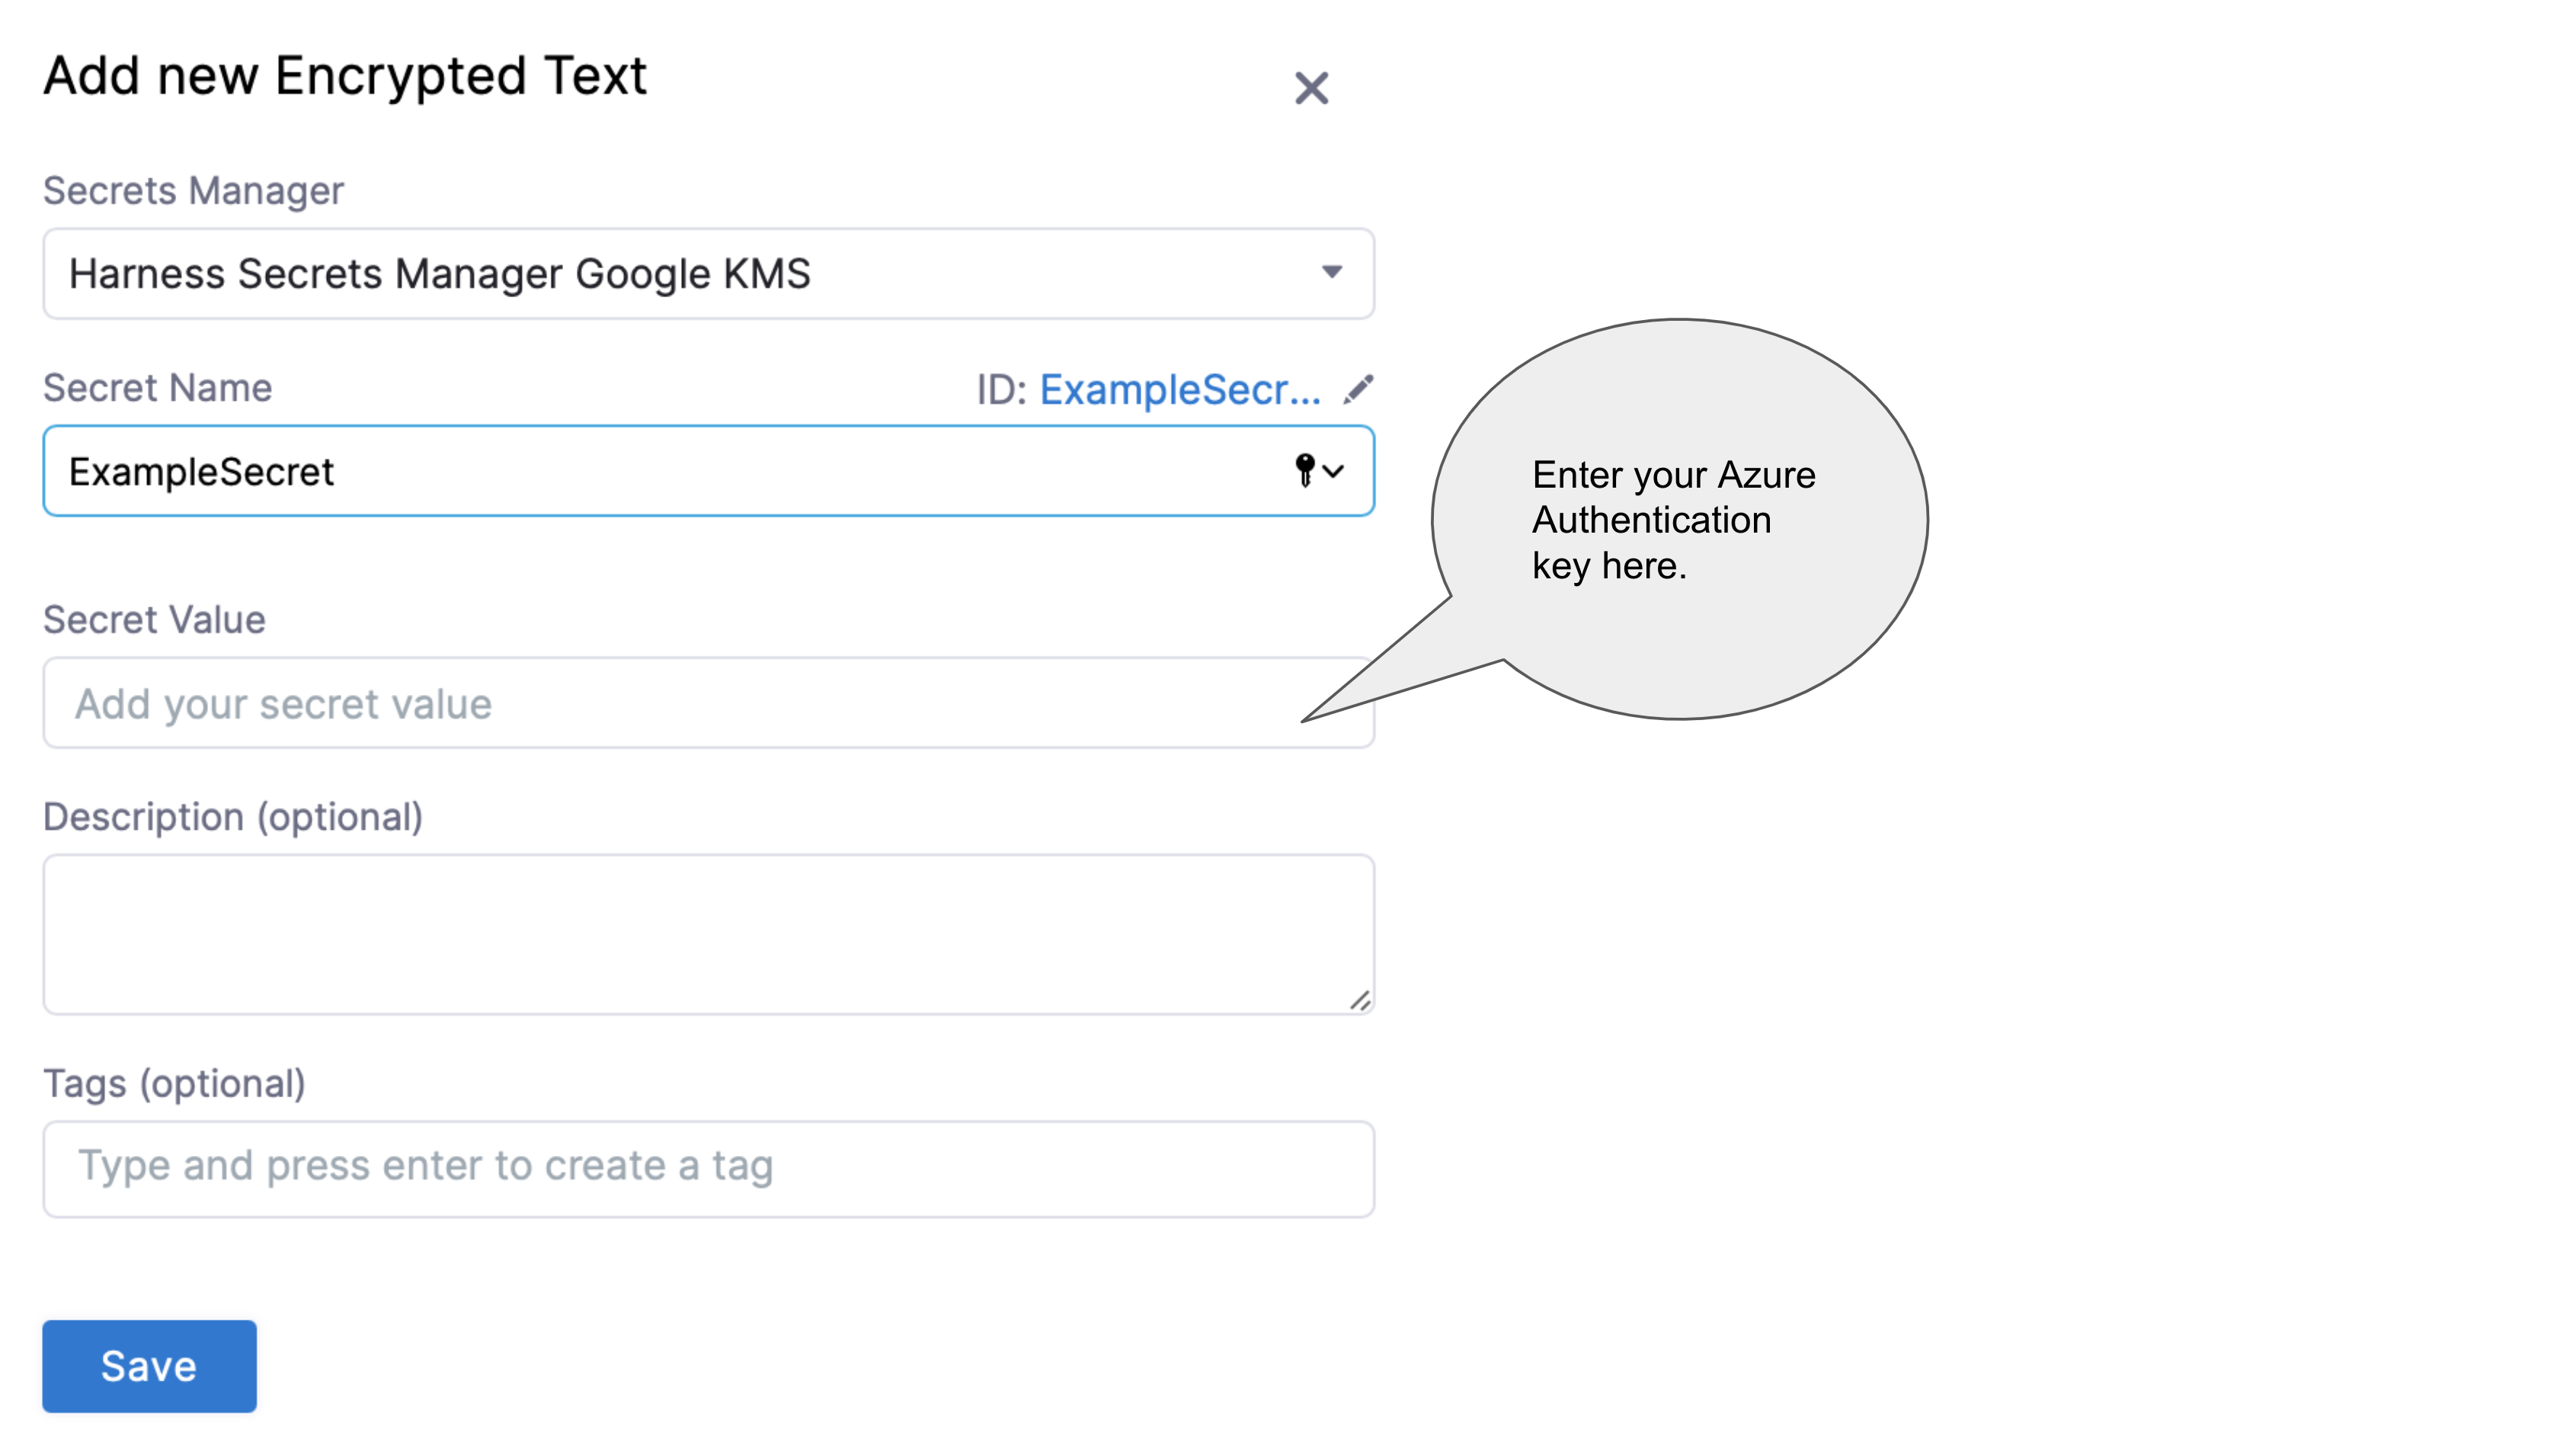
In Key, select Create or Select a Secret. For detailed steps on creating a new secret, go to Add Text Secrets.
The secret that you reference here should have the Azure authentication key as the Secret Value. The image below shows the creation of a secret with Azure authentication key as its value:
To create and exchange the azure authentication key, follow these steps:
- Navigate to Azure's Certificates & secrets page. (For details, see Microsoft Azure's Create a new application secret documentation.)
- In the resulting page’s Client secrets section, select New client secret.

- Enter a Description and expiration option, then click Add.
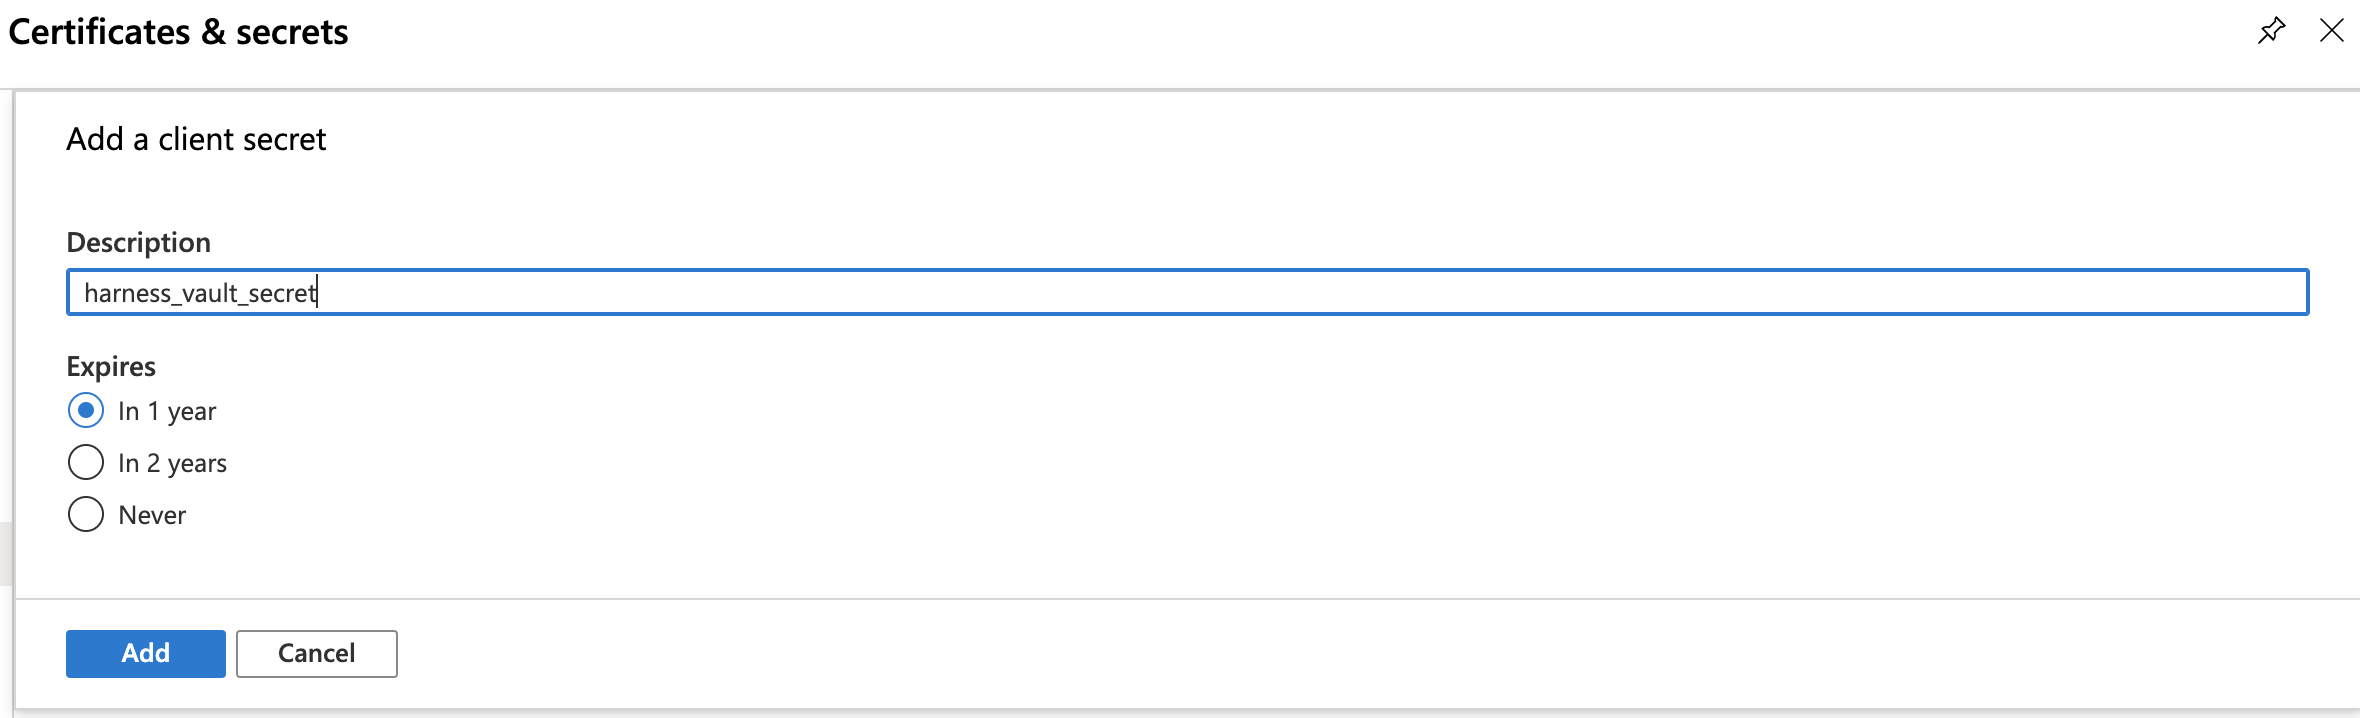
- Find your new key in the Client secrets section, and copy its value to your clipboard.
 note
noteThis is your only chance to view this key's value in Azure. Store the value somewhere secure, and keep it on your clipboard.
- Click Continue.
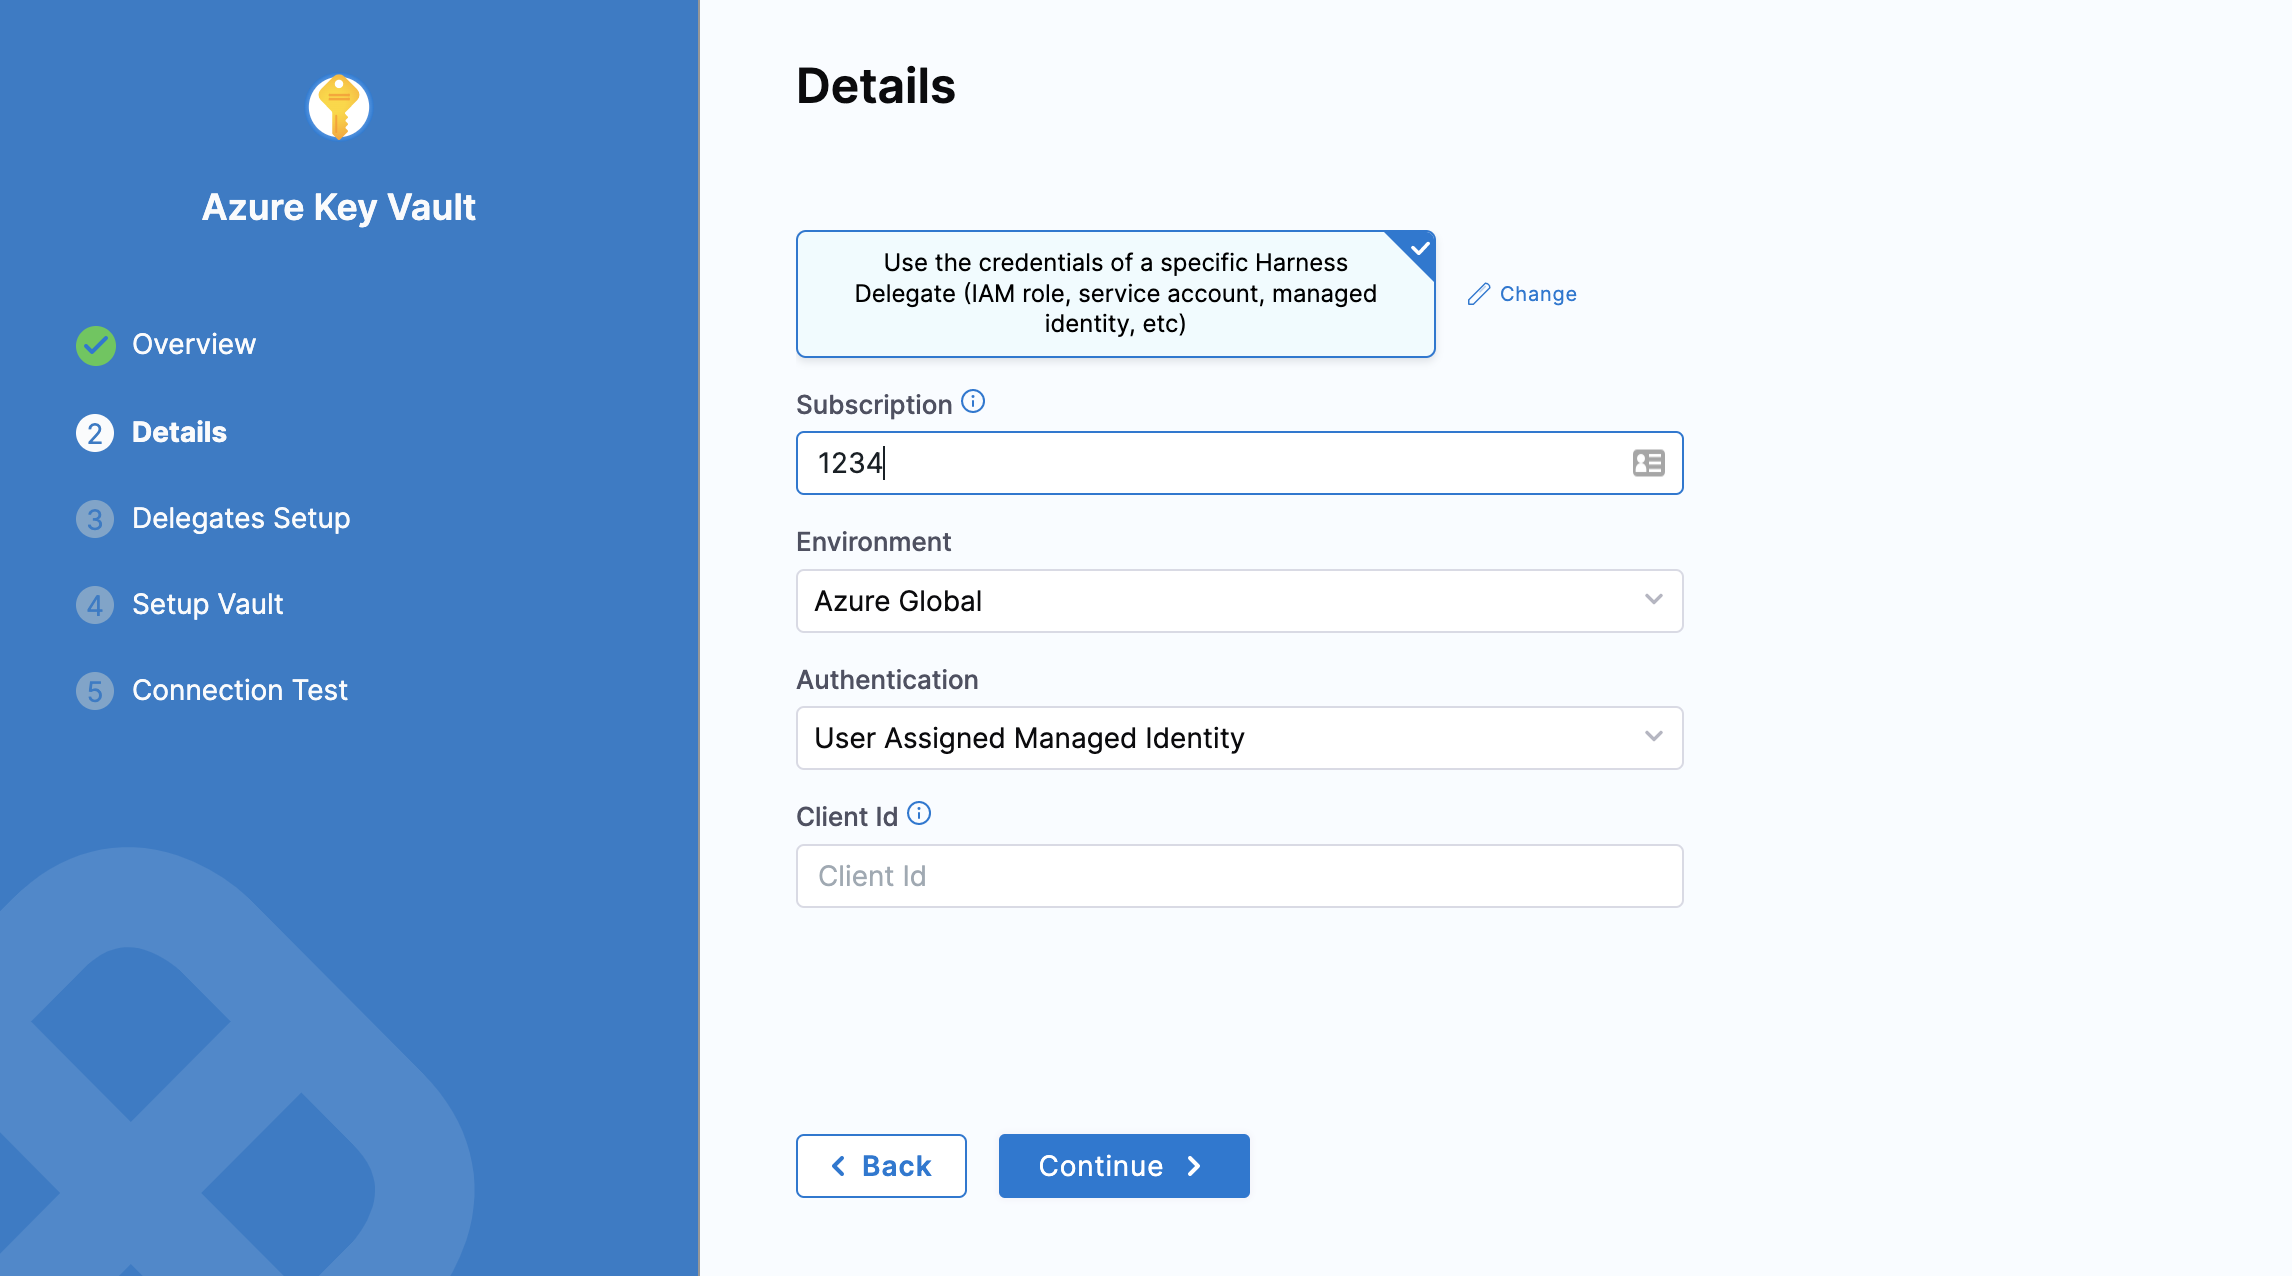
Use the credentials of a specific delegate
Select Use the credentials of a specific Harness Delegate (IAM role, service account, managed identity, etc).
In Subscription, enter your Azure Subscription ID (GUID).
In Environment, select your environment.
In Authentication, select one of the following:
System Assigned Managed Identity: If you select this, you need not provide any Ids.
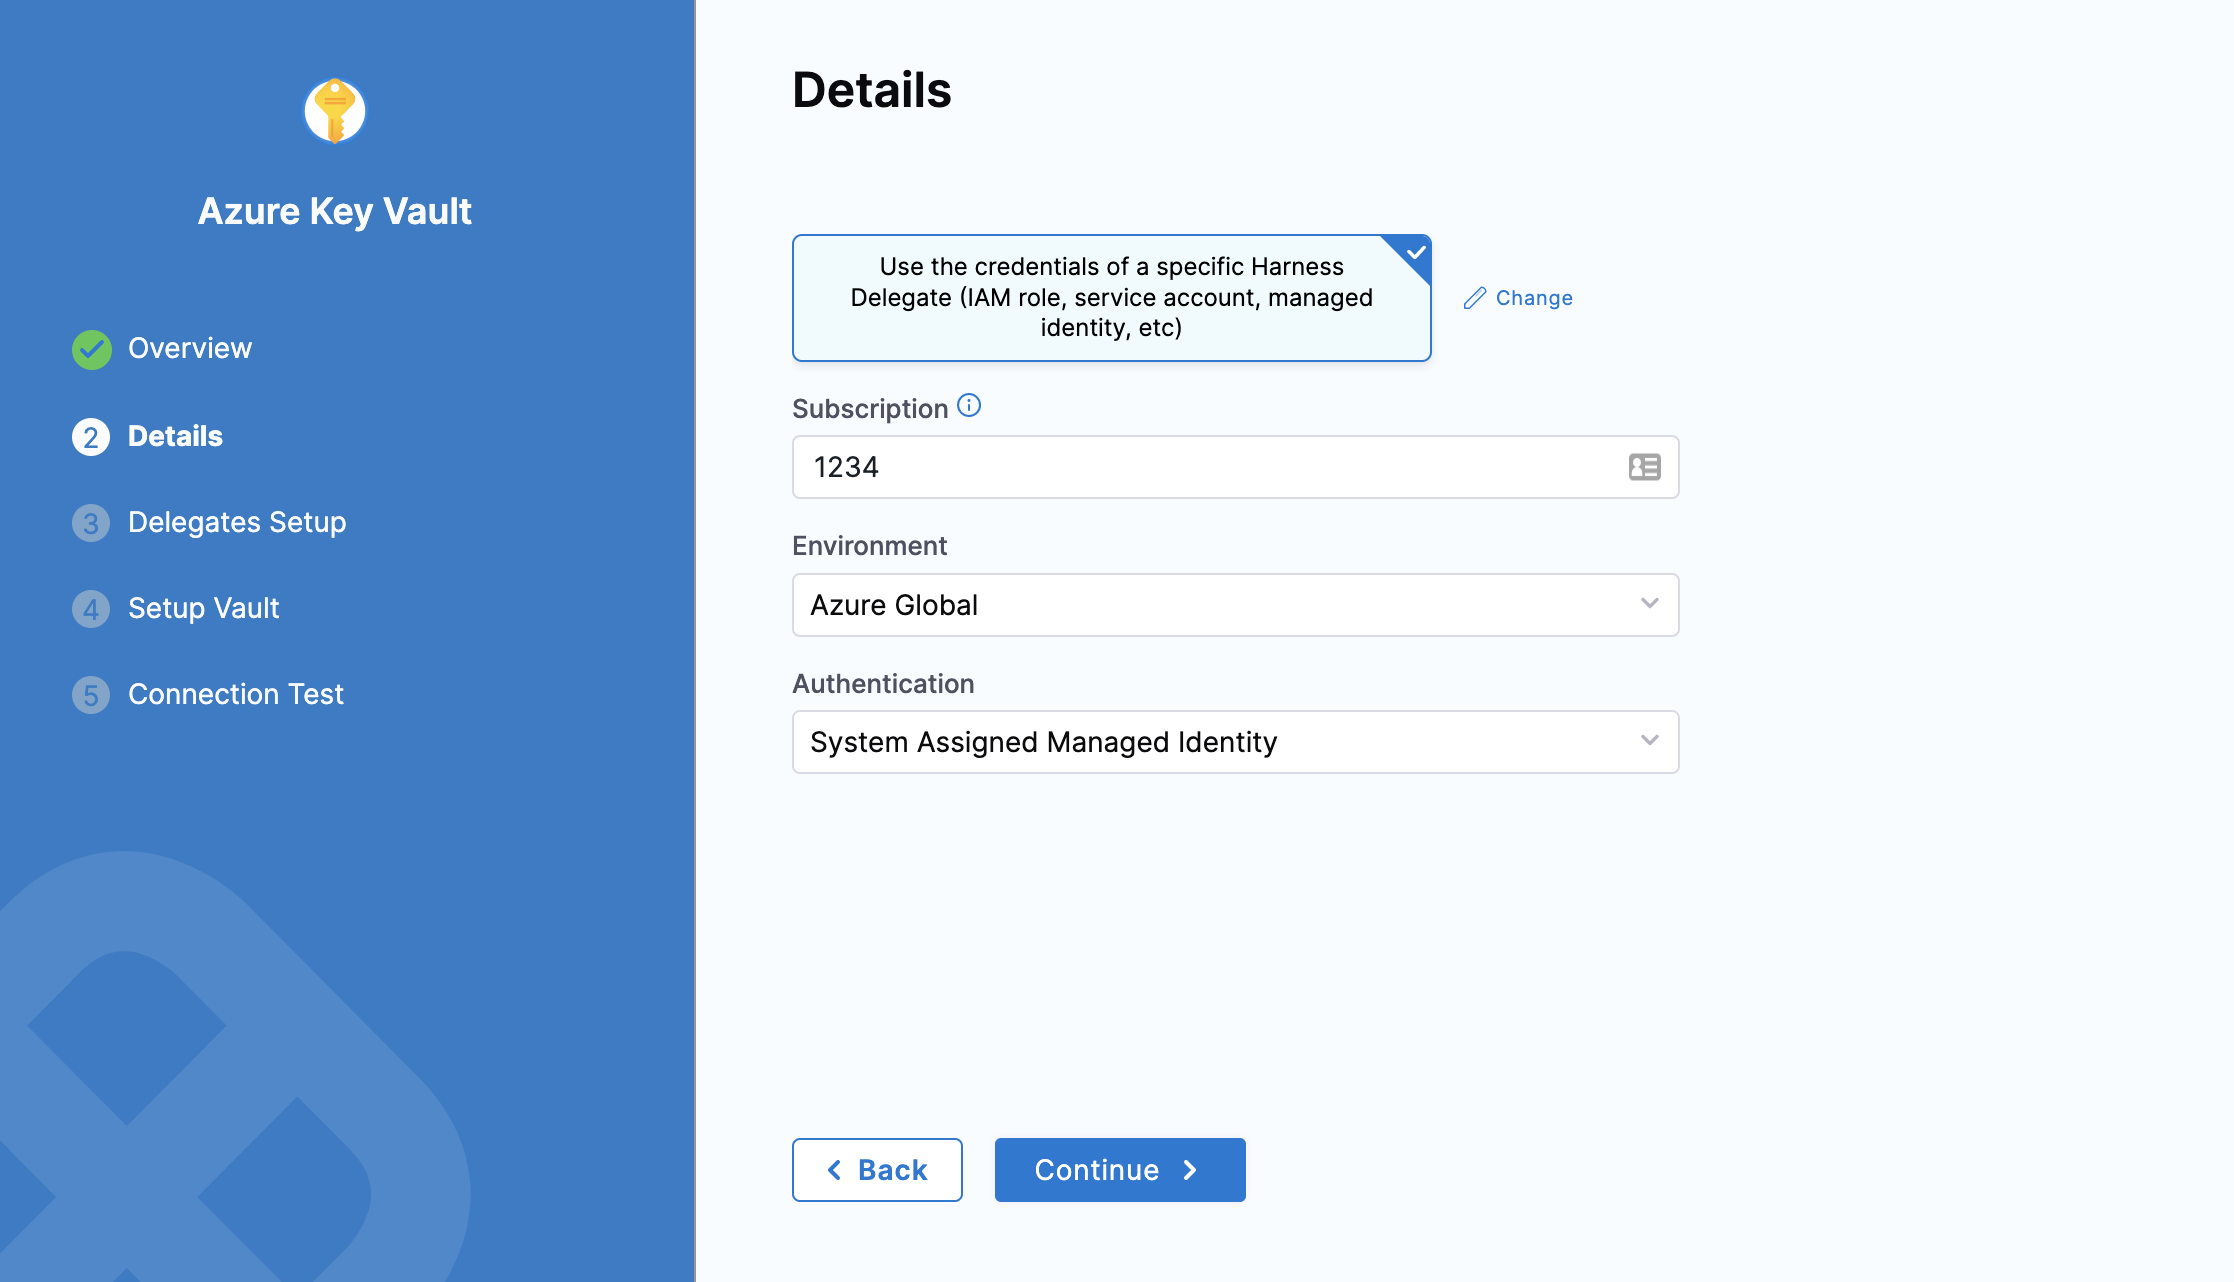
User Assigned Managed Identity: If you select this, you need to provide the Application (client) Id in Client Id.
Set up delegates
In Delegates Setup, enter Selectors for specific Delegates that you want to allow to connect to this Connector. Click Continue.
Set up vault
Click Fetch Vault.
After a slight delay, the Vault drop-down list populates with vaults corresponding to your client secret. Select the Vault you want to use.
Click Save and Continue.
Test connection
Once the Test Connection succeeds, click Finish. You can now see the Connector in Connectors.
Important: Harness tests connections by generating a fake secret in the Secret Manager or Vault. For the Test Connection to function successfully, make sure you have the Create permission for secrets.
The Test Connection fails if you do not have the Create permission. However, Harness still creates the Connector for you. You may use this Connector to read secrets if you have View permissions.