Create a step template
The Harness Template Library enables you to standardize and create step templates that can be re-used across pipelines and teams that use Harness.
This topic walks you through the steps to create a Run step template.
Objectives
You'll learn how to:
- Create a Run step template.
- Define template parameters.
- Use the run step template in a pipeline.
Before you begin
- Review Harness Key Concepts to establish a general understanding of Harness.
- The Run template in this quickstart is added to a CD pipeline. If you are new to Harness CD, go to CD Quickstarts.
- Go to CI tutorials.
Step 1: Create a template
First, we'll create a project-level template in the Builds module. You can do this in any project.
To create a project-level template, do the following:
In Harness, navigate to the Builds module.
In Projects, select the desired project.
Select Templates under Project Setup.
Select New Template.
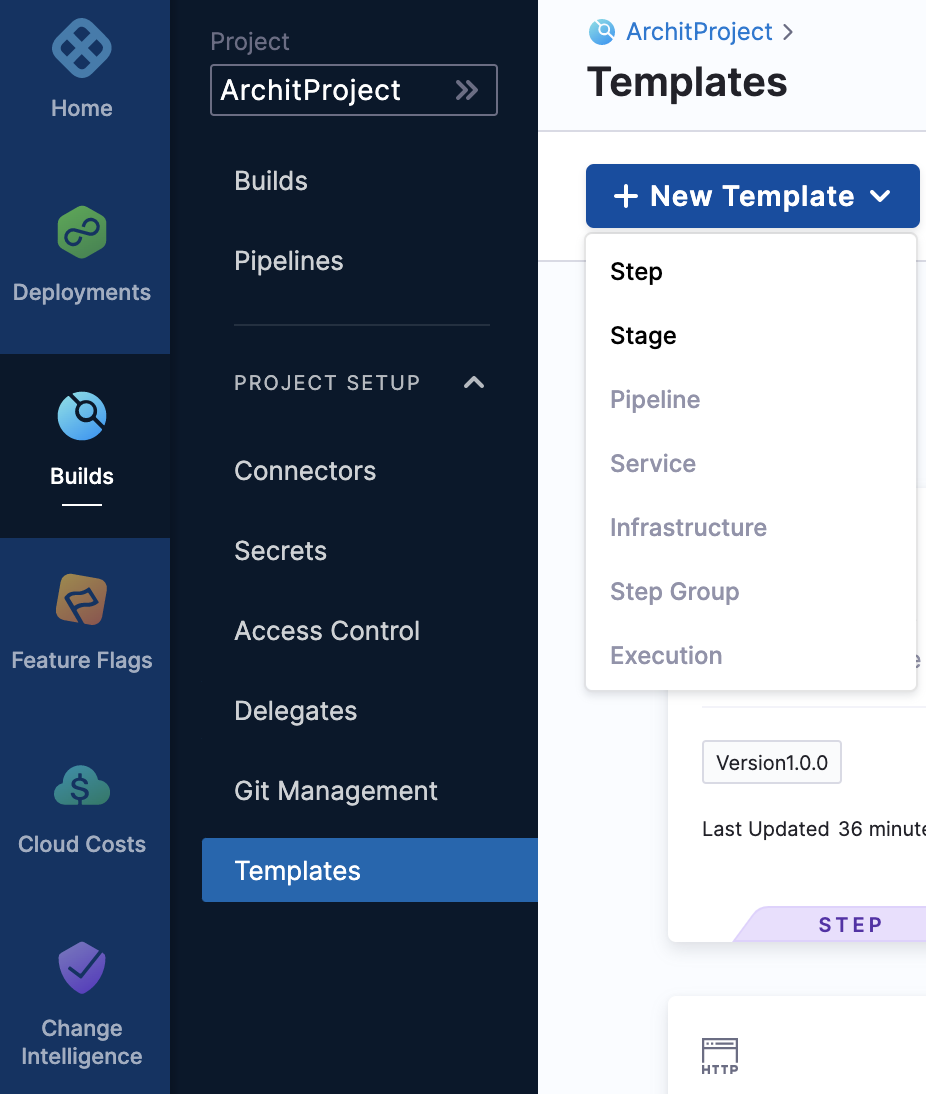
Select Step to create a step template.
The Create New Step Template settings appear.
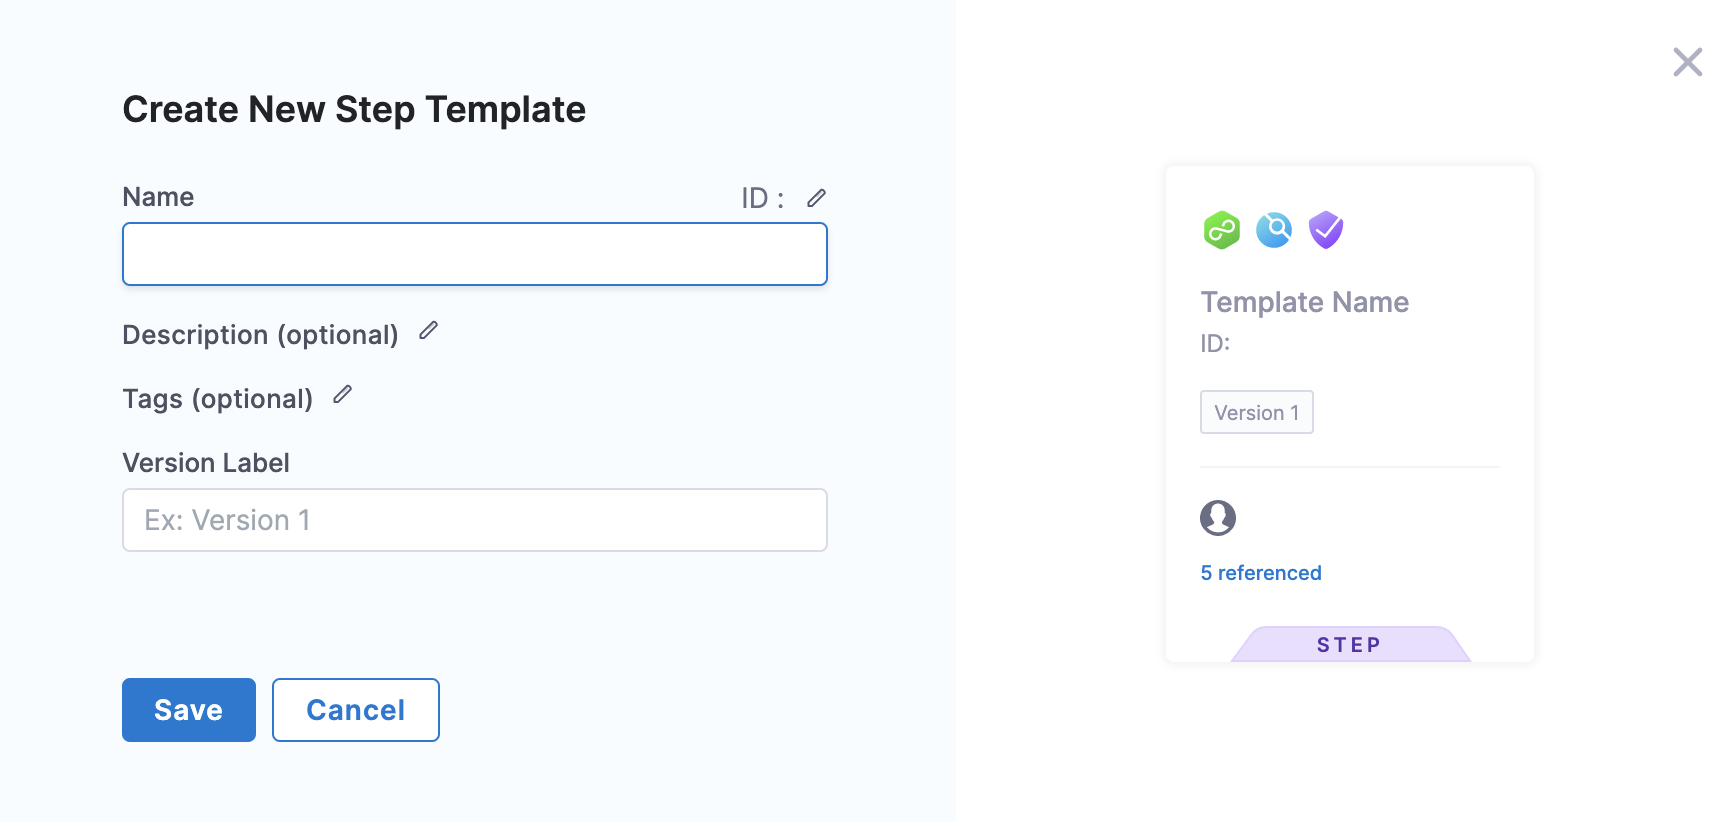
In Name, enter a name for the template, for example
Quickstart.In Version Label, enter a name for the version of the template, for example
V1.Select Save. The Step Library panel opens.
Step 2: Add step parameters
To add step parameters, do the following:
Follow the steps above to create a template.
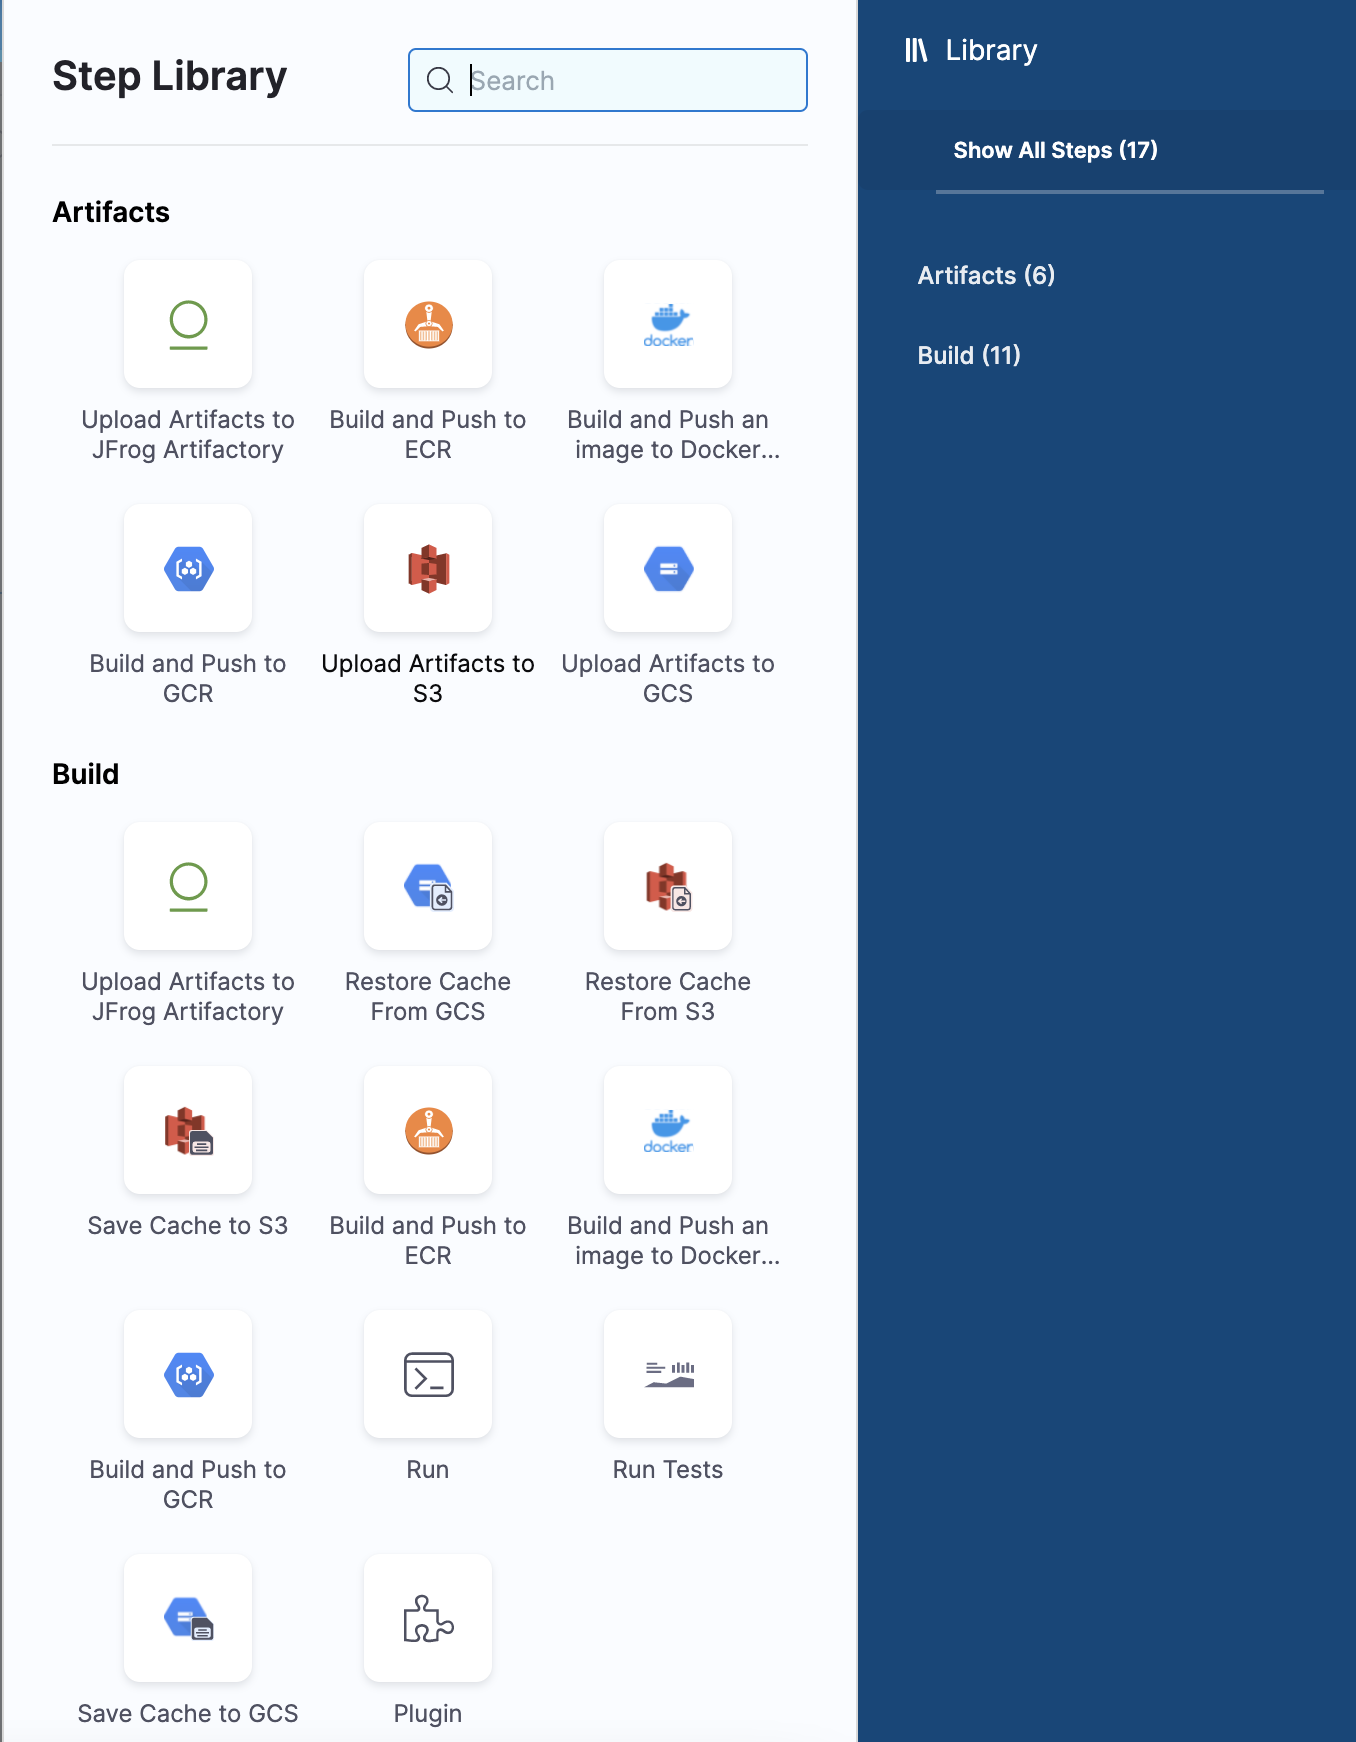
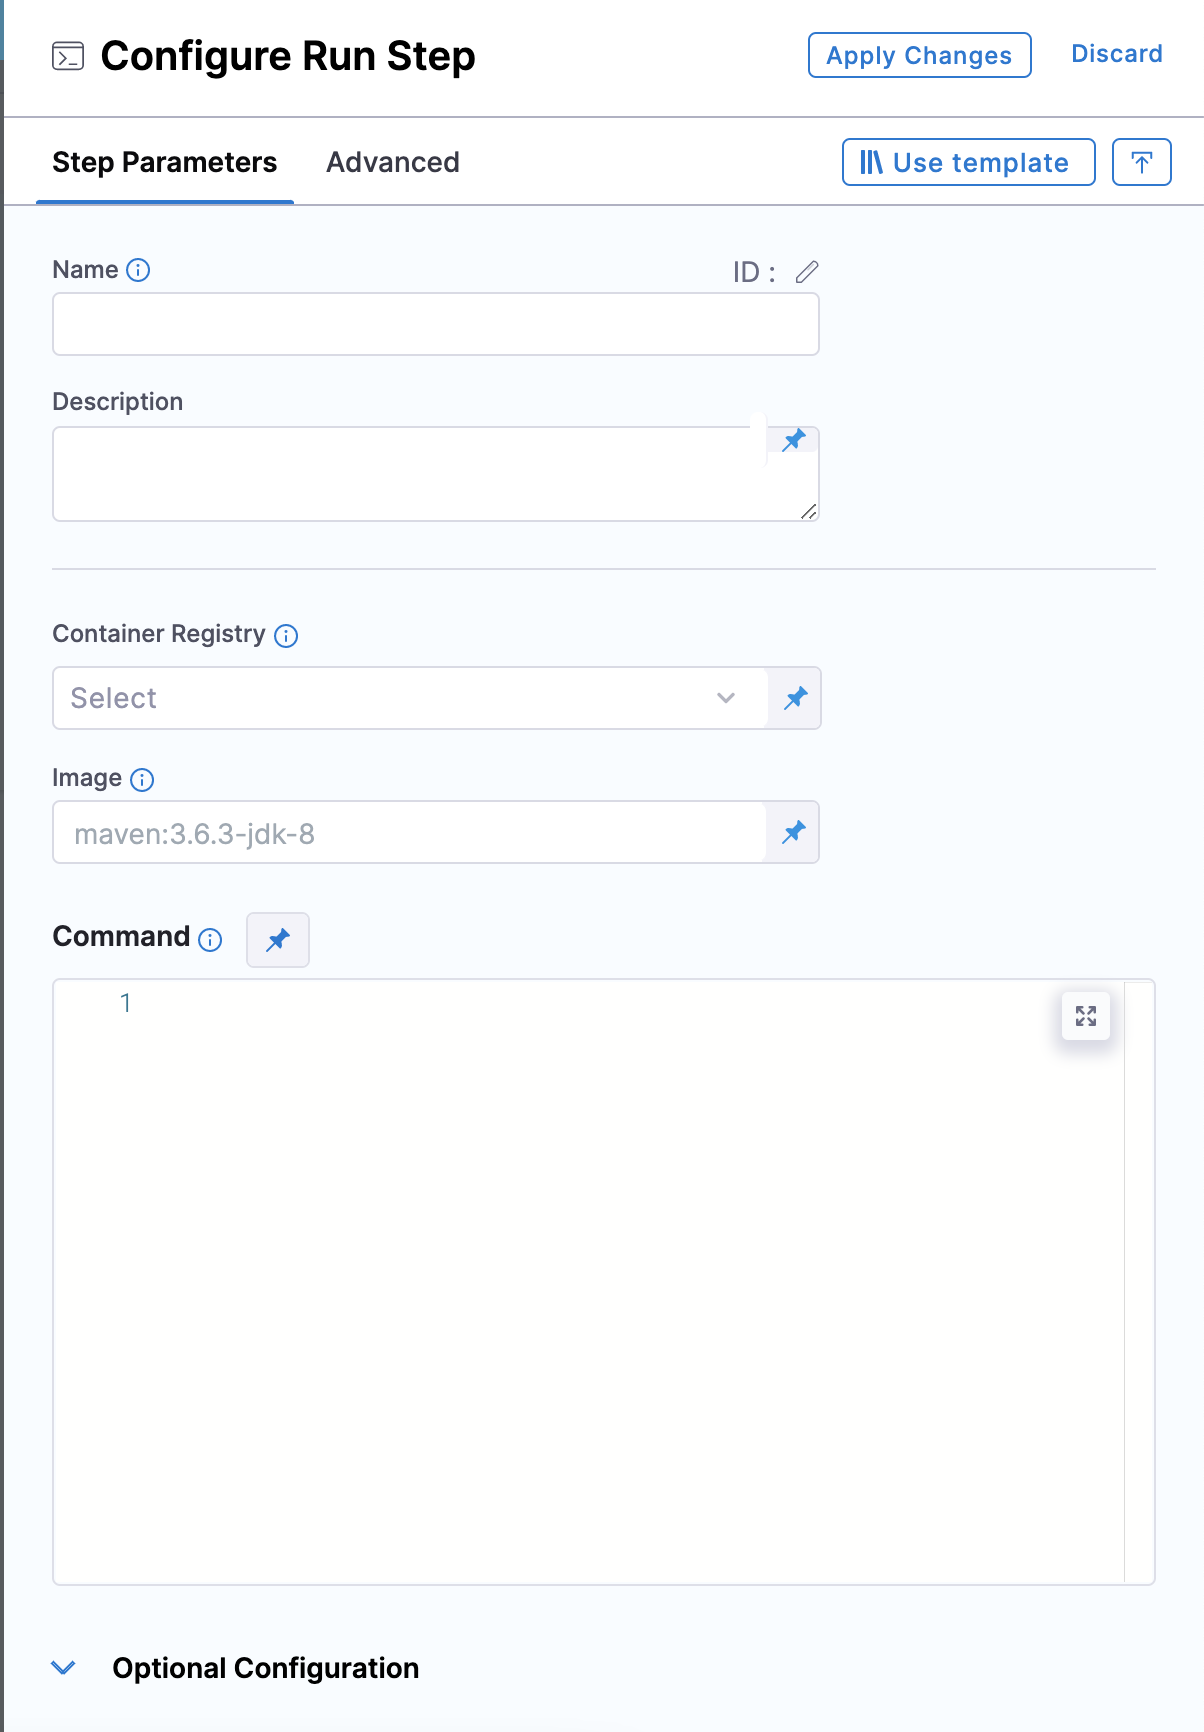
In Step Library, select Run under Build.
The Step Parameters settings appear.
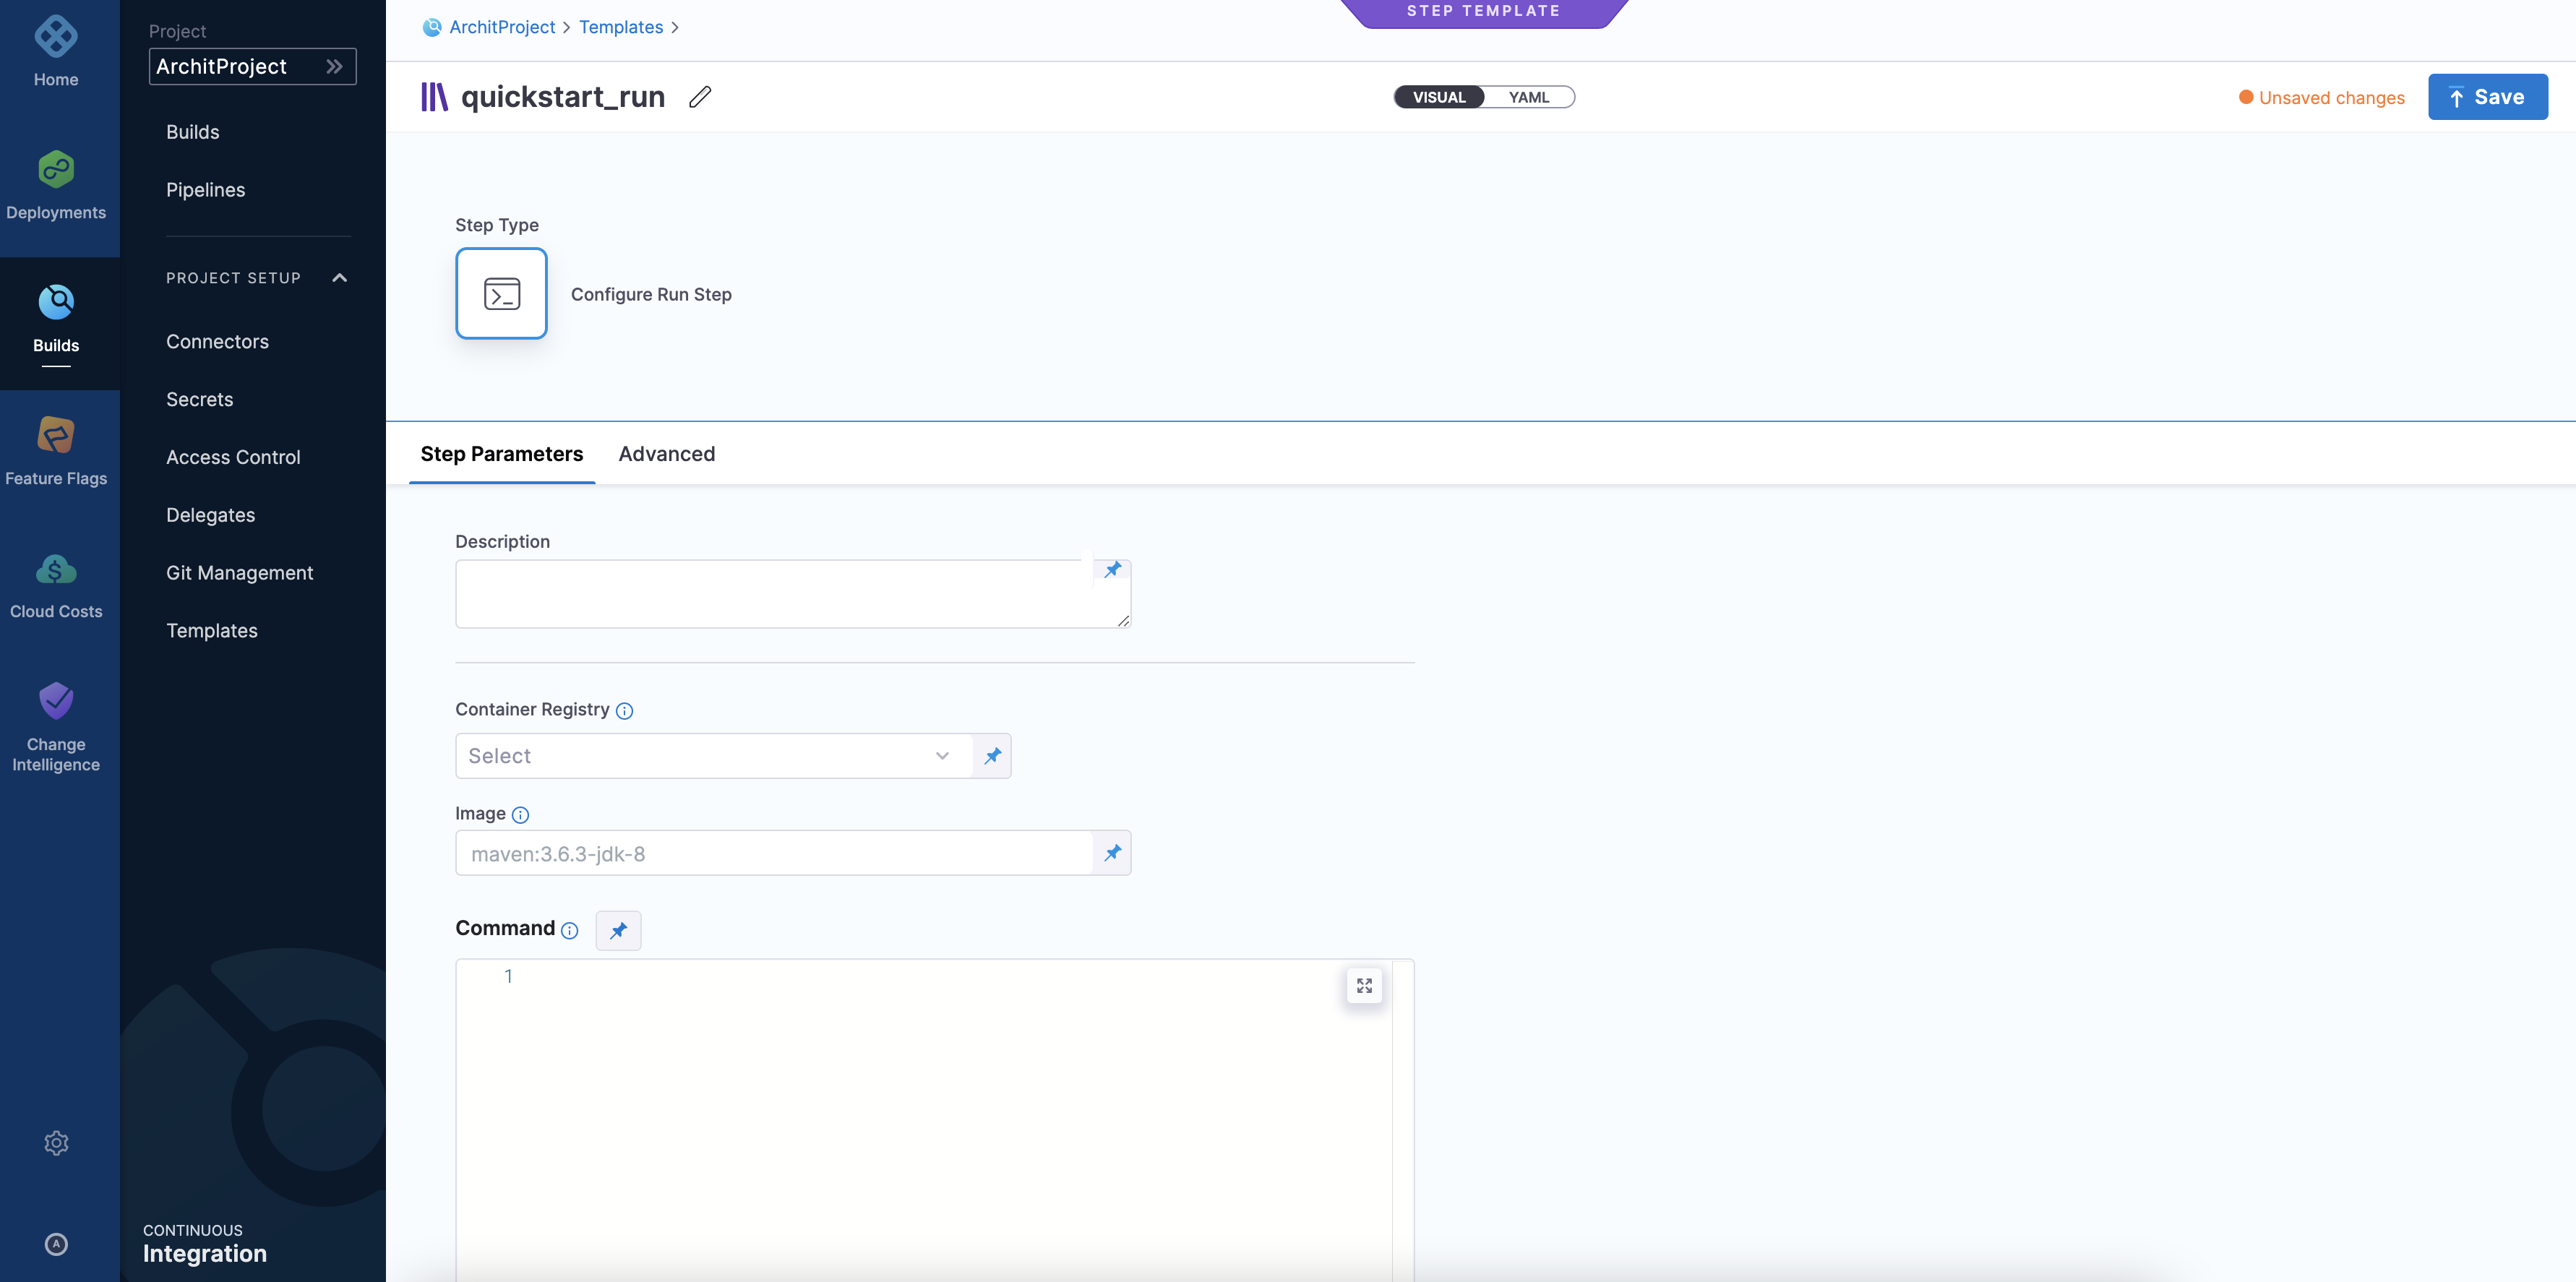
Select Container Registry, and then select Runtime input, which lets you add values when you start a pipeline execution.
In Image, select Runtime input. You can use any Docker image from any Docker registry, including private registries.
In Command, select Runtime input.
Select Save. The new template appears under the Templates list.
Use Runtime Inputs instead of variable expressions: when you want to template settings in a Stage or step template, use Runtime inputs instead of variable expressions. When Harness tries to resolve variable expressions to specific stage-level settings using fully-qualified names, it can cause issues at runtime. Every pipeline where the stage or step template is inserted must utilize the exact same names for fully-qualified name references to operate. With runtime inputs, you can supply values for a setting at deployment runtime.
Step 3: Add the run step template to a pipeline
To add the run step template to a pipeline, do the following:
Follow the steps above to create a template.
Go to your pipeline, and then select Add Step.
The Step Library panel opens.
In Step Library, select Run under Build. The Configure Run Step settings appear.
Select Use Template. The next page lists all the project-level templates.
Select the template that you created.
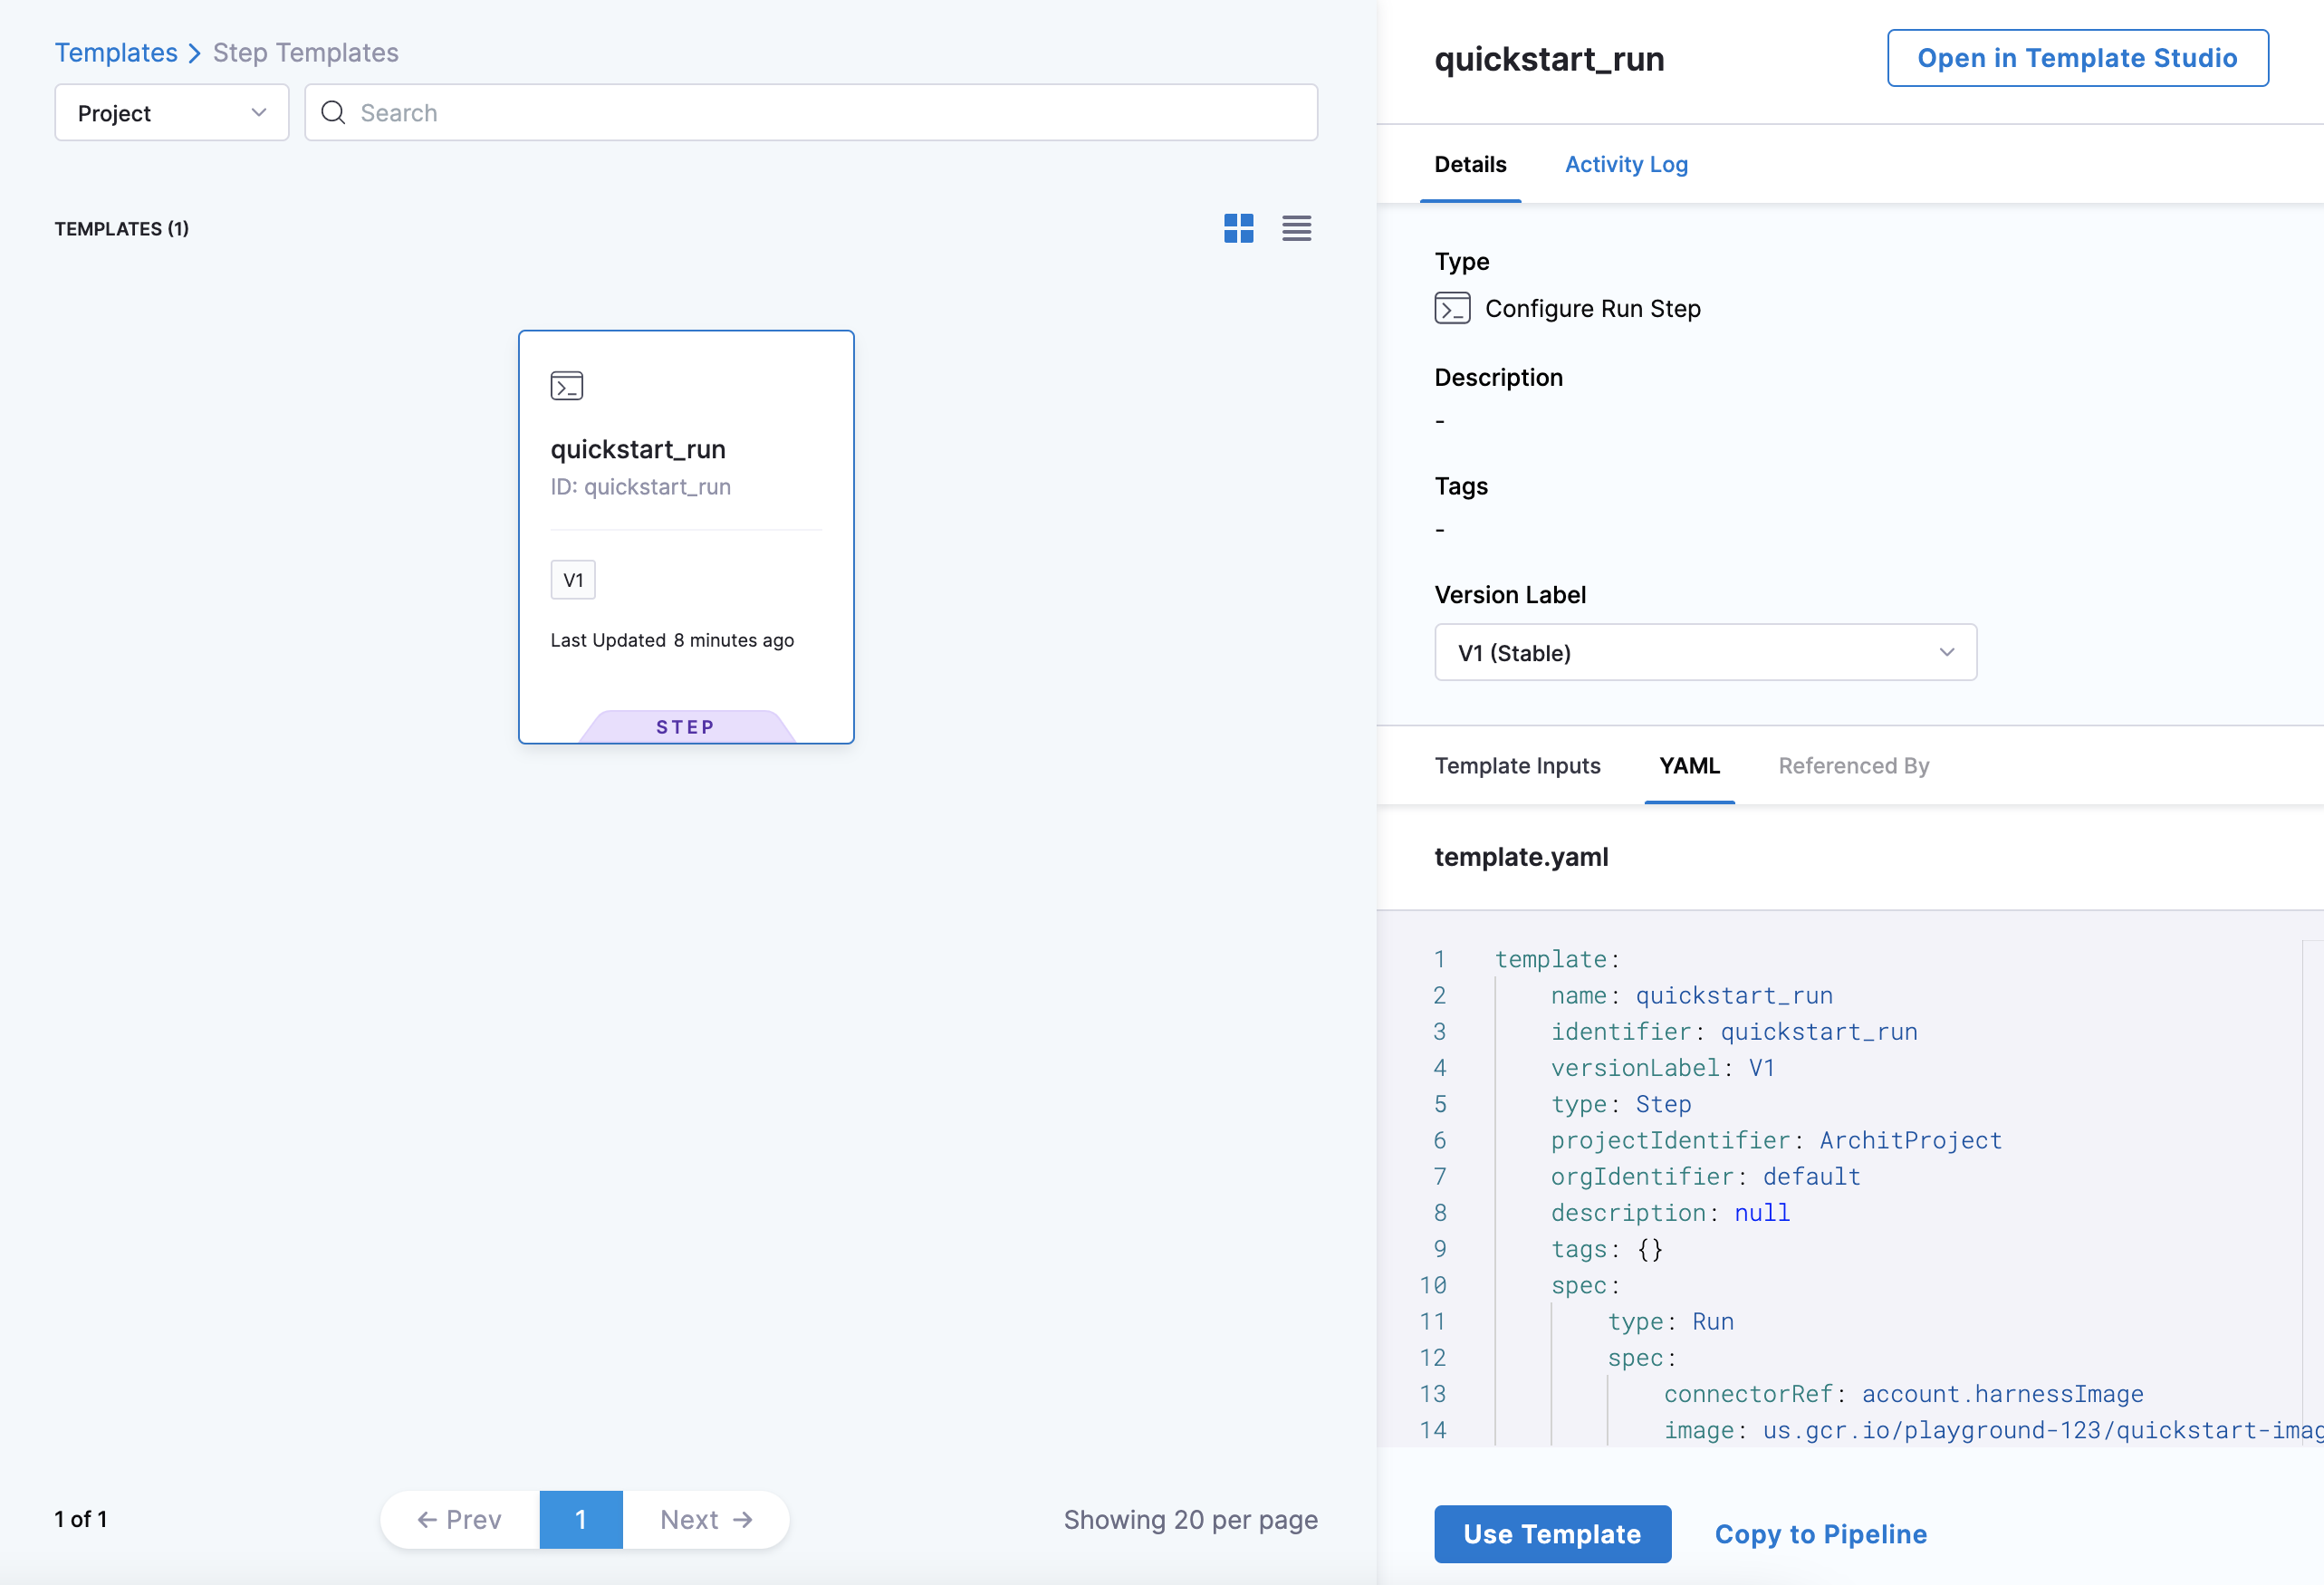
Select the Activity Log to track all template events. It shows you details like who created the template and template version changes.
In Details, from the Version Label list, select Always use the stable version. This ensures that any changes that you make to this version are propagated automatically to the pipelines using this template.
Select Use Template.
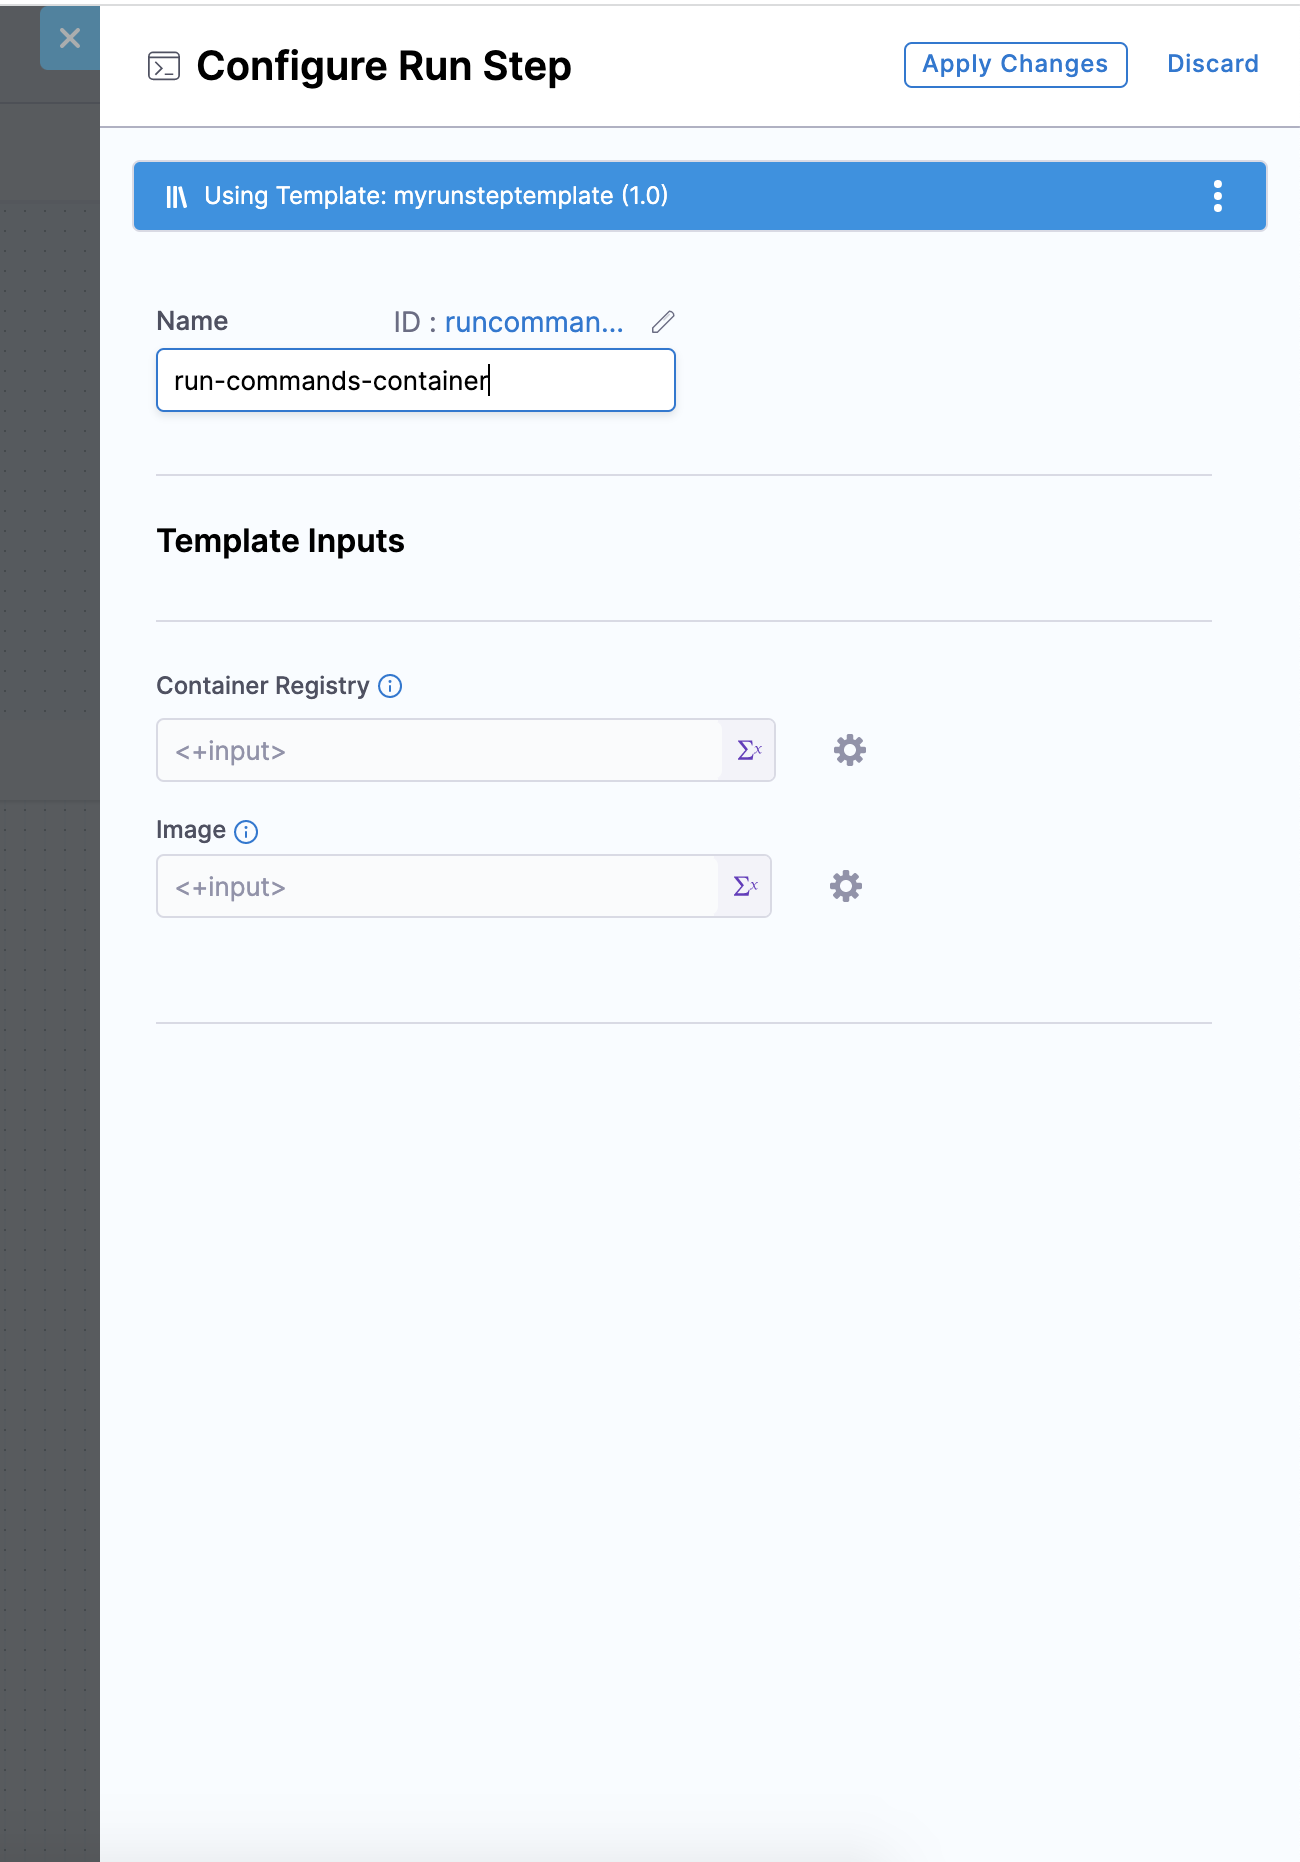
In Container Registry, select Runtime input.
In Image, select Runtime input.
In Command, select Runtime input.
Select Apply Changes.
Click Save.