Create a stage template
The Harness Template Library enables you to standardize and create templates that you can use across Harness Pipelines and teams.
A stage template is a Harness CD, CI, or approval stage template that you can use in any pipeline in any project.
This topic walks you through the steps to create a CD stage template, but the steps are the same for the other stage types.
Objectives
You'll learn how to:
- Create a deploy stage template.
- Define stage template parameters.
- Use the deploy stage template in a pipeline.
Before you begin
- Review Templated overview.
- Review Harness Key Concepts to establish a general understanding of Harness.
- The stage template in this quickstart is added to a CD Pipeline. If you are new to Harness CD, go to CD Quickstarts.
- You can also create CI Build Stage Templates and Manual and Jira Approval Stage Templates. Go to CI tutorials, Using manual Harness approval stages, and Adding Jira approval stages and steps.
- The stage template in this quickstart uses runtime inputs. Runtime inputs are placeholders for values that will be provided when you start a pipeline execution. Go to Fixed values, runtime inputs, and expressions.
Review: Templates
- You can add templates to template libraries at any scope.
- Tags can be used to group templates. You can search or filter templates using these tags.
- You can have nested templates. You can refer to a stage template from your pipeline template.
Step 1: Create a template
First, we'll create a project-level template in the Deployments module. You can do this in any project.
To create a template, do the following:
In Harness, navigate to the Deployments module.
In Projects, select the desired project.
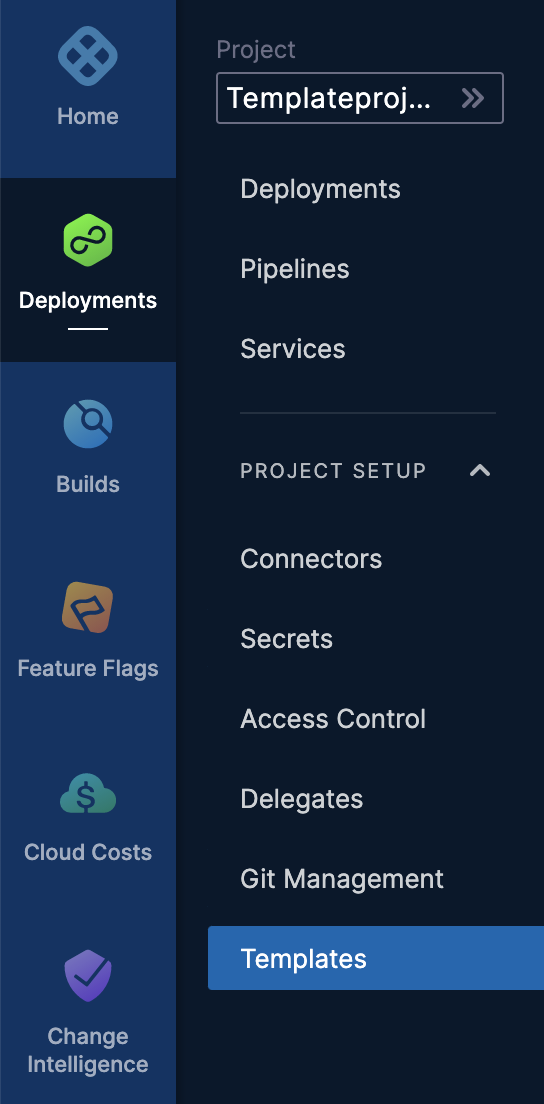
Select Templates under Project Setup.
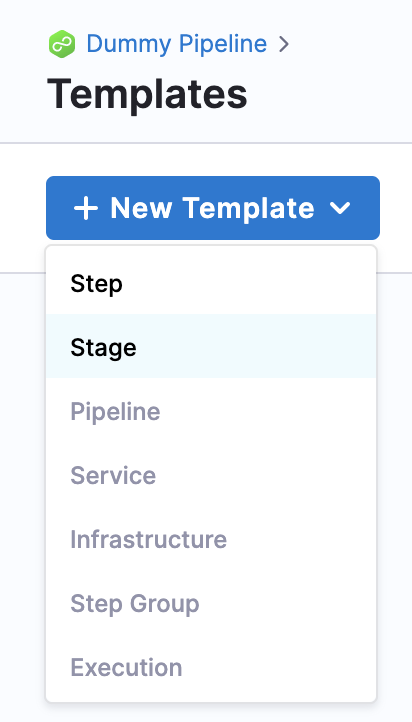
Select New Template.
Select Stage to create a stage template.
The Create New Stage Template settings appear.
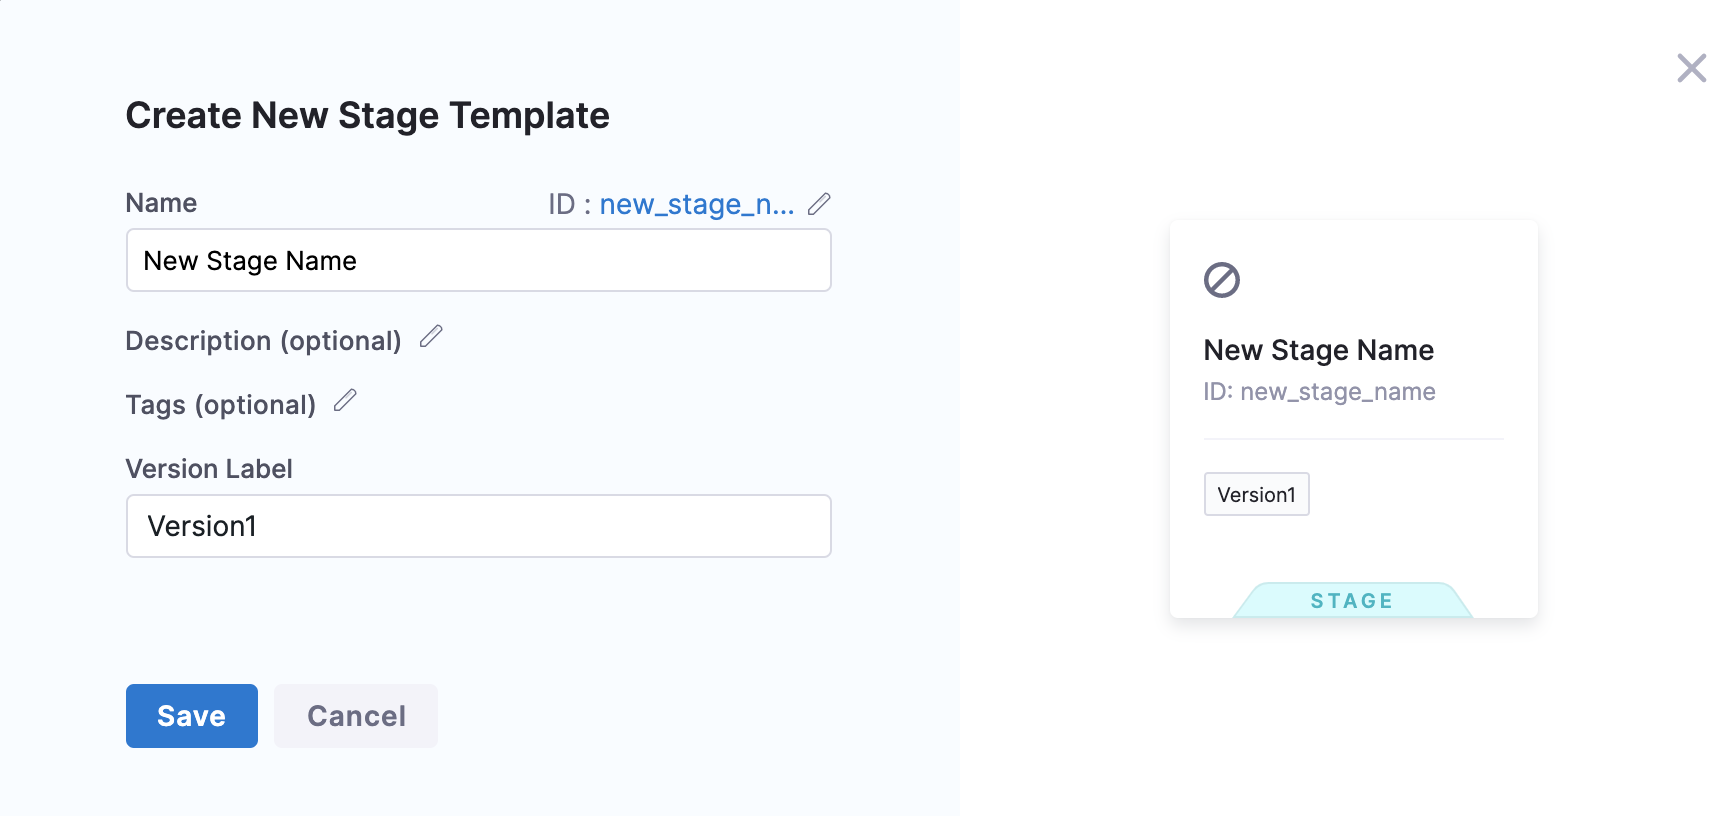
In Name, enter a name for the stage, for example
Quickstart.In Version Label, enter the version of the stage, for example
v1.Select Save.
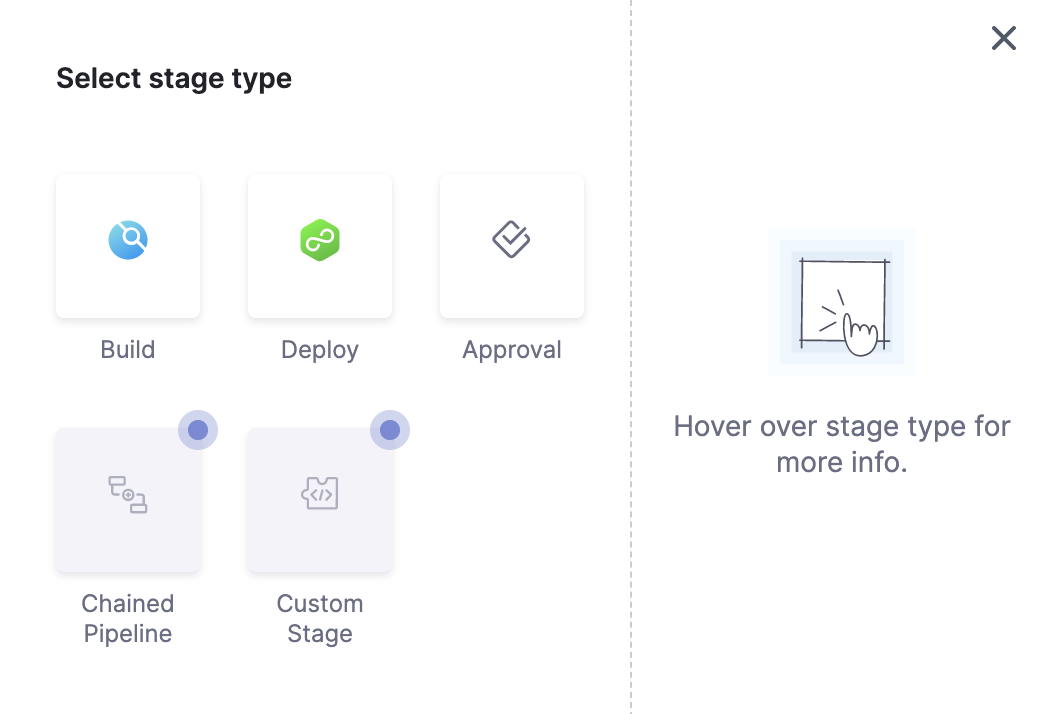
Select stage type settings appear.
You can now add stage parameters.
Step 2: Add stage parameters
To add stage parameters, do the following:
Follow the steps above to create your template.
In Select stage type, select Deploy. The deploy stage type is a CD stage that enables you to deploy any service to your target environment. Other options include Build for CI and Approval for manual and Jira approval stages.
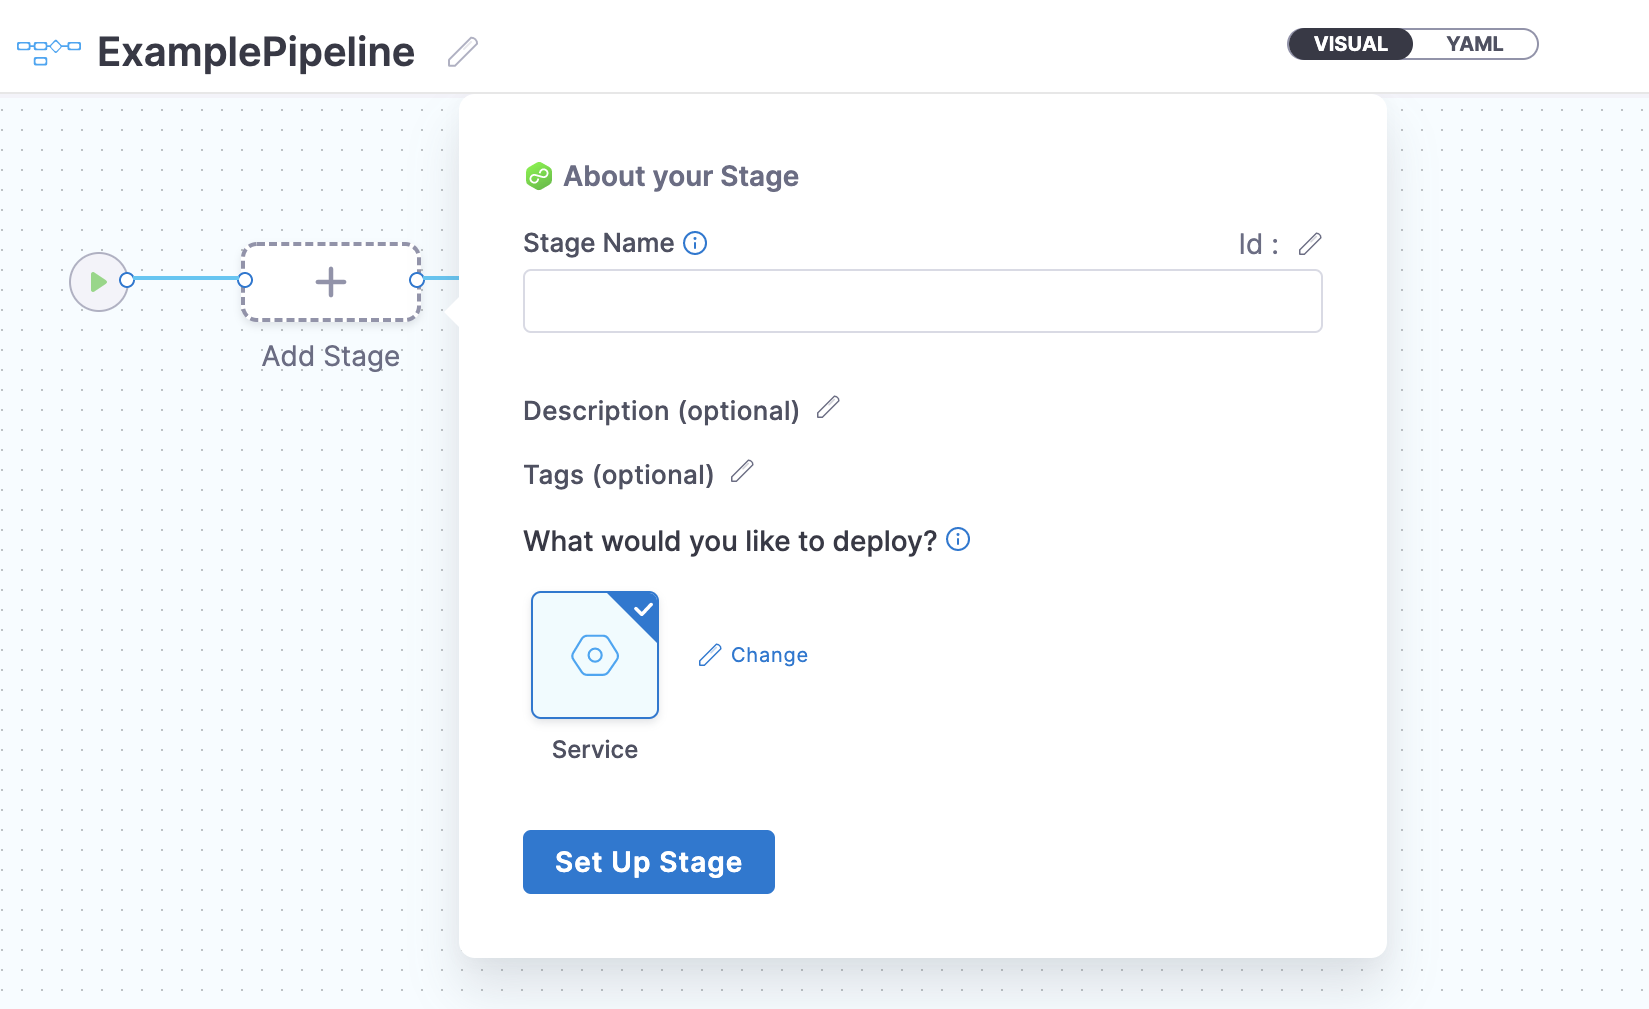
The About Your Stage settings appear.
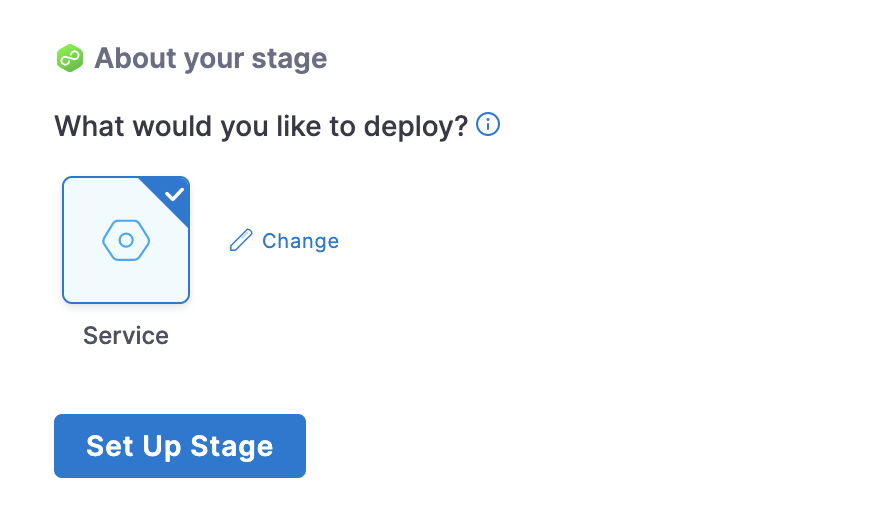
Select the type of deployment this stage must perform. Service is selected by default. A stage can deploy services and other workloads.
Select Set Up Stage. The Template Studio page appears.
In Specify Service, select Runtime input.
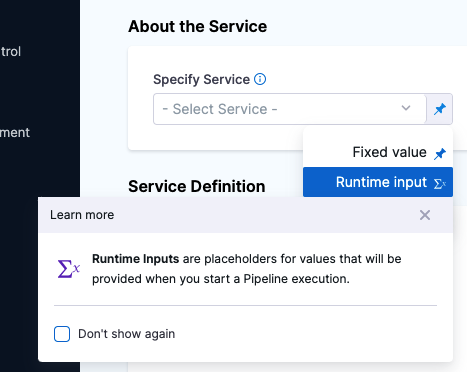
Harness Services represent your microservices or applications logically. You can propagate the same service to as many stages as you need.
Use Runtime Inputs instead of variable expressions: when you want to template settings in a stage or step template, use Runtime Inputs instead of variable expressions. When Harness tries to resolve variable expressions to specific stage-level settings using fully-qualified names, it can cause issues at runtime. Every pipeline where the stage or step template is inserted must use the same names for fully-qualified name references to operate. With runtime inputs, you can supply values for a setting at deployment runtime. In Deployment Type, Kubernetes is selected by default. Deployment Type defines how your Service will be deployed.
Select Next.
In Specify Environment, select Runtime input. Environments represent your deployment targets logically (QA, Prod, etc). You can add the same environment to as many stages are you need.
In Infrastructure Definition, select Kubernetes. Infrastructure Definition represents your target infrastructure physically. They are the actual clusters, hosts, etc. By separating environments and infrastructure definitions, you can use the same environment in multiple stages, while changing the target infrastructure settings with each stage.
Under Cluster Details, select Runtime input in both Connector and Namespace fields. The namespace must already exist during deployment. Harness will not create a new namespace if you enter one here.
Select Next. The Execution Strategies dialog appears.
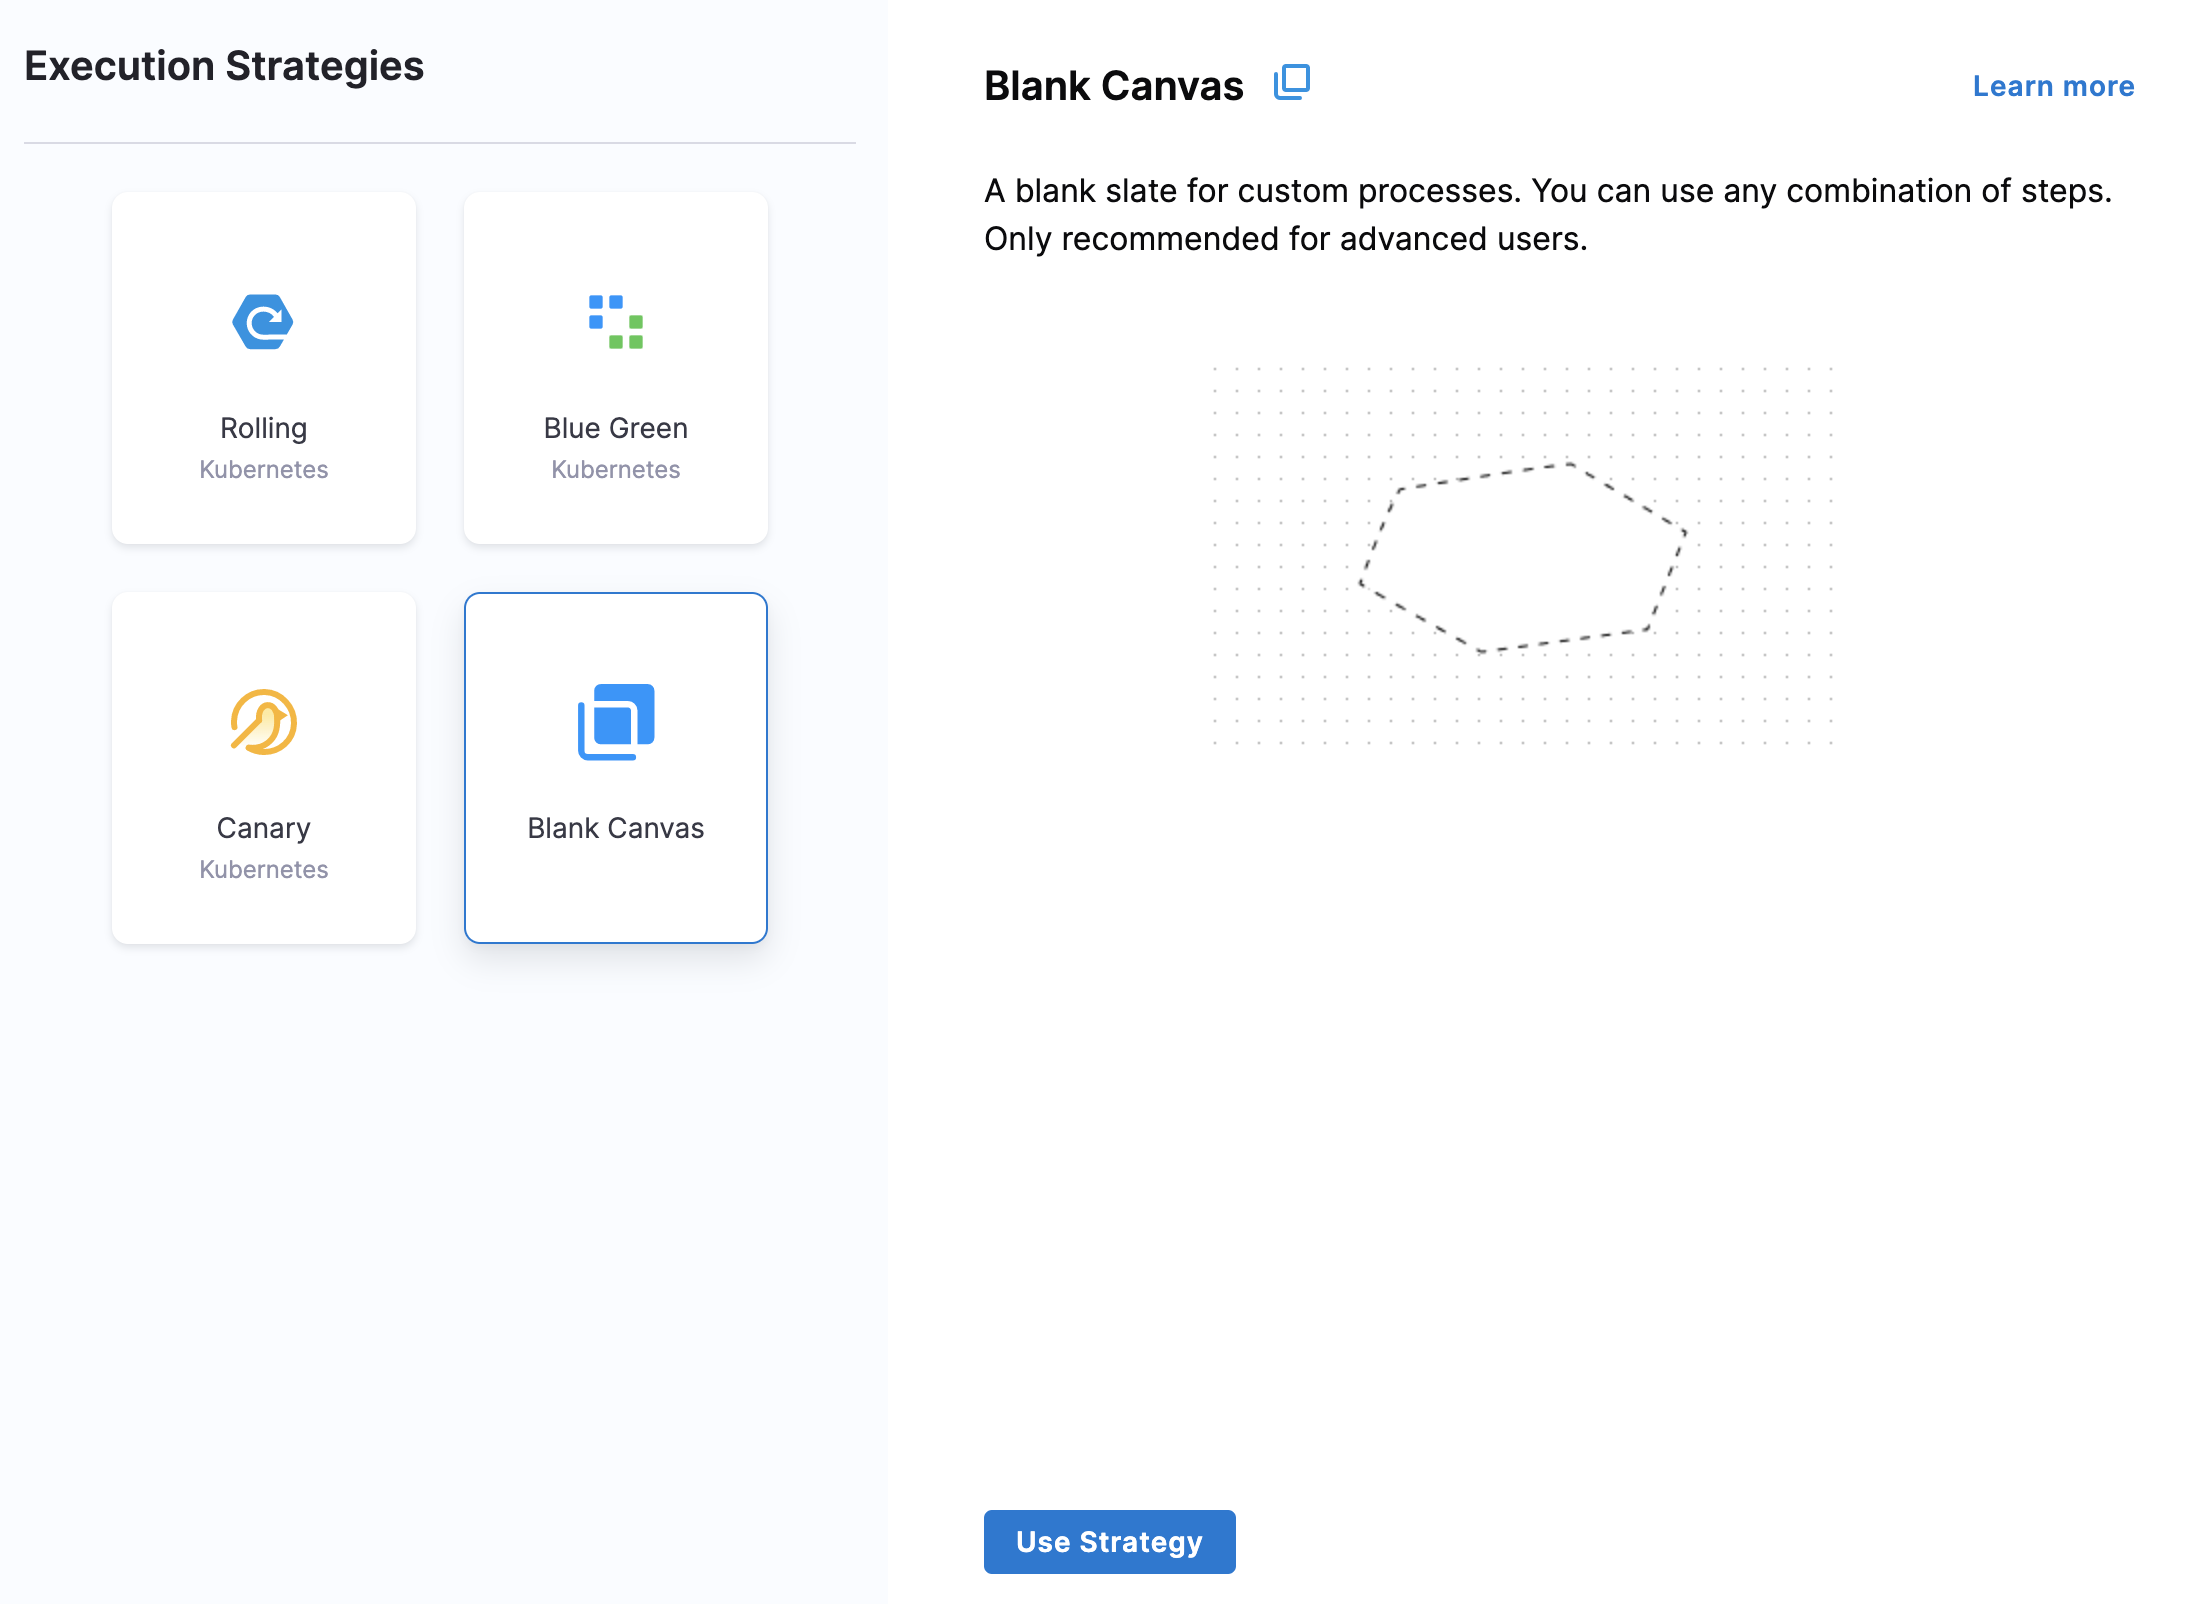
Select Rolling, and then select Use Strategy.
In Execution, you can see the Rollout Deployment step is added automatically.
Your template is now ready.
Select Save, add a comment, and then select Save again.
The template is published successfully.
Option: Variables
You can add variables to your template as needed.
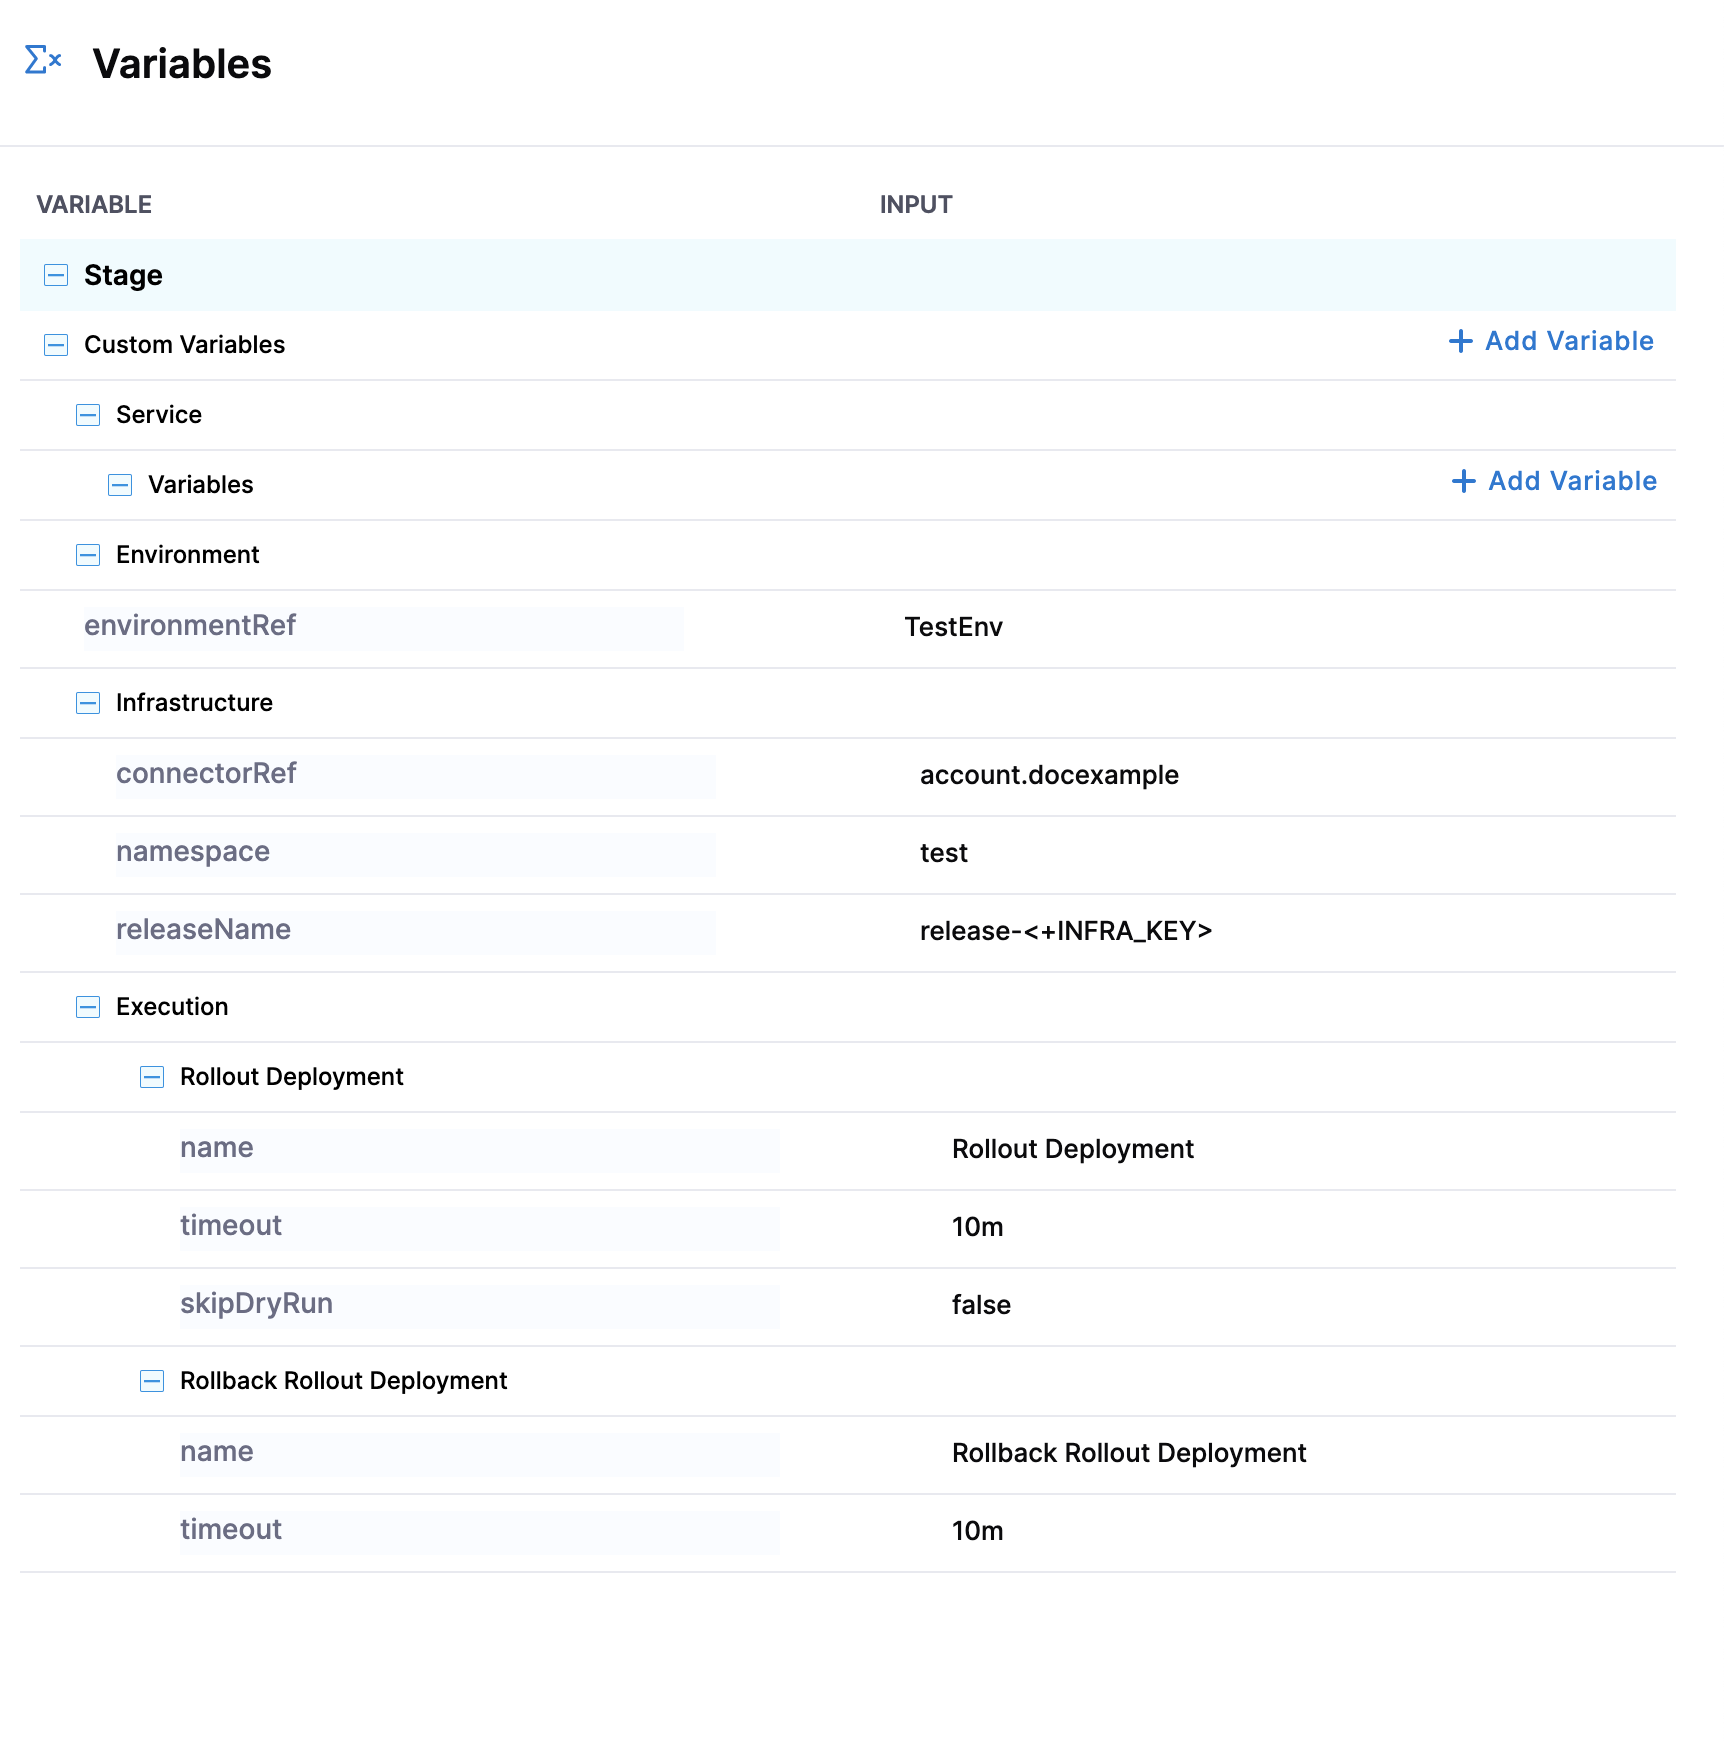
You can add the following types of values to your variables:
- Fixed values: These cannot be overridden.
- Default values in the Template: These can be overridden.
- Expressions: These can be provided during consumption or at runtime.
- Combination of variables and fixed values: These variables will be automatically created as part of the template.
Step 3: Add the stage template to a pipeline
You can use the CD stage template in any pipeline in your project.
To add a stage template to a pipeline, do the following:
In Harness, open the pipeline, and then select Add Stage.
The Select Stage Type settings appear.

Select Use Template. The next page lists all the project-level templates.
Select the Quickstart template that you created.
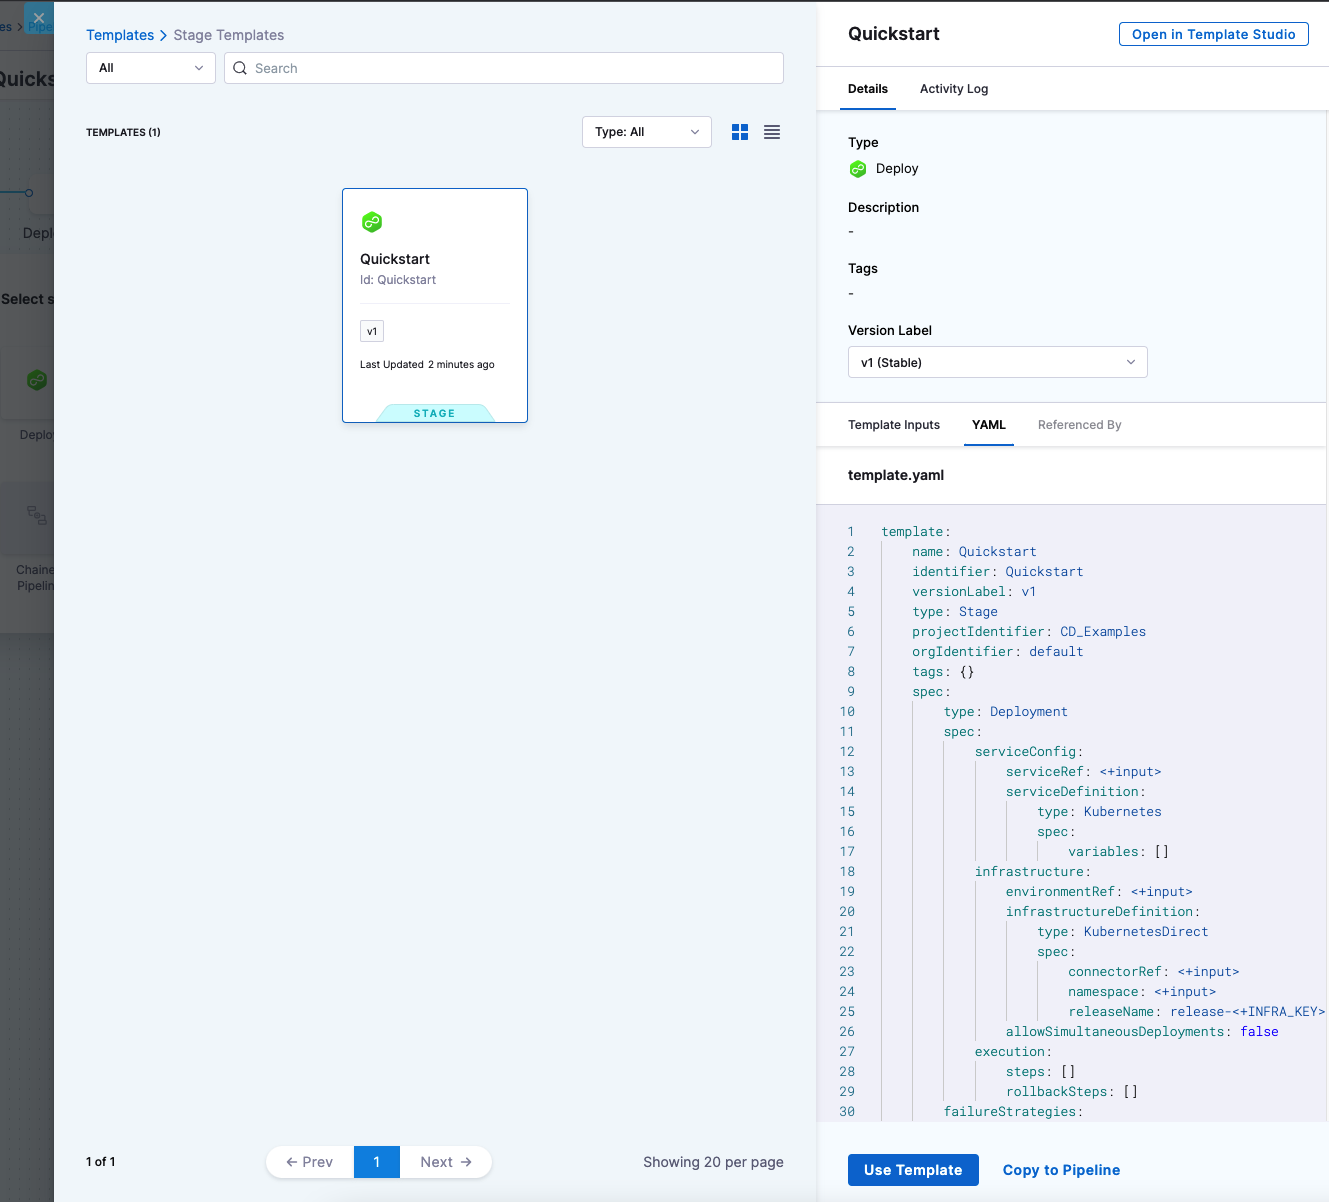
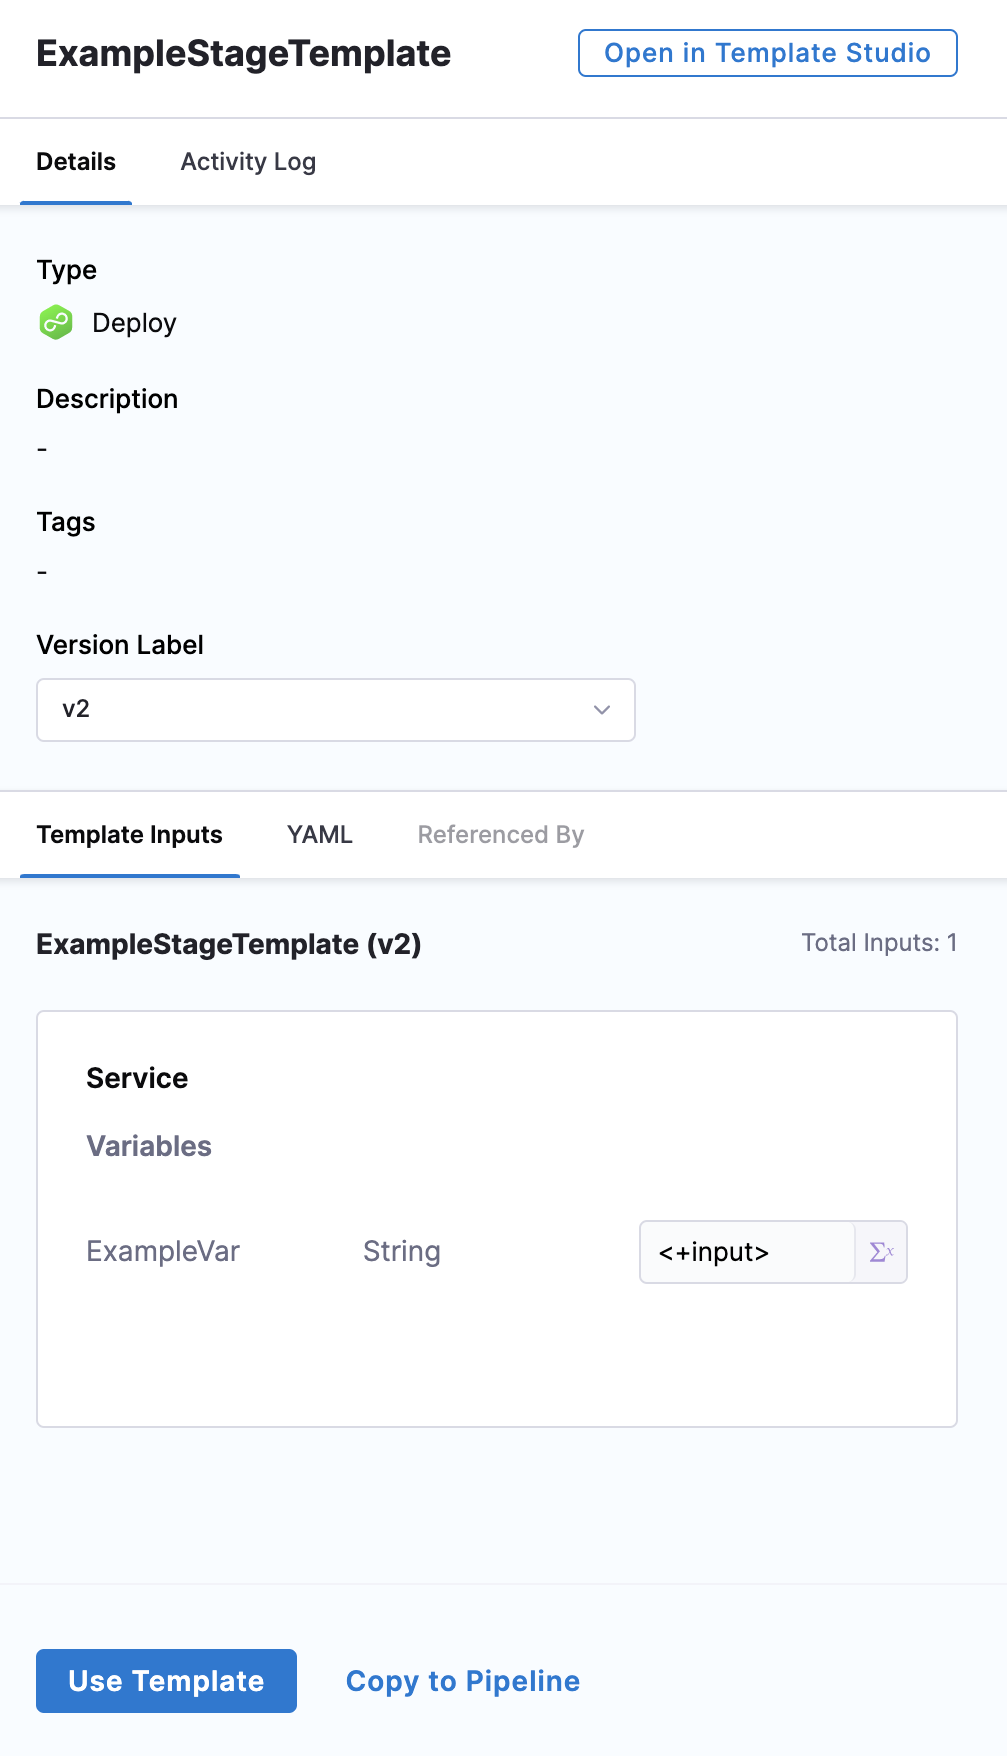
Click the Activity Log to track all template events. It shows you details like who created the template and template version changes.
In Details, from the Version Label list, select Always use the stable version.
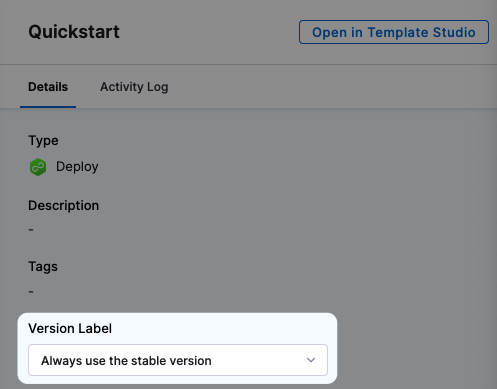
Selecting this option ensures that any changes that you make to this version are propagated automatically to the pipelines using this template.
Select Use Template.
The About your stage dialog opens. Enter Quickstart, and then select Set Up Stage.
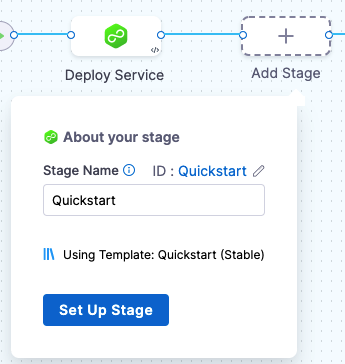
The template stage is added to your pipeline.
The stage is added and not copied by the template icon in the stage.
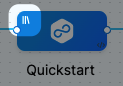
If you had used Copy to Pipeline, this icon would not be there, and you could change settings in the stage.
You can now enter all the Runtime Inputs for this Pipeline execution.
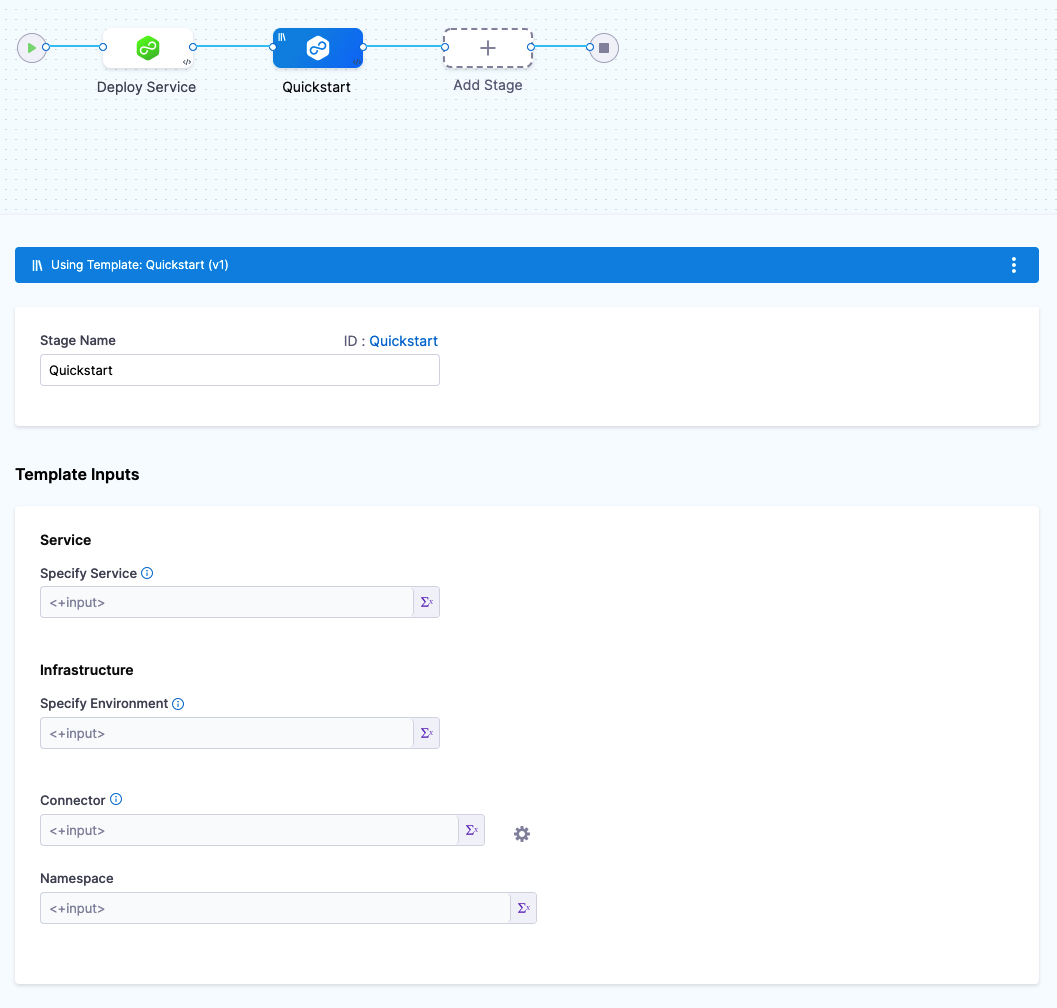
Select Save.
You'll notice that you can change and remove the template as needed.
Option: Copy to pipeline
You can copy the contents of a specific template to your pipeline using the Copy to Pipeline option. This does not add any reference to the template. Copying a template to a pipeline is different from linking a template to your pipeline. You can't change any stage parameters when you link to a template from your pipeline.
To copy a template to your pipeline, do the following:
In Harness, go to your pipeline.
Select Add Stage.
The Select Stage Type settings open.
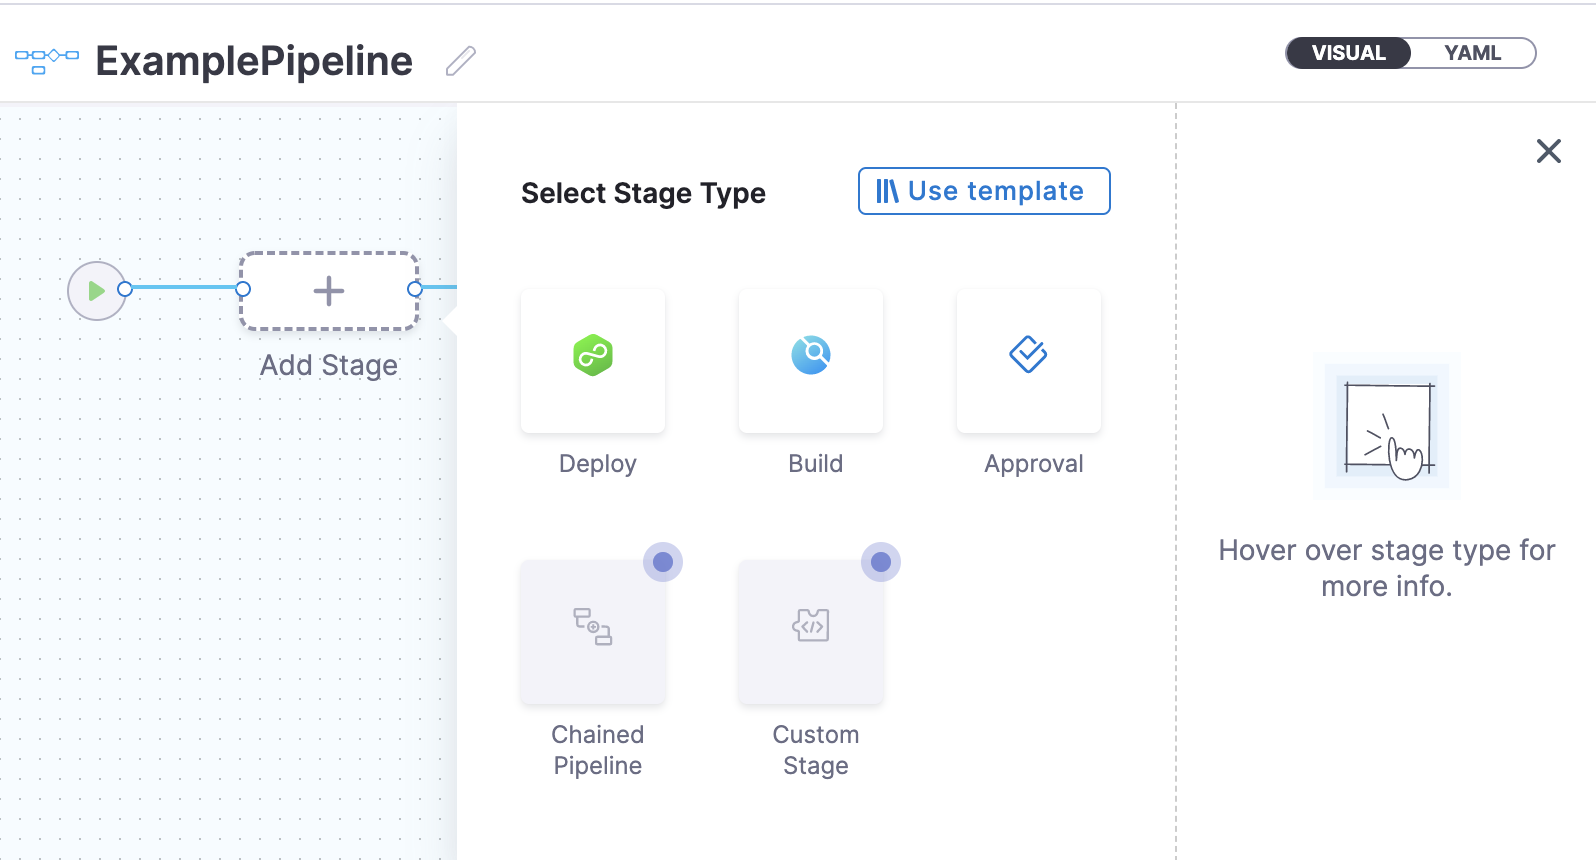
Select Use Template, and then select the template you want to copy.
Select Copy to Pipeline.
Enter a name for your stage, and then select Set Up Stage.
The template contents are copied to your pipeline stage. You can change any settings in the stage that you have copied from a template.