Windows VM deployments using WinRM
You can use Windows Remote Management (WinRM) to deploy your artifacts to Windows VM or bare-metal hosts located in Microsoft Azure, AWS, or any platform-agnostic Physical Data Center (PDC). Harness connects to your target Windows instances using the WinRM protocol and executes PowerShell commands to deploy your artifact.
In this topic, we will deploy a .zip file to an AWS EC2 Windows instance using Harness. We will pull a publicly-available .zip file from Artifactory and deploy it to an EC2 Windows instance in your AWS account by using the Basic execution strategy.
Harness connects to your target Windows instances using the WinRM protocol and executes PowerShell commands to deploy your artifact.
For WinRM, you can access artifacts from Jenkins, Artifactory, Custom, Nexus and Amazon S3.
The Execution Strategies supported for WinRM include Blank Canvas, Basic, Rolling, and Canary.
Supported security protocols for WinRM include Kerberos and Windows New Technology LAN Manager (NTLM).
Harness File Store should be enabled if you want to upload Config files from the file store.
Before You Begin
- Review Harness Key Concepts Harness Key Concepts to establish a general understanding of Harness.
- Make sure that you have a Delegate available in your environment.
- You can install a Kubernetes or Docker Delegate.
- Ideally, you should install the Delegate in the same subnet as the target host(s)
- Target host — In this guide, we use an AWS EC2 instance as the target host.
- Credentials and other details for the EC2 Instance
- To configure and authenticate your WinRM credentials by using NTLM, you should have the domain name, username and password for the EC2 instance.
Objectives
You will learn how to:
- Create a Harness WinRM service by using Windows New Technology LAN Manager (NTLM)
- Set up a Harness Artifactory Connector
- Add credentials needed to connect to the target host
- Define the target infrastructure for deployment (AWS hosts)
- Select the Basic deployment strategy
- Add the required commands for the execution
- Run the Pipeline and review
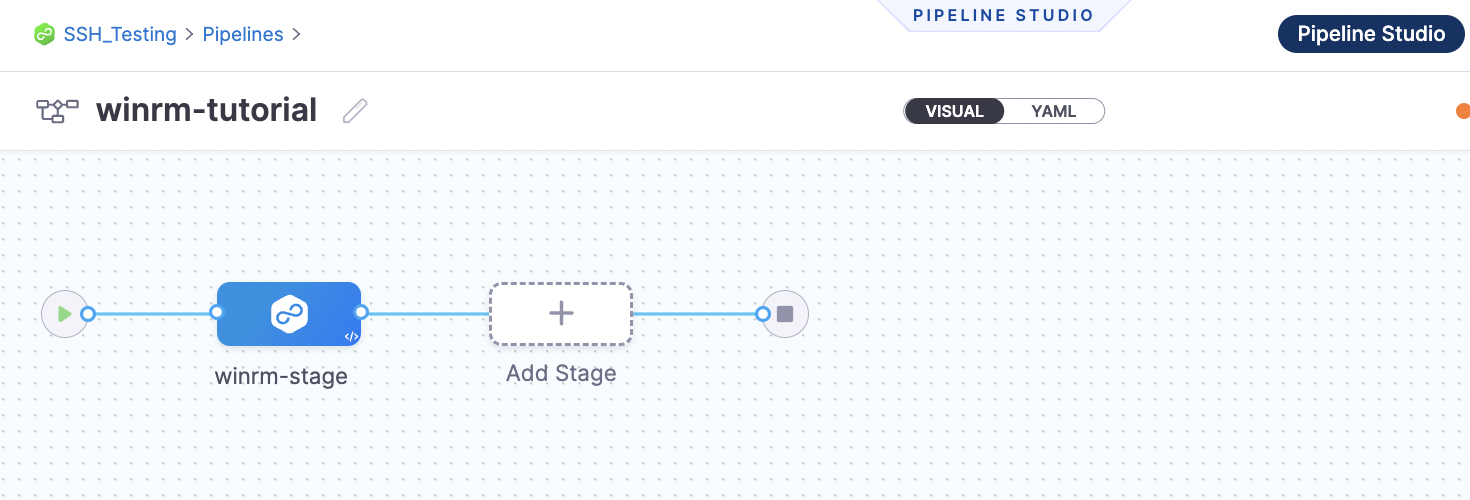
Create the Deploy Stage
Pipelines are collections of stages. In this tutorial, we will create a new Pipeline and add a stage for WinRM deployments of artifacts to a target host.
- In your Harness project, click Pipelines, and then Create a Pipeline.
- Enter a name for the pipeline: winrm**-tutorial. Keep the default Inline (Pipeline is stored in Harness) for How do you want to set up your pipeline**.
- Click Start and your pipeline appears.
- Click Add Stage.
- For Select Stage Type, select Deploy.
- For Stage Name, enter: winrm**-stage.**
- For Deployment Type, select WinRM and click Set Up Stage.
Create a Harness WinRM Service
Next, you will create a Harness Service that represents your application. Once you have created a Service, it is persistent and can be used throughout the stages of this or any other Pipeline in the Project.
The Harness WinRM Service contains the application package artifact (file or metadata) and the related config files to deploy on the target host.
Let's create the Service for an application artifact.
- For Select Service, click New Service, enter a name for the service: winrm-service**.** You will use this name when selecting this Service in Harness Environments.
- For Service Definition, in Deployment Type, select WinRM and click Continue.
Add the Artifactory Connector
Harness includes Connectors for all the major artifact repositories. In this tutorial, we will use a todolist.zip file, available in a public Harness Artifactory repo.
In Artifacts, click Add Primary Artifact.
In Specify Artifact Repository Type, select Artifactory and click Continue.
For the Artifactory Connector, select New Artifactory Connector.
In Name, enter a name for the connector: artifactory-connector and click Continue.
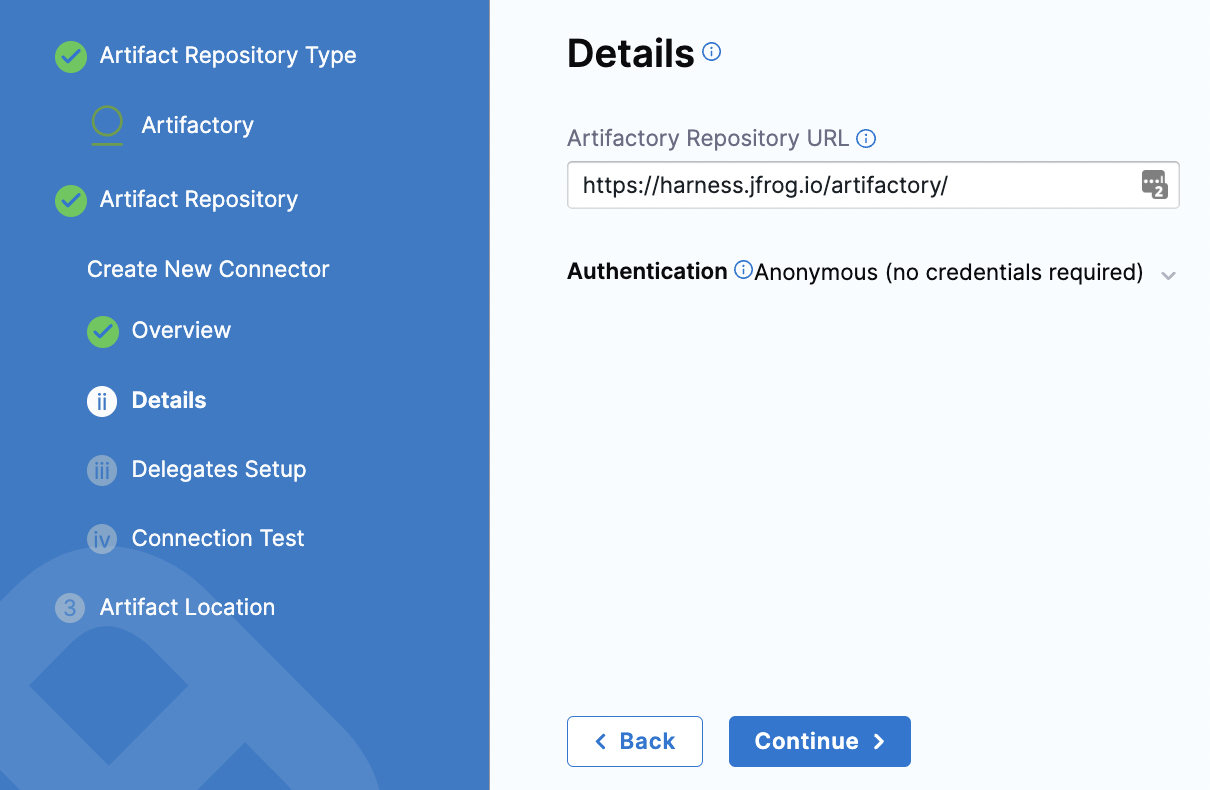
In Details, enter the following URL path for Artifactory Repository URL or click the tooltip and copy the URL: https://harness.jfrog.io/artifactory. In this tutorial, we will use the artifacts stored in that repository.
For Authentication, click the down-drop arrow for Username and Password. Then, select Anonymous (no credentials required). Click Continue.
Click Continue to connect with Artifactory by using a Harness Delegate.
In Delegates Setup, retain the default selection: Use any available delegate.
Click Save and Continue.
In Connection Test, Harness validates the Artifactory Repository authentication and permissions for the repo. Click Continue. If the test fails, that means the Delegate can't connect to https://harness.jfrog.io/artifactory/. Make sure that the EC2 instance hosting the Delegate can make outbound connections to https://harness.jfrog.io/artifactory/.
Set up Artifact Location and Details
For this tutorial, we'll use a ToDo List app artifact, todolist.zip, available in a public Harness Artifactory repo.
- In Artifact Details, for Repository Format, keep the default value Generic.
- For Repository, enter: todolist-tutorial. Note that if you select the down-drop menu for Repository, Harness loads any available repositories and displays them for selection.
- for Artifact Directory, enter a forward slash /.
- For Artifact Details, keep the default Value.
- For Artifact Path, leave the default Runtime Input value <+input> for that field. Click Submit. The Artifactory Connector is added to Artifacts. Click Continue.
Add the Target Infrastructure for the Physical Data Center
Create the Infrastructure Definition for the target host.
- In Specify Environment, click New Environment enter winrm-env for Name. This is the name that you will use when you select this Infrastructure Definition.
- For Environment Type, select Pre-**Production, and click Save**.
- For Specify Infrastructure, click New infrastructure.
- Enter a name for the new infrastructure: winrm-infra.
- For Select Infrastructure Type, select Physical Data Center.
- Scroll down to view Infrastructure definition.
- Keep the default selection: Select preconfigured hosts from Physical Data Center.
Create the PDC Connector for the Host
In Infrastructure Definition, for Connector, click Select Connector to create the Connector for PDC.
In Create or Select an Existing Connector, select New Connector.
For Name, enter pdc-connector and click Continue.

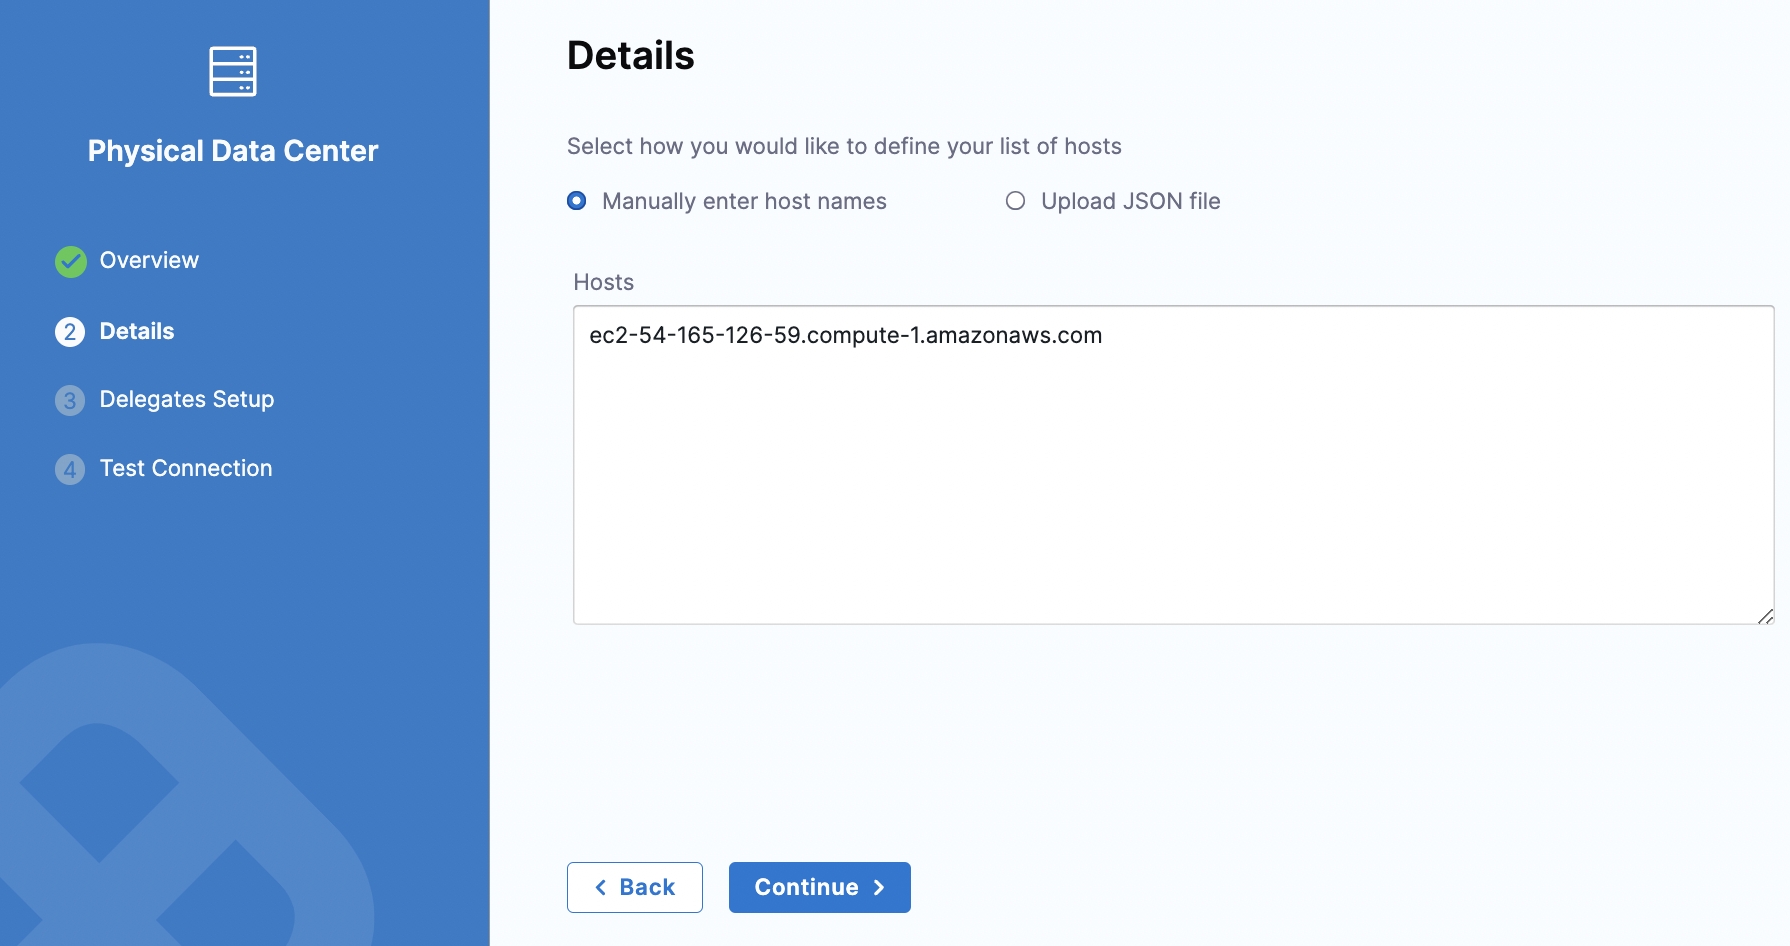
In Details, keep the default selection for Manually enter host names. In Hosts, enter the host name for your EC2 instance and click Continue.
In Delegates Setup, keep the default for Use any available Delegate. Click Save and Continue.
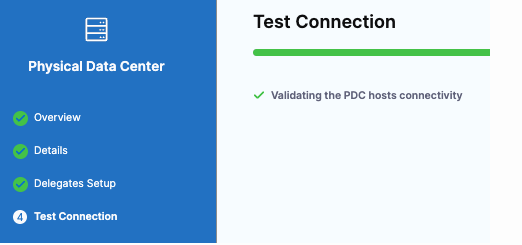
In Test Connection, Harness validates the connectivity for the PDC host. Click Finish.
Use WinRM Credentials with NTLM to Authenticate
We will now create the credentials for the secret that is used by Harness to connect to the target host.
- For Specify Credentials, click Create or Select a Secret.
- in Create or Select an Existing Secret, click New WinRm Credential.
- In WinRm Details, enter a name for this credential.
- For Select an Auth Scheme, keep the default NTLM.
- For Domain, enter the domain name for your EC2 instance.
- For Username, enter the user name used to access the EC2 instance.
- For Password, click Create or Select a Secret.
- In Create or Select an Existing Secret, click New Secret Text.
- In Add new Encrypted text, enter a name for this secret. This is the name you will use to reference the text elsewhere in your resources.
- In Secret Value, enter the password that you use to access the EC2 instance. Click Save and Password is populated with the secret you created.
- Click the checkboxes for Use SSL and Skip Cert Check. Leave the Use No Profile checkbox empty.
- For WinRM Port, keep the default port number 5986. Click Save and Continue.
- For Add a Host Name to start Verification, enter the hostname for your EC2 instance and click Test Connection. Harness checks for Delegates and verifies the connection to the target host.
- In Create New Infrastructure, click Preview Hosts.
- Click the checkbox for the host and click Test Connection. The WinRM connection to the EC2 instance is tested. Click Finish. Click Continue.
Use a Basic Deployment for WinRM Execution
You are now taken to Execution Strategies where you will use a deployment strategy and run your pipeline.
- In Execution Strategies, select Basic**.**
- For Package type, select tudolist.zip and keep the defaults for the other selections.
- Click Use Strategy. Harness adds the Deploy step for execution.
- In the Deploy step that is added to your pipeline, click Deploy.
Run the Pipeline to Deploy and Review
After selecting the Execution Strategy, we are now ready to run the pipeline.
- Click Run to run the pipeline.
- In Run Pipeline, for Artifact Path, click the down-drop arrow. Harness displays a list of available artifact packages.
- Select todolist.zip file.
- Click Run Pipeline. Harness runs the pipeline and the Console View displays the tasks executed for each step.
You have now successfully created and completed the steps for running a pipeline by using WinRM.
Notes
Reference hosts in steps using expressions
You can use all of the <+instance...> expressions to reference your hosts.
For Microsoft Azure, AWS, or any platform-agnostic Physical Data Center (PDC):
For Microsoft Azure or AWS:
instance.name has the same value as instance.hostName. Both are available for backward compatibility.