1 – Instana Connection Setup
The first step in using Instana with Harness is to set up a Instana Verification Provider in Harness.
A Harness Verification Provider is a connection to monitoring tools such as Instana. Once Harness is connected, you can use Harness 24/7 Service Guard and Deployment Verification with your Instana data and analysis.
Instana Verification Provider Setup
To add Instana as a verification provider:
Click Setup.
Click Connectors, and then click Verification Providers.
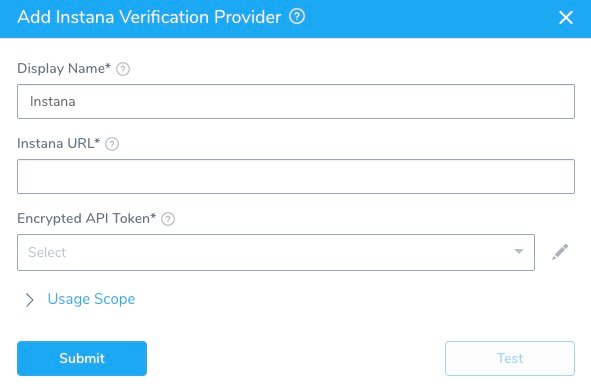
Click Add Verification Provider, and select Instana. The Add**Instana Verification Provider** dialog appears.

Complete the following fields in this dialog.On Instana, you must have the account owner role to create the API token needed to connect Harness to Instana.
| Field | Description |
| Display Name | Enter a display name for the provider. If you are going to use multiple providers of the same type, ensure that you give each provider a different name. |
| Instana URL | Enter the URL of the Instana server, such as:https://integration-<your-company>.instana.io |
| Encrypted API Token | Select or create a new Harness Encrypted Text secret for your Instana API token. |
| Usage Scope | Usage scope is inherited from the secrets used in the settings. |
To create an API key in Instana, do the following:
- In Instana Settings, select Team Settings > API Tokens.
- Select Add API Token.
- On the resulting New API Token page, enter a name for the new API key, such as Harness.
- Under Permssions, enable Service & Endpoint Mapping.
- Copy the value from the API Token field, and save the token.
- In Harness, paste the token's value into the API Token field.
Testing and Saving Your Setup
- After you have filled in the Add Instana Verification Provider dialog's settings, click Test to confirm them.
- Once the test is successful, click Submit to create your new Instana Connector.