Attribute-based access control
Harness Attribute-Based Access Control (ABAC) lets you grant access to your Resources based on the attributes associated with your Harness Resources.
This topic shows you how to configure ABAC in Harness.
Before you begin
- Learn Harness' Key Concepts
- Create Organizations and Projects
- Make sure you have Admin rights for the Account/Org/Project where you want to configure Access Management.
Attribute-Based Access Control Overview
Harness Role-Based Access Control (RBAC) helps you manage who has access to your Harness resources, what they can do with those resources, and in what scope they have access.
RBAC is role-based. This means permissions to resources are determined by the roles assigned to Users, User Groups, and Service Accounts.
Harness ABAC builds on top of Harness RBAC by adding role assignment conditions based on attributes in the context of specific actions. It lets you provide more fine-grained access management or simplify the management of hundreds of role assignments.
With Harness ABAC, you can have an additional check based on the type of your Harness Resources and then do the Role Assignments. The Resource type filters down the Resource Groups for access control.
For example, you can create a Resource Group with all the Production Environments and grant access to this Resource Group through Role Assignment.
Why and when should I use Harness ABAC?
Harness ABAC helps you achieve the following:
- Provide more fine-grained access control.
- Help reduce the number of Role Assignments.
- Use attributes that have specific business meaning.
Following are a few examples of scenarios to configure ABAC:
- Create/Edit, Delete and Access permissions only for Non-Production Environments.
- Create/Edit, Delete and Access permissions only for Secret Managers.
- View permission for Code Repositories.
Where can I configure ABAC?
You can add attributes to configure ABAC for the following Harness resources:
- Connectors: Type of Connectors
- Environments: Type of Environments
The following table shows the attributes you can select for Harness ABAC:
| Resource | Attributes |
| Connectors | |
| Environments |
Step 1: Add a new Resource Group
You can configure ABAC in the Account, Org, or Project scope.
This topic shows you how to configure ABAC in the Project scope.
To configure ABAC for Resources, perform the following steps:
- In your Harness Account, go to PROJECT SETUP in your Project.
- Click Access Control and click Resource Groups.
- Click New Resource Group.
- Enter a Name for your Resource Group.
- Click Save.
Step 2: Select Resources and add Attributes
In Resources, select ENVIRONMENTS.
In SHARED RESOURCES, select Connectors.
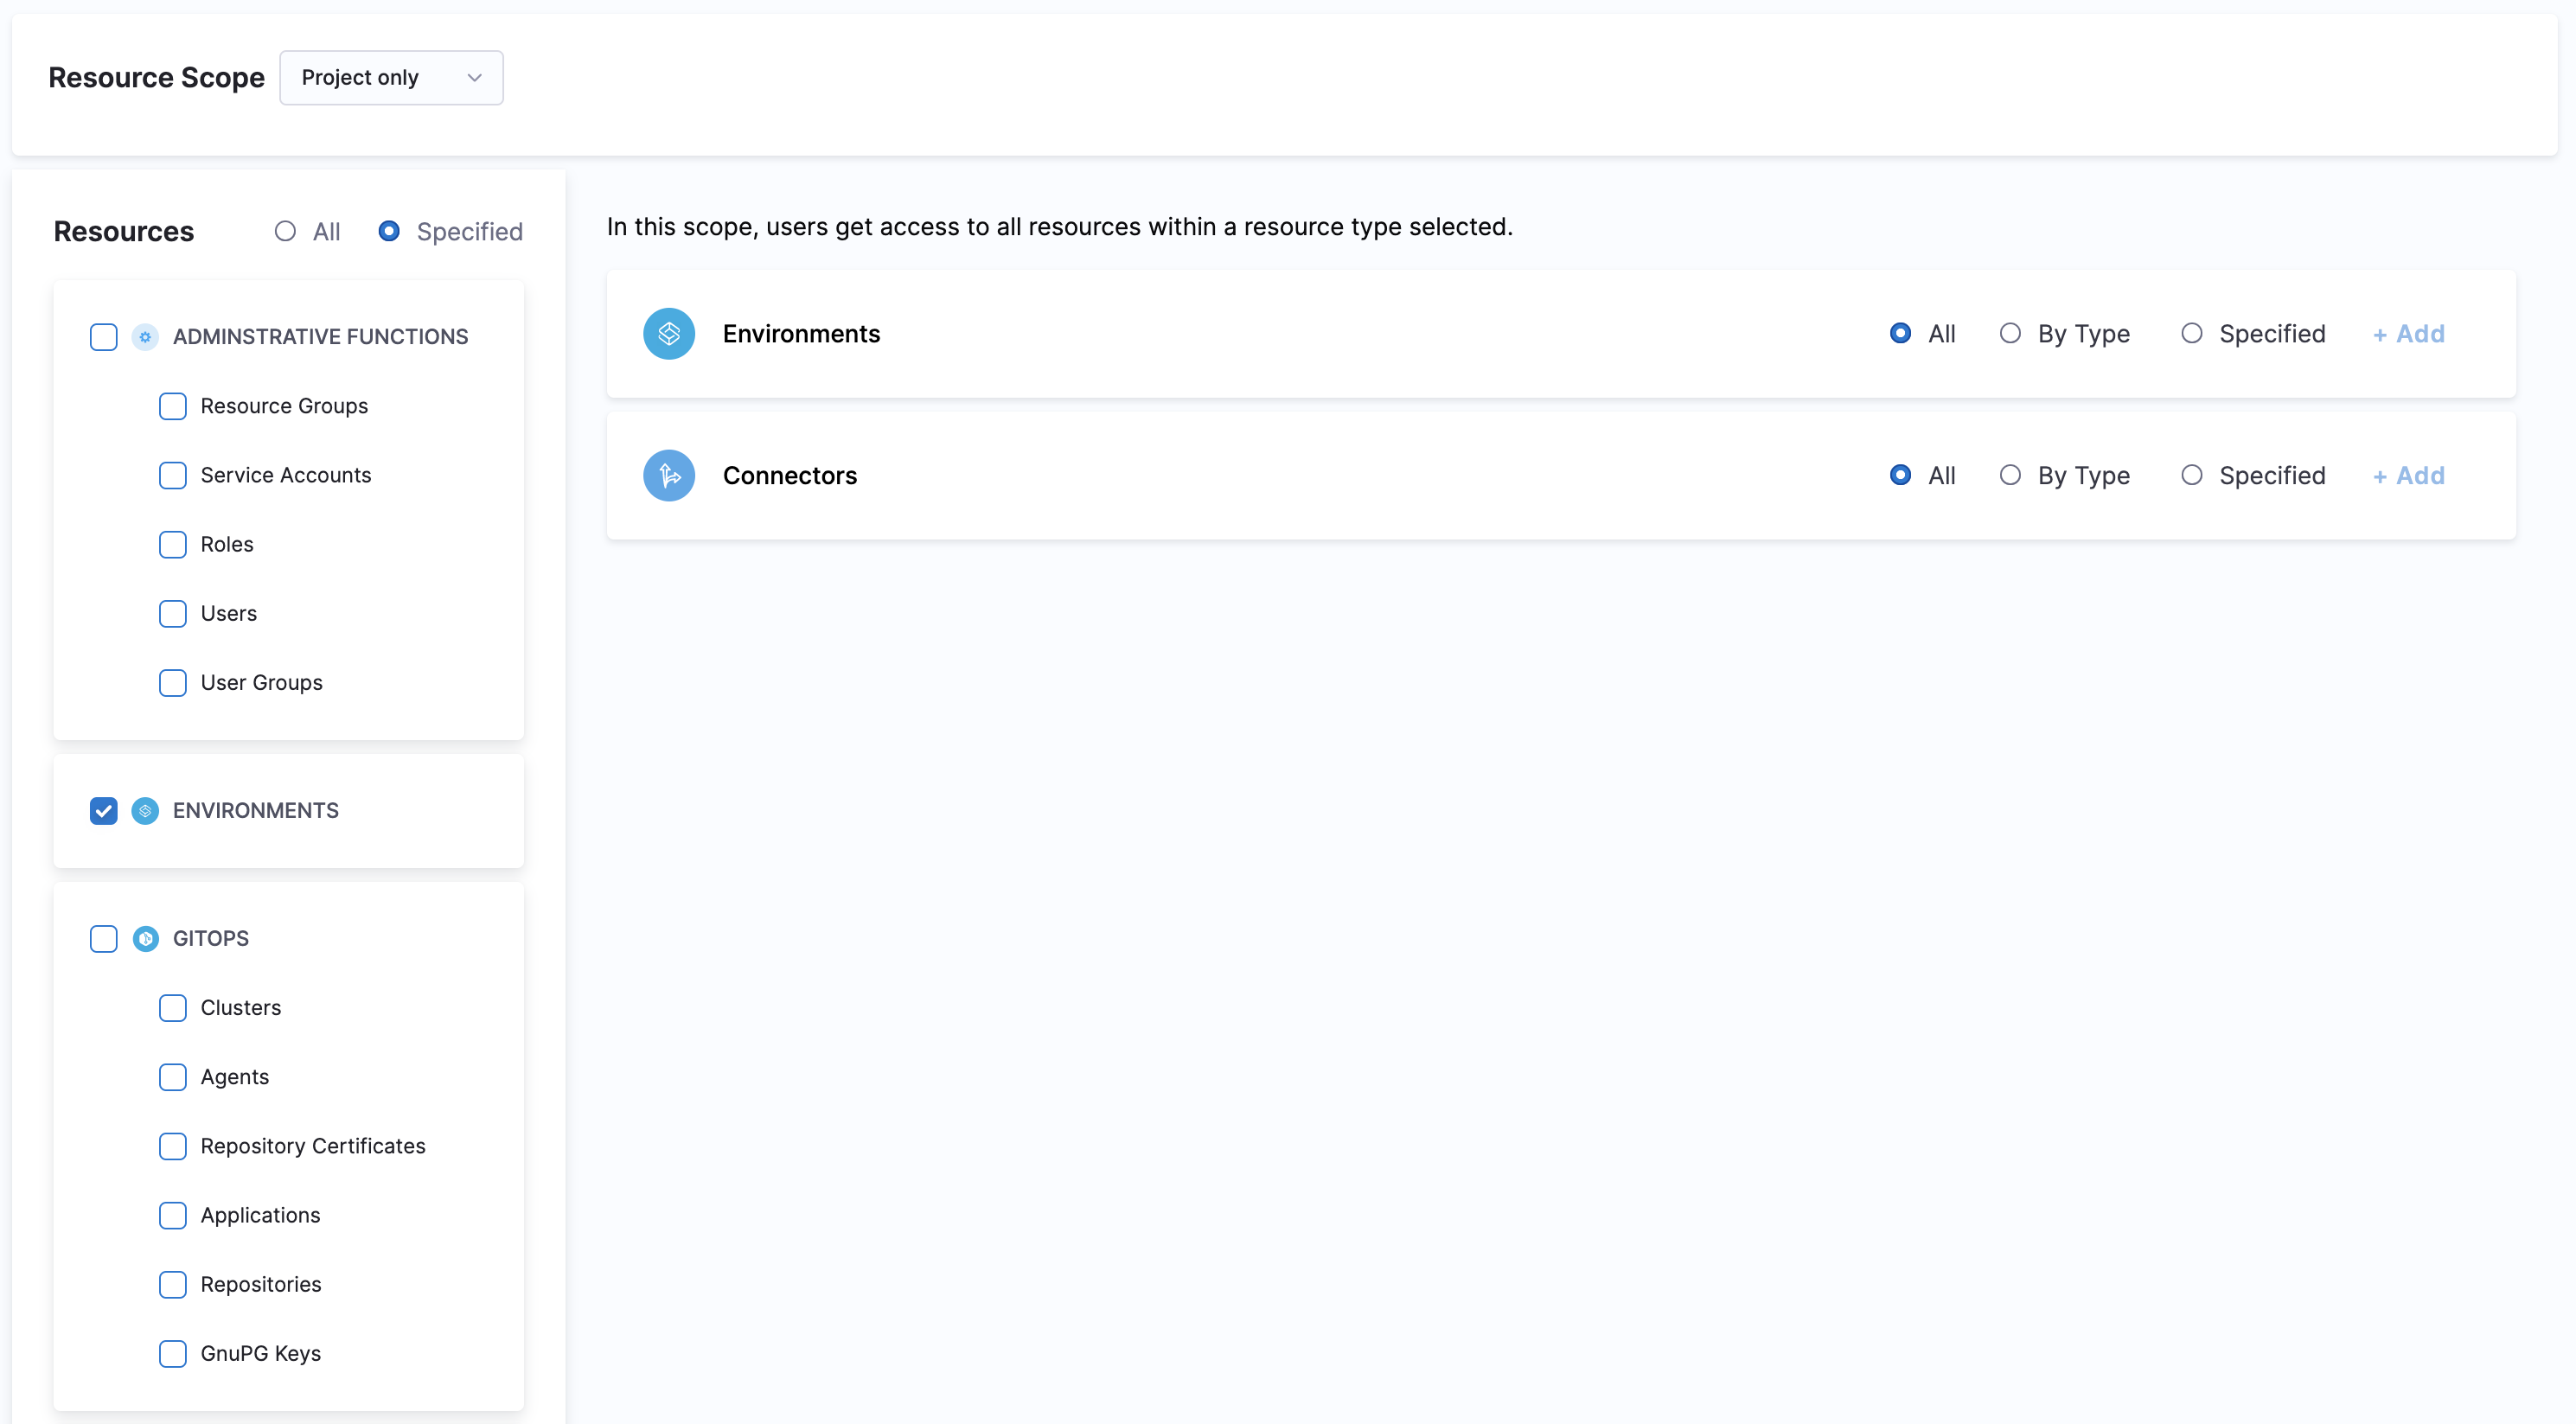
You can filter and include resources in your Resource Group in the following ways:
- All: you can select all the resources of the selected type for the chosen scope.
- By Type: you can select a specific type of resource for the chosen scope.
- Specified: you can select specific resources for the chosen scope.Select By Type against Environments and click Add. The Add Environment Types settings appear.
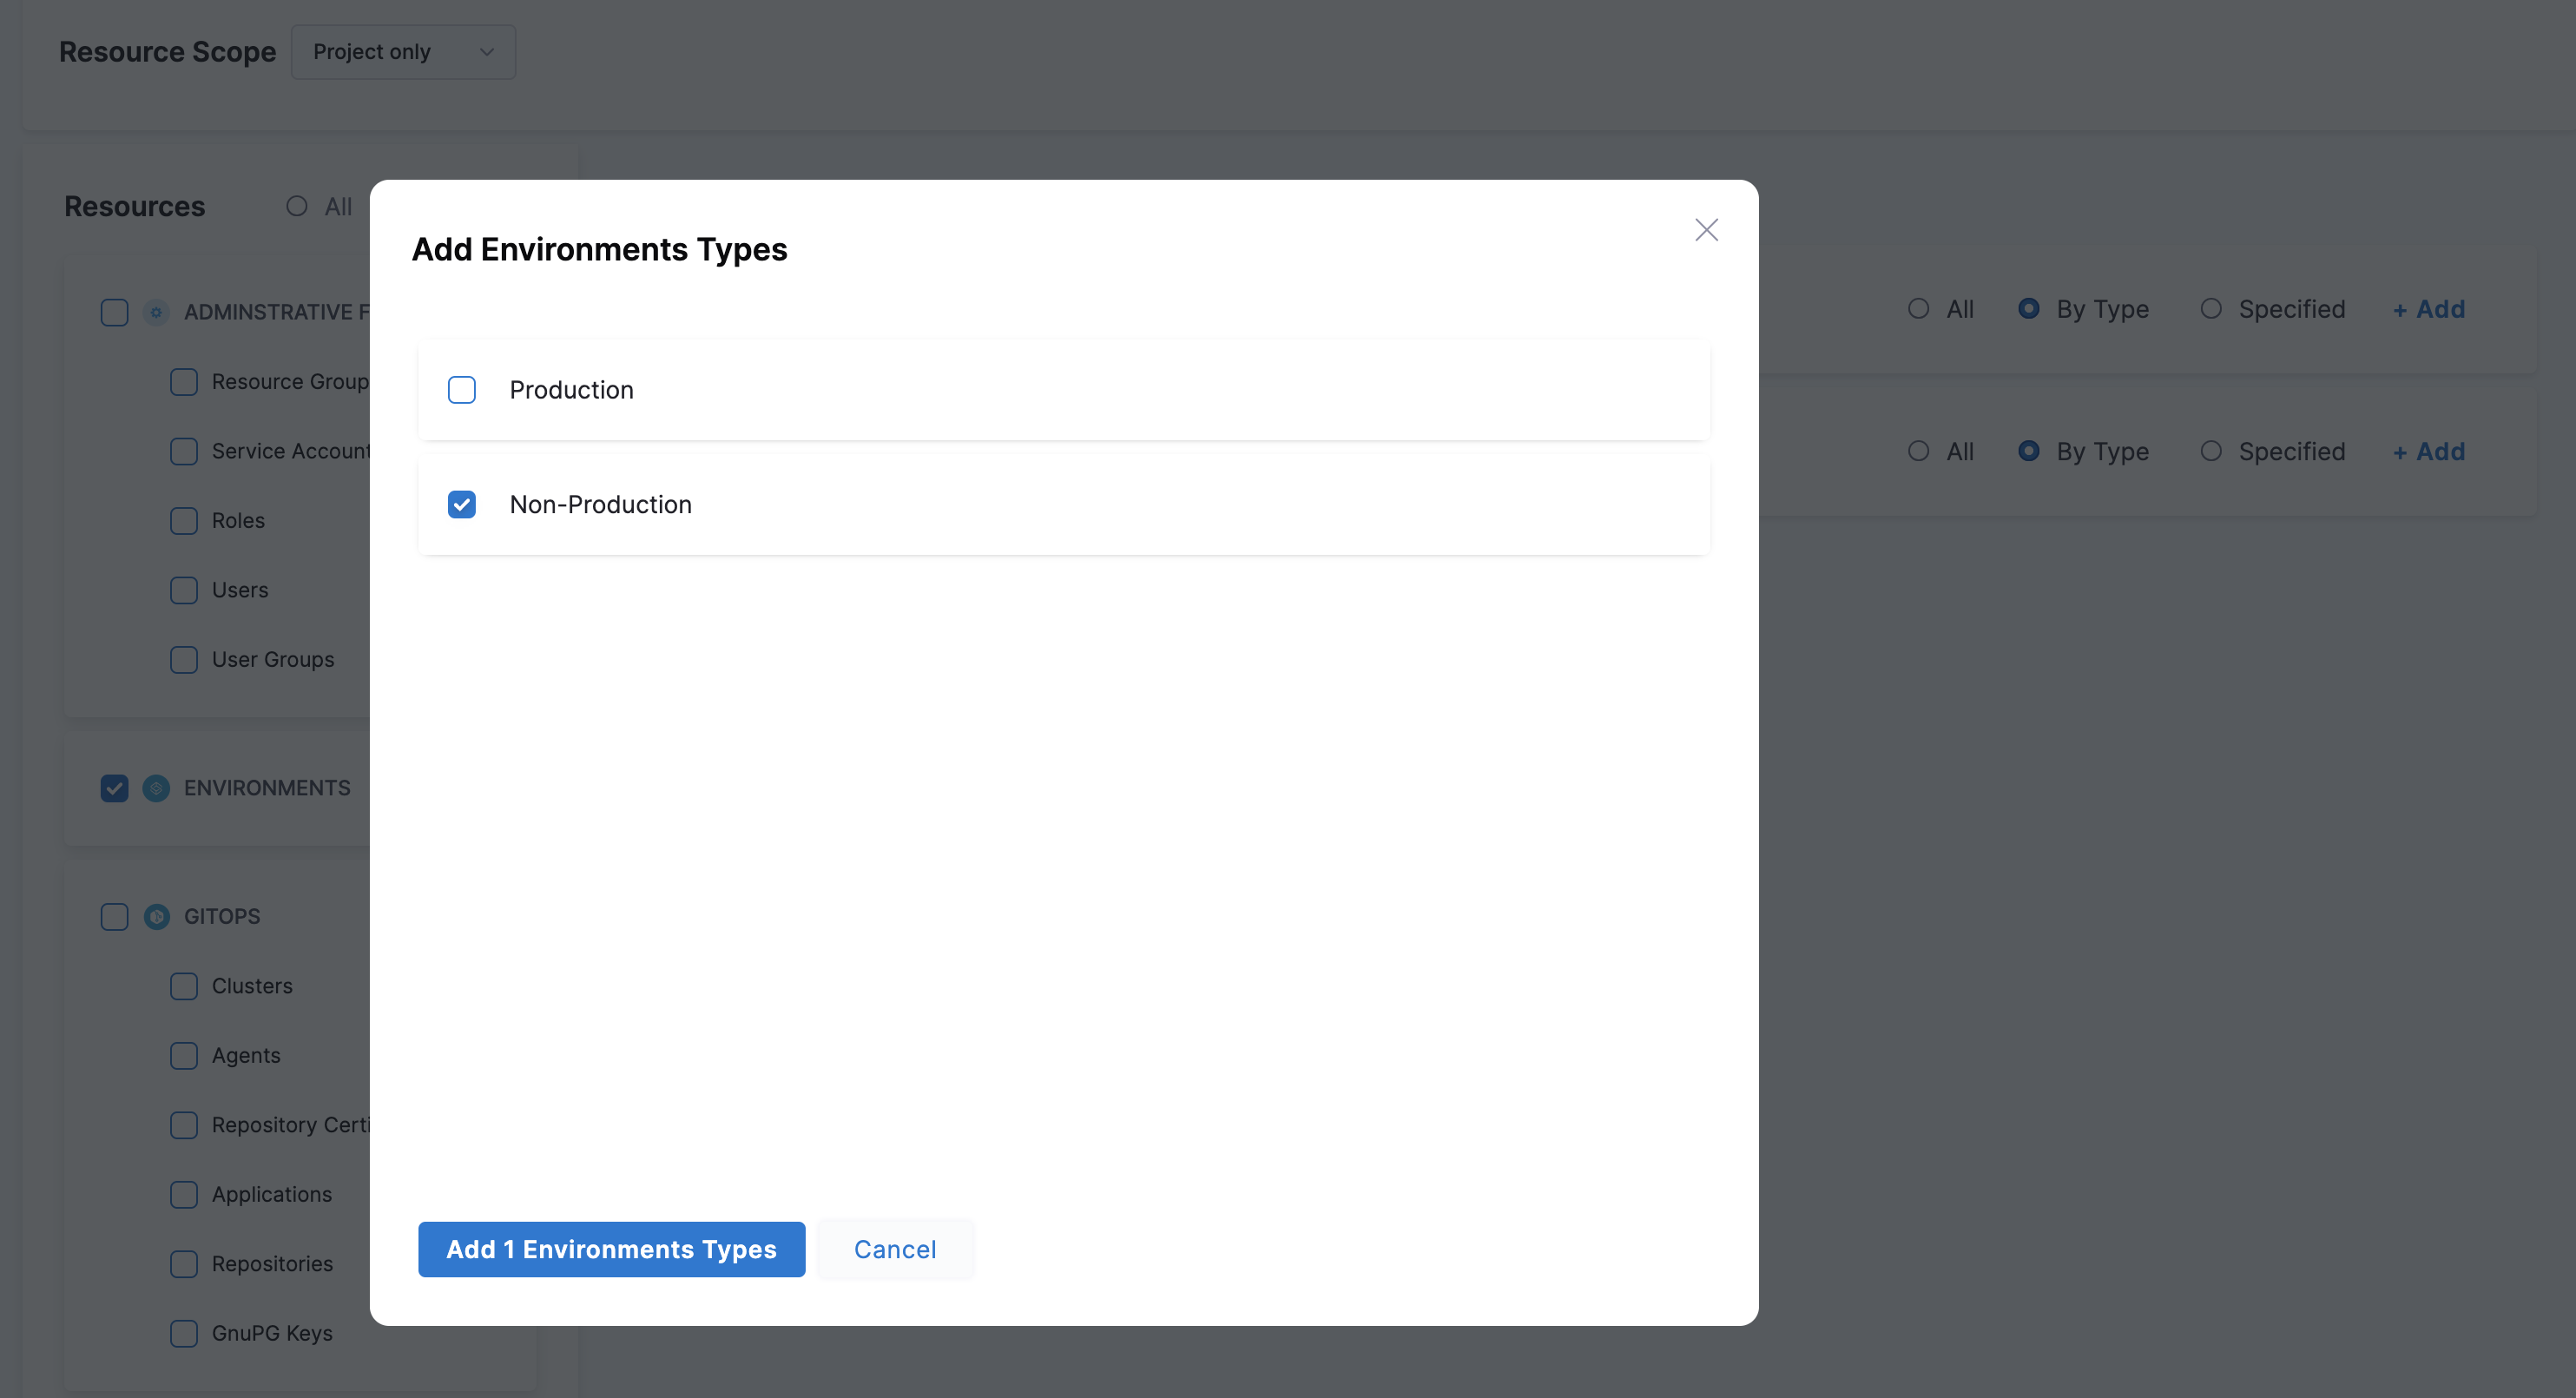
Select Non-Production and click Add.
Select By Type against Connectors and click Add. The Add Connector Type settings appear.
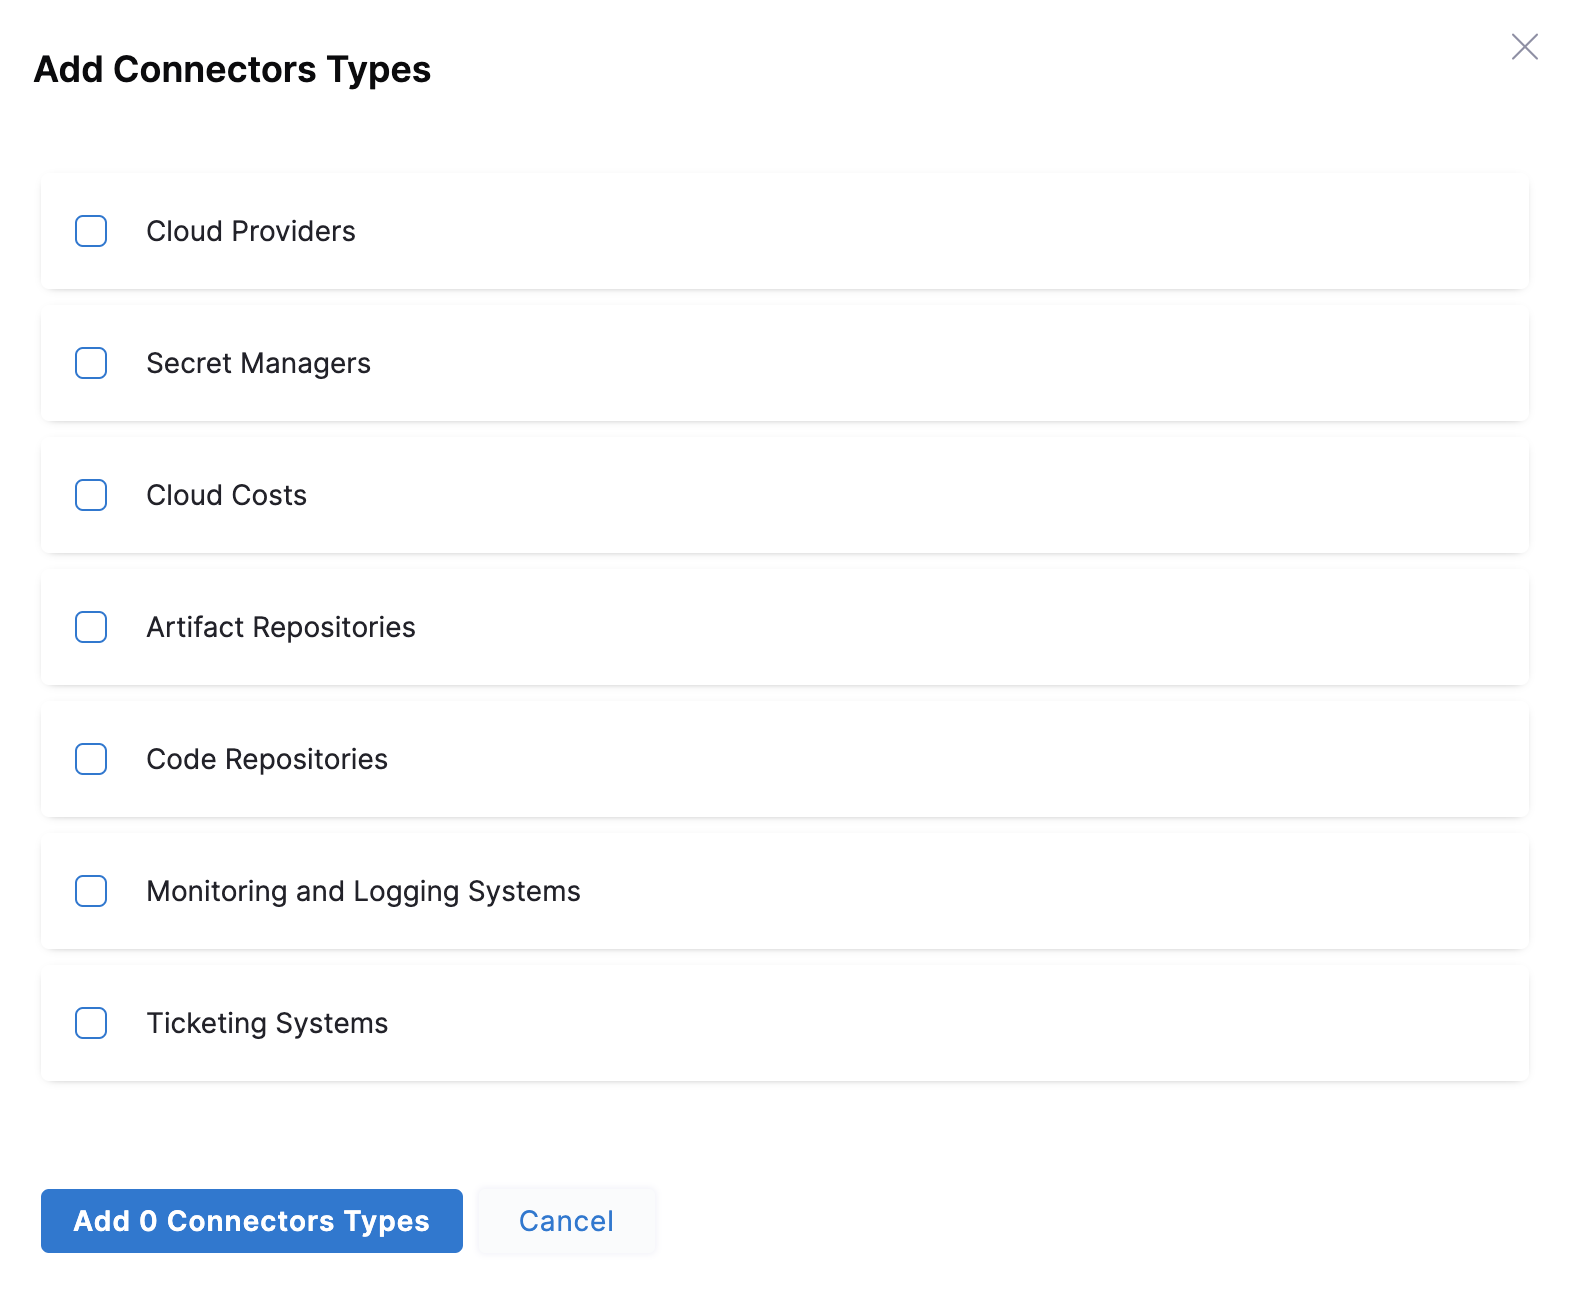 Select Secret Managers and click Add.
Click Save.
Step 3: Add a new Role
- In your Harness Account, go to PROJECT SETUP in your Project.
- Click Access Control and click Roles.
- Click New Role. The New Role settings appear.
- Enter a Name for your Role and click Save.
- Select all permissions for Environments and Connectors.

- Click Apply Changes.
Step 4: Assign Role and Resource Group
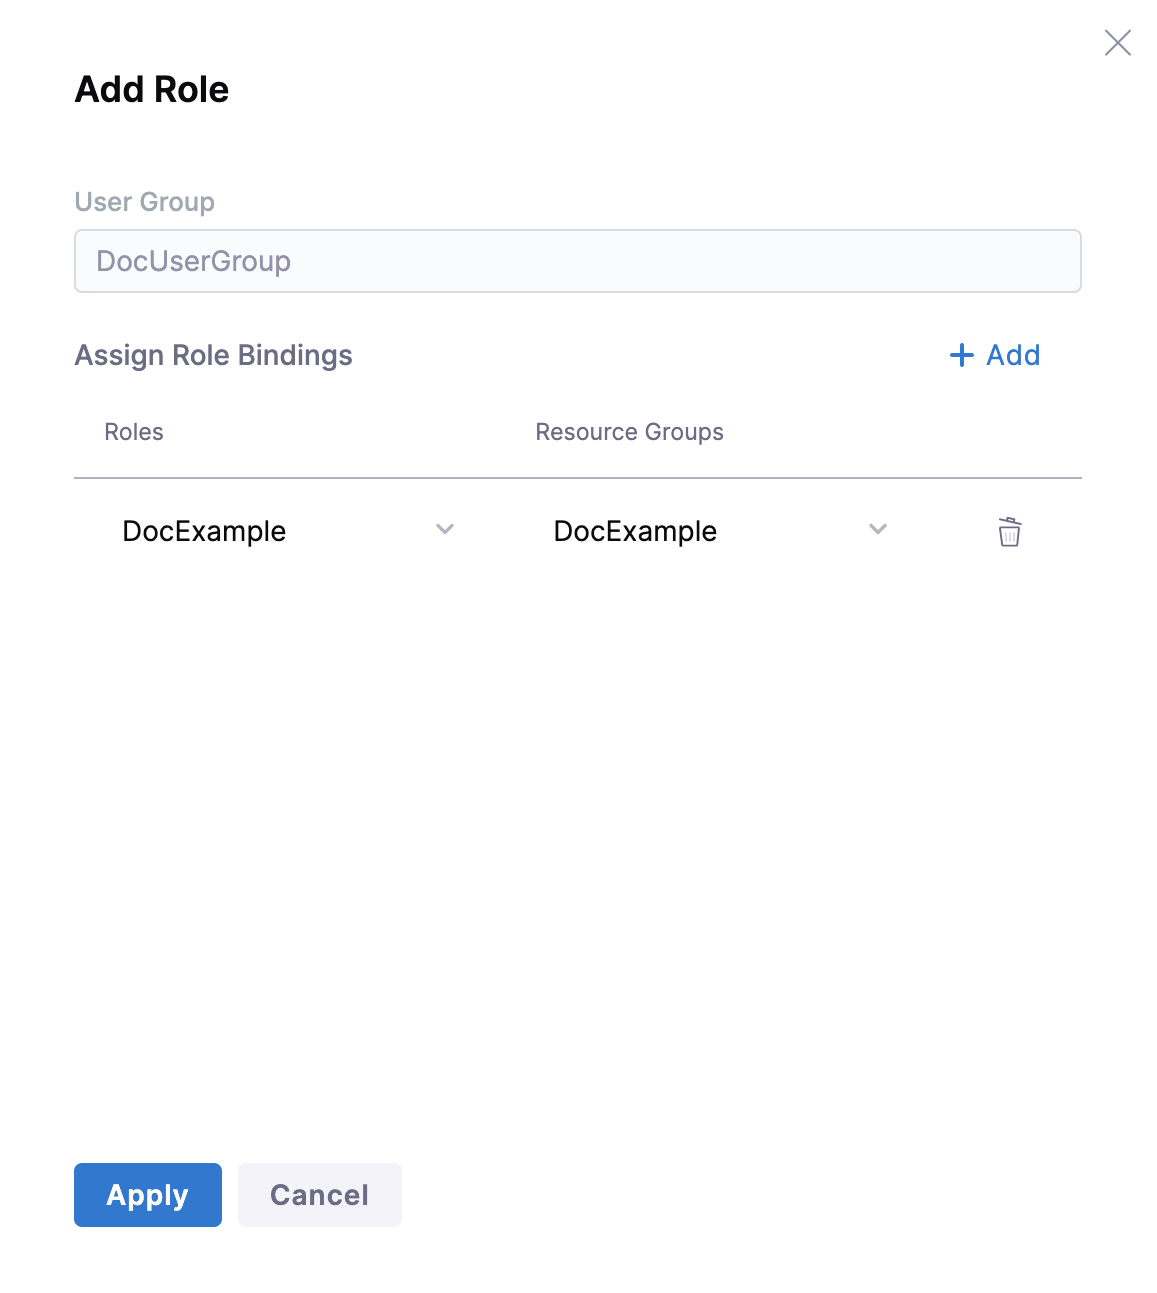
Let us now complete the Role Assignment for the User Group to complete the ABAC setup.
- In your Harness Account, go to PROJECT SETUP in your Project.
- Click Access Controls and click User Groups.
- Locate your User Group to assign the Role and Resource Group you just created.
- Click Role.

- In Role, select the Role that you created.
- In Resource Group, select the Resource Group you just created.
- Click Apply.
 The members of the User group now have all permissions for Non-Production Environments and connectors that are of type Secret Managers.