Provision Users and Groups with OneLogin (SCIM)
This content is for Harness FirstGen. Switch to NextGen.You can use OneLogin to provision your organization's users in Harness.
Harness' SCIM integration enables OneLogin to serve as a single identity manager for adding and removing users. This is especially efficient for managing large numbers of users.
This topic describes how to set up OneLogin provisioning for Harness Users and User Groups.
Before You Begin
- This topic assumes you understand System for Cross-domain Identity Management (SCIM). For an overview, see the article Introduction to System for Cross-domain Identity Management (SCIM).
Review: Harness and OneLogin Requirements
To provision Harness users via OneLogin, you must be an Administrator in your OneLogin account, and must have the Account Administrator role in Harness.
Step 1: Add Harness App to OneLogin
The first step is adding the Harness app to your OneLogin Applications.
To add the app, you must be in OneLogin Administration:

In Applications, click Add App.
Search for Harness. The Harness Application appears.
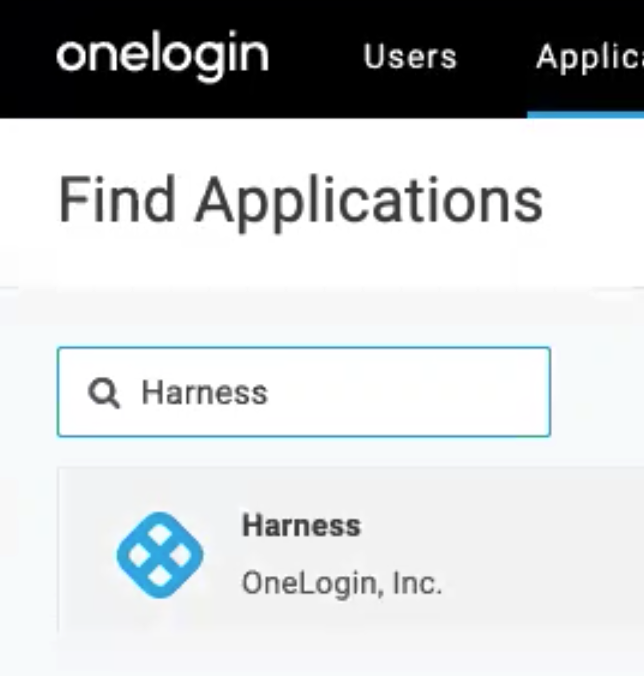
Click the Harness app to open its Configuration page and click Save.
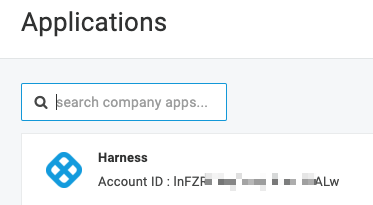
When you are done, the Harness OneLogin app appears:
 For more information on adding apps, see OneLogin's documentation: Introduction to App Management.
Step 2: SCIM Base URL
Next, add a special Harness account URL to the OneLogin app's SCIM Base URL.
Log into your Harness account.
In Harness Manager's address bar, copy the Harness account from your Harness URL.
The Harness account ID comes after
accountin the URL. For example, in the following URL, the account ID isPVyBOd5NseCZSn9pe6xn87:https://app.harness.io/#/account/PVyBOd5NseCZSn9pe6xn87.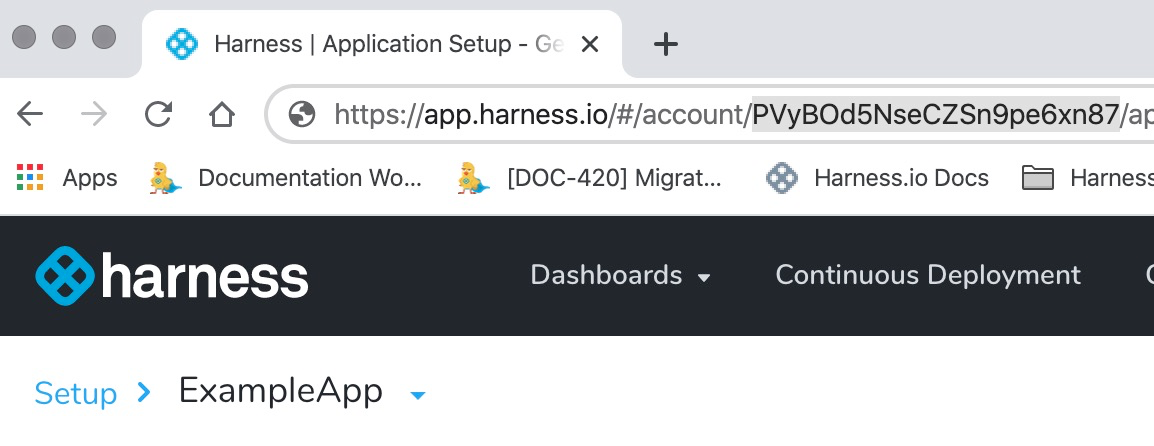
Add your account ID to the end of the following URL:
https://app.harness.io/gateway/api/scim/account/<account_ID>For Harness On-Prem, the URL will use your custom domain name and
gatewayis omitted. For example, if your On-Prem domain name is harness.mycompany.com:
https://harness.mycompany.com/api/scim/account/<account_ID>
- Copy the full URL.
- In OneLogin, open the Harness OneLogin app.
- Click Configuration.
- In SCIM Base URL, paste the Harness URL you copied.You can ignore the SCIM JSON Template and Custom Headers settings.
Next we will use a Harness API access key for the SCIM Bearer Token setting in your Harness OneLogin app.
Step 3: SCIM Bearer Token
The SCIM Bearer Token value is used to authenticate requests and responses sent between the OneLogin SCIM provisioning service and Harness.
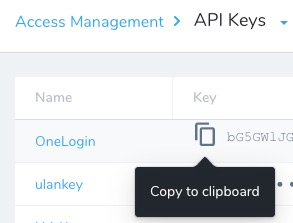
- In Harness Manager, create an API key by following the instructions in API Keys.
Make sure this key's permissions are inherited from the Account Administrator User Group, as shown here: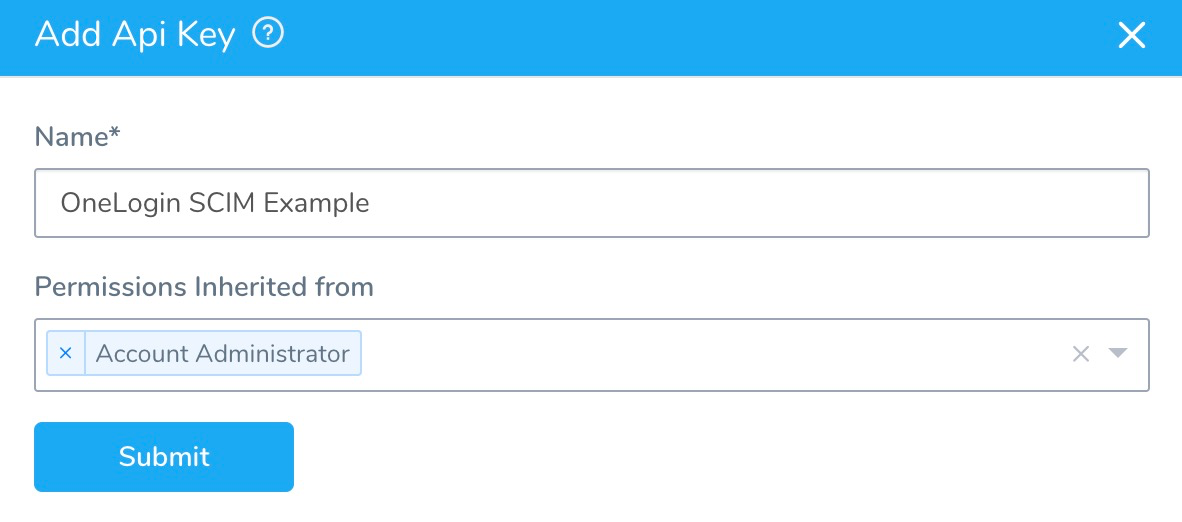
Copy the new API key.
In OneLogin, paste the API key in the SCIM Bearer Token setting in your Harness OneLogin app.
Step 4: Enable API Connection
In the Harness OneLogin app, ensure that the API Status is enabled:
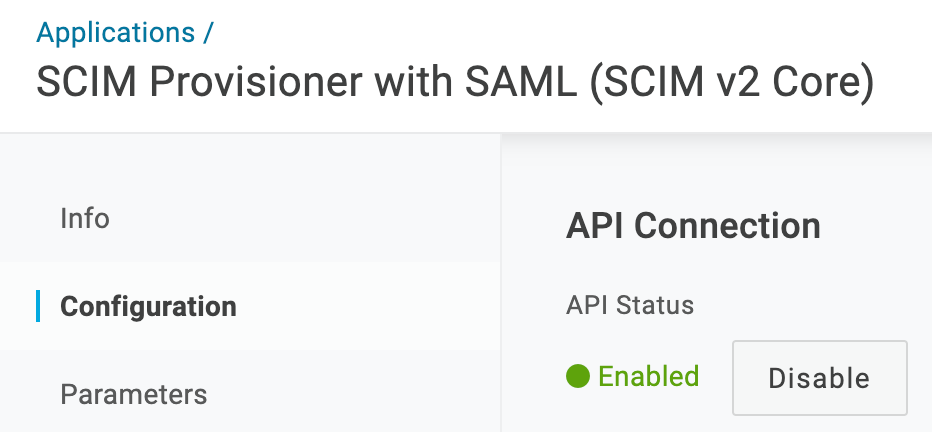 Click Save to save setting up the app's configuration.
Step 5: Set Up Harness OneLogin App Provisioning
Next, you will set the required provisioning settings for the Harness OneLogin app.
Ensure these settings are set up exactly as shown below.
In the Harness OneLogin app, click Provisioning.
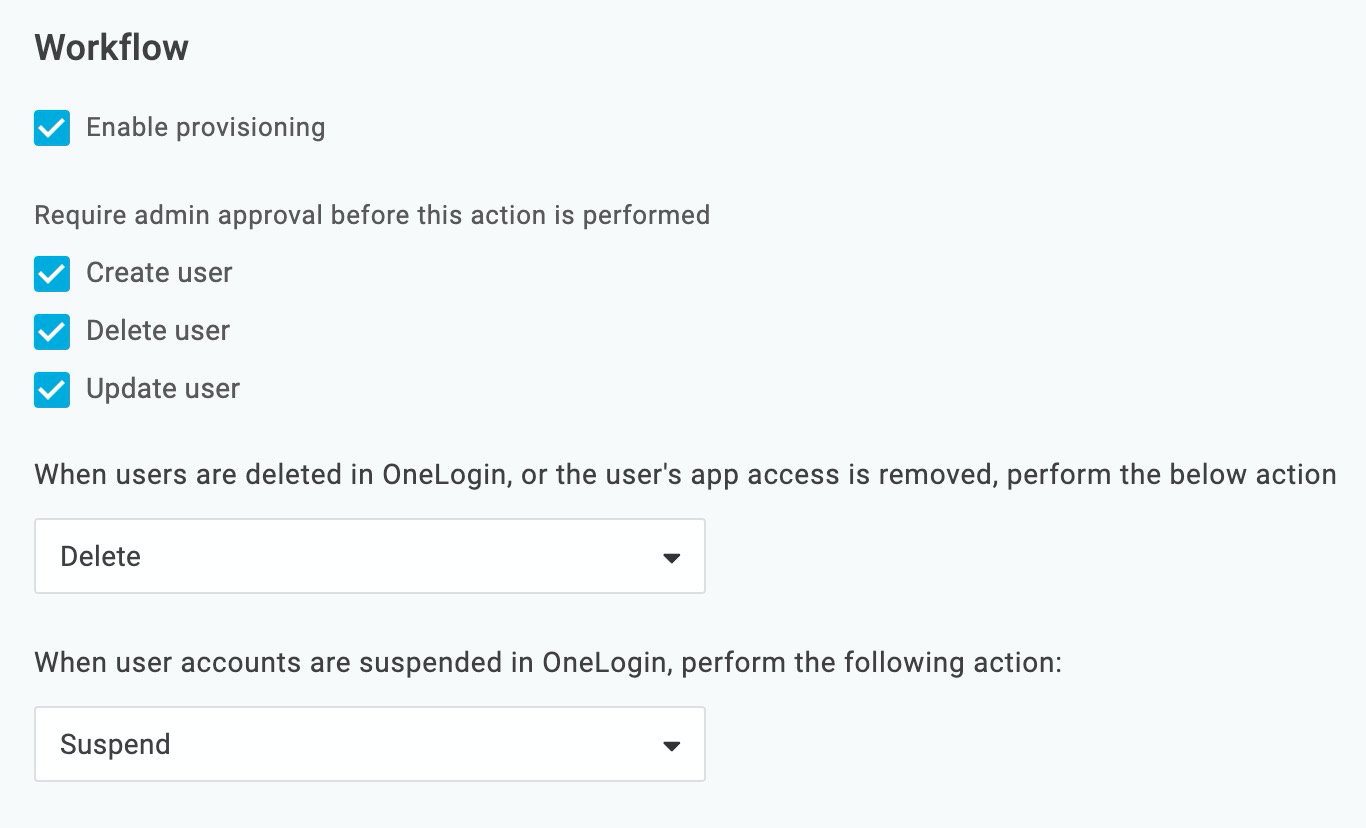
In Workflow, ensure the following are selected:
- Enable provisioning
- Create user
- Delete user
- Update user
- When users are deleted in OneLogin, or the user's app access is removed, perform the below action: Delete.
- When user accounts are suspended in OneLogin, perform the following action: Suspend.
When you are done, it will look like this:
Click Save.
Option 1: Provision OneLogin Users to Harness
Next, we will add users to the Harness OneLogin app. Once OneLogin SSO in enabled in Harness. these users will be provisioned in Harness automatically.
- In OneLogin, click Users.
- Click a user.
- In User Info, ensure that user has First name, Last name, and Email completed.
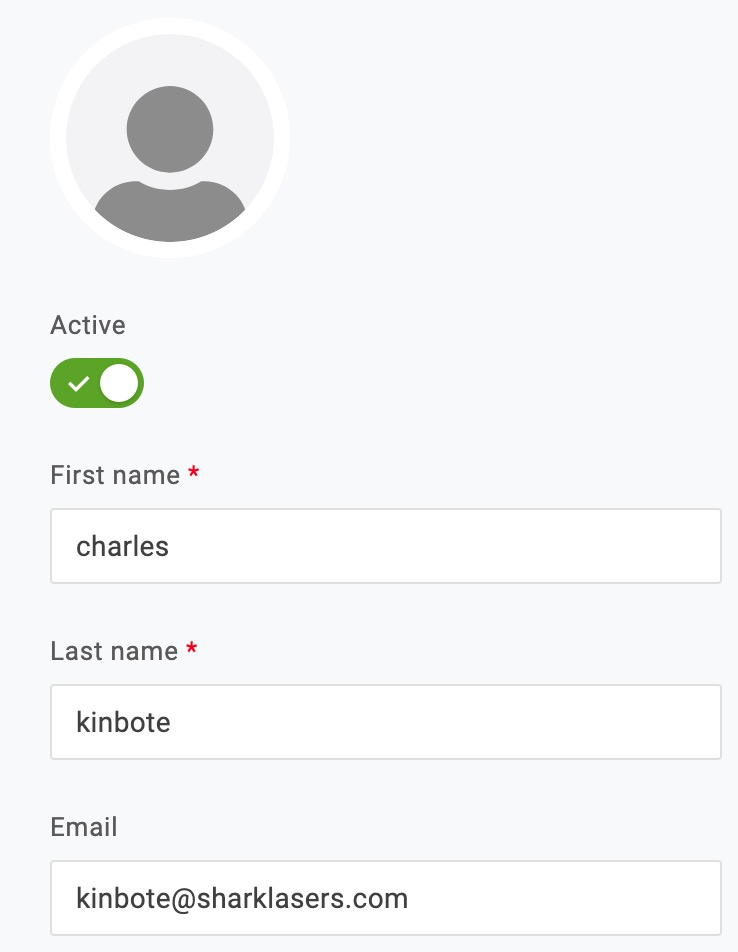
Only First name, Last name, and Email are permitted for Harness OneLogin SCIM provisioning. Do not use any additional User Info settings.
Click Applications.
In the Applications table, click the add button (+).
In the Assign new login settings, select the Harness OneLogin App, and click Continue.
In SCIM Username, enter the email address for the user. This is the same email address in the NameID setting.
When you are done, the settings will look something like this: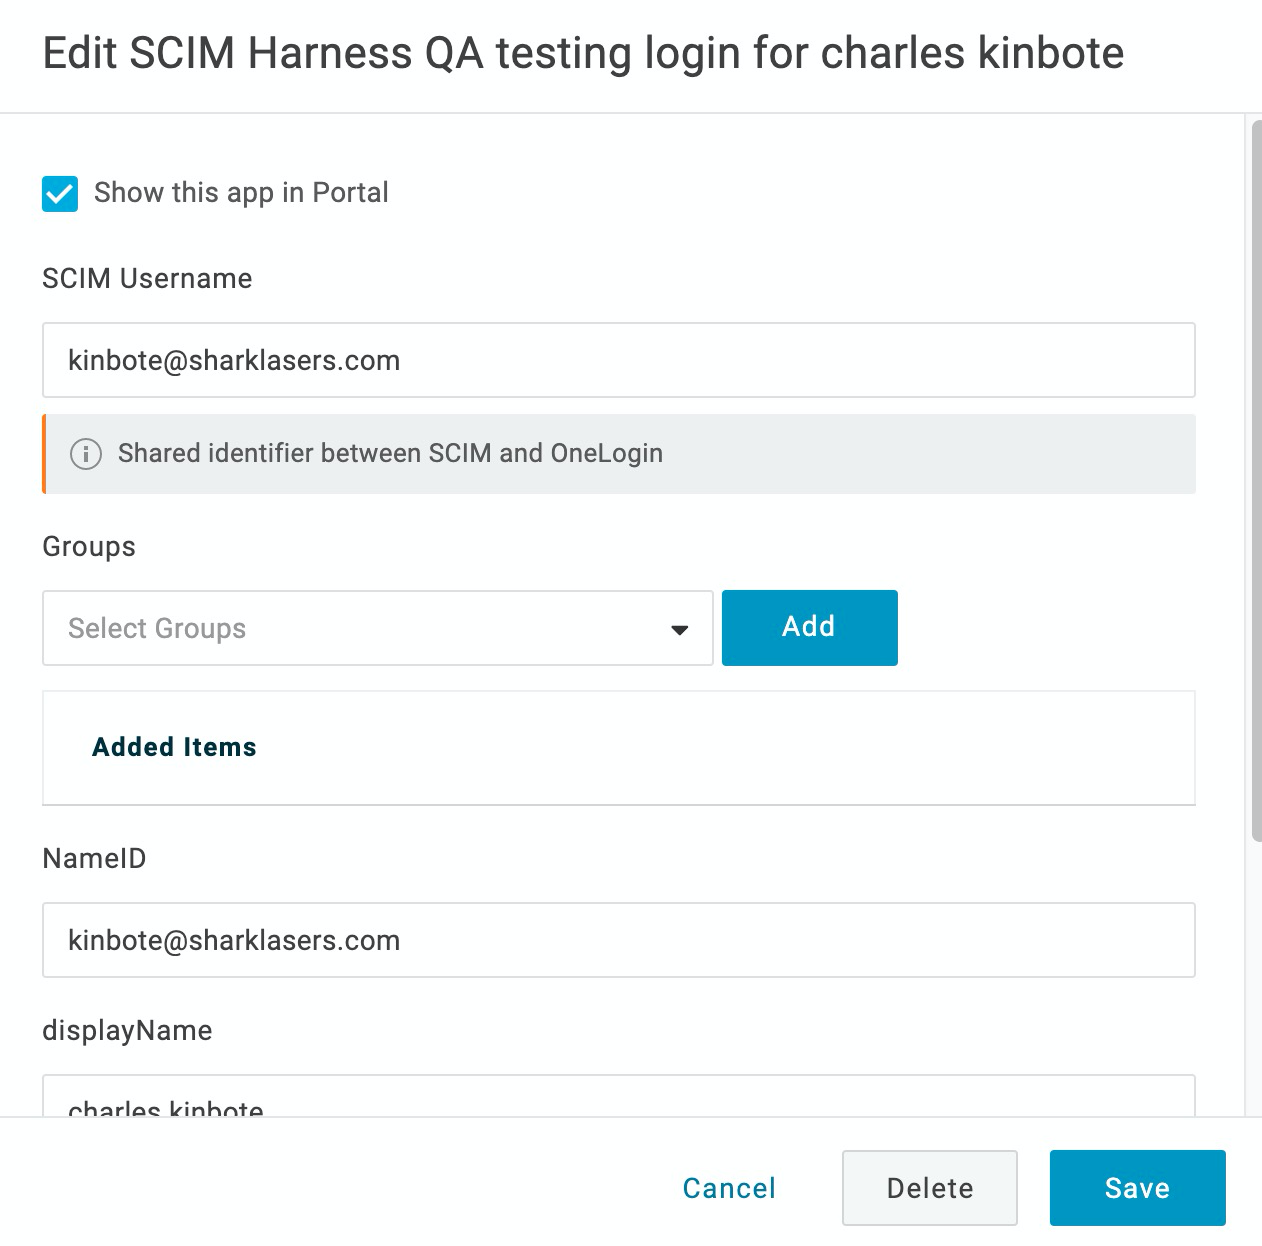
Click Save. The status in the Applications table is now Pending.
Click Pending. The Create User in Application settings appear:
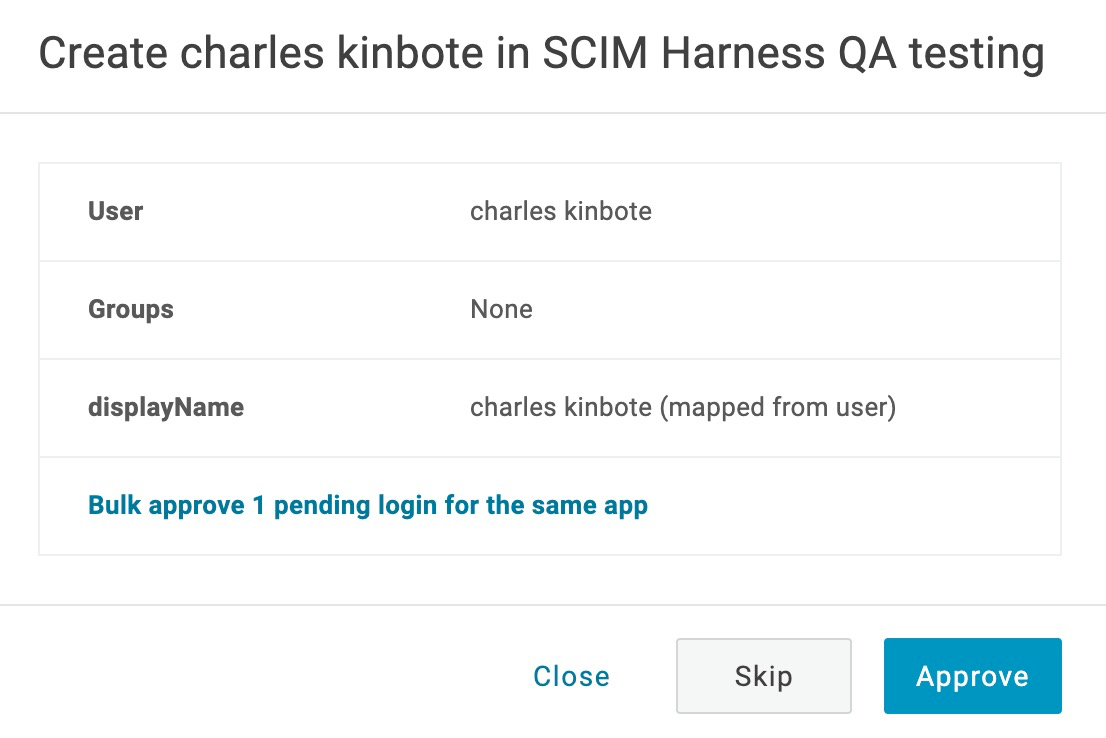
Click Approve. The Provisioning status will turn to Provisioned.

If provisioning fails, you might see something like the following error:
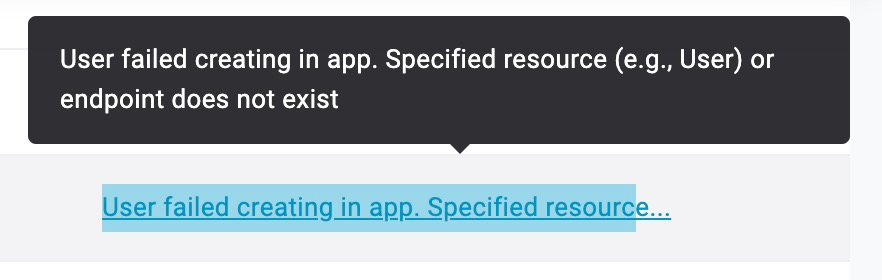 The most common reason is incorrect SCIM Base URL or SCIM Bearer Token settings in the OneLogin app.
Verify Provisioning in Harness
Now that you have provisioning confirmation from OneLogin, let's verify that the provisioned user is in Harness.
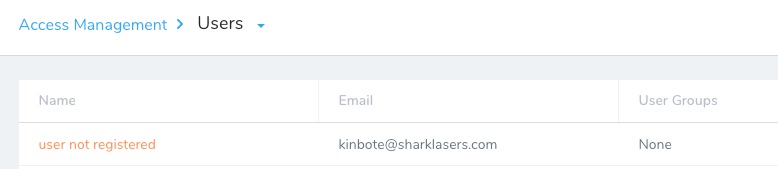
- In Harness, click Continuous Security, and then select Access Management.
- Click Users.
- Locate the provisioned user.
User Registers and Logs into Harness
Provisioned users will received an email invite from Harness.
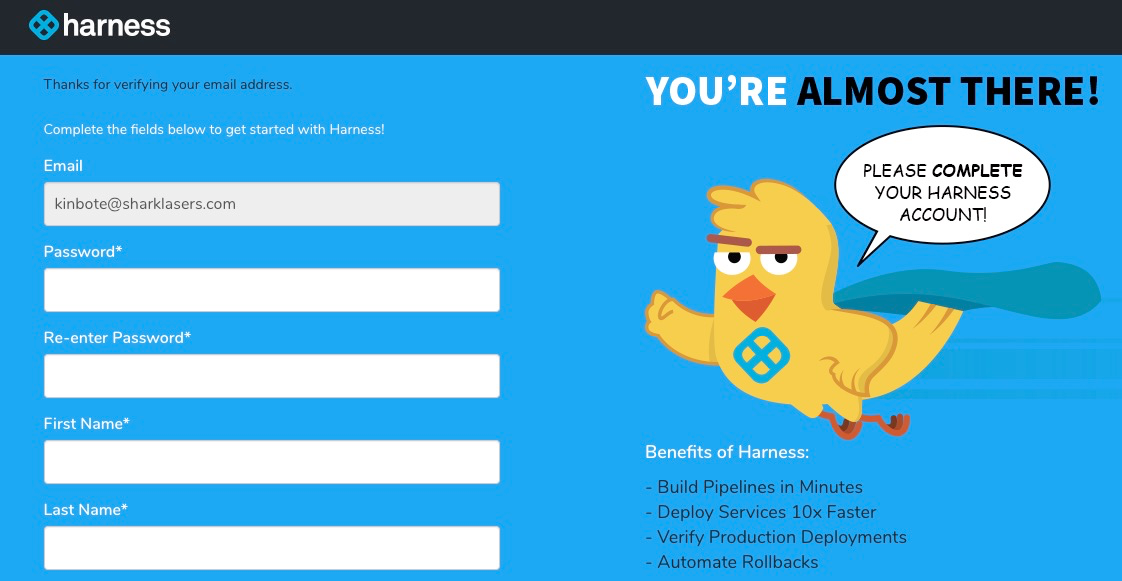
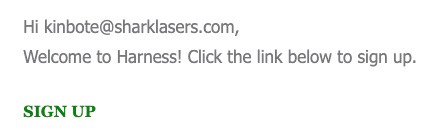 When users click SIGN UP they are sent to Harness where they can create a password and log in.
Option 2: Provision OneLogin Roles to Harness Groups
You can create, populate, and delete Harness User Groups using OneLogin.
Due to OneLogin currently not supporting group deletion via SCIM, you must remove User Groups using OneLogin. If you try to delete OneLogin-provisioned User Groups within Harness, you will get the error message, Cannot Delete Group Imported From SCIM. Once the group is removed from OneLogin, contact Harness Support to have it removed from Harness.To perform Harness User Group provisioning using OneLogin, you assign the Harness OneLogin app and OneLogin users to a OneLogin role.
Next, you create a rule in the Harness OneLogin app that creates groups in Harness using the role.
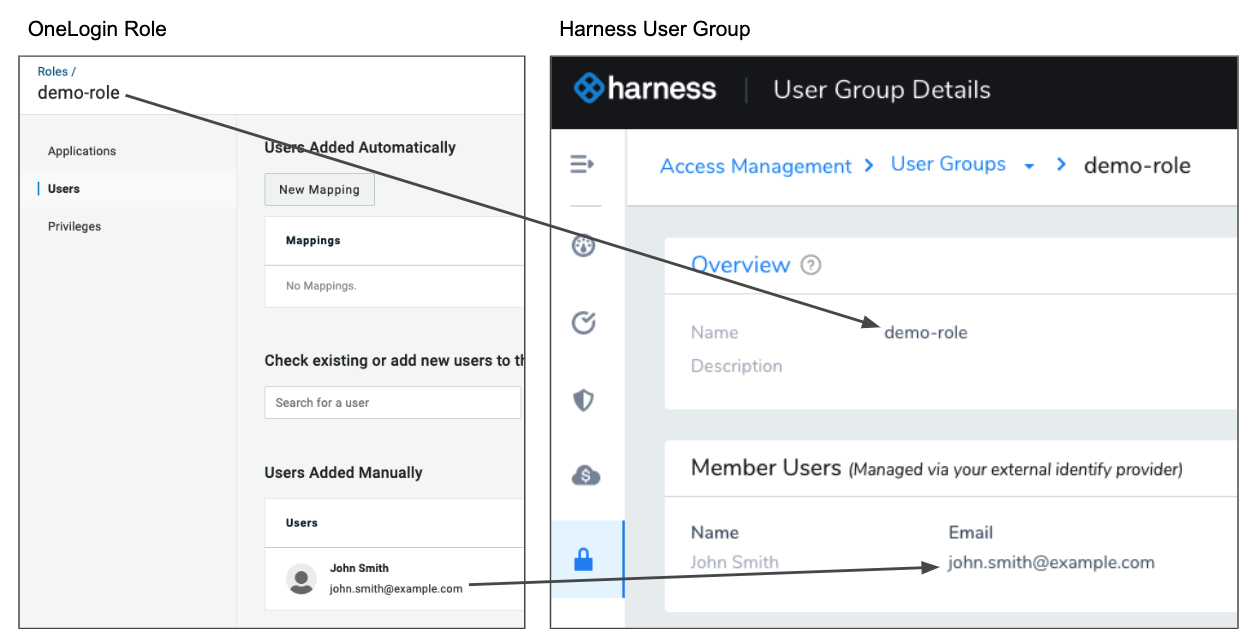
The OneLogin roles become User Groups in Harness.
 You cannot provision OneLogin users to Harness User Groups if they are already provisioned in Harness. Simply remove them from Harness and then provision them using the step below.
Add User Provisioning to the Harness OneLogin App
Ensure the Harness OneLogin app is added and configured as described in steps 1 through 5 in this topic.
In OneLogin, open the Harness OneLogin app.
In Parameters, in Optional Parameters, click on Groups.
In Edit Field Groups, select Include in User Provisioning and click Save.
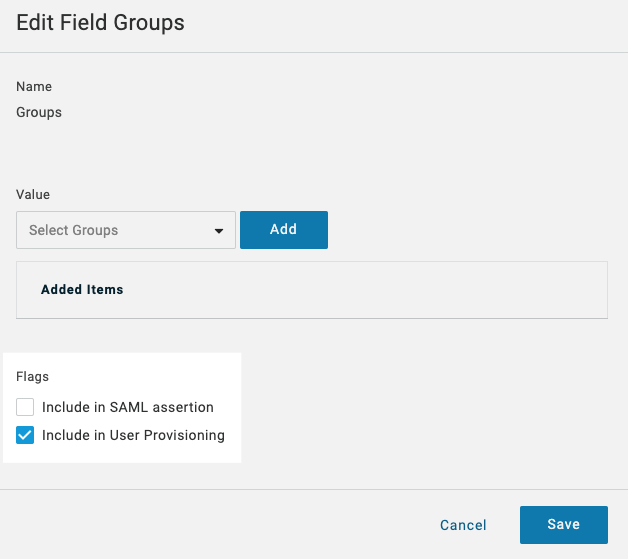
Click Save to save the Harness OneLogin app.
Next, we'll create the OneLogin role that will be used as your Harness User Group.
Create OneLogin Role
In OneLogin, click Users and select Roles.
Click New Role.
Enter a name for the new role, click Save.
In Roles, open the new role.
Click Users.
In Check existing or add new users to this role, enter the name(s) of the users to add.
When you have located each user name, click Check.
For each user, click Add to Role. When you are done, the user(s) are listed in Users Add Manually.
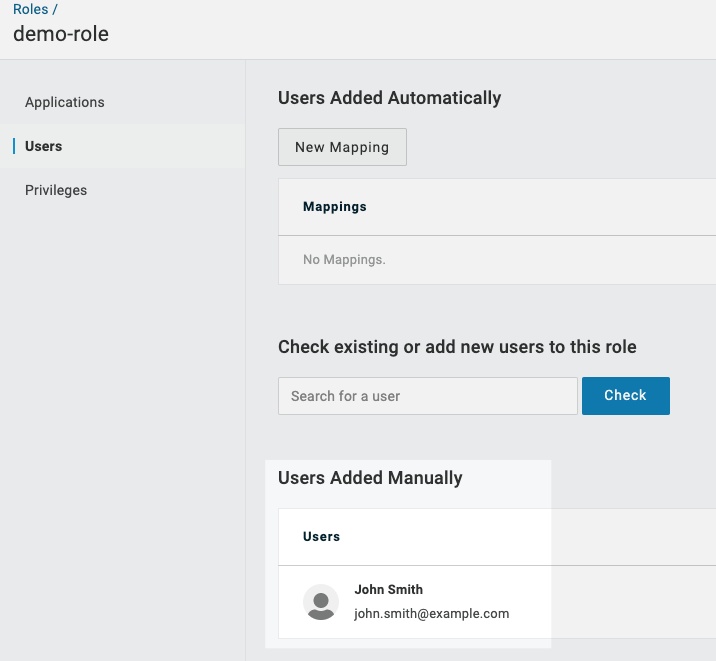
Click Save. You are returned to the Roles page.
Open the role.
In the roie, click Applications.
Click the Add Apps button.
In Select Apps tp Add, click the Harness OneLogin app.
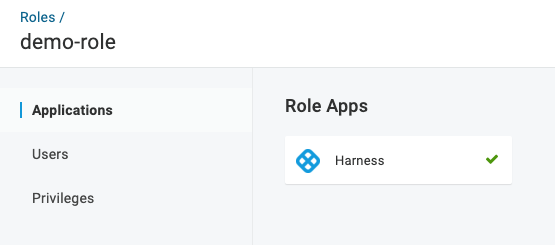
Click Save.
Now that the role has users and the Harness OneLogin app, we can add the Harness OneLogin app to each OneLogin user.
Add Harness OneLogin app to Users
For each of the OneLogin users you added to the role, you will now add the Harness OneLogin app.
In OneLogin, click Users, and then select each user you want to add.
In the user's page, click Applications.
Click the Add App button.
In Assign new login, select the Harness OneLogin app, and click Continue.
In the Edit settings, in Groups, select the role you created and click Add.
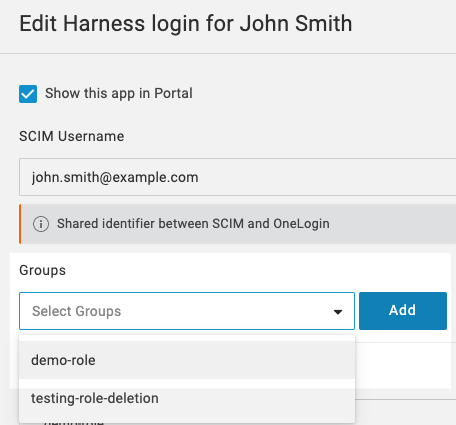
Click Save.
Now that each user is associated with the Harness OneLogin app and role, you add a rule to the Harness OneLogin app. The rule will set groups in the Harness OneLogin app using the role you created.
Add Rule to Harness OneLogin App
Next, you create a rule in the Harness OneLogin app to create groups using the role you created.
Click Application, and then select the Harness OneLogin app.
In the app, click Rules.
Click Add Rule.
Name the rule.
In Actions, select Set Groups in [Application name].
Select Map from OneLogin.
In For each, select role.
In with value that matches, enter the name of the role you create or enter the regex
.*.
When you are done it will look something like this:
Click Save.
Click Save to save the app.
If you have created users prior to adding the mapping rule, click Reapply Mappings in your Harness application User settings:
Now that the app has a rule to set groups in Harness using the role you created, you can begin provisioning users using the app.
Provision Users in Application
Each of the OneLogin users that you added the Harness OneLogin app to can now be provisioned.
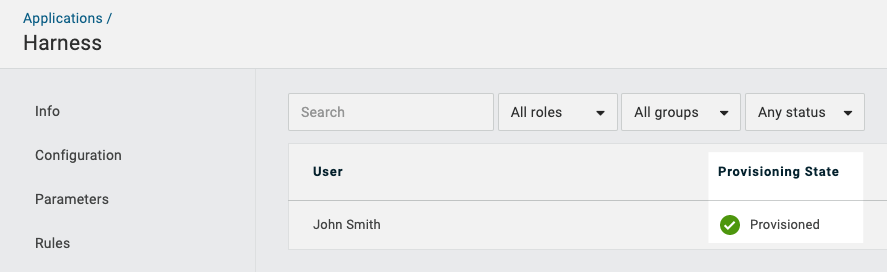
- In the Harness OneLogin app, click Users. The users are listed as Pending.
- Click each user and then click Approve.
The Provisioning State for each user is changed to Provisioned.
See the Provisioned Group In Harness
Now that you have provisioned users using the Harness OneLogin app, you can see the new group and users in Harness.
- In Harness, click Access Management.
- Click User Groups.
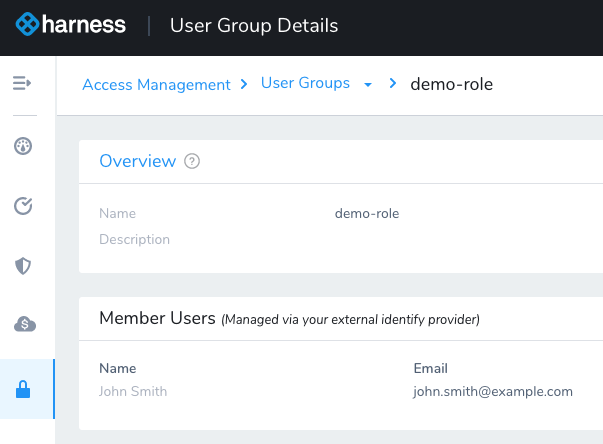
- Locate the name of the User Group. It is named after the role you created. Click the User Group.
You can see the User Group and Users are provisioned.
 Repeat the steps in this process for additional users.
Limitations
This integration does not support updating a provisioned user's Email in OneLogin. Once the user is provisioned in Harness, the user's email address must remain the same. If you change the email address in OneLogin and then try to remove the user from Harness, the removal will fail.
Once a user is provisioned in Harness, you cannot delete the user in the Harness Manager. You must delete the user in OneLogin.
The provisioned user cannot use the Harness OneLogin app to log into Harness unless OneLogin is also set up for OneLogin SAML authentication in Harness. They must use their email address and password.
Multiple Values in SAML Response for Group Attribute
Harness SAML authorization works with single values in the SAML response. If multiple values are included, it will fail.
Instead, create a Custom Param with multi-value support fields (Default;Role1;SAMLTest):
<saml:Attribute Name="Group3" NameFormat="urn:oasis:names:tc:SAML:2.0:attrname-format:basic">
  <saml:AttributeValue xmlns:xsi="http://www.w3.org/2001/XMLSchema-instance"
  xsi:type="xs:string">Default;Role1;SAMLTest</saml:AttributeValue>
</saml:Attribute>
Assigning Permissions Post-Provisioning
Permissions can be assigned manually or via the Harness API: