Manage Alert Notifications
The Alert Notification Rules determine which alerts to send to specific User Groups, such as an alert that a Harness Delegate is down. This topic explains the process to set up notification rules and alerts.
In this topic:
- Before You Begin
- Step 1: Set up Alert Notification Rules
- Step 2: Set up Alerts
- Step 3: Set up 24/7 Alerts
- Review: Alert Thresholds
- Step 4: Set up Workflow and Phase Notifications
Before You Begin
Step 1: Set up Alert Notification Rules
To set up an Alert Notification Rule, do the following:
- In Harness Manager, click Setup, and then click Alert Notification Rules. The Alert Notification Rules settings appear.
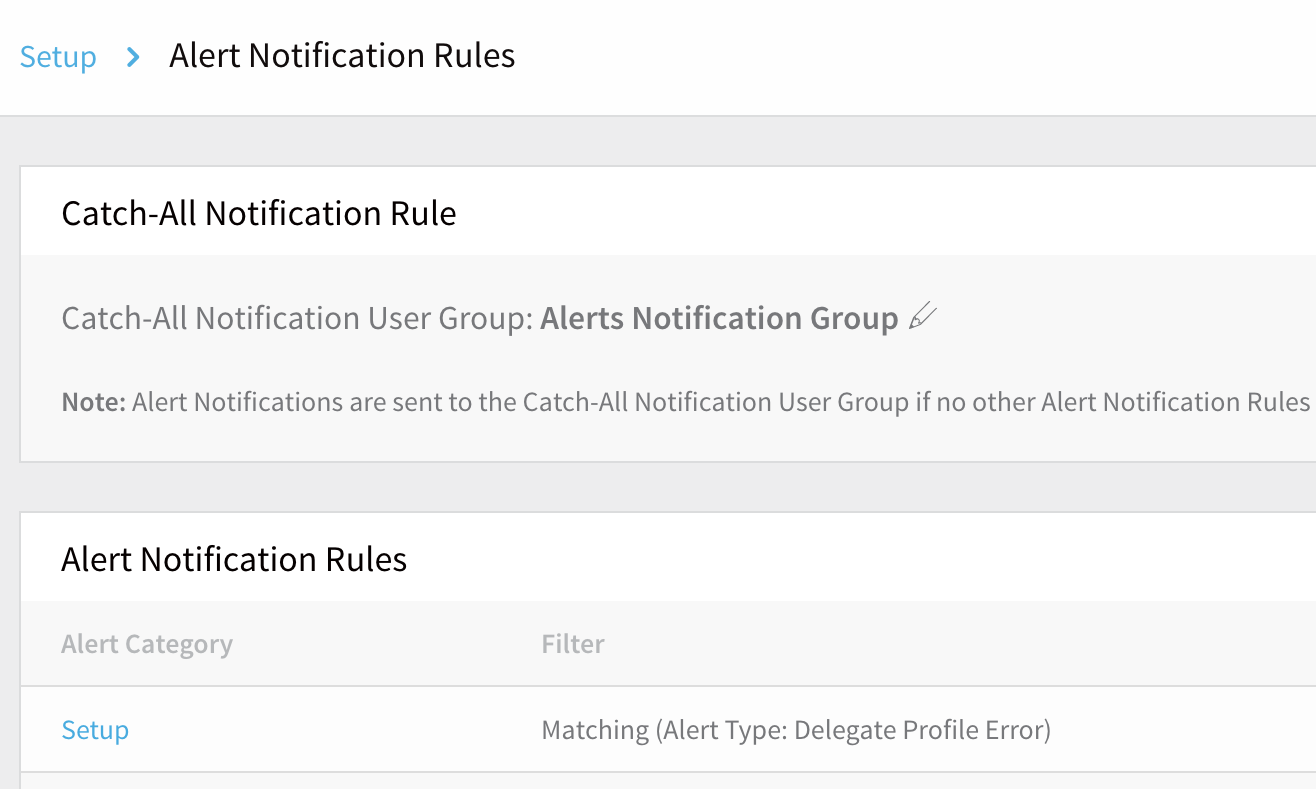
The options here are outlined in the following sections:
Alert Notification Status Toggle
The Alert Notification Status slider at upper right is a global panic button for situations where your users are receiving too-frequent notifications. By sliding this to its OFF position, you restrict notifications to Harness Manager's adjacent bell-shaped Alerts indicator, only. This prevents notifications from being forwarded to any of the channels configured below.
While set to OFF, this Status toggle will suppress notifications to all User Groups—those configured under both the Catch-All Notification Rule and Alert Notification Rules sections.
Catch-All Notification Rule Setup
In Catch-All Notification Rule, you specify the User Groups to use as the Catch-All Notification Groups, and the alert rules for those Groups. Whatever rules are not covered by the parallel Alert Notification Rules section are applied to the User Groups in the Catch-All Notification Rule section.
For example, if a specific rule is not applied to any User Group in the Alert Notification Rules section, then that alert is sent to the User Groups set up in the Catch-All Notification Rule section.
At least one Catch-All Notification Rule User Group is required. By default, the Account Administrator User Group is used.
To set up a Catch-All Notification Rule User Group, do the following:
- In the Alert Notification Rules page, click the pencil icon next to the Catch-All Notification User Group. The Notification Settings dialog appears.
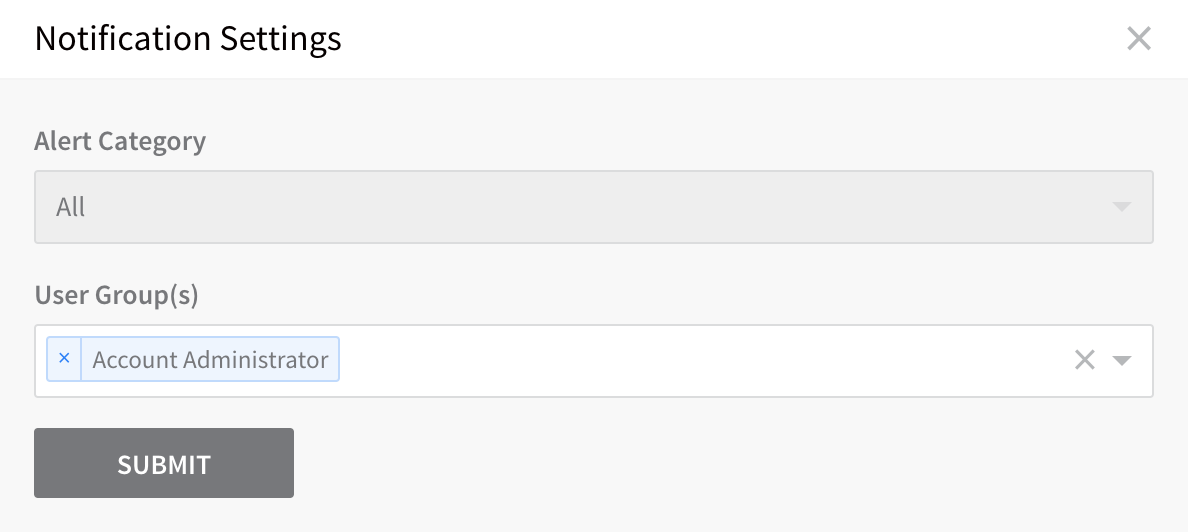
- In User Group(s), select the User Groups to set as the Catch-All Notification User Groups.
- Click SUBMIT. The groups you selected are listed.
For the Catch-All group, the Notification Settings dialog's Alert Category selection is locked to All alerts.
Alert Notification Rules Setup
The Alert Notification Rules determine how alerts are routed to User Groups.

To begin defining an alert notification rule, do the following:
- In the Alert Notification Rules section, click Add New Rule. The Notification Settings dialog appears.
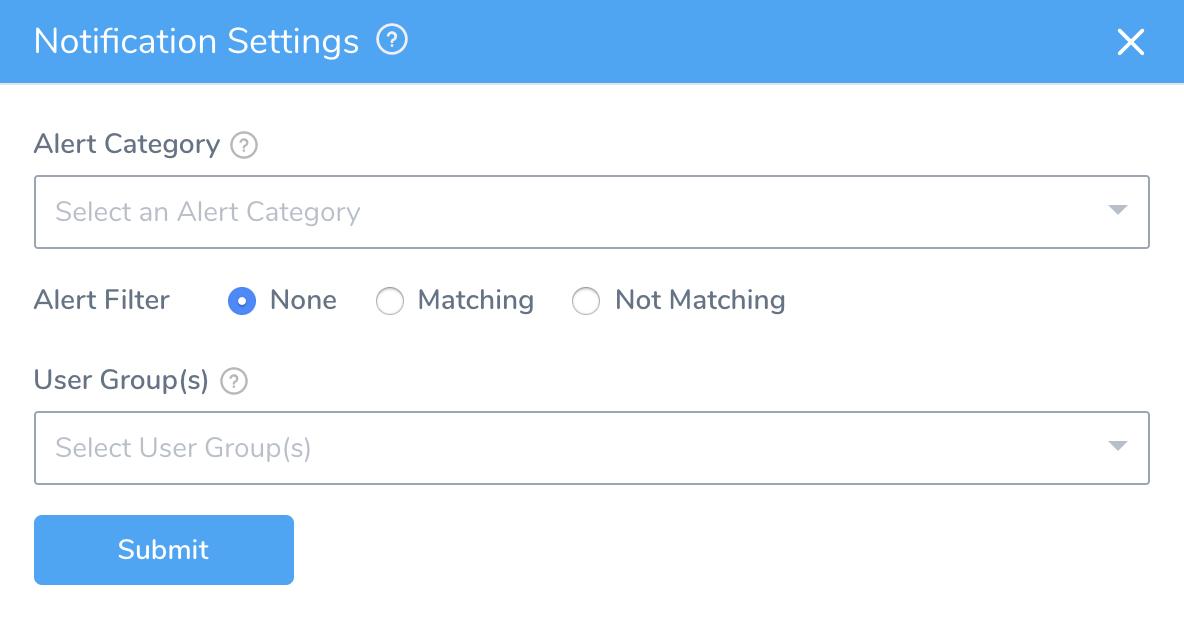
- Set the Alert Filter to either Matching or Not Matching, depending on the type of rule you want to create.

- In Alert Category, select a category.
The dialog now displays different controls, depending on which category you selected:
- Setup – These alerts are triggered by events within Harness.
- 24/7 Service Guard – These alerts are triggered by Harness' analysis of data from your configured third-party monitoring and verification tools.
Step 2: Set up Alerts
Selecting an Alert Category of Setup keeps the Notification Settings dialog compact. To finish defining your notification rule:
- In Alert Type, select the specific alert for this rule.
- In User Groups, select the User Groups that will receive the alert.
When you are done, the dialog will look something like this:
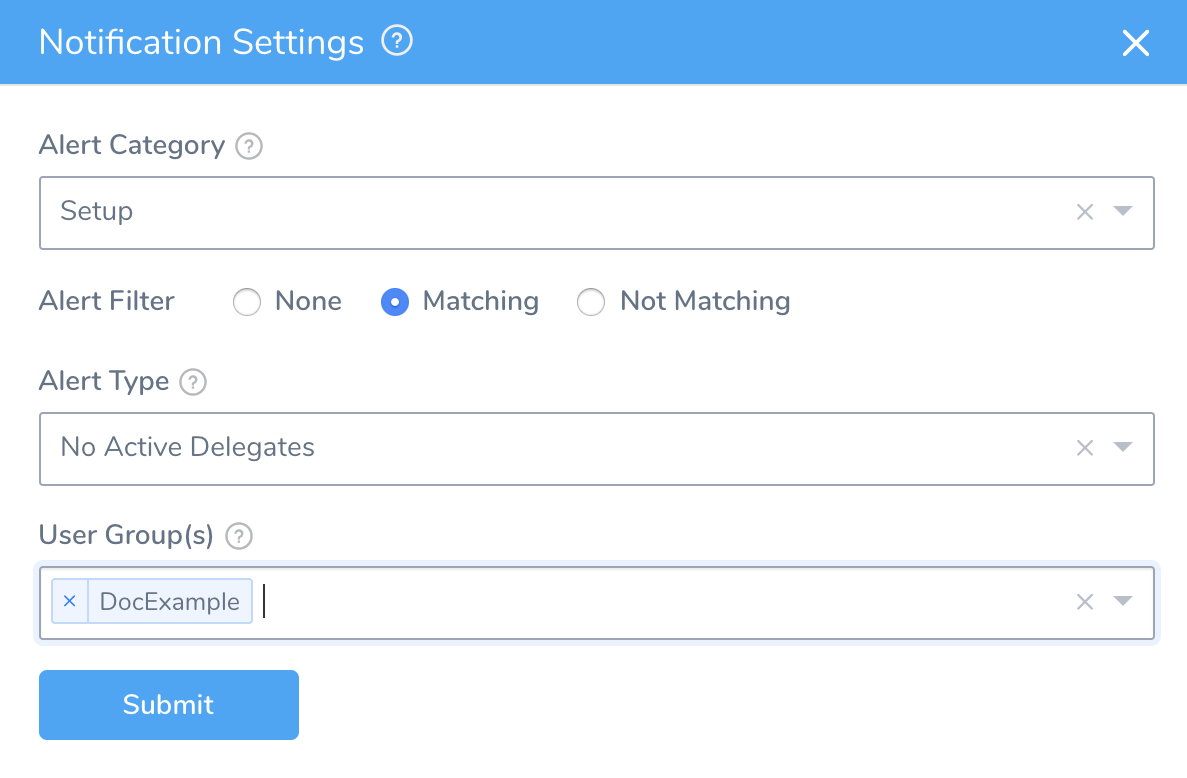
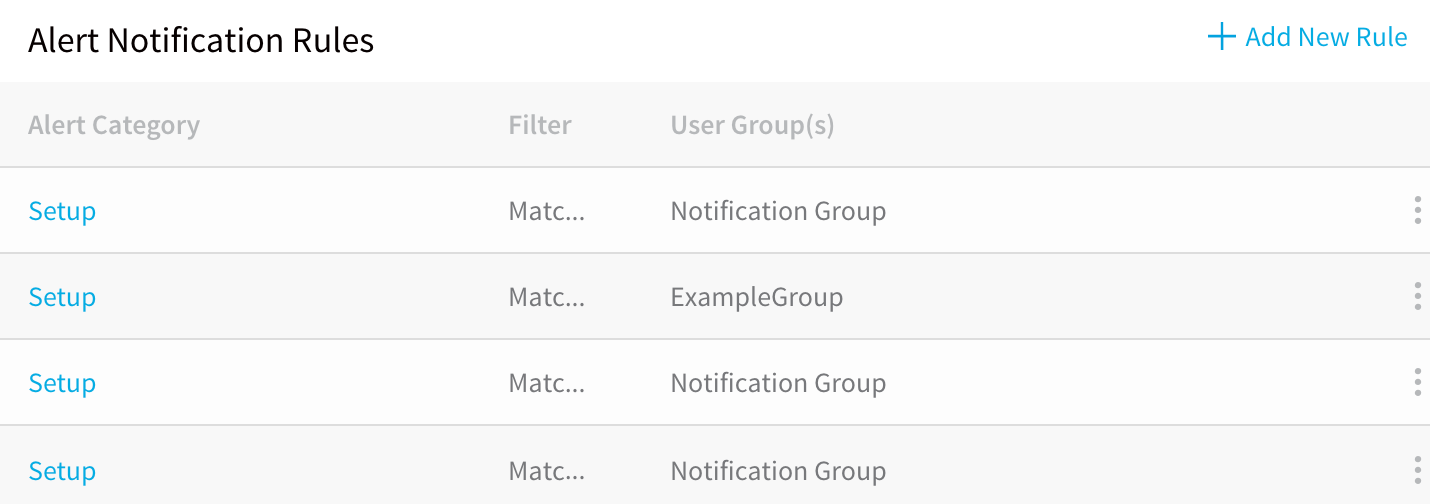
- Click SUBMIT. The new rule is displayed.
Step 3: Set up 24/7 Service Guard Alerts
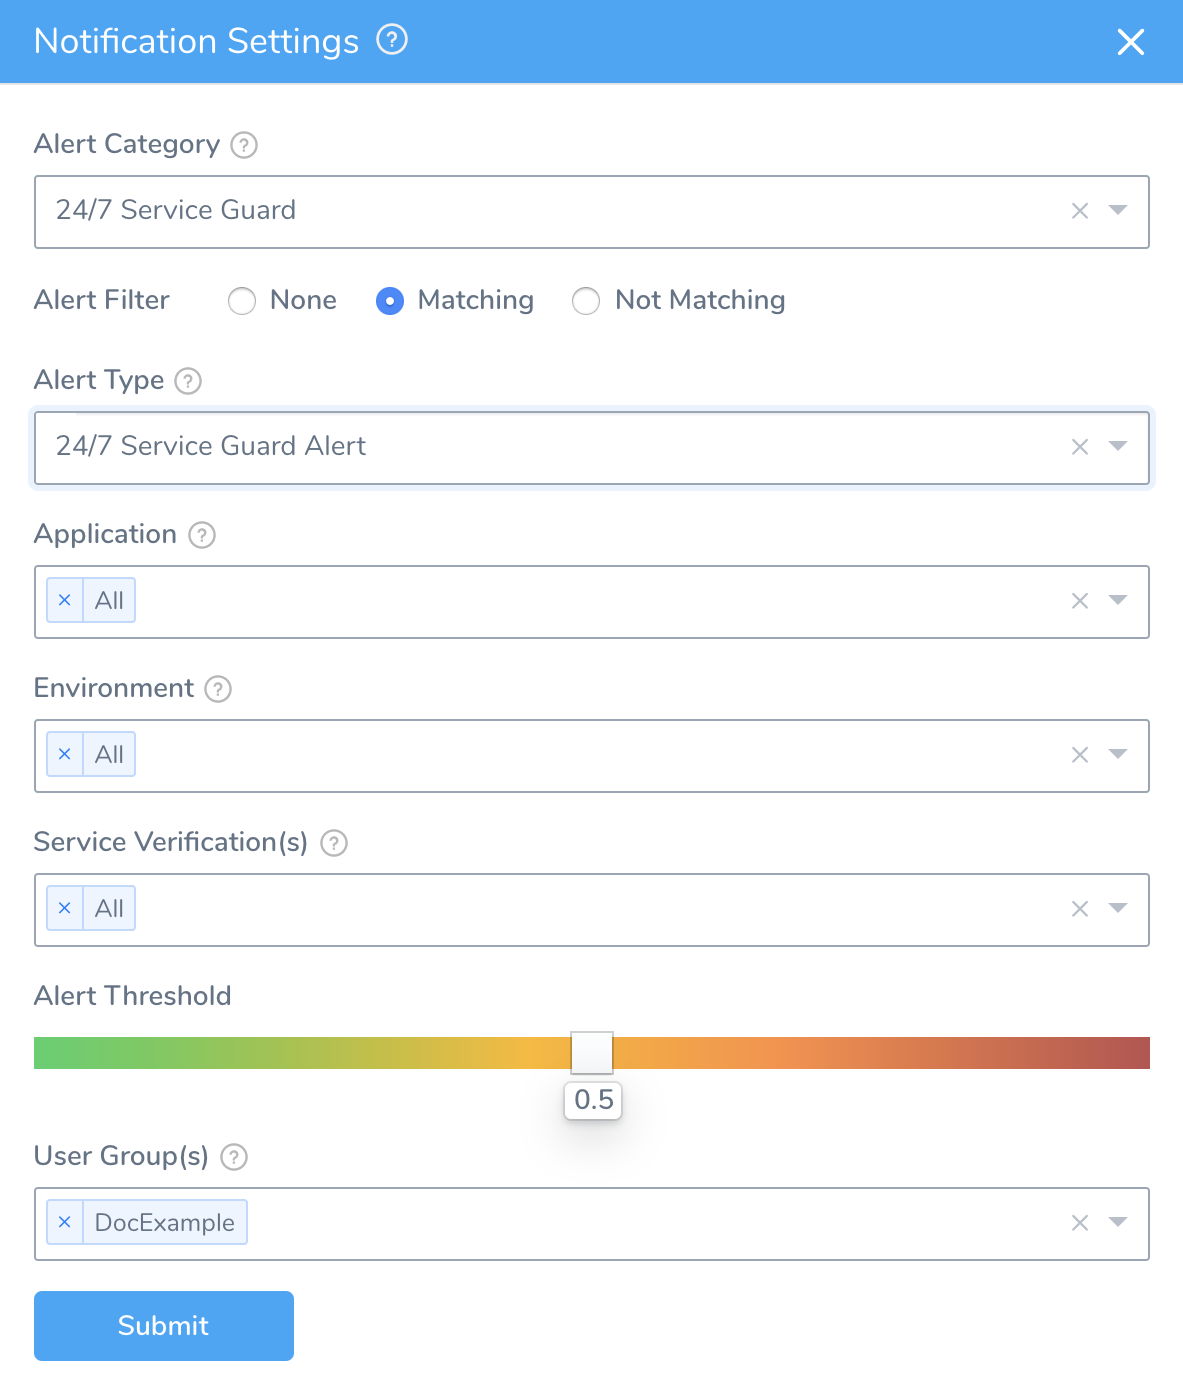
Setting the Alert Category to 24/7 Service Guard expands the Notification Settings dialog. Use the additional controls here to fine-tune how this rule will send alerts to your User Groups. (For details, see Alert Thresholds.) To continue defining the rule:
Set the Alert Type to 24/7 Service Guard.
- Leave the Application multi-select drop-down set to All, or limit this rule by selecting one or more specific Harness Applications.
- Leave the Environment drop-down set to All, or limit this rule by selecting one or more specific Harness Environments.
- If you have modified the Application and/or Environment defaults, select corresponding Service Verification(s).
- Drag the Alert Threshold slider to set the minimum severity level for User Groups to receive these alerts. For details, see Alert Thresholds.
- Select the User Groups(s) to receive the alert.
When you are done, the dialog will look something like this:
- Click SUBMIT. The new rule is displayed.

Review: Alert Thresholds
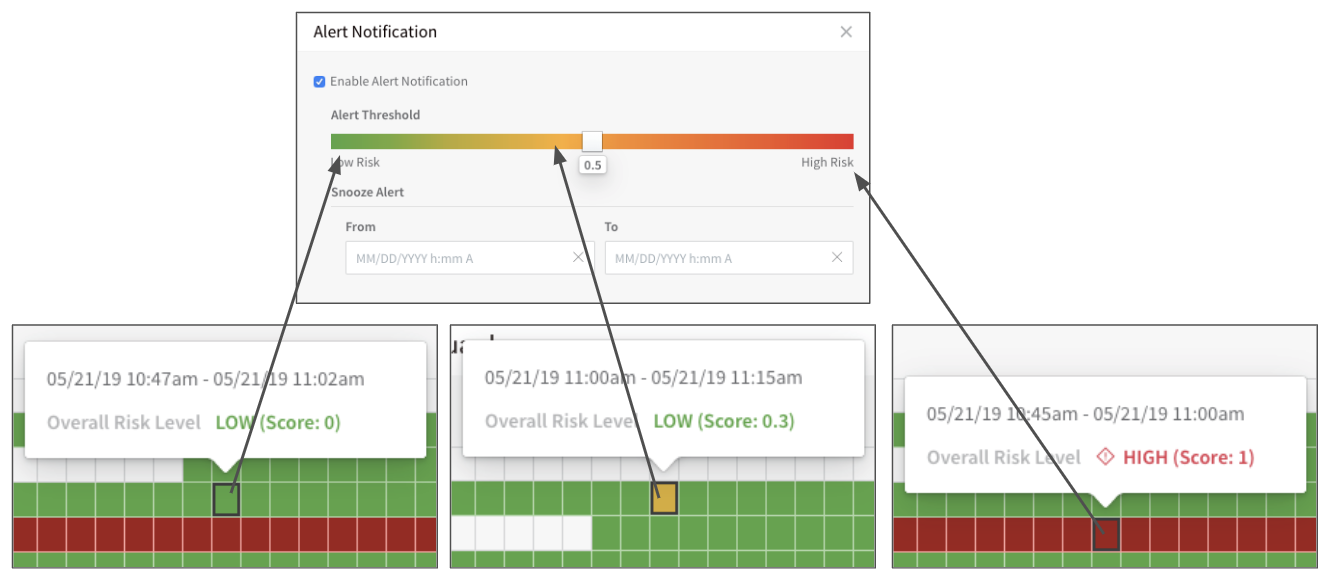
When you create a 24/7 Service Guard alert rule, you use the Alert Threshold slider to define a severity level. When Harness determines that this severity threshold has been met or exceeded, it will send alerts to the User Group(s) you configure.
You can create multiple rules to route the same Alert Type to different User Groups, depending on severity. For example, you might set three rules, using the following thresholds on the slider's 0–1.0 scale:
- 0.2+: Send to developers (via Slack, email, etc.).
- 0.5+: Send to DevOps.
- 0.8+: Send to engineering managers
Thresholds and Overall Risk Level
The slider's scale represents Harness' analyzed risk level, based on metrics, transaction history, and machine-learning models. While third-party Verification Providers' alerts are typically based on static rules, Harness' alerts are dynamic. Over time, Harness will escalate or decrease alerts, as we observe anomalies, regressions, and other factors.
To set the Overall Risk Level at which Harness originally triggers alerts—based on our analysis of data from your third-party Verification Providers—each provider's Alert Notification dialog provides a similar Alert Threshold slider. For details, see 24/7 Service Guard Overview.
Alert Examples
Here is an example of an alert in Slack:

Here is an example of an alert in email:

Step 4: Set up Workflow and Phase Notifications
Workflow notifications are set up in the Workflow Notification Strategy settings. For information on setting the Workflow Notification Strategy, see Notification Strategy.