Harness YAML quickstart
This quickstart shows you how to create a Harness Pipelines using YAML. It's not an exhaustive reference for all of the YAML entries, but a quick procedure to get you started with Harness Pipeline YAML.
Harness includes visual and YAML editors for creating and editing Pipelines, Triggers, Connectors, and other entities. Everything you can do in the visual editor you can also do in YAML.
A quick run through on how to use the YAML builder will get you up and coding Harness Pipelines in minutes. Let's get started.
For details of the YAML schema, see YAML Reference: Pipelines.
Objectives
You'll learn how to:
- View a Pipeline in the YAML builder.
- Review the Pipeline YAML schema structure.
- Use keyboard shortcuts for adding entries and selecting commands.
- Find and replace YAML.
- Verify and resolve YAML errors with the YAML builder's assistance.
Before you begin
- Review Harness Key Concepts to establish a general understanding of Harness.
- The best way to get started with YAML is to do a CI or CD quickstart and then view the YAML in Pipeline Studio. See CD Quickstarts and Get started with CI.
Visual Summary
Here's a very quick video showing you how to build a Pipeline using YAML:
Step 1: Start a New Pipeline
In your Harness Project, click New Pipeline.
Enter the name YAML Example for the Pipeline and click Start.
The Pipeline is created.
Click YAML to view the YAML editor.

You can see the Pipeline YAML. Here's an example:
pipeline:
    name: YAML Example
    identifier: YAML_Example
    projectIdentifier: CD_Examples
    orgIdentifier: default
    tags: {}
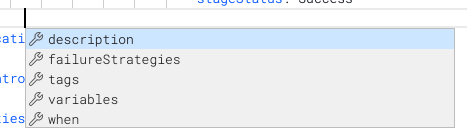
Place your cursor after tags: {} and hit Enter.
Press Ctrl + Space. The major Pipeline sections are displayed.

Completing the Pipeline in YAML is simply the process of filing out these sections.
Let's look at the YAML structure of a Pipeline.
Review: Basic Pipeline Structure
The following outline shows the basic hierarchy of the Pipeline YAML.
This outline is shown to help you gain a general idea of the structure of a Pipeline and help you know which entry to make next as you develop your Pipeline in YAML.
Here are the Pipeline settings and major sections:
pipeline:
    name: YAML Example
    identifier: YAML_Example
    projectIdentifier: CD_Examples
    orgIdentifier: default
    tags: {}
    description:
    stages:
        -
    notificationRules:
        -
    flowControl:

    properties:

    timeout:
    variables:
        -
The following steps walk through adding the YAML for the stages section of the Pipeline.
For details of the YAML schema, see YAML Reference: Pipelines.
Step 2: Add a Stage
The basic Stage YAML looks like this:
    stages:
        - stage:
              identifier:
              name:
              type:
              description:
              tags:
              spec:
                  serviceConfig:

                  infrastructure:

                  execution:
                      steps:
                          -
              variables:
                  -
              when:
                  pipelineStatus:
              failureStrategies:
                  - onFailure:
                          errors:
                              - null
In identifier, enter a unique Id for the stage, such as mystage. In the Visual editor the Id is generated automatically. In YAML, you have to enter an Id.
In name, enter a name for the stage, such as mystage.
In type, you select the type of Stage you want to add. This is the same as clicking Add Stage in the Visual editor.

For details on each type, see:
- Approval: Using Manual Harness Approval Stages, Adding Jira Approval Stages and Steps
- CI: CI Pipeline Quickstart
- Deployment: CD Quickstarts
For this quickstart, we're going to use the Deployment type.
In type, select Deployment.
Next, we'll add a spec that defines the Service, Environment, and Execution for the stage.
Stage Spec
The Stage spec contains the three major sections of the Stage:
              spec:
                  serviceConfig:
                      ...
                  infrastructure:
                      ...
                  execution:
                      steps:
                          - ...
These correspond to the Stage sections in the Visual editor:

Stage Service
In serviceConfig, press Enter, and then Ctrl + Space.
You can see the serviceConfig options:
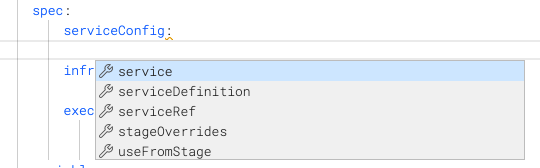
For this quickstart, we'll just use service and serviceDefinition. We're just looking at the structure so we'll use Runtime Inputs wherever we can:
              spec:
                  serviceConfig:
                      service:
                          identifier: myservice
                          name: myservice
                      serviceDefinition:
                          type: Kubernetes
                          spec:
                              manifests:
                                  - manifest:
                                        identifier: <+input>
                                        type: K8sManifest
                                        spec:
                                            store:
                                                type: Github
                                                spec:
                                                    connectorRef: <+input>
                                                    gitFetchType: Branch
                                                    branch: <+input>
                                                    folderPath: <+input>
                                                    repoName: <+input>
This stage simply adds a Service named myservice and a Service Definition using Kubernetes manifests.
For details on adding manifests to a Service Definition, see Add Kubernetes Manifests.
The connectorRef setting is for the Harness Connector that connects to the Git repo where the manifests are located. In the Visual editor you can create/select Connectors inline, but in the YAML editor, you must use the name of an existing Connector. In this example, we simply use a Runtime Input (connectorRef: <+input>) and we can add the Connector later.
Stage Infrastructure
In infrastructure, press Enter, and then Ctrl + Space.
You can see the infrastructure options:
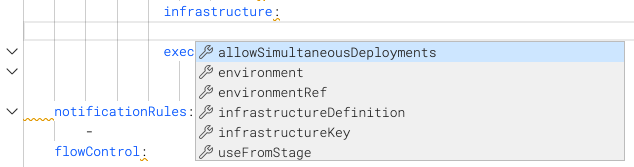
For this quickstart, we'll just use environment and infrastructureDefinition. We're just looking at the structure so we'll use Runtime Inputs wherever we can:
                  infrastructure:
                      environment:
                          identifier: myinfra
                          name: myinfra
                          type: PreProduction
                      infrastructureDefinition:
                          type: KubernetesDirect
                          spec:
                              connectorRef: <+input>
                              namespace: <+input>
                              releaseName: <+input>
In infrastructureDefinition, you can see that we are using a Kubernetes Cluster Connector for a platform-agnostic direct connection to the target cluster.
Stage Execution
In execution, in steps, press Enter, type -, and then press Space.
You can see the steps options:
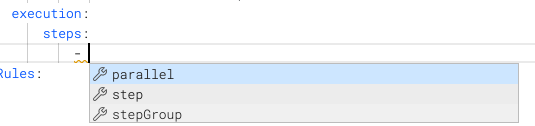
Click step. The step settings appear.
In type, press Ctrl + Space to see the steps you can add.
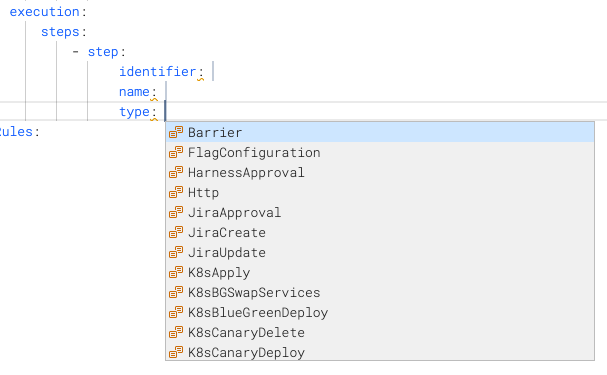
For this quickstart, we'll just use ShellScript. Here's an example:
                          - step:
                                identifier: ssh
                                name: ssh
                                type: ShellScript
                                description: <+input>
                                spec:
                                    shell: Bash
                                    source:
                                        type: Inline
                                        spec:
                                            script: echo "hello world"
                                    timeout: <+input>
                                    onDelegate: false
                                failureStrategies:
                                    - onFailure:
                                            errors:
                                                - AllErrors
                                            action:
                                                type: Abort
                                when:
                                    stageStatus: Success
The step Failure Strategy is set using failureStrategies and the Conditional Execution is set using when.
Stage Conditional Execution
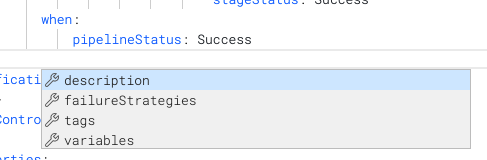
You can add the Stage Conditional Execution settings before or after stage. To add them after, make sure you indent to the same depth as stage identifier. and then press Ctrl + Space.
You can see the remaining options:
Click when. The pipelineStatus setting appears.
Press Ctrl + Space and select Success.
Stage Failure Strategy
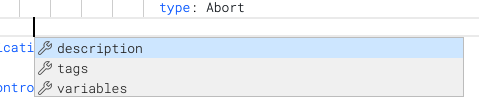
Create a new line under pipelineStatus: Success , indent to the same level as when, and the remaining options appear.
Click failureStrategies. The Failure Strategy settings appear.
Here's an example:
              failureStrategies:
                  - onFailure:
                          errors:
                              - AllErrors
                          action:
                              type: Abort
Stage Variables
Create a new line, indent to the same level as failureStrategies, and the remaining options appear.
Click variables. On the new line, press Ctrl + Space. The variables options appear.
Here's an example:
              variables:
                  - name: myvar
                    type: String
                    value: myval
The Pipeline stage is now complete.
Click Save.
For details of the YAML schema, see YAML Reference: Pipelines.
Review: Autocomplete
The YAML editor has an autocomplete feature that makes it very easy to see what entries are available.
The keyboard command for autocomplete is Ctrl + Space.

If an entry already has a value, the autocomplete will not show you other options. You need to delete the value and then enter Ctrl + Space.
Let's look at an example.
Navigate to rollbackSteps: [] at the bottom of the stage.
Delete the [], press Enter, type -, and press Space.
You can see the available options:
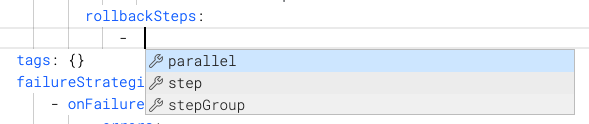
Click step. The default step settings appear:
                      rollbackSteps:
                          - step:
                                identifier:
                                name:
                                type:
In type, press Ctrl + Space to see the options. You can see all of the available steps:
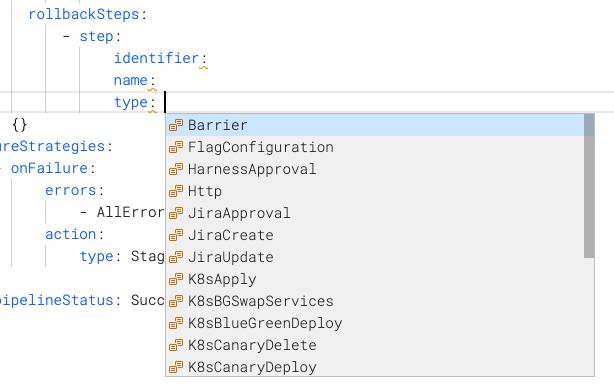
This shows you how easy it is to view settings with autocomplete.
Review: Find and Replace YAML
Click Cmd/Ctrl + f to see the Find and Replace settings.

You can quickly find and replace anything in the YAML.
Review: Command Palette
The command palette keyboard command is F1.
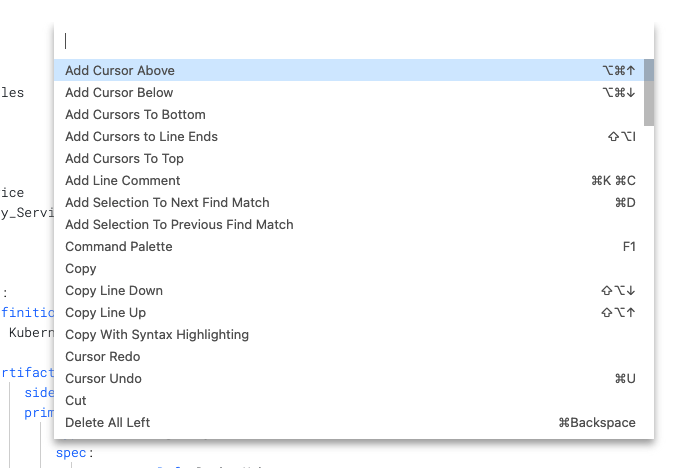
The command palette displays all of the commands and the keyboard shortcuts for most commands.
Review: Validating YAML
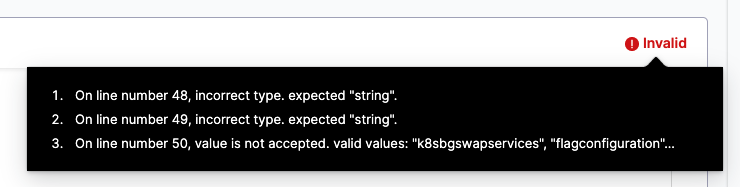
Ad you edit your YAML you will see Invalid to highlight that your YAML is incomplete.
Hover over Invalid to see where the errors are:
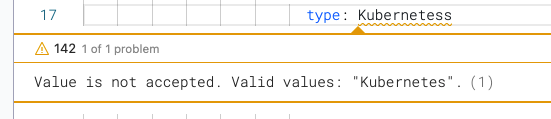
You can also hover over any incomplete entry to see what is expected:

Click Peek Problem to see suggestions and valid values also:
Next steps
In this tutorial, you learned how to:
- View a Pipeline in the YAML builder.
- Review the Pipeline YAML schema structure.
- Use keyboard shortcuts for adding entries and selecting commands.
- Find and replace YAML.
- Verify and resolve YAML errors with the YAML builder's assistance.