Add WinRM Connection Credentials
You can set up a WinRM connection and then use it as a Deployment Type in an Environment's Service Infrastructure.
Before You Begin
Review: Limitations
Secrets cannot contain special characters without escaping. For example, if the secret contains a $ like ab$c it will fail.
Escape any special characters in your secrets: ab\$c.
Step 1: Set Up the WinRM Connection
In Secrets Management, under Execution Credentials, click WinRM Connection.
The WinRM Connection Attributes dialog appears.
Step 2: Display Name
Name to identify the connection. You will use this name to identify this connection when setting up the Connection Attributes in the environment Service Infrastructure.
Step 3: Auth Scheme
Specifies the mechanism used to authenticate the credentials used in this connection. Select NTLM.
Step 4: Domain
The Active Directory domain name where the user account in the credentials is registered. This can be left blank when using a local user.
Step 5: User Name
The user account credentials for this connection. The user must belong to the same Active Directory domain as the Windows instances that this connection uses. These are the same user account credentials you would use to log into the VM using a remote connection such as Microsoft Remote Desktop.
In cases when Domain is blank (local user), you can put ./ before the user name. The ./ prefix is equivalent to local_host_or_ip\user.
Step 6: Select Encrypted Password
Make sure you use a Harness Encrypted Text secret to save the password and refer it using this option. Either select an existing secret from the drop down list or create a new one by clicking + Create Encrypted Text.
For more information on creating Encrypted Text, see Harness Encrypted Text secret.
Step 7: Use SSL
Enables an HTTPS connection instead of an HTTP connection. SSL is recommended.
When you select Use SSL, the port number in WinRM Port changes to the HTTPS port 5986 automatically.
When Use SSL port is not selected, the port number is set to the HTTP port 5985.
Step 8: Skip Cert Check
When connected over HTTPS (Use SSL in enabled), the client does not validate server certificate.
Step 9: Use No Profile
When you run a script, PowerShell will first load profiles and then run the script.
You might not know what the profile contains, so it can result in unexpected behavior.
Select this option to make the PowerShell session run without loading the Windows PowerShell profile, like running PowerShell -NoProfile.
See The NoProfile parameter from Microsoft.
Step 10: WinRM Port
Specifies the network port on the remote computer to use.
To connect to a remote computer, the remote computer must be listening on the port that the connection uses. The default ports are 5985, which is the WinRM port for HTTP, and 5986, which is the WinRM port for HTTPS.
To determine what ports WinRM is listening on, use the command:
winrm e winrm/config/listener
Step 11: Test the Connection
Click Test to ensure that the connection is successful. Once the connection is successful, click Submit.
Generally, the Harness Delegate and the target node will be in the same subnet and so the private IP address of the target host can be used.
If the Harness Delegate cannot resolve the private address of the target node, try the public address. Some cloud networking scenarios prevent private address resolution.
Step 12: Update the Infrastructure Definition
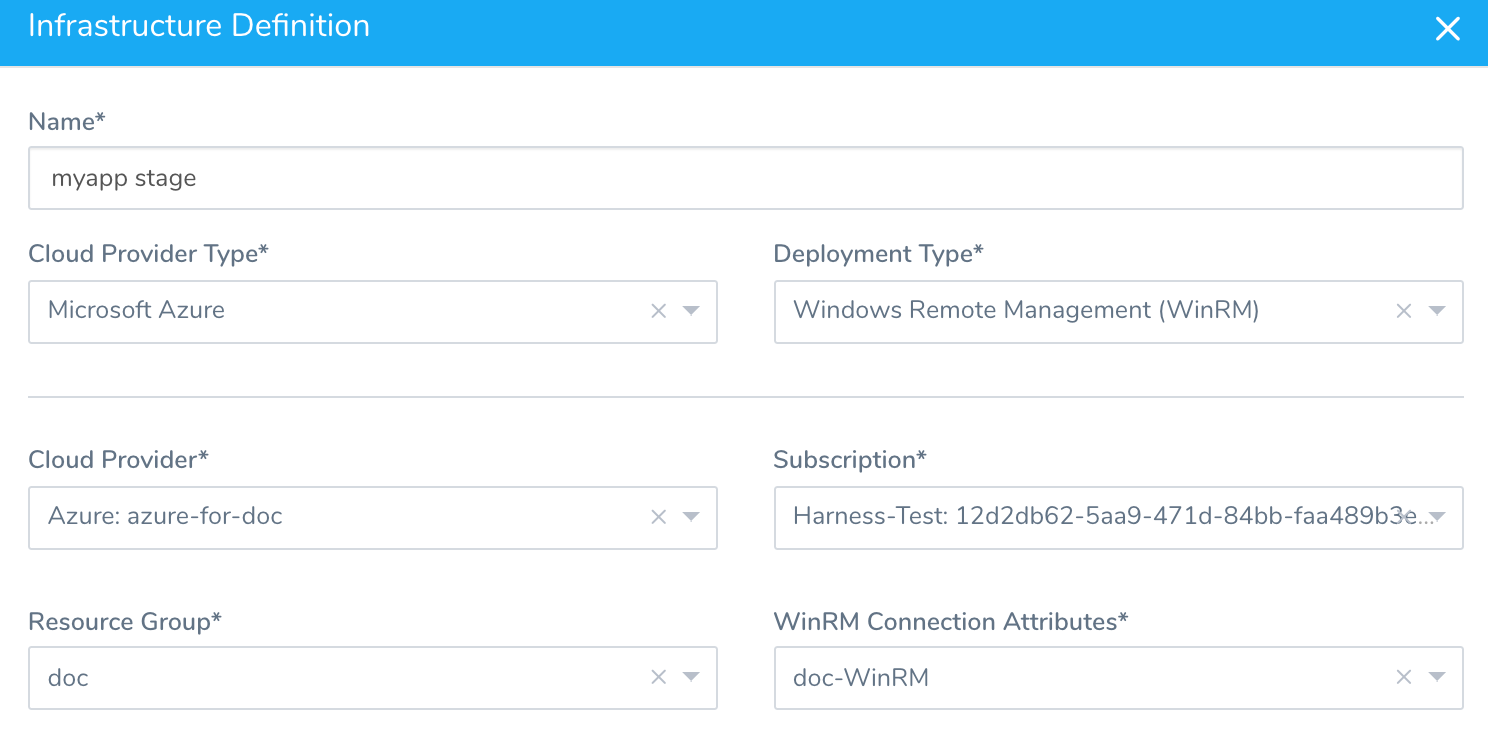
In Infrastructure Definition, the Infrastructure Definition dialog will look like this:

Troubleshooting
The WinRM Connection simply checks a log in. When you use the WinRM Connection to perform deployment operations other errors might occur.
In general, the errors result from port conflicts or the WinRM settings on the target host are not set up correctly.
See: