Connect to Custom Verification for Custom Logs
Connect Harness to a Custom Logs Provider to have Harness verify the success of your deployments. Harness will use your tools to verify deployments and use its machine learning features to identify sources of failures.
Before You Begin
Step 1: Add Custom Verification Provider
To connect a custom logs provider, do the following:
- Click Setup.
- Click Connectors.
- Click Verification Providers.
- Click Add Verification Provider, and click Custom Verification.
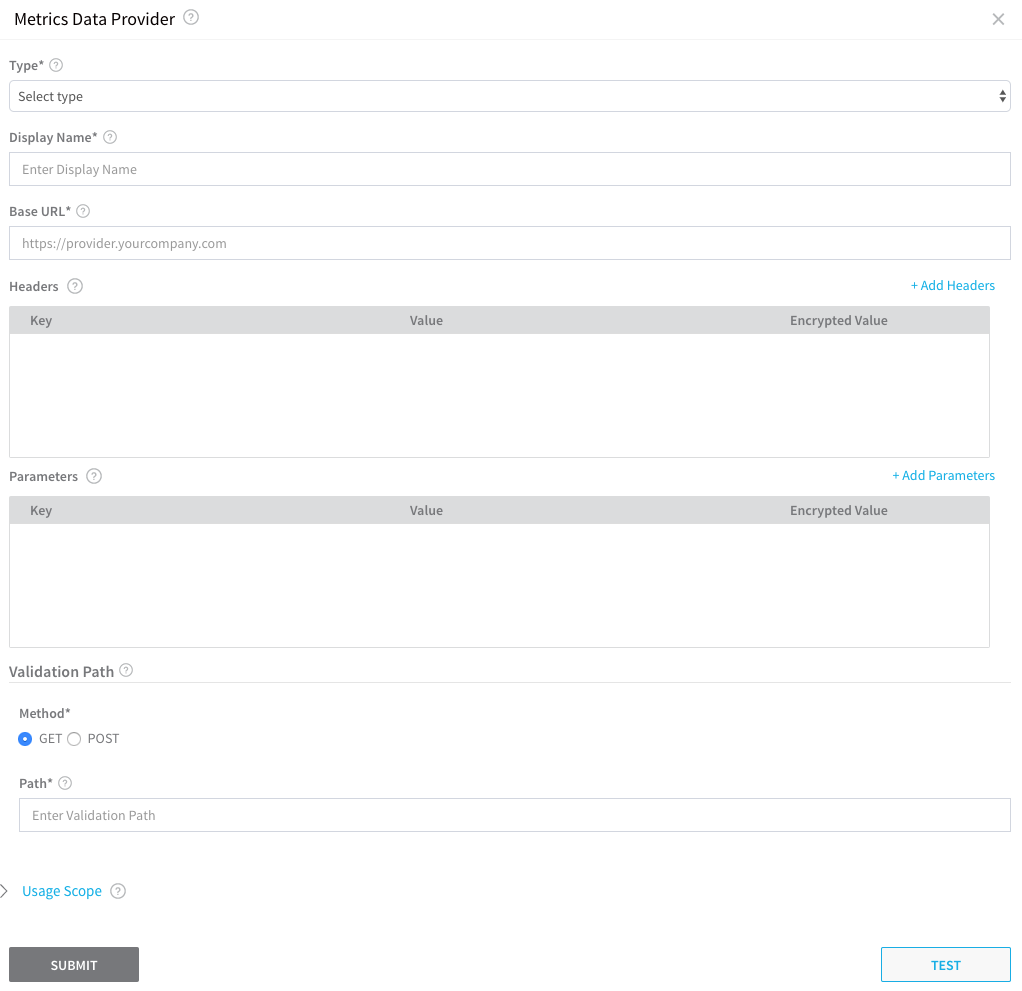
The Logs Data Provider dialog appears. In Type, select Custom Logs Provider.

Step 2: Display Name
In Display Name, give the Verification Provider a name. You will use this name to select this provider in a Workflow.
Step 3: Base URL
In Base URL, enter the base URL of the REST endpoint where Harness will connect. Often, the URL is the server name followed by the index name, such as http://server_name/index_name.
Step 4: Parameters
In Parameters, click Add Parameters, and add any required parameters.
Step 5: Validation Path
In Validation Path, you will define a validation path used by Harness to validate the connection and ensure a Harness Delegate can reach the provider. Harness expects an HTTP 200 response.
Step 6: Encrypted Text Secrets in Body
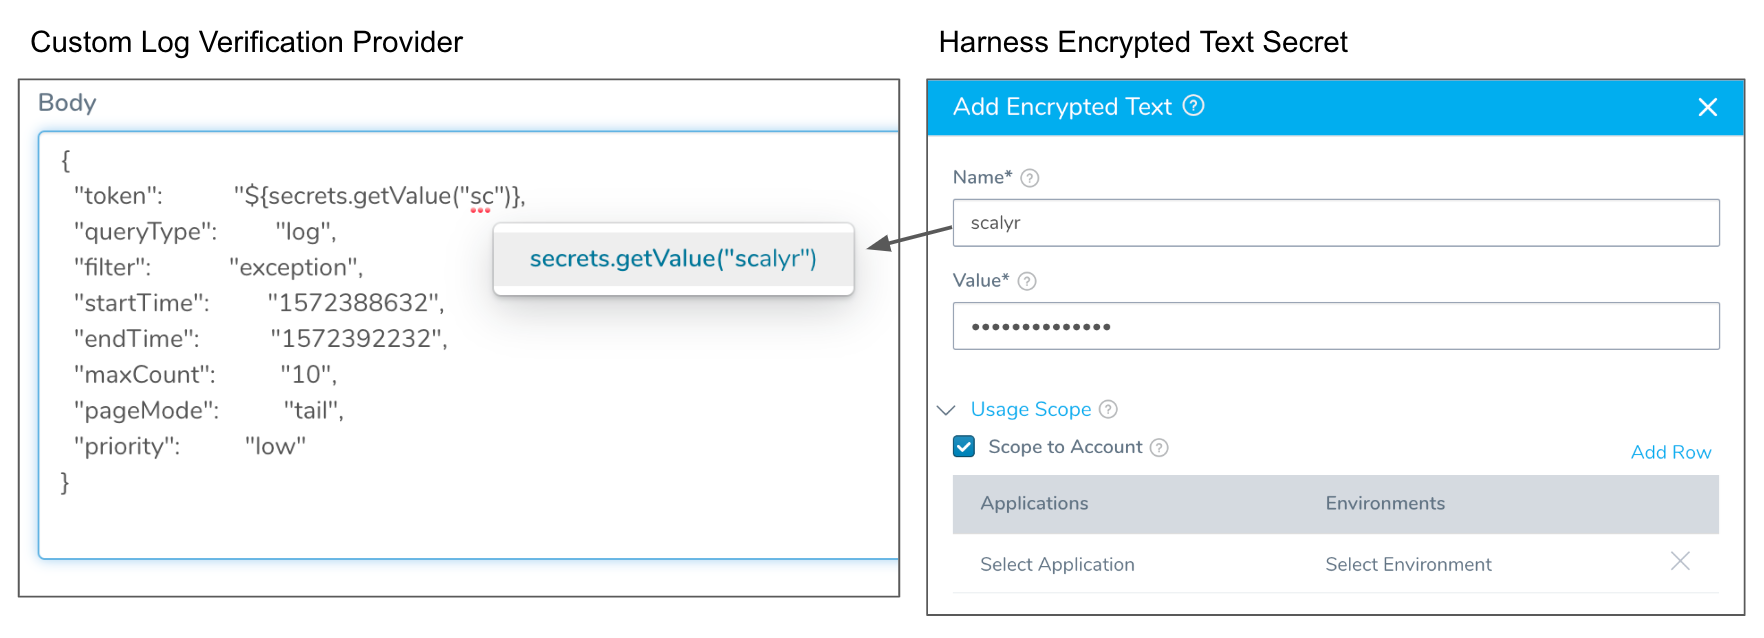
In some cases, you might need to include a token in the Body in Validation Path. You can enter your token in Body, but to protect your token, you can add it to Harness as an Encrypted Text secret and then reference it in Body using the ${secrets.getValue("secret_name")} syntax:

The Encrypted Text secret must have Scope to Account enabled or it cannot be used in the Custom Logs Provider.
If you want to use the same token in your 24/7 Service Guard Custom Logs setup, you must create another Encrypted Text secret for the same token and ensure that Scope to Account is not enabled. Encrypted Text secrets used in Harness account settings are not shared with Encrypted Text secrets used in Harness Applications. This enables you to prevent Application users from accessing account-level secrets.
Step 7: Test and Submit
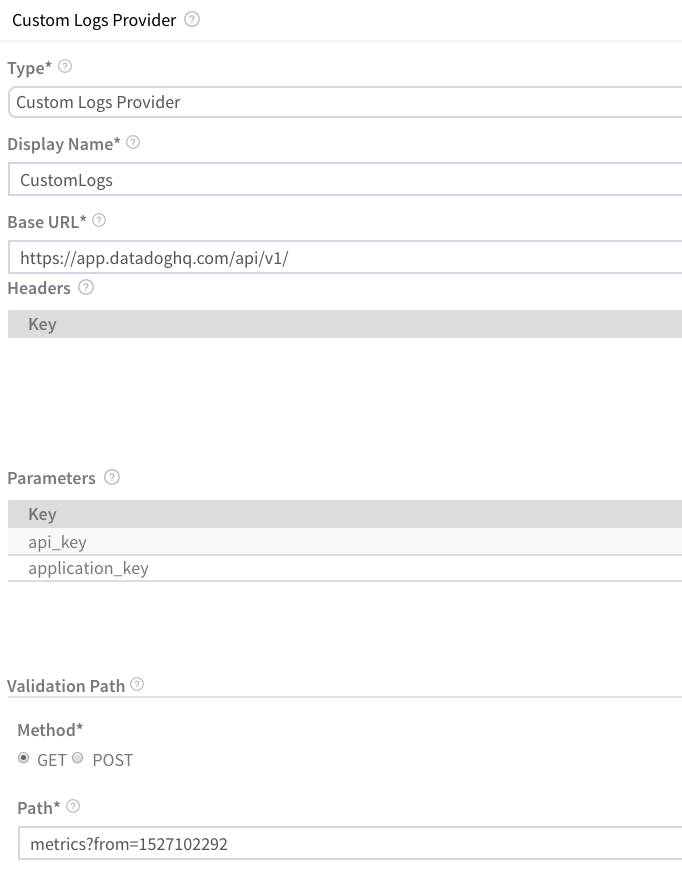
When you are finished, the dialog will look something like this:

Click TEST to validate the settings and SUBMIT to add the Verification Provider.