Connect to Datadog as a Custom APM
Currently, Datadog-Harness integration is for Kubernetes deployments only. To use Datadog with other deployment types, such as ECS, use the following example of how to use the Custom Metrics Provider with Datadog.
Before You Begin
Step 1: Add Datadog as a Custom Verification Provider
To add a Custom Metrics Provider using Datadog, do the following:
- In Harness Manager, click Setup > Connectors > Verification Providers.
- Click Add Verification Provider, and click Custom Verification. The Metrics Data Provider dialog appears.
- In Type, select Metrics Data Provider.
Step 2: Display Name
In Display Name, give the Verification Provider a name. You will use this name to select this provider in a Workflow.
Step 3: Base URL
In Base URL, enter https://app.datadoghq.com/api/v1/.
Step 4: Parameters
In Parameters, click Add Parameters, and add the following parameters.
| Key | Value | Encrypted Value |
| api_key | Enter the API key. | Checked |
| application_key | Enter the application key. | Checked |
If you need help obtaining the API and Application keys, see the following:
API Key
To create an API key in Datadog, do the following:
In Datadog, mouseover Integrations, and then click APIs.
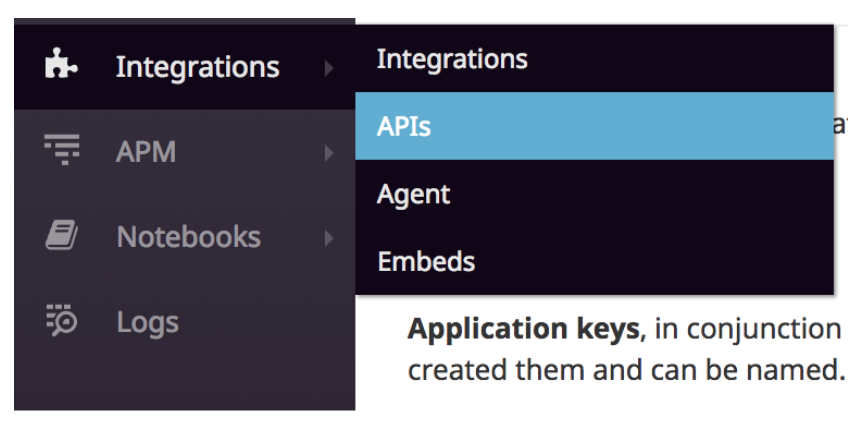
The APIs page appears.
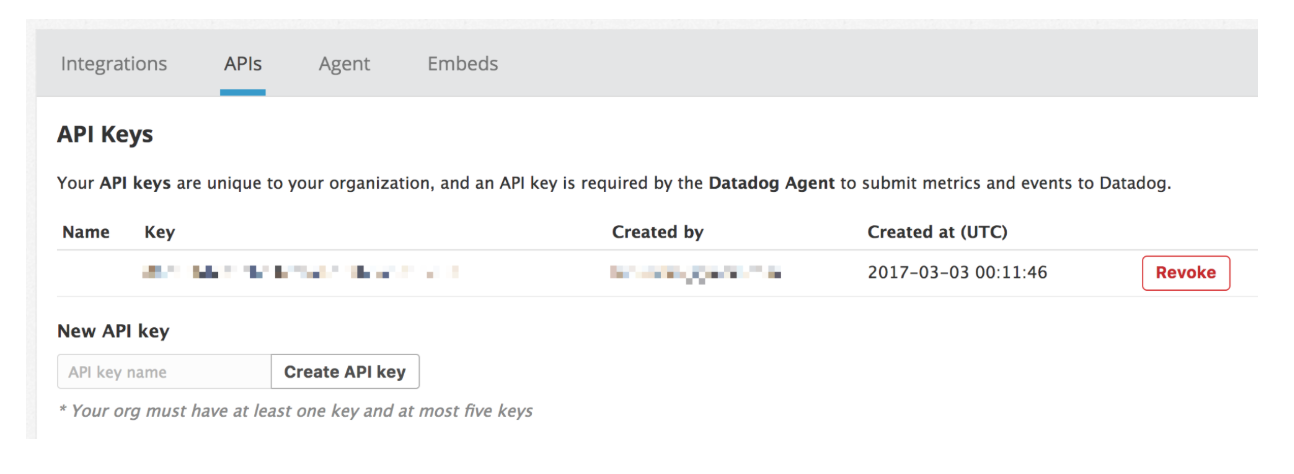
In API Keys, in New API key, enter the name for the new API key, such as Harness, and then click Create API key.
Copy the API key and, in Harness, paste it into the Value field.


Application Key
To create an application key in Datadog, do the following:
In Datadog, mouseover Integrations, and then click APIs. The APIs page appears.
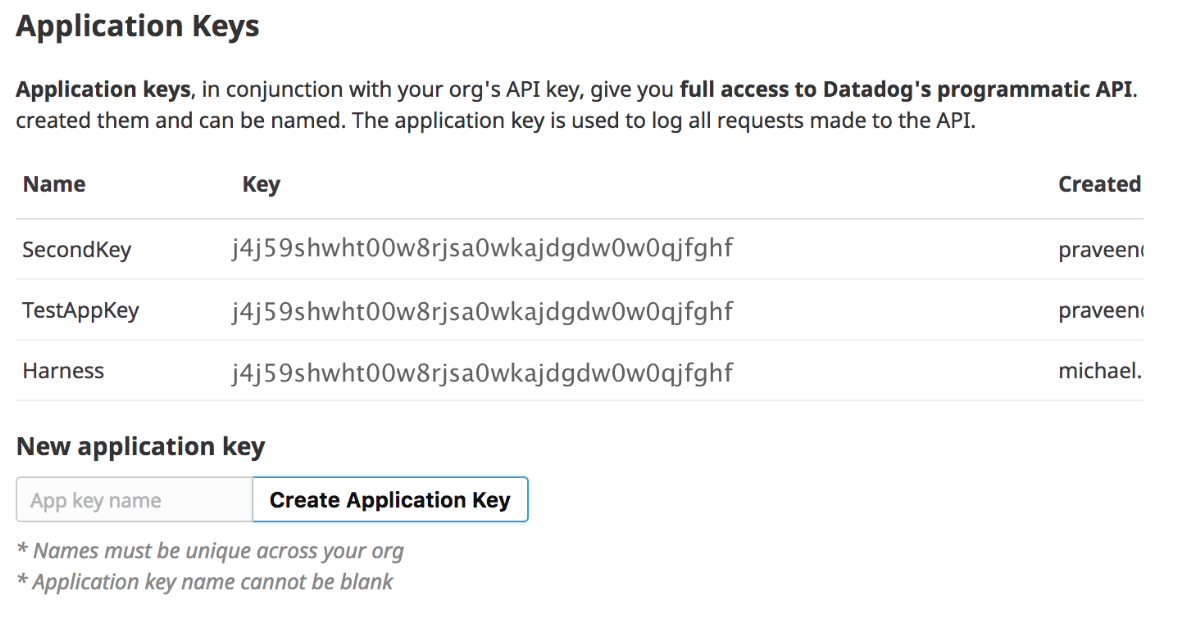
In Application Keys, in New application key, enter a name for the application key, such as Harness, and click Create Application Key.
Copy the API key and, in Harness, paste it into the Value field.

Step 5: Validation Path
In Validation Path, enter metrics?from=1527102292. This is the epoch seconds value used to ensure an HTTP 200 response with the credentials validated.
When you are finished, the dialog will look something like this:
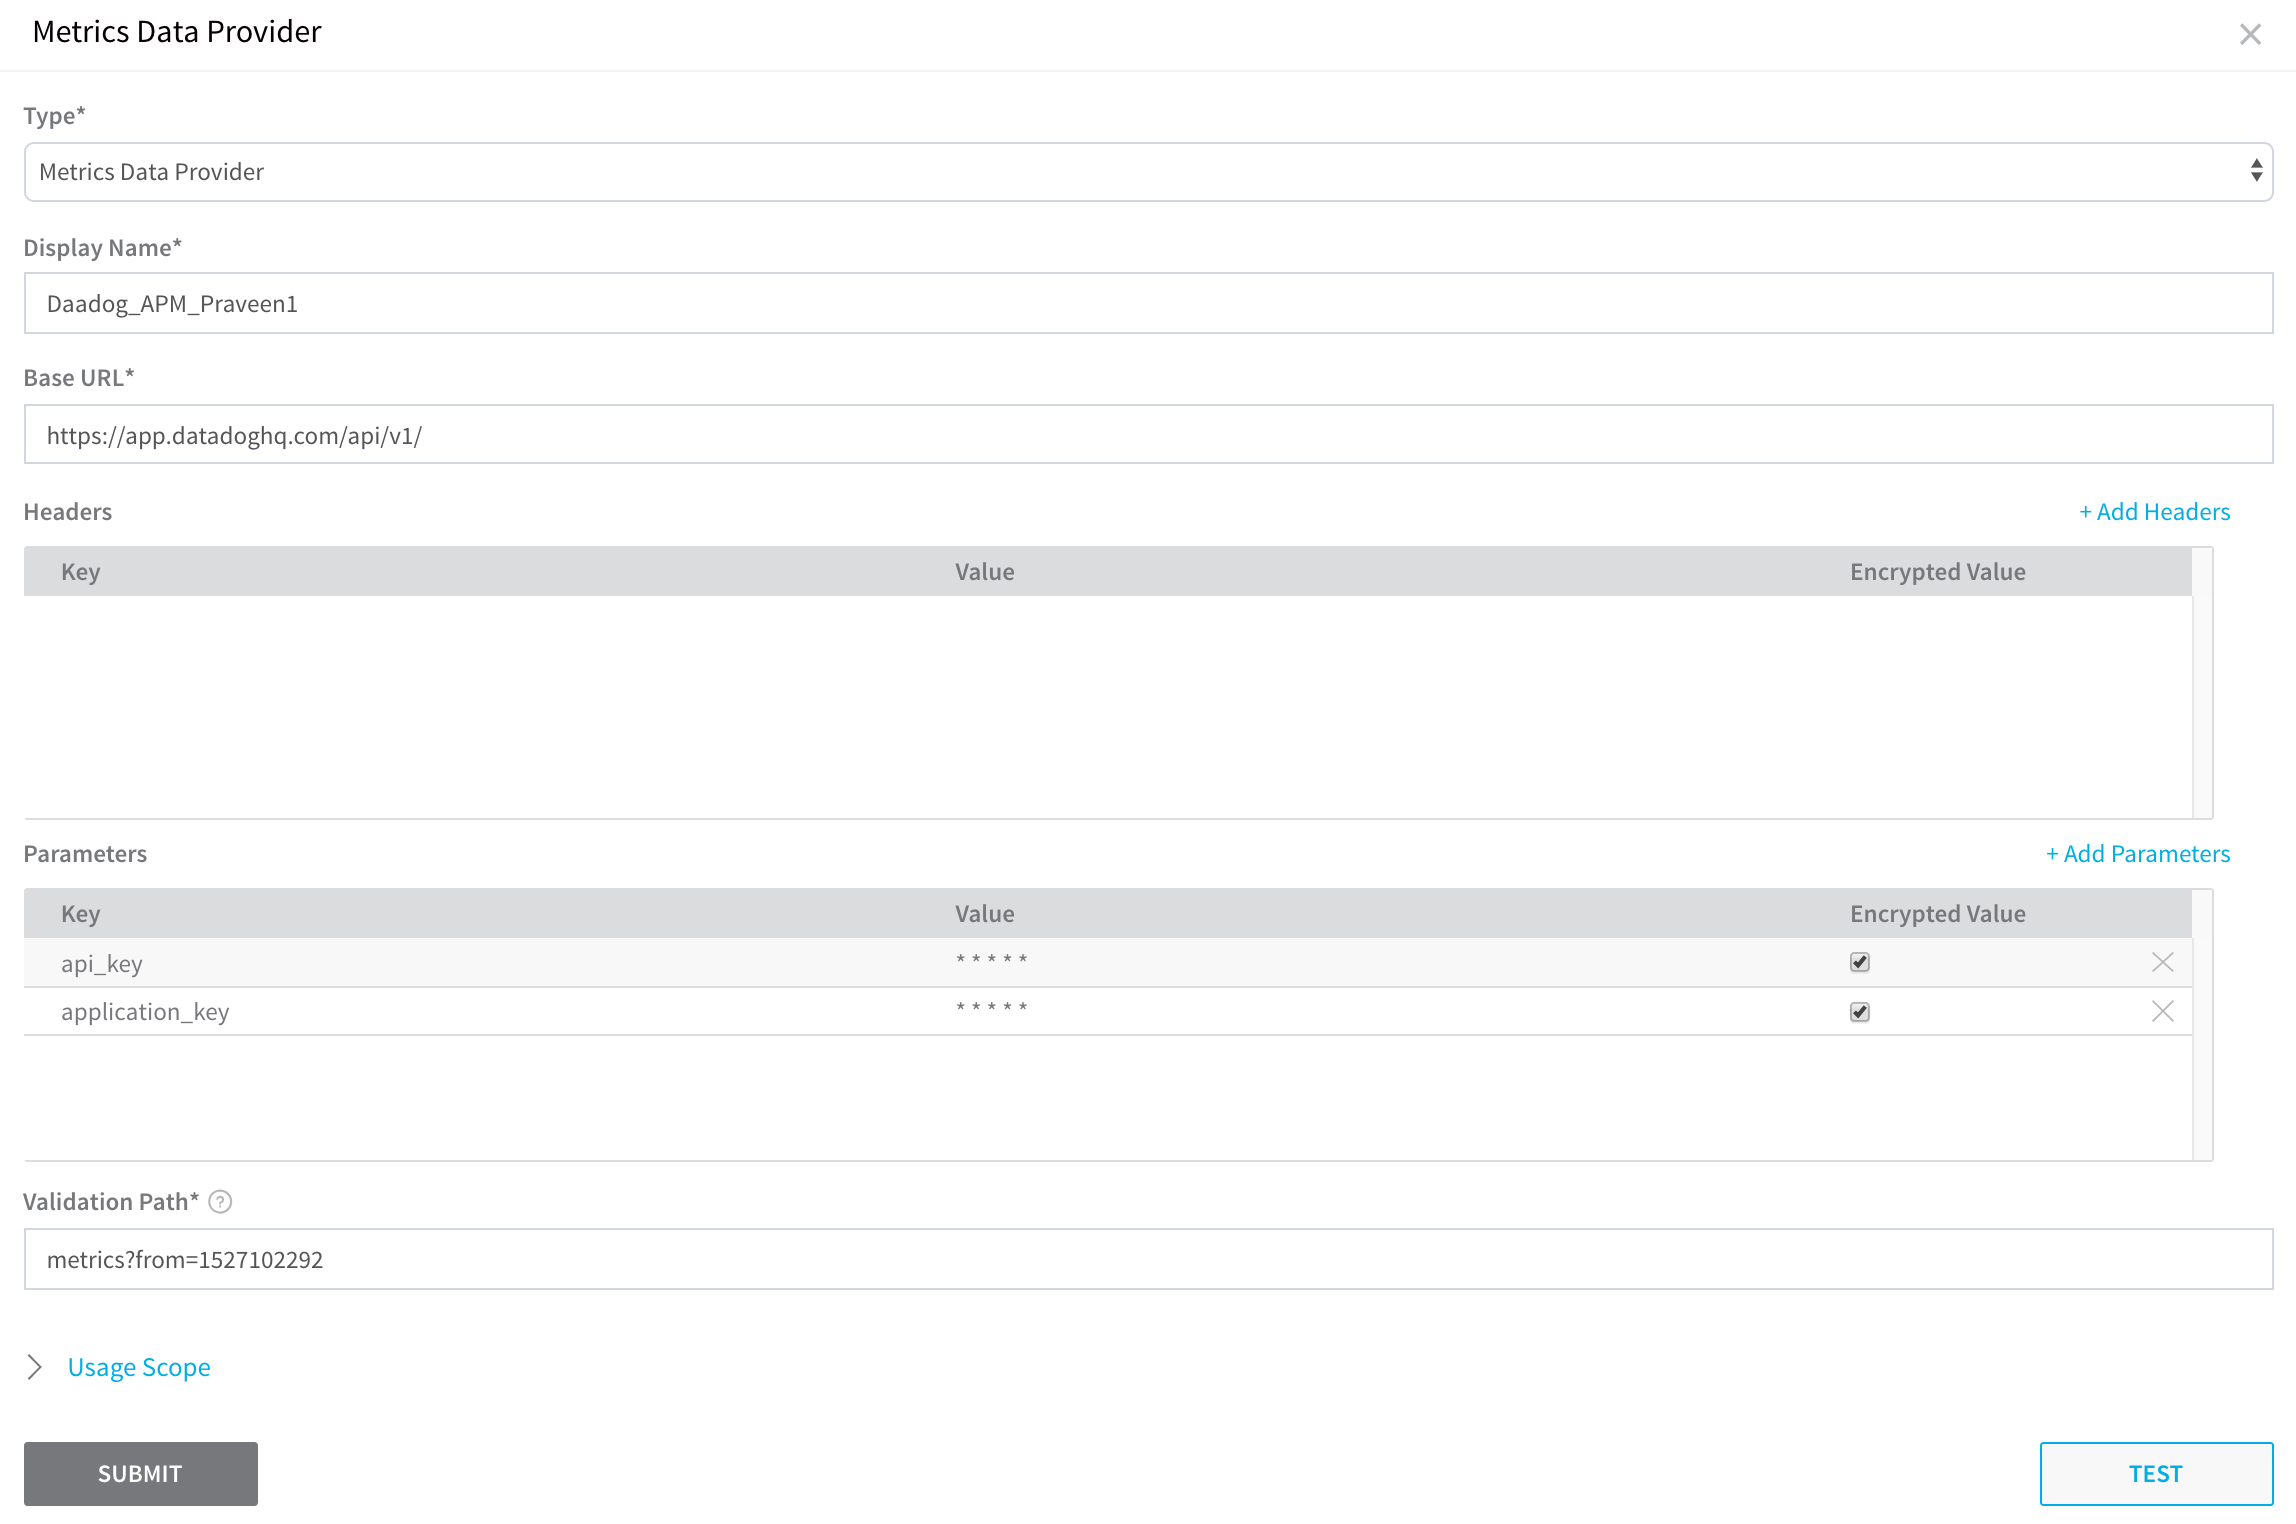
Click Submit.