Add Rancher Cloud Providers
Currently, this feature is behind the feature flag RANCHER_SUPPORT. Contact Harness Support to enable the feature.
You can deploy Kubernetes Services to multiple clusters simultaneously using Rancher and Harness. You use Rancher cluster labels to identify multiple clusters in a Harness Infrastructure Definition, and then deploy to each cluster simultaneously.
To connect Harness to your Rancher account, you must set up a Harness Rancher Cloud Provider.
This topic describes how to set up a Harness Ranch Cloud Provider.
Once you are done adding a Rancher Cloud Provider, you can deploy Kubernetes Services to multiple clusters simultaneously. See Deploy Kubernetes Services to Multiple Clusters using Rancher.
In this topic:
- Before You Begin
- Visual Summary
- Supported Platforms and Technologies
- Review: Harness Delegates and Rancher Clusters
- Step 1: Create a Rancher Account Bearer Token
- Step 2: Add a Rancher Cloud Provider
- See Also
Before You Begin
- This topic assumes you are familiar with Rancher, have a Rancher account, and have set up Kubernetes clusters in its UI. If you are new to Rancher, see Setting up Kubernetes Clusters in Rancher from Rancher.
Visual Summary
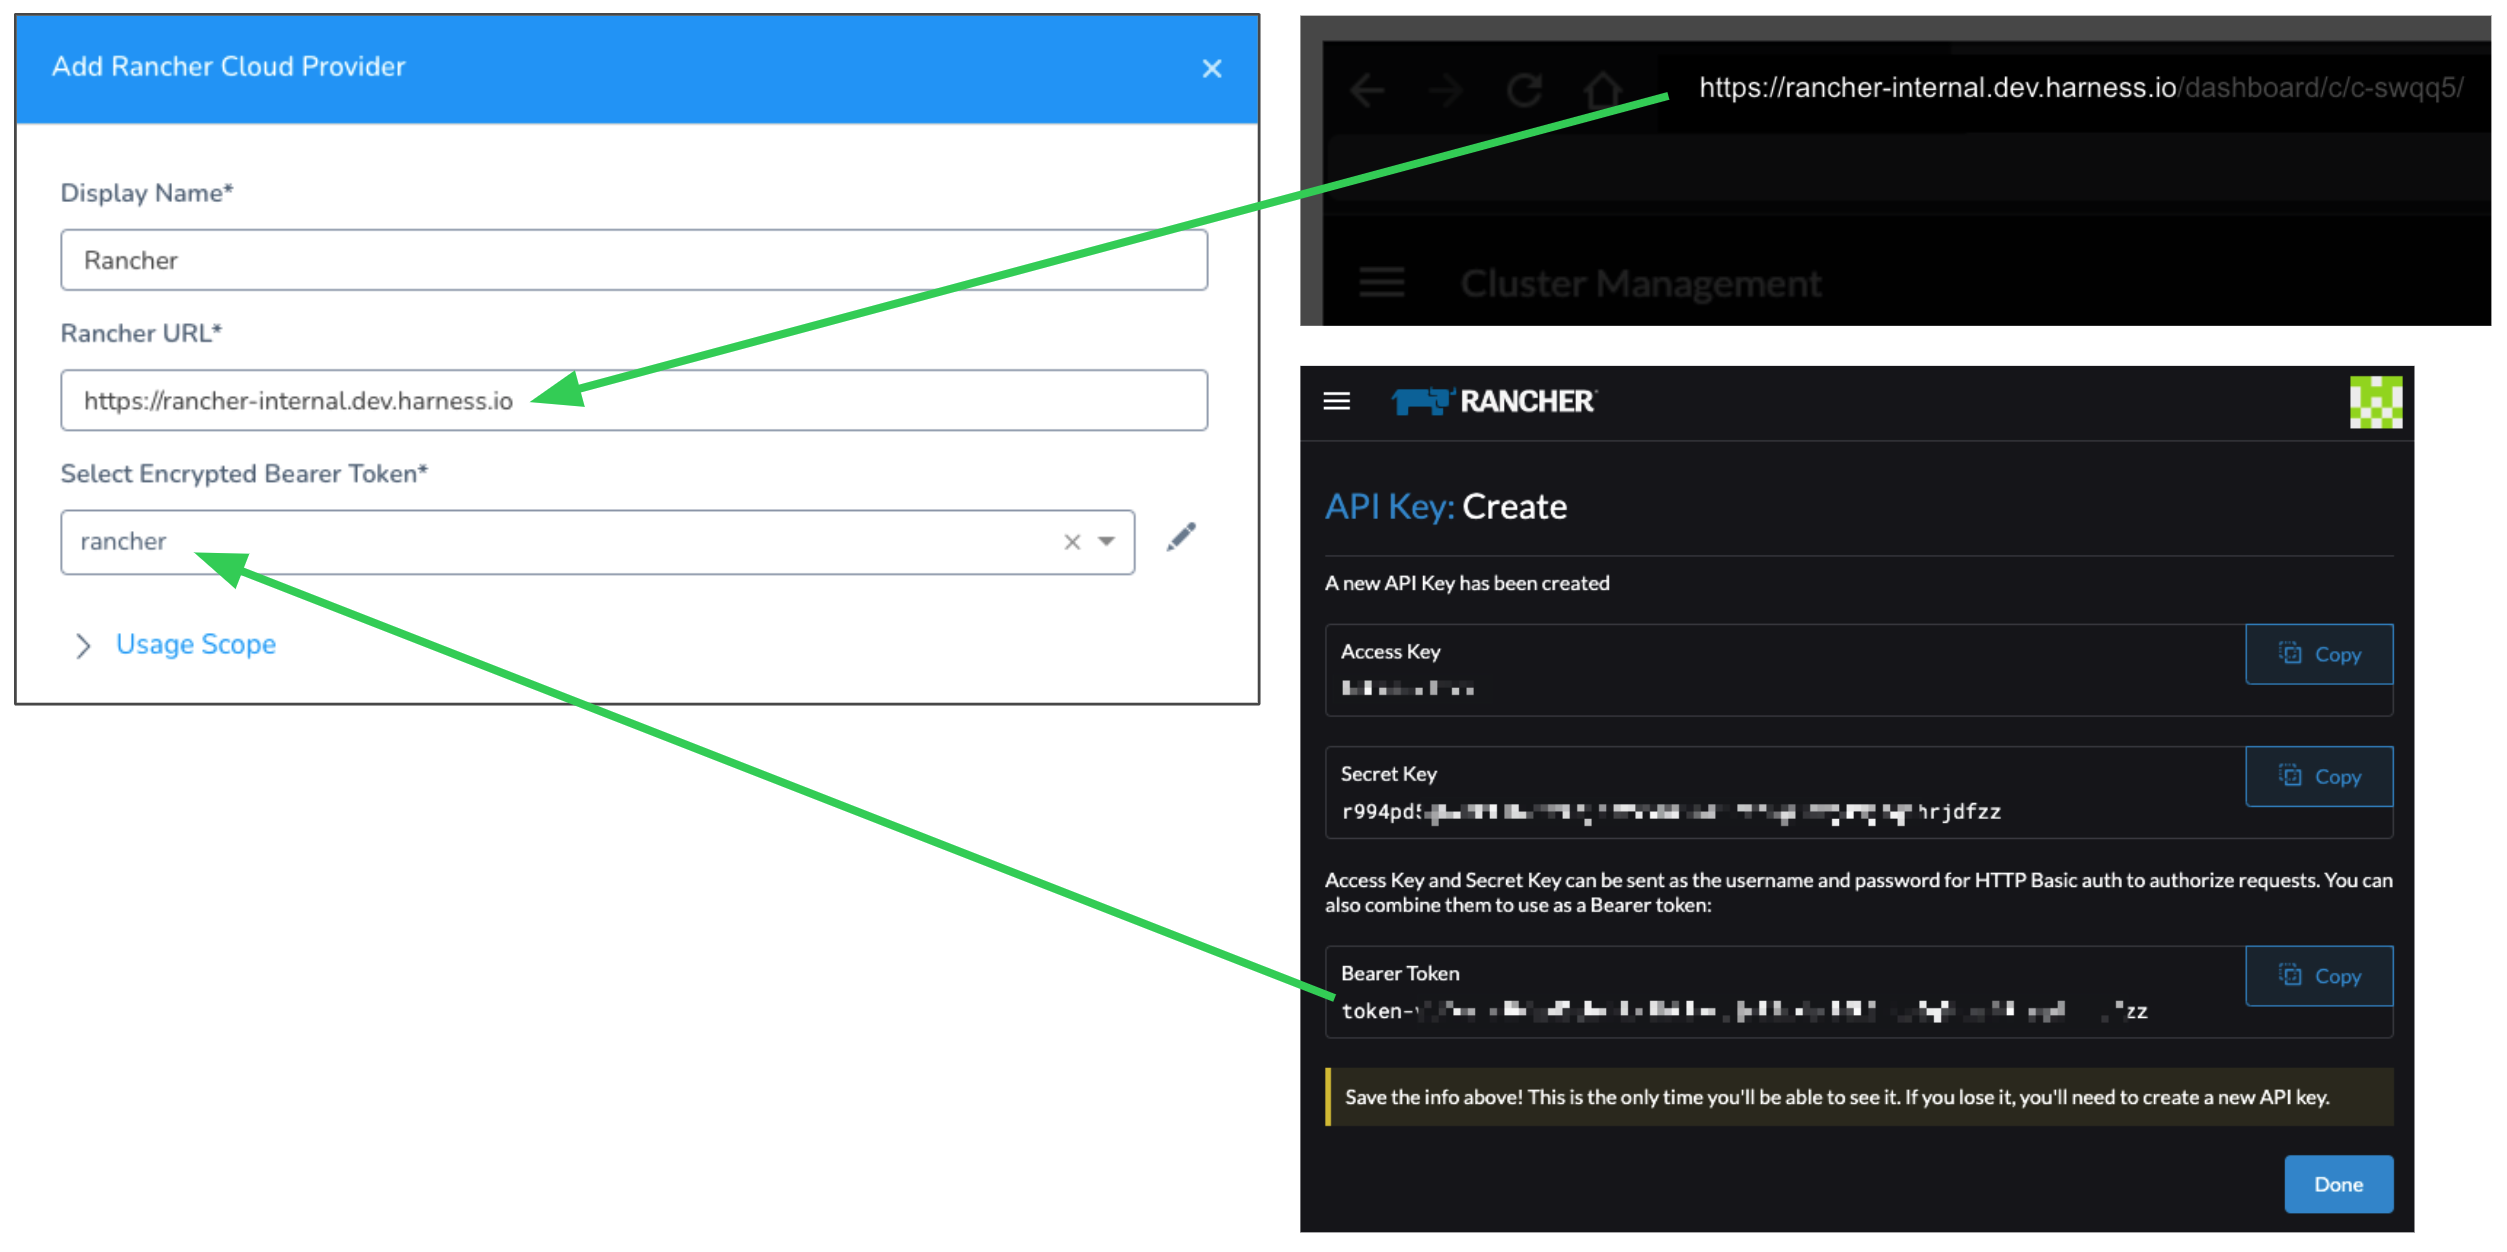
Enter the following in the Harness Rancher Cloud Provider:
- URL of the Rancher endpoint.
- Bearer token for the Rancher account to use.

Supported Platforms and Technologies
See Supported Platforms and Technologies.
Review: Harness Delegates and Rancher Clusters
Before setting up a Rancher Cloud Provider, you need to install a Harness Delegate in your environment.
The Harness Delegate does not need to be a Kubernetes Delegate and it does not need to be installed in a target cluster.
The Harness Delegate does need to be able to connect to the Rancher URL endpoint and to connect to the target Kubernetes clusters.
See Harness Delegate Overview.
Step 1: Create a Rancher Account Bearer Token
In Rancher, create a bearer token to use for Harness authentication with Rancher.
The Rancher bearer token you use must be able to use the /v3/clusters/{clusterName}?action=generateKubeconfig and /v3/clusters APIs. The Rancher user account you use to generate the token should have the Rancher Cluster Owner role or a Global Permission that enable cluster administration. See Cluster and Project Roles and Global Permissions from Rancher.
For steps on creating a bear token, see API Keys from Rancher.
Save the token in a secure location.
A few things to consider:
- When you create the token, you can scope it to specific clusters. A scope will limit the API key so that it will only work against the Kubernetes API of the specified clusters. If you scope the bearer token to specific clusters, Harness will only be able to query and target that list of clusters when deploying.
- If you set an expiration period for the token, make sure that its expiration date will not impact your Harness deployments.
Step 2: Add a Rancher Cloud Provider
In Harness, click Setup, and then click Cloud Providers.
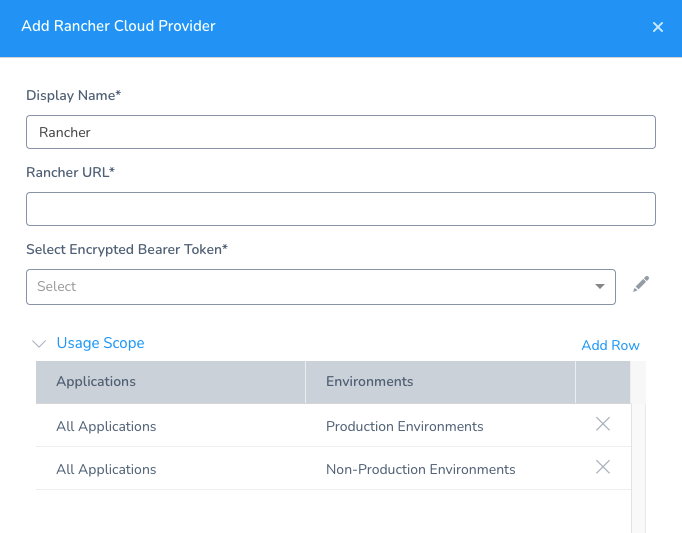
Click Add Cloud Provider, and then select Rancher. The Rancher Cloud Provider appears.
 In Display Name, give the Cloud Provider a name.
In Rancher URL, enter the Rancher URL endpoint. This is the domain name you use to connect to Rancher, such as https://rancher-internal.dev.mycompany.io. Make sure to include the URL scheme.
In Select Encrypted Bearer Token, click Create Encrypted Text, and add the Rancher bearer token to Harness. See Use Encrypted Text Secrets.
Click Test. Harness reports Test was successful. If the test fails, check that the URL and bearer token are correct.
Click Submit.
The Rancher Cloud Provider is added.