Add SMTP Collaboration Provider
Add your SMTP server as a Harness Collaboration Provider, to use email for deployment notifications, approvals, and tracking. In this topic:
- Before You Begin
- Limitations
- Step 1: Add Collaboration Provider
- Step 2: Type
- Step 3: Display Name
- Step 4: Host
- Step 5: Port
- Step 6: SSL
- Step 7: Start TLS
- Step 8: From Address
- Step 9: Username
- Step 10: Password
- Step 11: Usage Scope
- Step 12: Test and Save
- Next Steps
Before You Begin
Limitations
Configuring your SMTP server is required only if you are using Harness On-Prem, or if you wish to use your own SMTP server instead of the Harness SaaS default SMTP option.
Step 1: Add Collaboration Provider
Start adding a Collaboration Provider to Harness as follows:
- Click Setup.
- Click Connectors.
- Click Collaboration Providers.
- Click Add Collaboration Provider. This opens the default Collaboration Provider settings, which you will configure in the following steps.
Step 2: Type
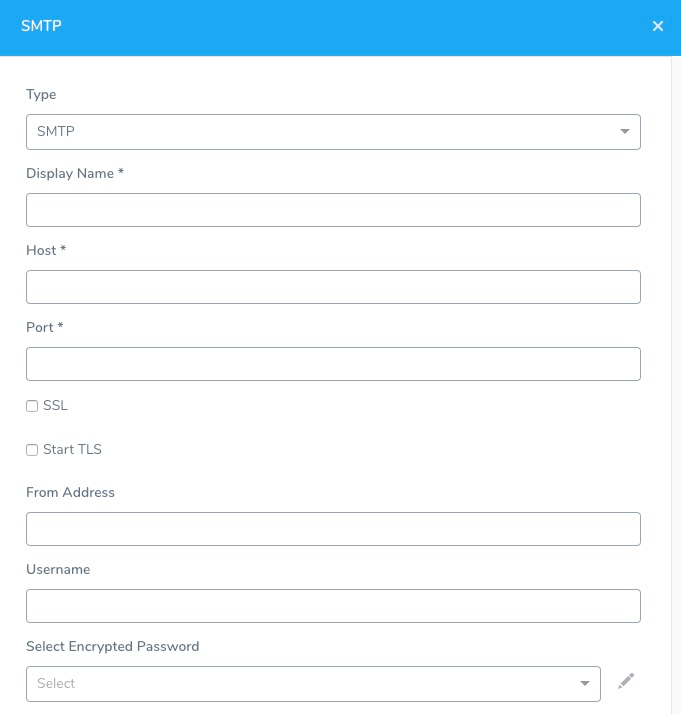
In Type select SMTP. The SMTP settings appear.

Step 3: Display Name
In Display Name, enter a unique name for this Collaboration Provider.
Step 4: Host
In Host, enter the SMTP server's URL.
Step 5: Port
Enter the port number on which the SMTP server is listening (typically, 25).
Step 6: SSL
Select this option for secure connections (SSL/TLS).
Step 7: Start TLS
Select this option to enable SMTP over TLS, or when the connection is upgraded to SSL/TLS using STARTTLS.
Step 8: From Address
Enter the email address from which Harness will send emails.
Step 9: Username
Enter the username for the email account.
Step 10: Password
In Select Encrypted Password, select or create a new Harness Encrypted Text secret for the email account password.
Step 11: Usage Scope
Usage scope is inherited from the secret you entered in Select Encrypted Password.
Step 12: Test and Save
- Click Test to check your configuration.
- When the test is successful, click Submit to save your SMTP Collaboration Provider.
Next Steps
- For details about Harness email notifications, see User Notifications and Alert Settings.