Create a Kubernetes Canary Deployment (FirstGen)
This topic will walk you through creating a Canary Workflow in Harness for a Deployment workload.
Before You Begin
While you can add multiple phases to a Kubernetes Canary Workflow, you should simply use the Canary and Primary Phases generated by Harness when you add the first two phases. Kubernetes deployments have built-in controls for rolling out in a controlled way. The Canary Phase is a way to test the new build, run your verification, then roll out to the Primary Phase.A Harness Canary Workflow for Kubernetes is a little different than a typical Canary deployment.
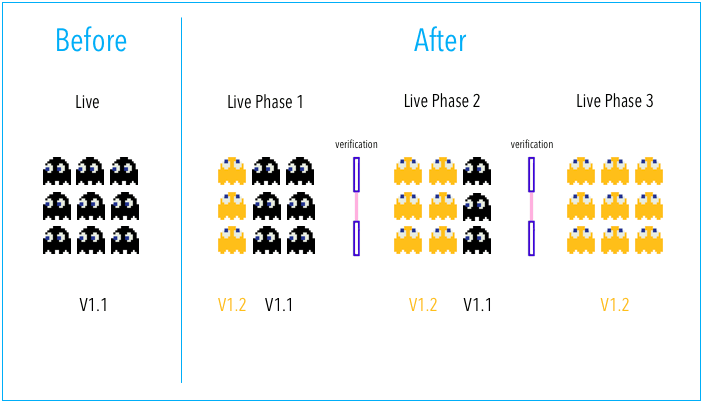
This is a standard Canary deployment:
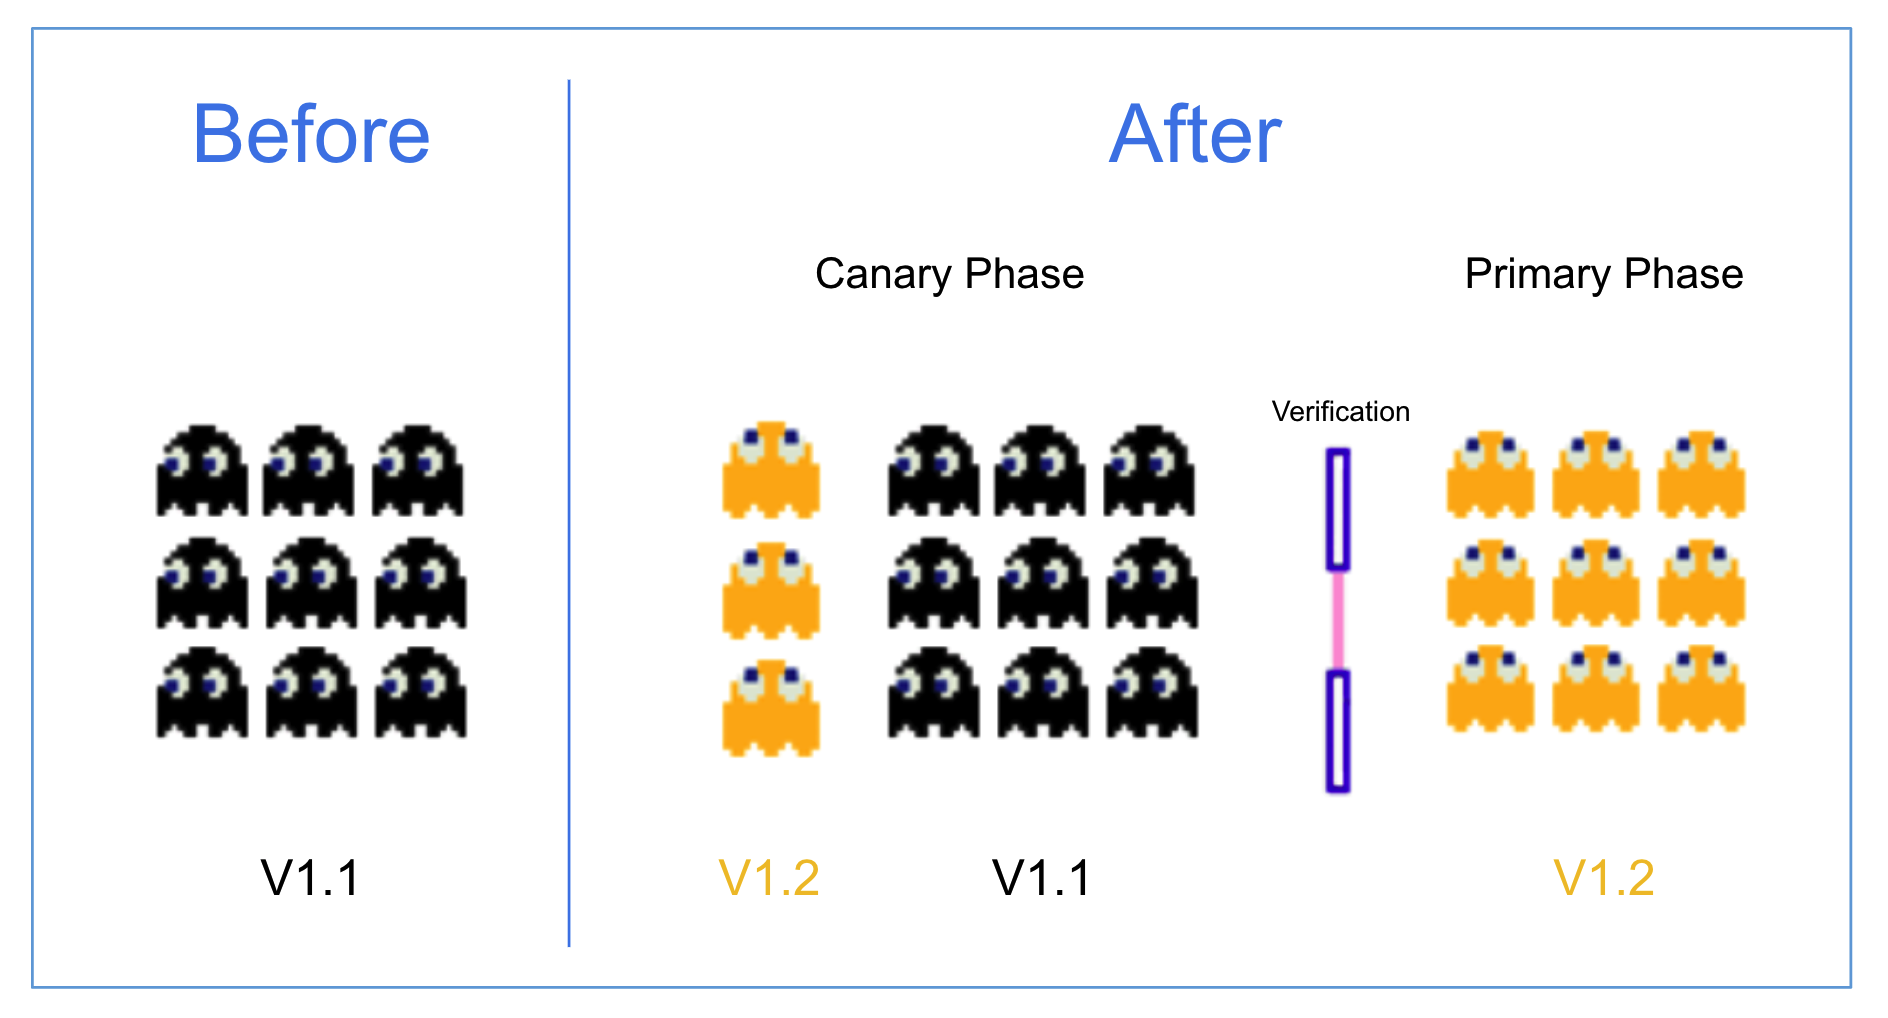
Harness does this a little different:
In a typical Canary deployment, all nodes in a single environment are incrementally updated in small phases, with each phase requiring a verification/gate to proceed to the next phase.
This typical method isn't needed for Kubernetes because Kubernetes includes Rolling Update. Rolling Update is a built-in control for rolling out in a controlled way. It incrementally updates pod instances with new ones. New pods are scheduled on nodes with available resources.
A Harness Kubernetes Canary Workflow uses two phases, a Canary and a Kubernetes Rolling Update:
- Phase 1: Harness creates a Canary version of the Kubernetes Deployment object defined in your Service Manifests section. Once that Deployment is verified, the Workflow deletes it by default.
Harness provides a Canary Phase as a way to test the new build, run your verification, then rollout to the subsequent Rolling Update phase. - Phase 2: Run the actual deployment using a Kubernetes Rolling Update with the number of pods you specify in the Service Manifests files (for example,
replicas: 3).
When you add phases to a Kubernetes Canary Workflow, Harness automatically generates the steps for Canary and Primary phases. You simply need to configure them.
If you are new to Kubernetes RollingUpdate deployments, see Performing a Rolling Update from Kubernetes. That guide summaries Rolling Update and provides an interactive, online tutorial.Although it is not covered here, you can also scale your Workloads between the Canary and Rolling Update phases if you like. You simply add a new Phase and use the Scale step. See Scale Kubernetes Pods.
Review: What Workloads Can I Deploy?
See What Can I Deploy in Kubernetes?.
Review: Manifest and Canary Phases
Harness pulls the manifests for each Phase in the Canary Workflow. The Canary Phase fetches the manifests, and then when the Primary Phase is initiated the manifests are pulled again.
To ensure that the identical manifest is deployed in both the Canary and Primary phases, use the Specific Commit ID option when selecting manifests. See Link Resource Files or Helm Charts in Git Repos.
If you use the Latest from Branch option, when Harness fetches the manifest for each phase there is the possibility that the manifest could change between fetches for the Canary and Primary phases.
Step 1: Create the Workflow
Create the Harness Kubernetes Canary Workflow that will preform the Canary deployment.
- In your Application, click Workflows.
- Click Add Workflow.
- In Name, enter a name for your Workflow.
- In Workflow Type, select Canary Deployment.
- In Environment, select the Environment you created for your Kubernetes deployment. You will pick Infrastructure Definitions from this Environment when you create Phases in the Workflow.
- Click SUBMIT. By default, the new Canary Workflow does not have any phases pre-configured.
Step 2: Create the Canary Phase
The Canary Phase creates a Canary deployment using your Service Manifests files and the number of pods you specify in the Workflow's Canary Deployment step.
To add the Canary Phase, do the following:
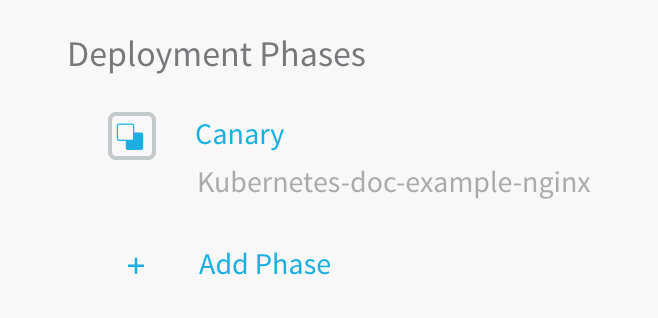
- In Deployment Phases, click Add Phase. The Workflow Phase dialog appears.
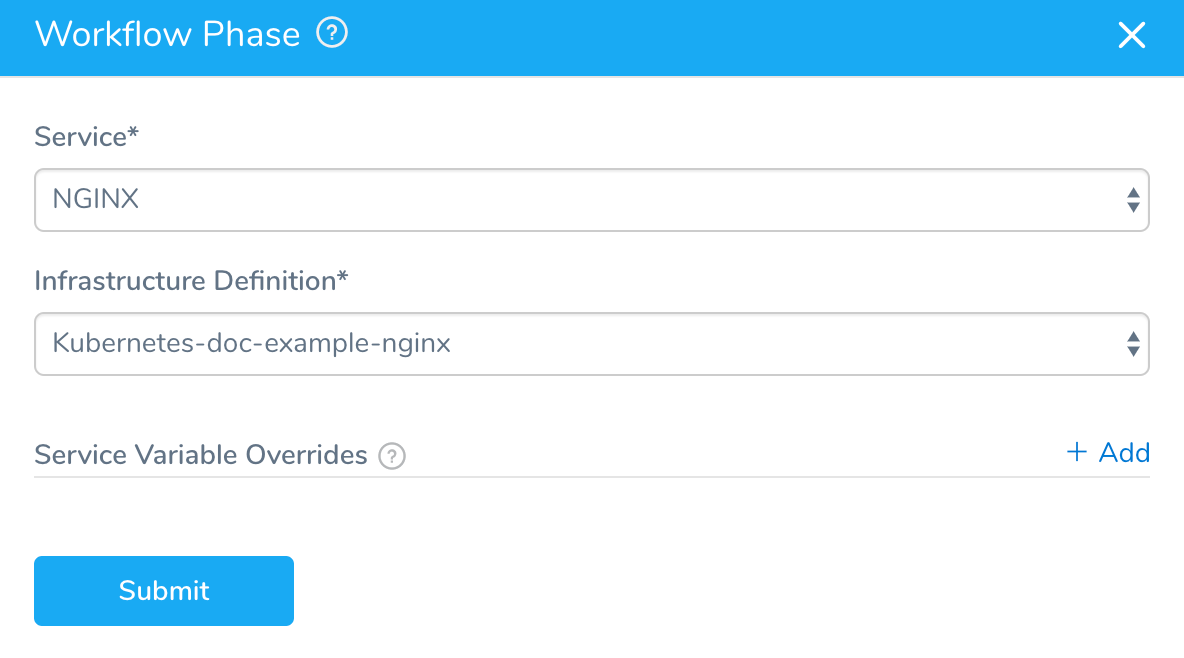
- In Service, select the Service where you set up your Kubernetes configuration files.
- In Infrastructure Definition, select the Infrastructure Definition where you want this Workflow Phase to deploy your Kubernetes objects. This is the Infrastructure Definition with the Kubernetes cluster and namespace for this Phase's deployment.
- In Service Variable Overrides, you can add a variable to overwrite any variable in the Service you selected. Ensure that the variable names are identical. This is the same process described for overwriting variables in Override Harness Kubernetes Service Settings.
- Click SUBMIT. The new Phase is created.

You'll notice the Phase is titled Canary Deployment. You can change the name of any Phase by editing it and entering a new name in the Name setting.
Let's look at the default settings for this first Phase of a Canary Workflow.
Step 3: Canary Deployment Step
Click the Phase 1 step, named Canary Deployment. The Canary Deployment step dialog appears.
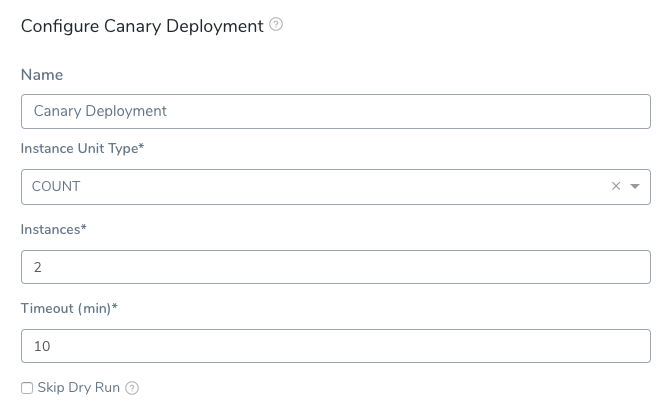
In this step, you will define how many pods are deployed for a Canary test of the configuration files in your Service Manifests section.
- In Instance Unit Type, click COUNT or PERCENTAGE.
- In Instances, enter the number of pods to deploy.
- If you selected COUNT in Instance Unit Type, this is simply the number of pods.
- If you selected PERCENTAGE, enter a percentage of the pods defined in your Service Manifests files to deploy. For example, in you have
replicas: 4in a manifest in Service, and you enter 50 in Instances, then 2 pods are deployed in this Phase step.
Delegate Selector
If your Workflow Infrastructure Definition's Cloud Provider uses a Delegate Selector (supported in Kubernetes Cluster and AWS Cloud Providers), then the Workflow uses the selected Delegate for all of its steps.
In these cases, you should not add a Delegate Selector to any step in the Workflow. The Workflow is already using a Selector via its Infrastructure Definition's Cloud Provider.
If your Workflow Infrastructure Definition's Cloud Provider is not using a Delegate Selector, and you want this Workflow step to use a specific Delegate, do the following:
In Delegate Selector, select the Selector for the Delegate(s) you want to use. You add Selectors to Delegates to ensure that they are used to execute the command. For more information, see Select Delegates for Specific Tasks with Selectors.
Harness will use Delegates matching the Selectors you add.
If you use one Selector, Harness will use any Delegate that has that Selector.
If you select two Selectors, a Delegate must have both Selectors to be selected. That Delegate might also have other Selectors, but it must have the two you selected.
You can use expressions for Harness built-in variables or Account Default variables in Delegate Selectors. When the variable expression is resolved at deployment runtime, it must match an existing Delegate Selector.
For example, if you have a Delegate Selector prod and the Workflow is using an Environment also named prod, the Delegate Selector can be ${env.name}. This is very useful when you match Delegate Selectors to Application component names, such as Environments, Services, etc. It is also a way to template the Delegate Selector setting.#### Manifest Options
Export Manifest
If you enable this option, Harness does the following at runtime:
- Downloads manifests (if remote).
- Renders manifests in logs.
- Performs a dry run unless the Skip Dry Run option is enabled.
- Export the deployment manifests to the variable
${k8sResources.manifests}. - Does not deploy the manifests. To deploy the manifests, you must add another Kubernetes step of the same type (Canary, Rolling, Apply, Stage Deployment) an enable the Inherit Manifest option to deploy a copy of the exported manifests.
If Export Manifest is enabled, the manifests are not deployed. You can use the Inherit Manifest option in a subsequent Kubernetes step to deploy a copy of the exported manifests.
The exported manifests can be written to storage on the Delegate where the step is run. For example, you can add a Shell Script step to echo and write the manifest to a file:
echo "${k8sResources.manifests}" > /opt/harness-delegate/test/canaryPlan
If you use ${k8sResources.manifests} in a script ensure that your script expects multiline output. You can use cat command to concatenate the lines.If you have the 3rd party tool that check compliance, it can use the exported manifests.
To deploy the manifests, a copy of the exported manifests can be inherited by the next Kubernetes step (Canary, Rolling, Apply, Stage Deployment) using the Inherit Manifest option.
If Export Manifest is enabled in multiple Kubernetes steps of the same type in the same Workflow Phase, the last step overrides the exported manifests. This is important because the next Kubernetes step to inherit a copy of the exported manifests will only use the exported manifests from last Kubernetes step with Export Manifest is enabled.
Inherit Manifest
Enable this option to inherit and deploy a copy of the manifests exported from the previous Kubernetes step (Canary, Rolling, Apply, Stage Deployment) using the Export Manifest option.
The Inherit Manifest option will only inherit the exported manifest from the last Kubernetes step of the same type and in the same Workflow Phase.
For example, if you enable the Inherit Manifest option in a Canary Deployment step, then it will only inherit a copy of the manifests exported from the last Canary Deployment step with the Export Manifest option enabled in the same Workflow Phase.
Inherit Manifest From Canary To Primary Phase
Currently, this feature is behind the Feature Flag MANIFEST_INHERIT_FROM_CANARY_TO_PRIMARY_PHASE and is only applicable to Kubernetes deployments with Canary Workflow phase. Contact Harness Support to enable the feature.Harness pulls the manifests for each Phase in the Canary Workflow. The Canary Phase fetches the manifests, and then when the Primary Phase is initiated the manifests are pulled again.
You can select one of the following options for Commit ID in the Remote Manifests settings:
- Latest from Branch - Uses the latest commit id for both Canary and Primary Phases.
- Specific Commit ID - Uses the specific commit id for both Canary and Primary Phases.

To ensure that the identical manifest is deployed in both the Canary and Primary phases, the commitId recorded in the Canary Phase is used when selecting manifests in the Primary Phase.

To inherit manifests from the Canary to the Primary phase, you must select Manifest Format using Git Repositories. Following are the Manifest Formats that use Git Repo:
- Kubernetes Resource Specs in YAML format
- Helm Chart from Source Repository
- Kustomization Configuration
- OpenShift Template

Skip Dry Run
By default, Harness uses the --dry-run flag on the kubectl apply command during the Initialize step of this command, which prints the object that would be sent to the cluster without really sending it. If the Skip Dry Run option is selected, Harness will not use the --dry-run flag.
Phase 1 of the Canary Deployment Workflow is complete. Now the Workflow needs a Primary Phase to roll out the objects defined in the Service Manifests section.
Canary Delete Step
See Delete Kubernetes Resources.
Verifications and Canary Deployments
When you add Harness Continuous Verification steps to a Canary Workflow, add them to the Canary Phase, not the Primary Phase.
If the Canary Phase is verified, then the Primary Phase will proceed successfully. Adding Continuous Verification steps to the Primary Phase defeats the purpose of Canary Workflows, because the Canary Phase verifies the new deployment against previous deployments.
Do Not Use Multiple Canary Deployment Steps
Your Phase should only use one Canary Deployment step. If you use multiple Canary Deployment steps, the last step overrides all previous steps, rendering them useless.
If you want to scale the pods deployed by the Canary Deployment step, use the Scale step.
Step 4: Create the Primary Phase using Rolling Update
The Primary Phase runs the actual deployment as a rolling update with the number of pods you specify in the Service Manifests files (for example, replicas: 3).
Similar to application-scaling, during a rolling update of a Deployment, the Kubernetes service will load-balance the traffic only to available pods (an instance that is available to the users of the application) during the update.
To add the Primary Phase, do the following:
- In your Workflow, in Deployment Phases, under Canary, click Add Phase.
 The Workflow Phase dialog appears.
 - In Service, select the same Service you selected in Phase 1.
- In Infrastructure Definition, select the same Infrastructure Definition you selected in Phase 1.
- In Service Variable Overrides, you can add a variable to overwrite any variable in the Service you selected. Ensure that the variable names are identical. This is the same process described for overwriting variables in Override Harness Kubernetes Service Settings.
- Click SUBMIT. The new Phase is created.

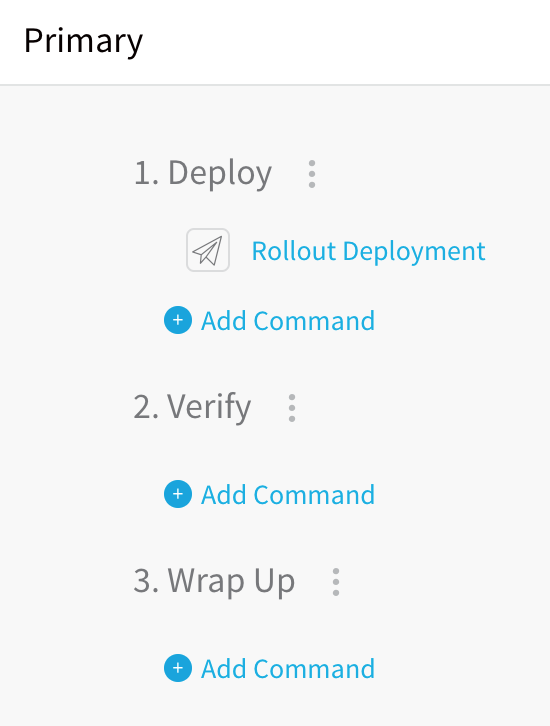
The Phase is named Primary automatically, and contains one step, Rollout Deployment.
Rollout Deployment performs a rolling update. Rolling updates allow an update of a Deployment to take place with zero downtime by incrementally updating pod instances with new ones. The new pods are scheduled on nodes with available resources. The rolling update Deployment uses the number of pods you specified in the Service Manifests (number of replicas).
Example: Canary Workflow Deployment
Let's look at how the Workflow steps deploy the workload.
Canary Deployment Step in Deployment
Let's look at an example where the Canary Deployment step is configured to deploy a COUNT of 2. Here is the step in the Harness Deployments page:

You can see Target Instance Count 2 in the Details section.
Below Details you can see the logs for the step.
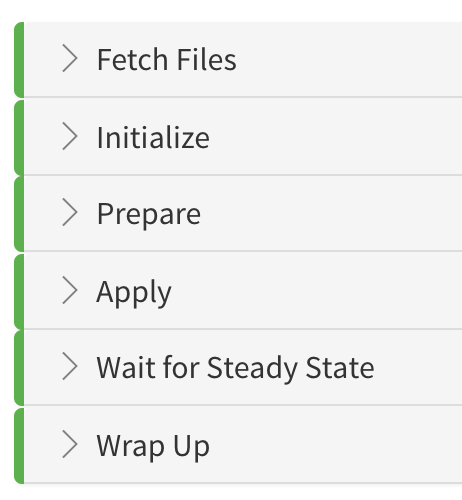
Let's look at the Prepare, Apply, and Wait for Steady State sections of the step's deployment log, with comments added:
Prepare
Here is the log from the Prepare section:
Manifests processed. Found following resources:

# API objects in manifest file

Kind                Name                                    Versioned
ConfigMap           harness-example-config                  true
Deployment          harness-example-deployment              false

# each deployment is versioned, this is the second deployment

Current release number is: 2

Versioning resources.

# previous deployment

Previous Successful Release is 1

Cleaning up older and failed releases

# existing number if pods

Current replica count is 1

# Deployment workload executed

Canary Workload is: Deployment/harness-example-deployment-canary

# number specified in Canary Deployment step Instance field

Target replica count for Canary is 2

Done.
The name of the Deployment workload in the Service Manifests file is harness-example-deployment (the name variable is harness-example): .
apiVersion: apps/v1
kind: Deployment
metadata:
  name: {{.Values.name}}-deployment
As you can see, Harness appends the name with -canary, harness-example-deployment-canary. This is to identify Canary Deployment step workloads in your cluster.
The next section is Apply.
Apply
Here you will see the manifests in the Service Manifests section applied using kubectl as a single file, manifests.yaml.
# kubectl command to apply manifests

kubectl --kubeconfig=config apply --filename=manifests.yaml --record

# ConfigMap object created

configmap/harness-example-config-2 created

# Deployment object created

deployment.apps/harness-example-deployment-canary created

Done.
Next, Harness logs the steady state of the pods.
Wait for Steady State
Harness displays the status of each pod deployed and confirms steady state.
# kubectl command for get events

kubectl --kubeconfig=config get events --output=custom-columns=KIND:involvedObject.kind,NAME:.involvedObject.name,MESSAGE:.message,REASON:.reason --watch-only

# kubectl command for status

kubectl --kubeconfig=config rollout status Deployment/harness-example-deployment-canary --watch=true

# status of each pod

Status : Waiting for deployment "harness-example-deployment-canary" rollout to finish: 0 of 2 updated replicas are available...
Event  : Pod    harness-example-deployment-canary-8675b5b8bf-98sf6   MountVolume.SetUp succeeded for volume "default-token-hwzdf"    SuccessfulMountVolume
Event  : Pod   harness-example-deployment-canary-8675b5b8bf-rl2n8   pulling image "registry.hub.docker.com/library/nginx:stable-perl"   Pulling
Event  : Pod   harness-example-deployment-canary-8675b5b8bf-98sf6   pulling image "registry.hub.docker.com/library/nginx:stable-perl"   Pulling
Event  : Pod   harness-example-deployment-canary-8675b5b8bf-rl2n8   Successfully pulled image "registry.hub.docker.com/library/nginx:stable-perl"   Pulled
Event  : Pod   harness-example-deployment-canary-8675b5b8bf-98sf6   Successfully pulled image "registry.hub.docker.com/library/nginx:stable-perl"   Pulled
Event  : Pod   harness-example-deployment-canary-8675b5b8bf-rl2n8   Created container   Created
Event  : Pod   harness-example-deployment-canary-8675b5b8bf-98sf6   Created container   Created
Event  : Pod   harness-example-deployment-canary-8675b5b8bf-rl2n8   Started container   Started
Event  : Pod   harness-example-deployment-canary-8675b5b8bf-98sf6   Started container   Started

Status : Waiting for deployment "harness-example-deployment-canary" rollout to finish: 1 of 2 updated replicas are available...

# canary deployment step completed

Status : deployment "harness-example-deployment-canary" successfully rolled out

Done.
Wrap Up
The Wrap Up log is long and describes all of the container and pod information for the step, using the kubectl command:
kubectl --kubeconfig=config describe --filename=manifests.yaml
Primary Step in Deployment
Let's look at an example where the Primary step deploys the Service Manifests objects. Here is the step in the Harness Deployments page:

Before we look at the logs, let's look at the Service Manifests files it's deploying.
Here is the values.yaml from our Service Manifests section:
name: harness-example
replicas: 1
image: ${artifact.metadata.image}
Here is the spec.yaml from our Service Manifests section:
apiVersion: v1
kind: ConfigMap
metadata:
  name: {{.Values.name}}-config
data:
  key: value
---
apiVersion: apps/v1
kind: Deployment
metadata:
  name: {{.Values.name}}-deployment
spec:
  replicas: {{int .Values.replicas}}
  selector:
    matchLabels:
      app: {{.Values.name}}
  template:
    metadata:
      labels:
        app: {{.Values.name}}
    spec:
      containers:
      - name: {{.Values.name}}
        image: {{.Values.image}}
        envFrom:
        - configMapRef:
            name: {{.Values.name}}-config
        ports:
        - containerPort: 80
Let's look at the Initialize, Prepare, and Apply stages of the Rollout Deployment.
Initialize
In the Initialize section of the Rollout Deployment step, you can see the same object descriptions as the Service Manifests section:
Initializing..

Manifests [Post template rendering] :

# displays the manifests taken from the Service Manifests section

---
apiVersion: v1
kind: ConfigMap
metadata:
  name: harness-example-config
data:
  key: value
---
apiVersion: apps/v1
kind: Deployment
metadata:
  name: harness-example-deployment
spec:
  replicas: 1
  selector:
    matchLabels:
      app: harness-example
  template:
    metadata:
      labels:
        app: harness-example
    spec:
      containers:
      - name: harness-example
        image: registry.hub.docker.com/library/nginx:stable-perl
        envFrom:
        - configMapRef:
            name: harness-example-config
        ports:
        - containerPort: 80

# Validates the YAML syntax of the manifest with a dry run

Validating manifests with Dry Run

kubectl --kubeconfig=config apply --filename=manifests-dry-run.yaml --dry-run
configmap/harness-example-config created (dry run)
deployment.apps/harness-example-deployment configured (dry run)

Done.
Now that Harness has ensured that manifests can be used, it will process the manifests.
Prepare
In the Prepare section, you can see that Harness versions the ConfigMap and Secret resources (for more information, see Kubernetes Versioning and Annotations).
Manifests processed. Found following resources:

# determine if the resources are versioned

Kind                Name                                    Versioned
ConfigMap           harness-example-config                  true
Deployment          harness-example-deployment              false

# indicates that these objects have been released before

Current release number is: 2

Previous Successful Release is 1

# removed unneeded releases

Cleaning up older and failed releases

# identifies new Deployment workload

Managed Workload is: Deployment/harness-example-deployment

# versions the new release

Versioning resources.

Done.
Now Harness can apply the manifests.
Apply
The Apply section shows the kubectl commands for applying your manifests.
# the Service Manifests section are compiled into one file and applied

kubectl --kubeconfig=config apply --filename=manifests.yaml --record

# the objects applied

configmap/harness-example-config-2 configured
deployment.apps/harness-example-deployment configured

Done.
Now that the manifests are applied, you can see the container and pod details described in Wrap Up.
Wrap Up
Wrap Up is long and uses a kubectl describe command to provide information on all containers and pods deployed:
kubectl --kubeconfig=config describe --filename=manifests.yaml
Here is a sample from the output that displays the Kubernetes RollingUpdate:
# Deployment name

Name:                   harness-example-deployment

# namespace from Deployment manifest

Namespace:              default
CreationTimestamp:      Wed, 13 Feb 2019 01:00:49 +0000
Labels:                 <none>
Annotations:            deployment.kubernetes.io/revision: 2
                        kubectl.kubernetes.io/last-applied-configuration:
                          {"apiVersion":"apps/v1","kind":"Deployment","metadata":{"annotations":{"kubernetes.io/change-cause":"kubectl apply --kubeconfig=config --f...
                        kubernetes.io/change-cause: kubectl apply --kubeconfig=config --filename=manifests.yaml --record=true

# Selector applied

Selector:               app=harness-example,harness.io/track=stable

# number of replicas from the manifest

Replicas:               1 desired | 1 updated | 1 total | 1 available | 0 unavailable

# RollingUpdate strategy

StrategyType:           RollingUpdate
MinReadySeconds:        0

# RollingUpdate progression

RollingUpdateStrategy:  25% max unavailable, 25% max surge
As you look through the description in Wrap Up you can see label added:
add label: harness.io/track=stable
You can use the harness.io/track=stable label with the values canary or stable as a selector for managing traffic to these pods, or for testing the pods. For more information, see Kubernetes Versioning and Annotations.
The Workflow is deployed.
Now that you have successfully deployed your artifact to your Kubernetes cluster pods using your Harness Application, look at the completed workload in the deployment environment of your Kubernetes cluster.
For example, here is the Deployment workload in Google Cloud Kubernetes Engine:

Or you can simply connect to your cluster in a terminal and see the pod(s) deployed:
john_doe@cloudshell:~ (project-15454)$ kubectl get pods
NAME                                                        READY     STATUS    RESTARTS   AGE
harness-example-deployment-7df7559456-xdwg5                 1/1       Running   0          9h
Kubernetes Rollback
See Kubernetes Rollback.
Notes
- If you are using the Traffic Split step or doing Istio traffic shifting using the Apply step, move the Canary Delete step from Wrap Up section of the Canary phase to the Wrap Up section of the Primary phase.
Moving the Canary Delete step to the Wrap Up section of the Primary phase will prevent any traffic from being routed to deleted pods before traffic is routed to stable pods in the Primary phase.
For more information, see Set Up Kubernetes Traffic Splitting, Delete Kubernetes Resources, and Deploy Manifests Separately using Apply Step. - Harness does not roll back Canary deployments because your production is not affected during Canary. Canary catches issues before moving to production. Also, you might want to analyze the Canary deployment. The Canary Delete step is useful to perform cleanup when required.
- Instances Deployed — In the Deployments page, the Instances Deployed label shows the total number of pods deployed in the entire deployment, including the Canary and Rollout steps.