Upload Kubernetes Resource Files
This content is for Harness FirstGen. Switch to NextGen.
Harness includes default Kubernetes resource files you can edit and add to, and the ability to link to remote Git and Helm repo files, but you might also have resource files you want to upload into Harness.
Harness enables you to upload files and folders and manage them in the Service Manifests section.
Before You Begin
Step 1: Delete the Default Files
- In your Harness Kubernetes Service, in Manifests, click the more options button (︙) and click Delete All Manifest Files.
- Click Confirm.
Step 2: Upload Resource Files
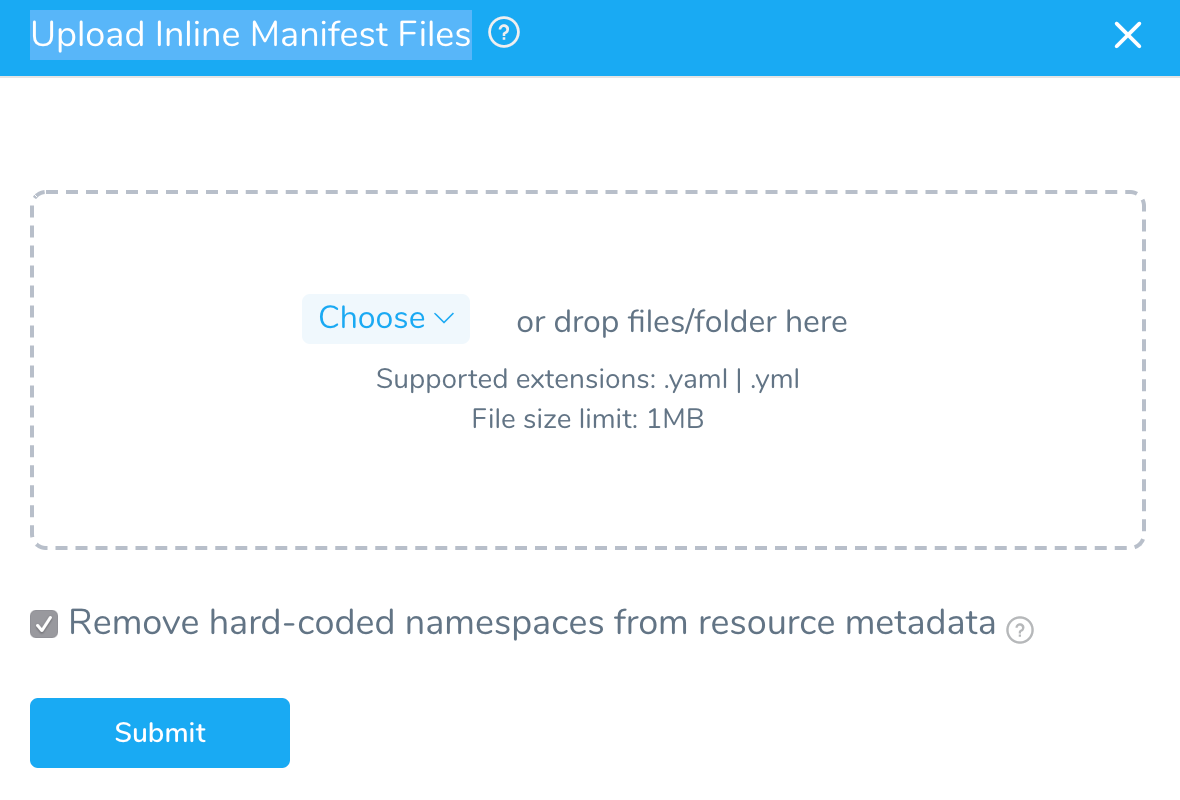
- Click the more options button (︙) again, and then click Upload Inline Manifest Files. The Upload Inline Manifest Files settings appear.

- Click Choose and select folders and files or drag and drop files into the dialog. If you select a folder, all subordinate folders and files are copied.
- Click SUBMIT. Your files are added to the Manifests section of the Service.
The files are added to the root folder. You can create folders and add the files into them. Simply select a file, click the more options button (︙) and click Rename File. Add the folder name before the file name, using a forward slash, like folderA/filename.yaml. The file is moved into the folder.
Option 1: Use Namespace Alternatives
You might have existing manifest files from other deployments that you want to add to your Manifests section, but you do not want to use the same namespace settings, such as the namespace in a Service object:
apiVersion: v1
kind: Service
metadata:
  name: my-service
  namespace: prod
spec:
  type: ExternalName
  externalName: my.database.example.com
You can remove existing namespace settings in the files you upload into Manifests by selecting the Remove hard-coded namespaces from resource metadata option in the Upload Inline Manifest Files dialog.
The uploaded files will have their namespace key and value removed. Using our Service example, you can see namespace: prod is gone:
apiVersion: v1
kind: Service
metadata:
  name: my-service
spec:
  type: ExternalName
  externalName: my.database.example.com
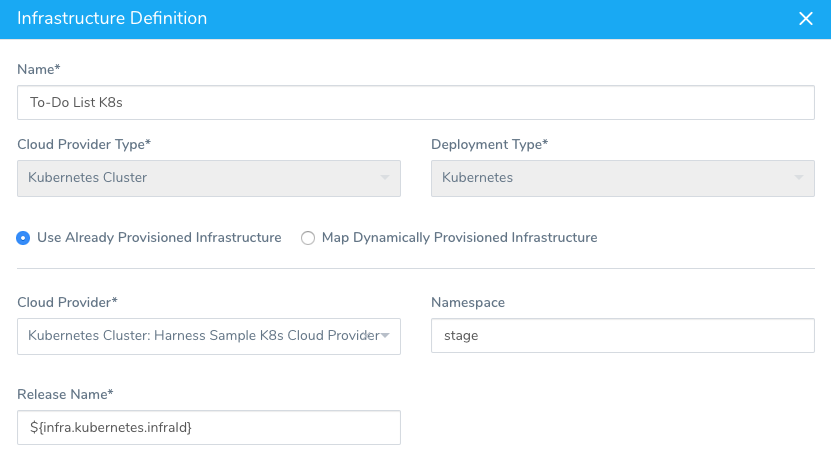
Harness will use the namespace you enter in the Infrastructure Definition Namespace field as the namespace for these manifests.
Here is an Infrastructure Definition with its Namespace field:

You can also use the expression namespace: ${infra.kubernetes.namespace} in your manifest files and Harness will use the namespace you enter in the Infrastructure Definition Namespace field as the namespace for these manifests.

Another option is to add namespace: ${infra.kubernetes.namespace} in the values.yaml file and refer it in your manifest with namespace: {{ .Values.namespace }}.
