Use Helm Chart Hooks in Kubernetes Deployments
You can use Helm chart hooks in your Kubernetes deployments to intervene at specific points in a release cycle.
Harness provides a few ways to integrate your Helm chart hooks into your Harness deployments. You can use a native Helm deployment in Harness or use a Harness Kubernetes deployment which supports Canary and Blue/Green strategies.
This topic describes the available options.
Before You Begin
- Helm chart hooks — We assume you are familiar with Helm chart hooks (sometimes called lifecycle hooks). If you are new to them, review Helm's docs.
- Harness Kubernetes and Helm differences — Harness includes both Kubernetes and Helm deployments, and you can use Helm charts in both. Here's the difference:
- Harness Kubernetes Deployments allow you to use your own Kubernetes manifests (remote or local) or a Helm chart, and Harness executes the Kubernetes API calls to build everything without Helm and Tiller needing to be installed in the target cluster.
- For Harness Helm Deployments, you must always have Helm and Tiller running on one pod in your target cluster. Tiller makes the API calls to Kubernetes in these cases.
- Apply step — The Harness Workflow Apply step allows you to deploy any resource you have set up in the Service Manifests section at any point in your Workflow. See Deploy Manifests Separately using Apply Step.
Option 1: Kubernetes and the Apply Step
This is the recommended method. It allows you to use Harness Kubernetes Canary and Blue/Green deployments and to apply the hooks flexibly with the Apply step.
A Harness Kubernetes deployment runs kubectl apply for manifest files. There is no Tiller involved in this process because Harness is not running any Helm commands. Harness native Helm implementation can only perform Basic deployments.
Let's implement a hook using Harness Kubernetes implementation, with no Helm or Tiller.
Here is a typical example of a Kubernetes Job using a Helm chart hook:
apiVersion: batch/v1
kind: Job
metadata:
  name: "{{.Release.Name}}"
  labels:
    app.kubernetes.io/managed-by: {{.Release.Service | quote }}
    app.kubernetes.io/instance: {{.Release.Name | quote }}
    app.kubernetes.io/version: {{ .Chart.AppVersion }}
    helm.sh/chart: "{{.Chart.Name}}-{{.Chart.Version}}"
  annotations:
    # This is what defines this resource as a hook. Without this line, the
    # job is considered part of the release.
    "helm.sh/hook": post-install
    "helm.sh/hook-weight": "-5"
    "helm.sh/hook-delete-policy": hook-succeeded
spec:
  template:
    metadata:
      name: "{{.Release.Name}}"
      labels:
        app.kubernetes.io/managed-by: {{.Release.Service | quote }}
        app.kubernetes.io/instance: {{.Release.Name | quote }}
        helm.sh/chart: "{{.Chart.Name}}-{{.Chart.Version}}"
    spec:
      restartPolicy: Never
      containers:
      - name: post-install-job
        image: "alpine:3.3"
        command: ["/bin/sleep","{{default "10" .Values.sleepyTime}}"]
The hook is a post-install-job. It will execute the Job after all resources are loaded into Kubernetes.
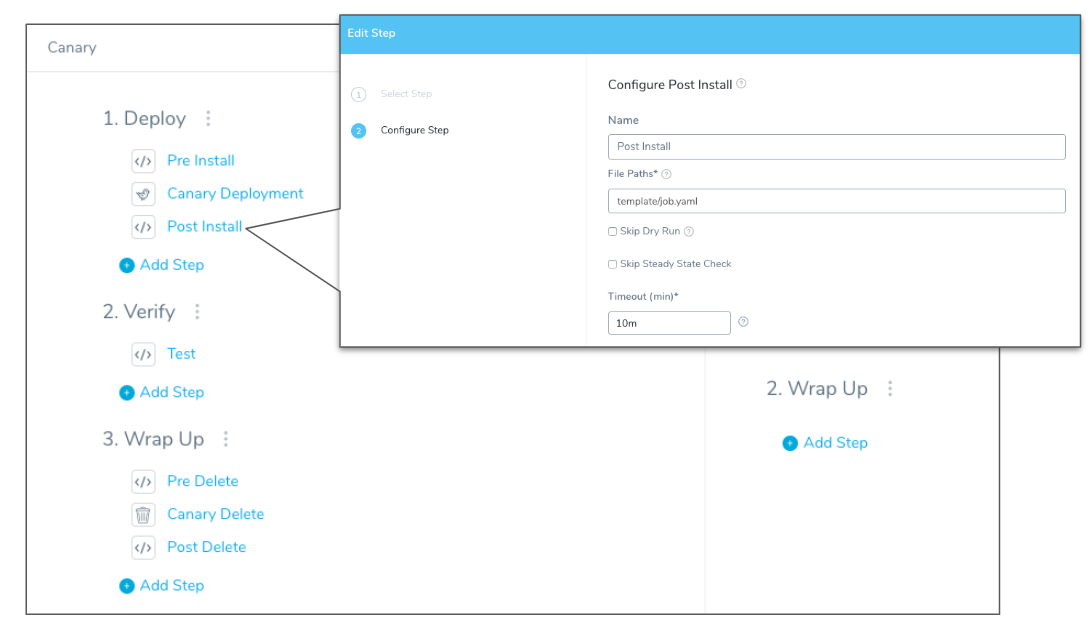
If you are using a pre-install hook, ensure the hook-weight is less than the hook-weight of the job.To implement Helm chart hooks in Harness Kubernetes deployments, you remove the Hook annotations and split out the Kubernetes Job as a separate yaml file in your Harness Service Manifests.
Next, you set when the Job is to be executed using the Apply step in your Workflow. Where you add the Apply step in the Workflow replaces the Helm hook annotation values (pre-install, post-delete, etc).
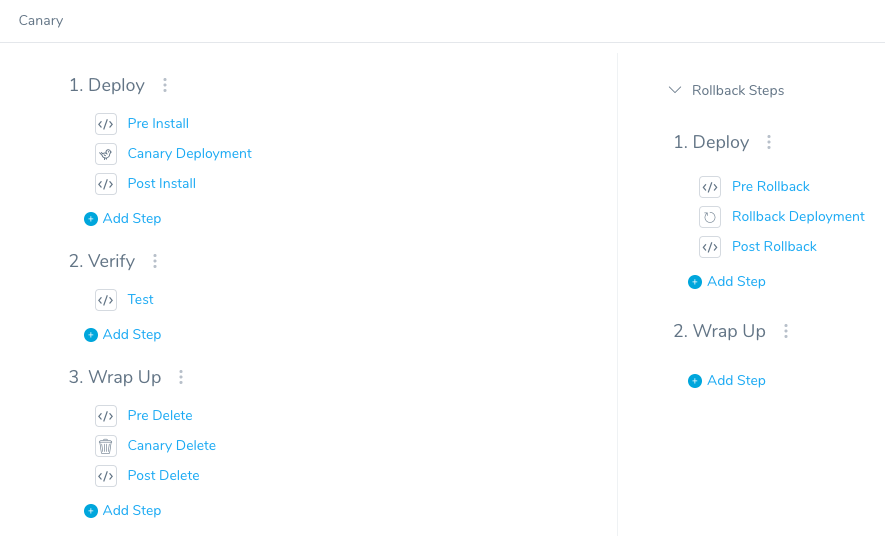
Here is an example of a Phase in a Harness Canary Workflow showing where all of the Helm chart hooks can be applied using Apply steps:
Using the example Job above, the Hook annotations are removed and the Kubernetes Job is set as a separate yaml file. In your Harness Service Manifests section, the Job manifest should look something like this:
apiVersion: batch/v1
kind: Job
metadata:
  name: "{{.Release.Name}}"
  labels:
    app.kubernetes.io/managed-by: {{.Release.Service | quote }}
    app.kubernetes.io/instance: {{.Release.Name | quote }}
    app.kubernetes.io/version: {{ .Chart.AppVersion }}
spec:
  template:
    metadata:
      name: "{{.Release.Name}}"
      labels:
        app.kubernetes.io/managed-by: {{.Release.Service | quote }}
        app.kubernetes.io/instance: {{.Release.Name | quote }}
    spec:
      restartPolicy: Never
      containers:
      - name: post-install-job
        image: "alpine:3.3"
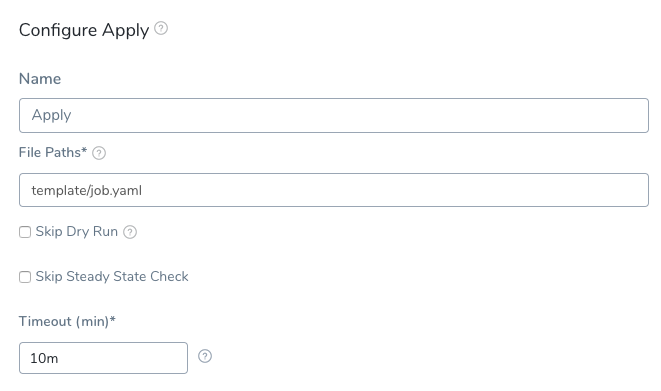
To apply the Job in a Workflow, you add the Apply step to your Workflow and reference the job.yaml in Service Manifests:
Since the original Helm chart hook was a post-install, you simply place the Apply step after the Canary Deployment step in your Workflow.
You can see the flexibility available for deploying your manifests in any order you want.
For example, if there is a pre-install Helm chart hook, you can use Apply to place this job.yaml before the Canary Deployment step.
With this method, you can integrate your hooks using the Canary and Blue/Green strategies.
Option 2: Use Native Helm
You can also use a Harness native Helm implementation. This utilizes Helm and Tiller capabilities.
As noted, you cannot use Canary deployment or Blue/Green deployments. Native Helm deployments can only leverage a Basic deployment.
For a Harness native Helm implementation, you simply link to your remote Helm chart in your Harness Service.
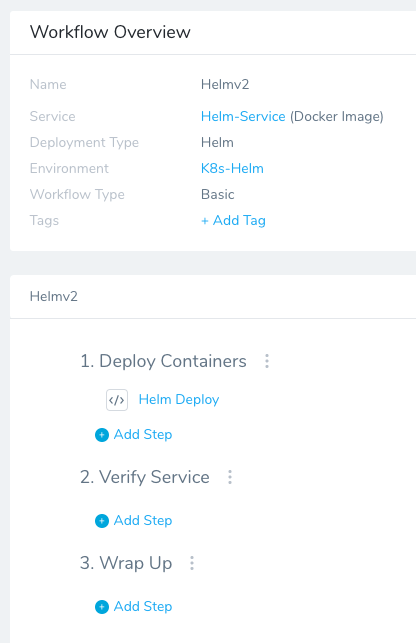
And then deploy the chart using a Harness Basic Workflow:
You Helm chart hooks are implement by Helm and Tiller in your target cluster.
Option: Delegate Selector
The Apply step has the Delegate Selector option.
If your Workflow Infrastructure Definition's Cloud Provider uses a Delegate Selector (supported in Kubernetes Cluster and AWS Cloud Providers), then the Workflow uses the selected Delegate for all of its steps.
In these cases, you shouldn't add a Delegate Selector to any step in the Workflow. The Workflow is already using a Selector via its Infrastructure Definition's Cloud Provider.
If your Workflow Infrastructure Definition's Cloud Provider isn't using a Delegate Selector, and you want this Workflow step to use a specific Delegate, do the following:
In Delegate Selector, select the Selector for the Delegate(s) you want to use. You add Selectors to Delegates to make sure that they're used to execute the command. For more information, see Select Delegates with Selectors.
Harness will use Delegates matching the Selectors you add.
If you use one Selector, Harness will use any Delegate that has that Selector.
If you select two Selectors, a Delegate must have both Selectors to be selected. That Delegate might also have other Selectors, but it must have the two you selected.
You can use expressions for Harness built-in variables or Account Default variables in Delegate Selectors. When the variable expression is resolved at deployment runtime, it must match an existing Delegate Selector.
For example, if you have a Delegate Selector prod and the Workflow is using an Environment also named prod, the Delegate Selector can be ${env.name}. This is very useful when you match Delegate Selectors to Application component names such as Environments, Services, etc. It's also a way to template the Delegate Selector setting.