Override Harness Kubernetes Service Settings
This content is for Harness FirstGen. Switch to NextGen.Harness Kubernetes Service Config Variables, Config Files, and values.yaml settings can be overwritten by Harness Environments Service Configuration Overrides.
This enables you to have a Service keep its settings but change them when the Service is deployed to the Environment.
For example, you might have a single Service but an Environment for QA and an Environment for Production, and you want to overwrite the namespace setting in the Service values.yaml depending on the Environment.
You can also overwrite Service variables at the Phase-level of a multiple Phase Workflow.
Before You Begin
- Define Kubernetes Manifests
- Using Harness Config Variables in Manifests
- Using Harness Config Files in Manifests
Step 1: Select the Service to Override
In the Harness Environment, in the Service Configuration Overrides section, click Add Configuration Overrides. The Service Configuration Override settings appear.
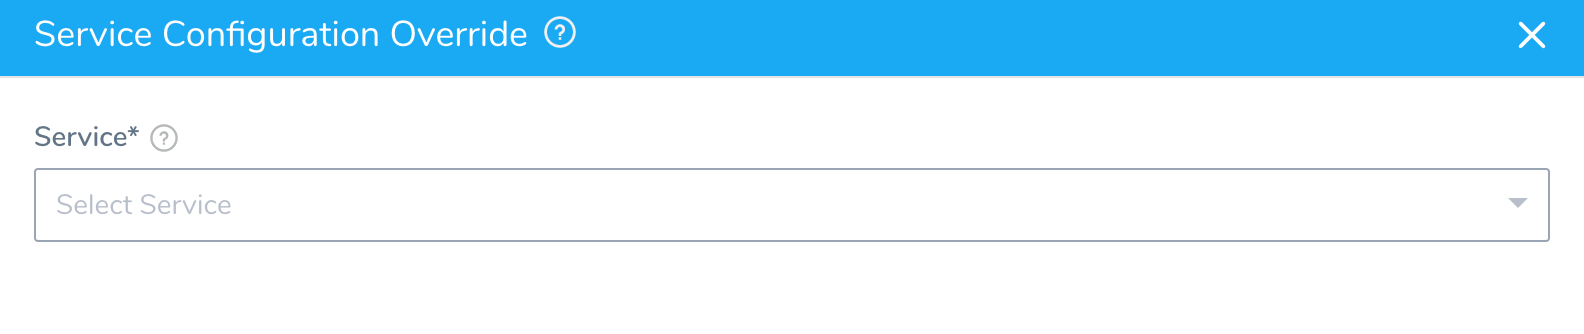
In Service, select the Service you are using for your Kubernetes deployment.
Select one of the Override Type options.
Option: Variable Override
- In Override Type, select Variable Override. The Variable Override options appear.
- In Configuration Variable, select a variable configured in the Service's Config Variables settings.
- In Type, select Text or Encrypted Text.
- In Override Value, enter the value to overwrite the variable value in the Service. If you selected Encrypted Text in Type, you can select an Encrypted Text values defined in Secrets Management.
Option: File Override
- In Override Type, select File Override.
- In File Name, select a file configured in the Service's Config Files settings.
- In File, select the file to overwrite the Service's Config Files file.
Option: Values YAML
- In Override Type, select Values YAML. Click Local or Remote.
- Local - Enter in the values.yaml variables and values just as your would in a Service Manifests values.yaml. Ensure the name of the variable you want to overwrite is identical.
- Remote - See Override Remote Values YAML Files.
Option: Helm Chart for Specific Service
- In Override Type, select Helm Chart.
- In Helm Repository, select a Helm Chart Repo that you have set up as a Helm Repository Artifact Server. See Use a Helm Repository with Kubernetes.
Notes
- You can use some overrides together. For example, you can use both Helm Chart Overrides with Values YAML Overrides for the same Harness Service. Harness will merge the overrides.
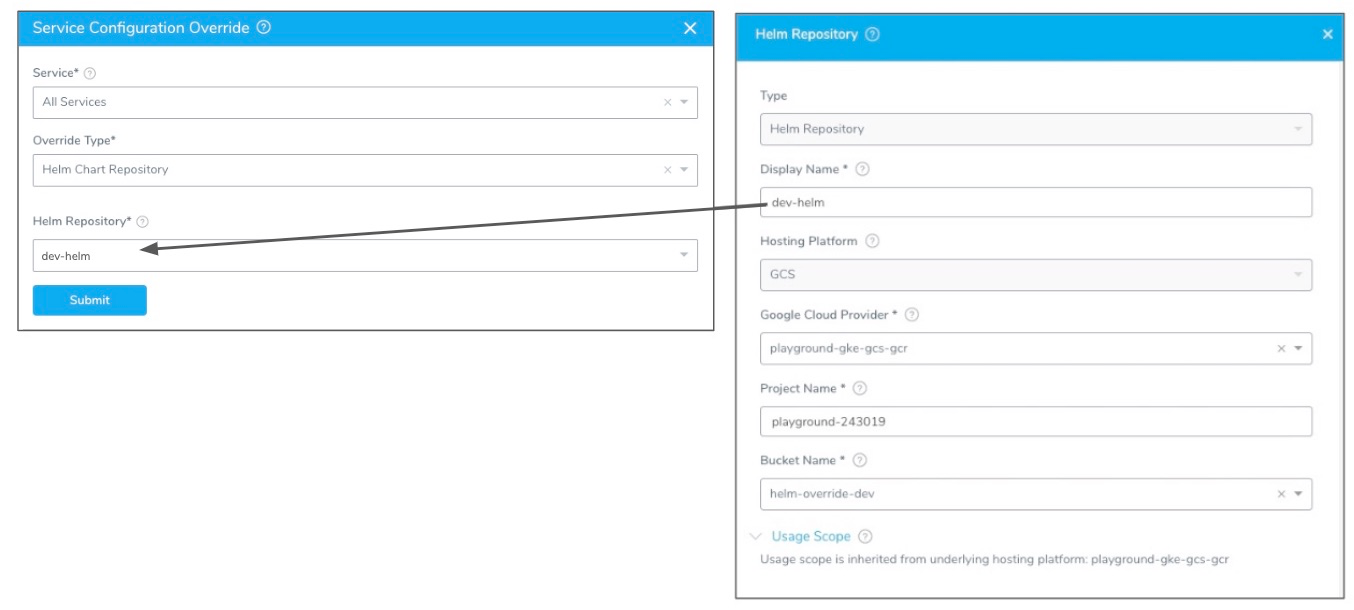
Option: Helm Chart for All Services
You can use a specific Helm chart to override All Services deployed to this Environment.
- In Service, select All Services.
- In Override Type, select Helm Chart Repository.
- In Helm Repository, select the Helm Repository containing the Helm chart that you want to override all Service's Helm Charts, and then click Submit.
Example
Here is an example of overwriting a Service values.yaml with a Service Configuration Override.
In the Service values.yaml, we have a variable for replicas:
replicas: 1
This is used in the manifest file like this:
...
spec:
  replicas: {{int .Values.replicas}}
...
Now, in Service Configuration Override, you can overwrite the Service values.yaml replicas value using the Local option:
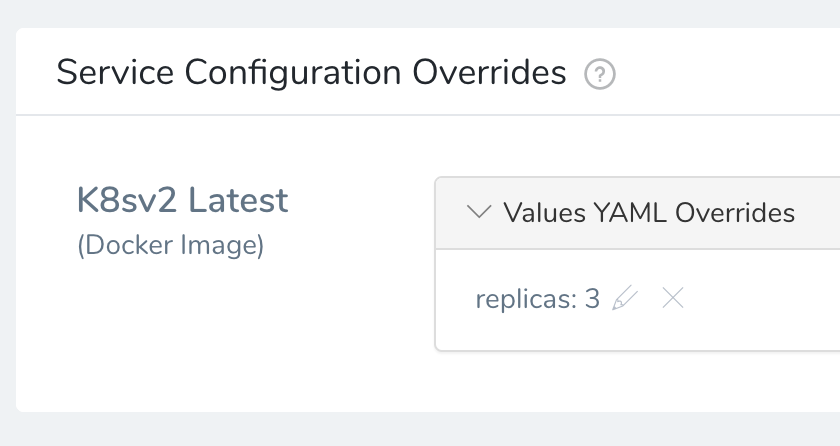 At deployment runtime to this Environment, the overwritten
 replicas values is used:
kind: Deployment
metadata:
  name: nginx-deployment
  labels:
    app: nginx
spec:
  replicas: 3
Option: OpenShift Template for Specific Service
- In Service, select the specific service that you want to override.
- In Override Type, select OpenShift Param.
- Select Inline or Remote.
- If you select Inline, then enter the value inline. If you select Remote, perform the following steps.
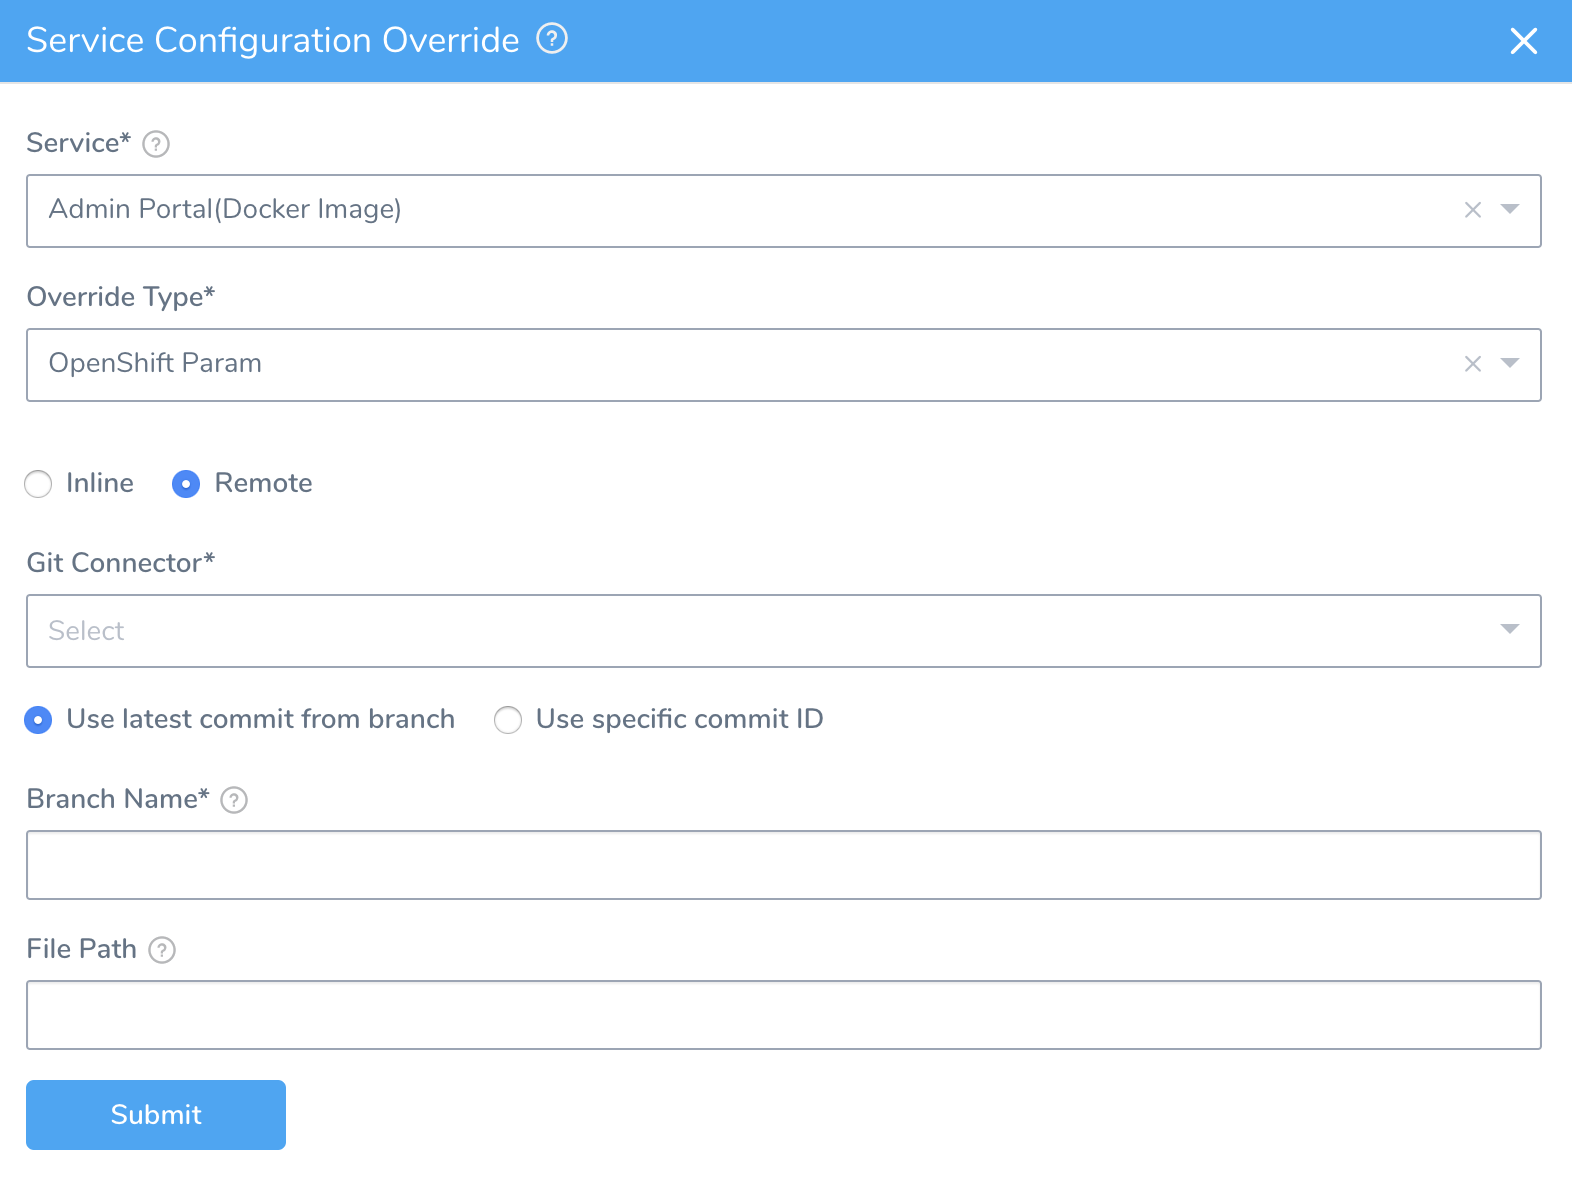
- If you select Inline, then enter the value inline. If you select Remote, perform the following steps.
- Select the Git Connector.
- Select either Use latest commit from branch or Use specific commit ID.
- If you select Use latest commit from branch, enter the branch name where the file is located, such as
master,dev, ormyAppName. Do not provide the full URL to the branch. - If you select Use specific commit ID, enter the commit ID.
- In File path, enter the full path to the file in the repo.
- Click Submit.
Option: OpenShift Template for All Services
- In Service, select All Services.
- In Override Type, select OpenShift Param.
- Select Inline or Remote.
- If you select Inline, then enter the value inline. If you select Remote, perform the following steps.
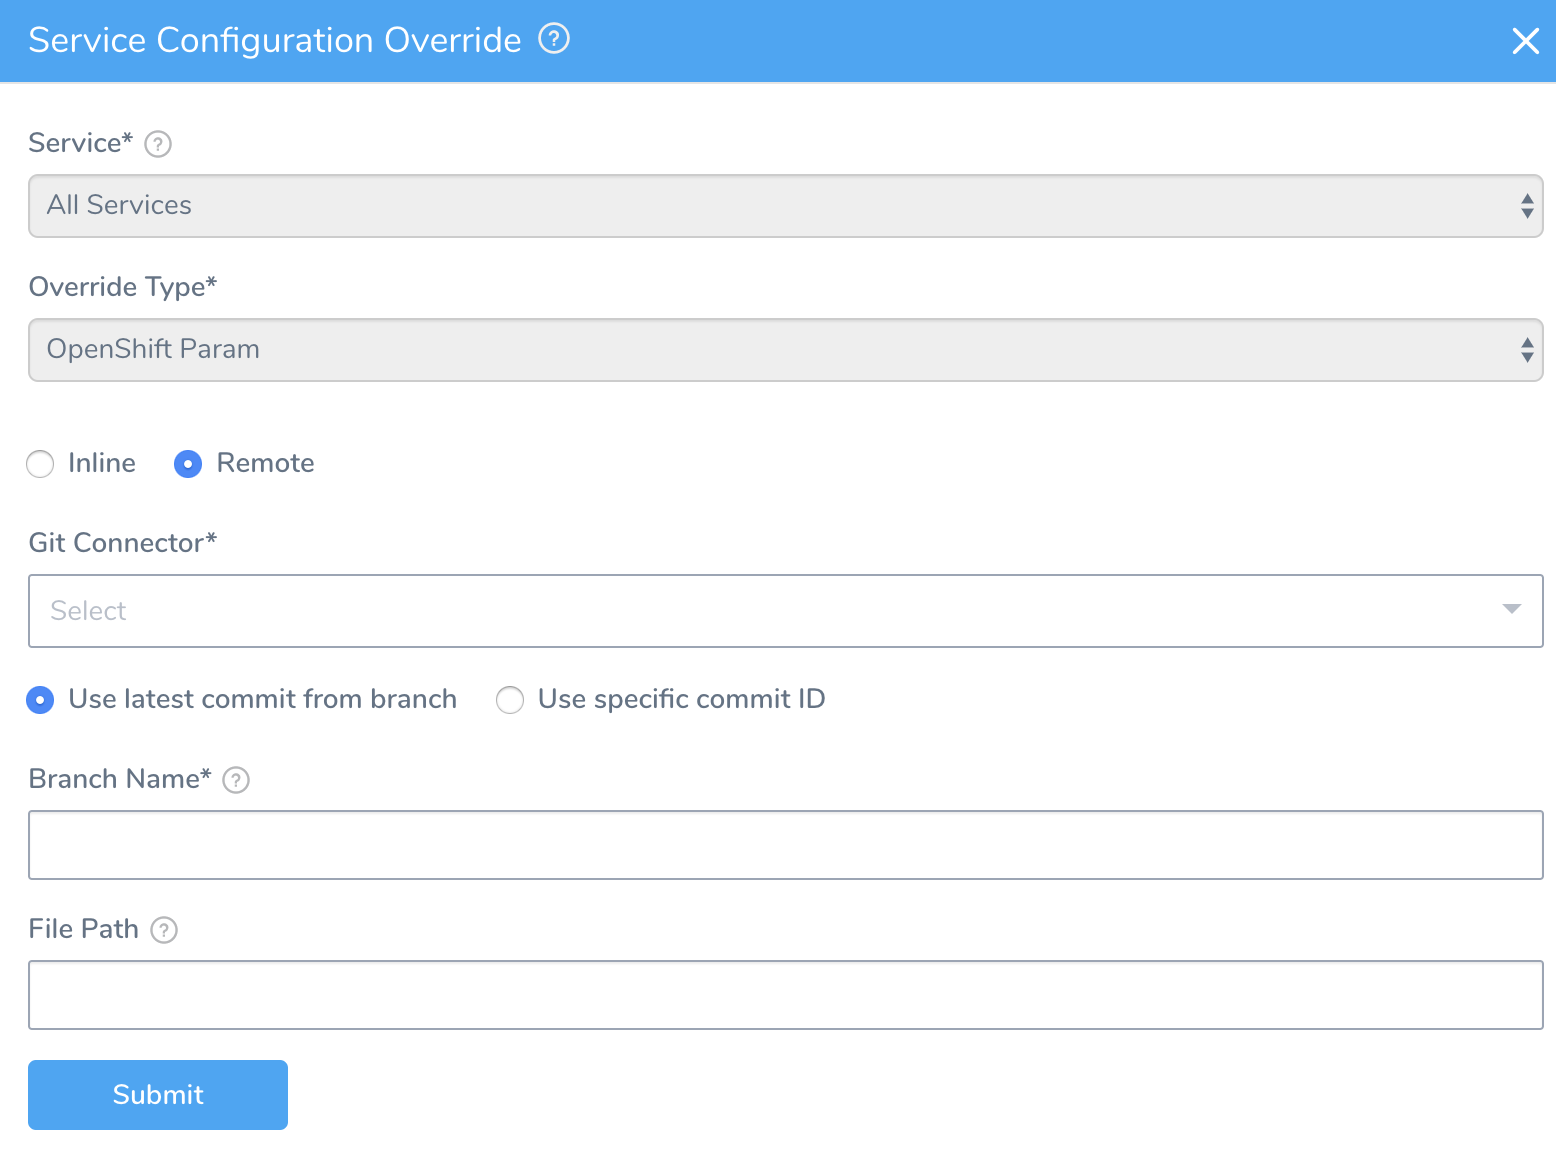
- If you select Inline, then enter the value inline. If you select Remote, perform the following steps.
- Select the Git Connector.
- Select either Use latest commit from branch or Use specific commit ID.
- If you select Use latest commit from branch, enter the branch name where the file is located, such as
master,dev, ormyAppName. Do not provide the full URL to the branch. - If you select Use specific commit ID, enter the commit ID.
- In File path, enter the full path to the file in the repo.
- Click Submit.