Delete Kubernetes Resources
Remove any deployed Kubernetes resources with the Delete step.
Before You Begin
- Define Kubernetes Manifests
- Create a Kubernetes Canary Deployment
- Create a Kubernetes Blue/Green Deployment
- Create a Kubernetes Rolling Deployment
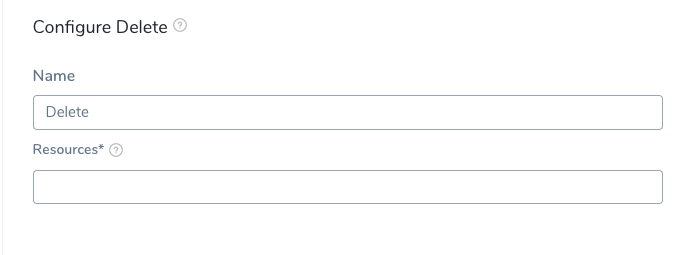
Step 1: Add Delete Step
In your Harness Workflow, click Add Step, and select Delete. The Delete settings appear:
You can add a Delete step anywhere in your Workflow, but typically it is added in the Wrap Up section.
Wherever you add a Delete step, the resource you want to delete must already exist in the cluster. For example, if the resource is added in Phase 2 of a Canary Workflow, the Delete step should not be placed in Phase 1.
Step 2: Select Resources to Delete
In Resources, enter the resources to be deleted.
There are a few ways to specify the resource to be removed.
Harness Built-in Variables
Using the Harness built-in variable, ${k8s.canaryWorkload}.
At runtime, this will resolve to something like:
Deployment/harness-example-deployment-canary
The deployed Kubernetes object must reach steady state for Harness to be able to resolve the ${k8s.canaryWorkload} expression. Consequently, if the Canary Deployment step fails to deploy the workload to steady state, Harness cannot set the ${k8s.canaryWorkload} expression and it will not execute successfully.
Resource Name
Using a resource name in the format [namespace]/Kind/Name, with namespace being optional.
You must add a Kind before the resource name, like Deployment in this example:
Deployment/harness-example-deployment-canary
Multiple Resources
Using a comma-separated list to delete multiple resources. For example:
Deployment/harness-example-deployment-canary,ConfigMap/harness-example-config
All Resources
Enter an asterisk (*) in Resources.
You cannot use the asterisk as a wildcard to match arbitrary resources. It is simply used to indicate all resources.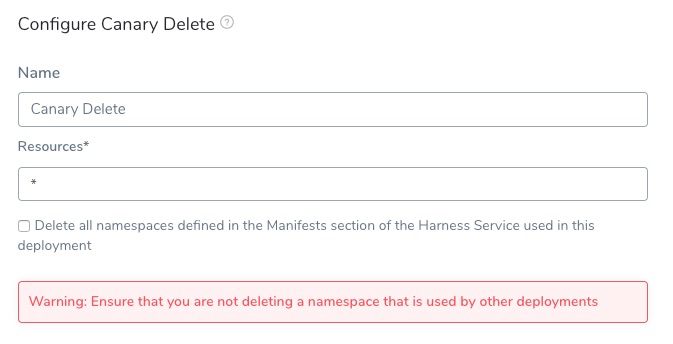
Using an asterisk (*) deletes all of the releases specified in the Infrastructure Definition Release Name setting used by the Workflow. The namespace is not deleted.
Delete Namespaces
If you want to delete the namespace(s) defined in the Manifests section of the Harness Service used in this deployment, click the Delete all namespaces defined in the Manifests section of the Harness Service used in this deployment checkbox.
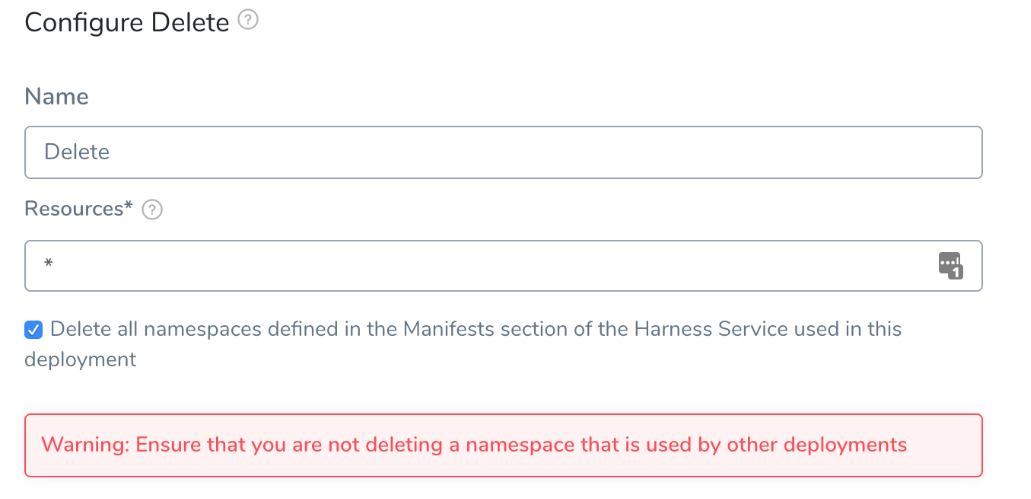
Ensure that you are not deleting a namespace that is used by other deployments.
Option: Enter the Path and Name of the Manifest
The Delete step will delete any resource in a Service Manifest section, Helm Source Repository, or Helm Repository explicitly.
The Delete step does not support resources in Kustomize or OpenShift Templates.
Service Manifest
Select the Use File Paths to enable this option.
You must provide the path and name of the file in File Paths, and Harness will delete the resource.
For resources in the Service Manifests section, enter the folder name and the file name of the manifest in the Harness Service deployed by this Workflow. For example, templates/jobs.yaml.
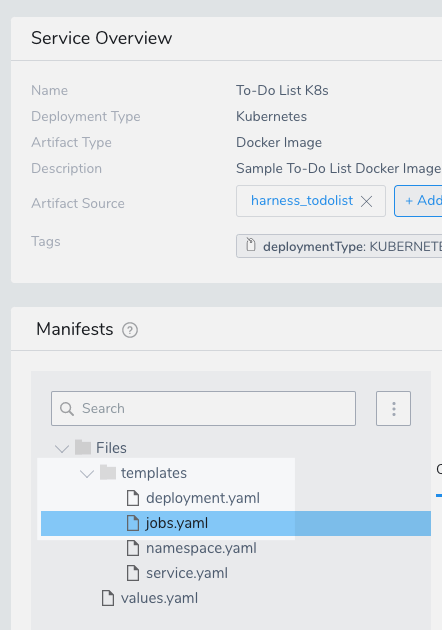
You can include multiple resource files by separating them with commas, for example:
templates/jobs.yaml, templates/statefulSet.yaml.
If you apply the ignore comment # harness.io/skip-file-for-deploy to a resource but do not use the resource in an Kubernetes Apply step, the resource is never deployed and does not need to be deleted.
Helm Source Repository
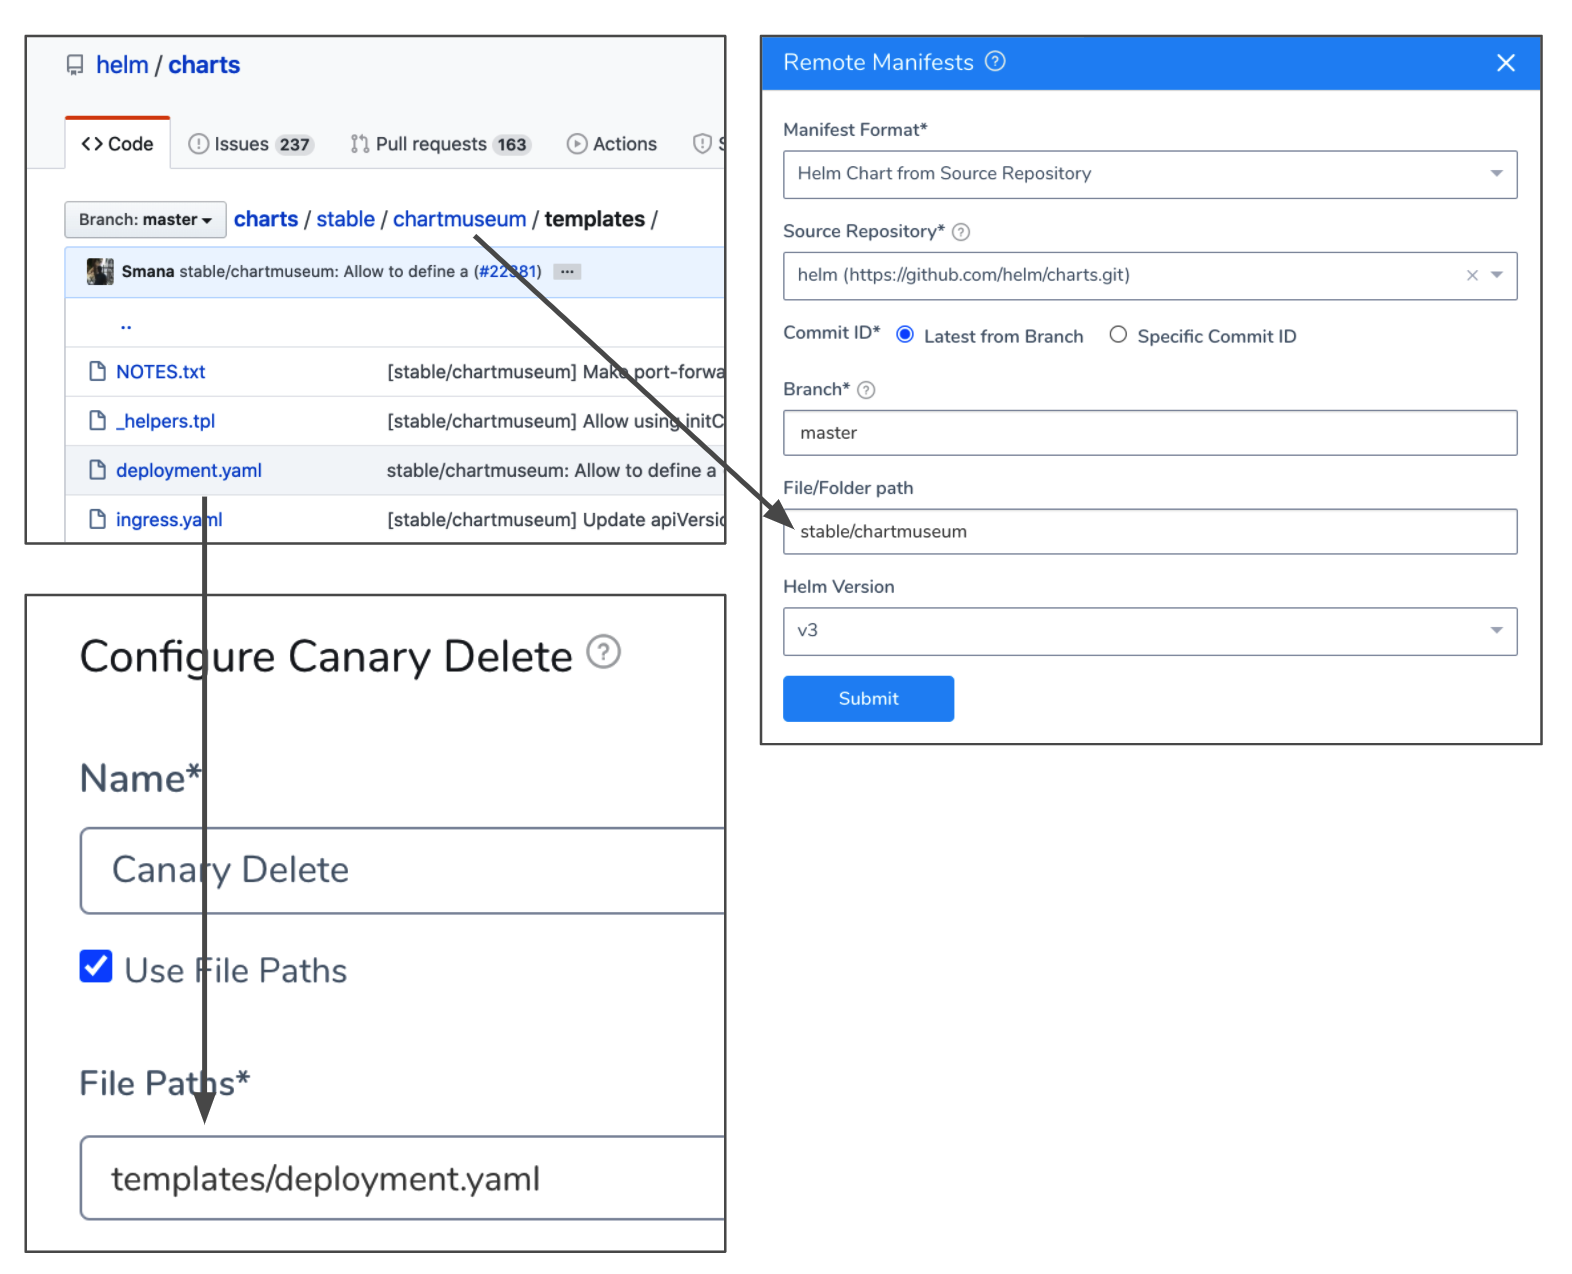
For resources in a Helm chart, provide the path and name of the file from the root folder of the repo.
For example, the following Service uses a remote manifest that points to a Helm chart at github.com/helm/charts.git/stable/chartsmuseum. In the chart's templates folder, there is a deployment.yaml file. In File Path, you reference templates/deployment.yaml.
Helm Chart Repository
For a Helm Chart Repository, you cannot see the resources as easily as a Helm Source Repository, but you can view the resources in the chart by extracting it or by viewing them in a deployment log.
For example, here is a deployment log showing the chart resources in Fetch Files, a Service Remote Manifests using the chart as a Helm Chart Repository, and Delete step deleting the deployment.yaml resource:

Option: Delegate Selector
If your Workflow Infrastructure Definition's Cloud Provider uses a Delegate Selector (supported in Kubernetes Cluster and AWS Cloud Providers), then the Workflow uses the selected Delegate for all of its steps.
In these cases, you shouldn't add a Delegate Selector to any step in the Workflow. The Workflow is already using a Selector via its Infrastructure Definition's Cloud Provider.
If your Workflow Infrastructure Definition's Cloud Provider isn't using a Delegate Selector, and you want this Workflow step to use a specific Delegate, do the following:
In Delegate Selector, select the Selector for the Delegate(s) you want to use. You add Selectors to Delegates to make sure that they're used to execute the command. For more information, see Select Delegates with Selectors.
Harness will use Delegates matching the Selectors you add.
If you use one Selector, Harness will use any Delegate that has that Selector.
If you select two Selectors, a Delegate must have both Selectors to be selected. That Delegate might also have other Selectors, but it must have the two you selected.
You can use expressions for Harness built-in variables or Account Default variables in Delegate Selectors. When the variable expression is resolved at deployment runtime, it must match an existing Delegate Selector.
For example, if you have a Delegate Selector prod and the Workflow is using an Environment also named prod, the Delegate Selector can be ${env.name}. This is very useful when you match Delegate Selectors to Application component names such as Environments, Services, etc. It's also a way to template the Delegate Selector setting.### Example 1: Deleting ${k8s.canaryWorkload}
Here is an example of the log from a Delete command:
Initializing..
...
Resources to delete are:
- Deployment/harness-example-deployment-canary
Done.
Example 2: Deleting All Resources and Namespaces
Here is an example using * and the Delete all namespaces defined in the Manifests section of the Harness Service used in this deployment setting:
All Resources are selected for deletion
Delete Namespace is set to: true
Fetching all resources created for release: release-44e74aca-279f-3b4a-bb15-06d750393a8d

Resources to delete are:
- adwait-12/Deployment/harness-example-deployment
- adwait-12/Service/harness-example-svc
- adwait-12/ConfigMap/release-44e74aca-279f-3b4a-bb15-06d750393a8d
- adwait-12/ConfigMap/harness-example-2
- adwait-12/ConfigMap/harness-example-1
- adwait-12/Secret/harness-example-2
- adwait-12/Secret/harness-example-1
- adwait-12/Namespace/adwait-12
Done.
Notes
- Canary Delete and Traffic Management —If you are using the Traffic Split step or doing Istio traffic shifting using the Apply step, move the Canary Delete step from Wrap Up section of the Canary phase to the Wrap Up section of the Primary phase.
Moving the Canary Delete step to the Wrap Up section of the Primary phase will prevent any traffic from being routed to deleted pods before traffic is routed to stable pods in the Primary phase. See Create a Kubernetes Canary Deployment and Set Up Kubernetes Traffic Splitting.